Did you find a great price on a design bundle that included JPG or PNG files? These are graphics files and can be used in Silhouette Studio for a variety of things. Let’s start with some basics about file types.
Raster Images
- Made of pixels or colored squares
- Not scalable
- Not designed for cutting
- Must be traced to convert to cut lines — lines may be jagged
- .jpg, .png, .gif, .bmp are most common
Vector Images
- Use paths to create images
- Scalable so no loss of image quality
- Are “ready to cut”
- .cdr, .svg, .ai are most common
Now that you are armed with all that technical jargon about images, what does it all mean? It means that raster images are great for sublimation, print and cut and as patterns. Vector images are great for cutting and are cut ready with no tracing involved. So let’s look at some raster images and see how we can use them in Studio.
Use as a background image
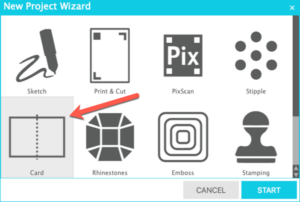
Let’s make a quick card. Click on the File menu and select New Project Wizard. In the dialog box that opens, select Card. Click Start.
A template for a 5×7″ card, complete with a score line for the fold, is placed in the workspace.
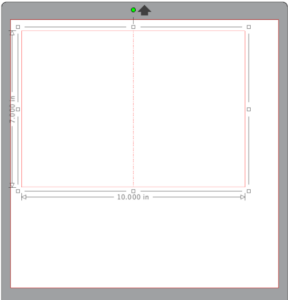
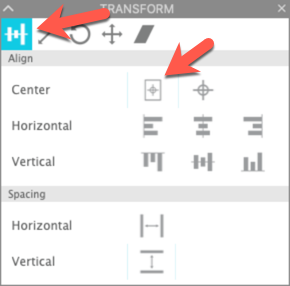
Because of the image I am going to use, I opened the Transform panel and selected the Rotate tab. I rotated the template 90 degrees. I selected the Align tab and selected Center to Page.
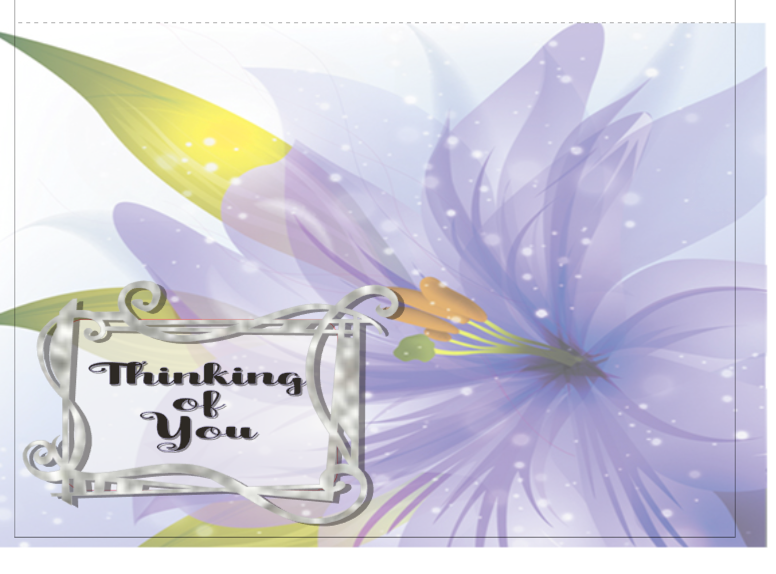
Now I am ready to add the graphic to my card front. One of my favorite places to get great graphic images is Creative Fabrica. I downloaded this fabulous free flower graphic from their website and added text to create a fun printed card front.

To add this to my card, I selected Merge from the File menu. This brings the design into the same workspace with my card template instead of opening it in a new design space. Then I selected the image and dragged it down to the bottom of the card template.
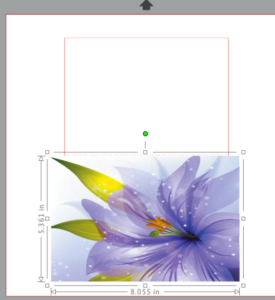
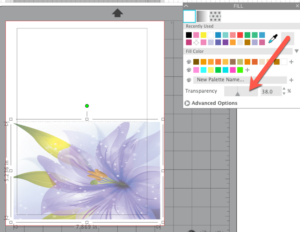
With the image selected, I clicked on the Fill panel in the right toolbar. Using the Transparency slider, I adjusted the transparency of the image so I could see the card behind it and moved the card into position on the card.
I allowed the image to overlap the edges of the card template when I positioned it. I did not want to try to get it lined up exactly on the edges of the card template and I also wanted to have a little bit of a fudge factor for when I cut the card. This way if my cut is off a little, my card front will still be completely filled.
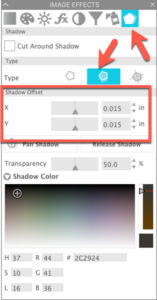
Now I am ready to add a sentiment. I selected the font Winter Wonderland from the Silhouette Design Store and entered my text. I wanted my text to have some dimension so I clicked on the Image Effects Panel. I selected the Shadow tab. I unchecked Cut around Shadow because this is going to be printed, not cut. I selected Dynamic as the Shadow type and adjusted the distance from the text.
I then added a frame I purchased in the Silhouette Design Store, Curl Frame (#12118) and added a shadow to it as well. There’s my card, ready to print.
Use as a Pattern Fill
Digital images make great pattern fills! Silhouette Studio comes with some patterns and you can add more! To see how to add digital patterns to your Library, click here.
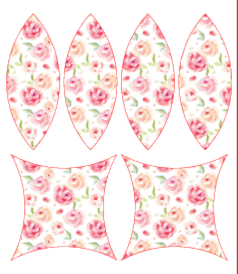
Let’s create a new workspace. I chose the Square Pillow Box (#142655) from Lori Whitlock that I purchased in the Silhouette Design Store and opened it in my workspace.
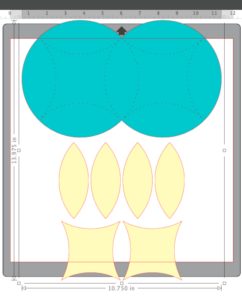
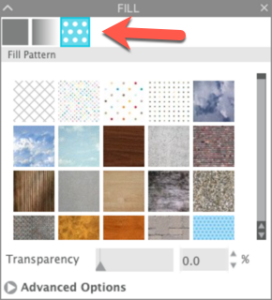
I ungrouped the design and moved the circles to the side for now. I will cut them from a solid paper. With the yellow part of the design selected, I clicked on the Fill icon in the right toolbar and selected the Pattern tab.
I then scrolled thru the patterns and selected the one I wanted to use for my box. When I clicked on the image, the pattern was applied to the shapes.
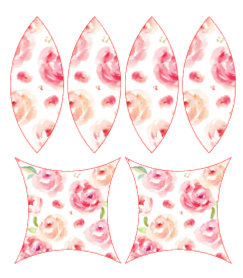
if you look closely, you will see that the pattern was applied to each shape individually and the size of the pattern varies with the size of the shape. If I make the entire group a compound path before applying the pattern, the pattern is applied to the shapes as if they are being cut from one piece of paper or fabric.
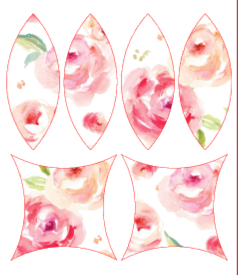
Using the Advanced options in the Pattern fill tab, I can change the scale of the pattern so all the shapes have the same size pattern in them but more (or less) of the pattern shows.
At this point, you are ready to turn on your registration marks (press “M”) and print the shapes on your cardstock. One they are printed, load the printed page on the mat and cut the shapes. I am away from my Silhouette for a few days so cannot create this to show you, but here’s the photo from the Design Store so you can see how nice this looks.

Create a Custom Design
You can also use individual graphics elements to create your own scene or design. I downloaded a set of 96 Dahlias from Creative Fabrica’s website. Create a new workspace and let’s get started.
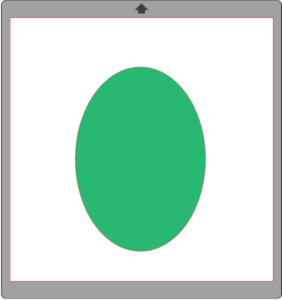
I want to use one of these flowers to create a frame for a monogram. First, use the Draw tools and create an ellipse for the shape of the frame. I added color so it will be easier to use.
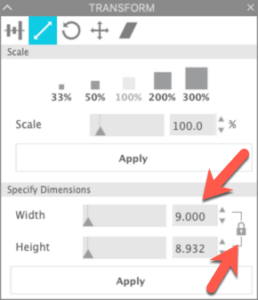
In order to open the flower files in the same workspace, I used File>Merge and located the flower file I wanted to use. Once it was placed in the workspace, I sized the flower using the corner handle to scale the design. Because this design is a PNG, Silhouette Studio automatically creates a cut line when I open the file. The file is very large, so I used the Scale tab in the Transform panel to adjust the size. I made sure the padlock was closed so the aspect ratio would be locked and then changed the larger dimension to the size I wanted and clicked Apply.
I moved the flower into position on the virtual mat, with the ellipse behind it. Because I added color to the ellipse it is easy to see where it is in relation to the flower and also to see that it is behind the flower.
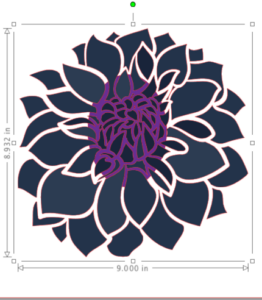
Right click on the flower and select Send to Back. Adjust the size and shape of the ellipse to suit you.

Select both the ellipse and the flower. Click on the Modify panel in the right toolbar. Select Subtract.
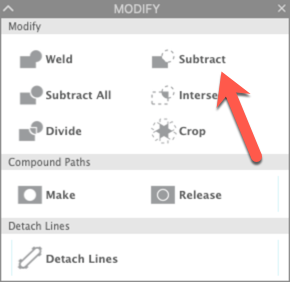
A hole will be created in the flower where the shape was. With all the flower parts selected, right click and select Make Compound Path so all the pieces of the flower will be treated as one object. I knew I wanted to cut the frame from a printed HTV, so I changed the pattern fill to that pattern so I could preview how it would look when cut. I used a pattern from Sparkleberry Ink called Toucan Play — Confetti Dots.

All that’s left now is to add my monogram. I chose a monogram font from The Rhinestone World. I clicked on the Text tool in the left toolbar and clicked in the workspace. I added my initial. Then I selected the font from the font dropdown in the Text panel in the right toolbar.

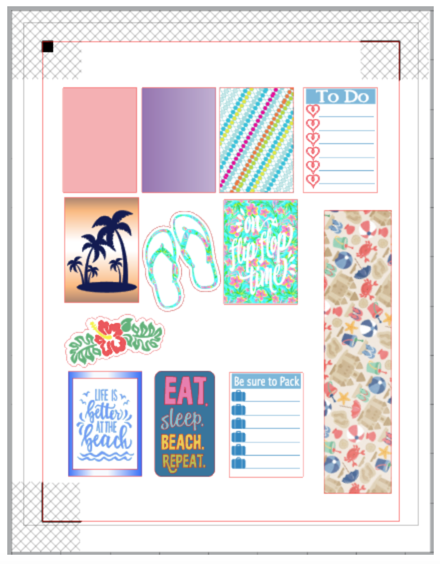
Graphics files are also great fun for creating planner stickers! See how to use graphics in your planner stickers in this blog.
There are lots of uses for graphics files … these are just a few! How will you use them?
If you enjoyed these tips, please join my Facebook groups … Libby’s Silhouette Group — Tips, Tricks, Tutorials and Projects, Libby’s Craft and Sewing Group and Running With Sisers – Juliet and Romeo. You can also find me on FB at Libby’s Loft.com. Please join and feel free to ask questions and share your creations! I look forward to seeing you there!!
Until Next Time,
Happy Crafting!!
Disclaimer: Posts on this site may contain affiliate links. Clicking on one of these links or making purchases at linked sites does not mean you pay more for your purchases. It means I may receive a small commission on your purchase. This commission helps defray the costs of this site and enables me to continue to provide you with new and exciting content.
Until next time,
Happy Crafting!
Disclaimer: Posts on this site may contain affiliate links. Clicking on one of these links or making purchases at linked sites does not mean you pay more for your purchases. It means I may receive a small commission on your purchase. This commission helps defray the costs of this site and enables me to continue to provide you with new and exciting content.