I love “dressing up” my planner for different occasions and times of year … but I cannot always find just the right sticker! So, of course, I make my own and you can too!! Let’s get started….
Page Setup
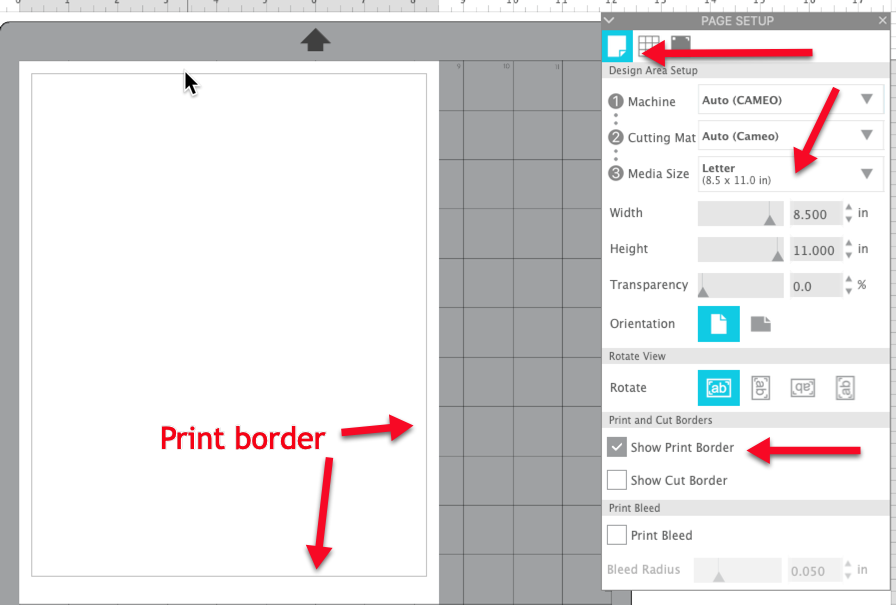
Open a new workspace in your Silhouette software. In the Page Setup panel, set the workspace. Select your Machine and Cutting Mat. I am using a Cameo 4 so I selected Auto (Cameo) for both these settings. I will be printing on 8.5″x11″ sticker paper, so I selected Letter (8.5x11in) as my Media Size. I also turned on Show Print Border.
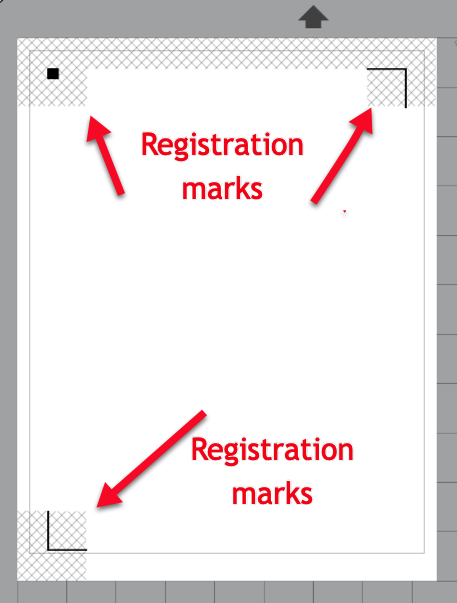
Press the “M” key on the keyboard to turn on you registration marks. You can also turn these on in the third tab of the Page Setup Panel. The black square and black lines are the registration marks that will be read by your Silhouette to align the printed page and the cut lines for your stickers. The hashmark area is the “no fly zone” … that means nothing can be placed inside those areas.
Create Sticker Templates
I use an Erin Condren planner, so that’s the size stickers I’ll be using for this post. I measured the boxes in my planner to get started. Below are the sizes for common planner boxes. Be sure to measure yours!!
Here are the sizes for the boxes in the Erin Condren planner and the Happy Planner.
- Erin Condren
- Weekly
- Daily Boxes
- 2.125×1.5W
- 1.875×1.5W
- Corner 1.625×1.375W
- Side bar 5.75×1.375W
- Daily Boxes
- Monthly
- Day Boxes 1.375×1.635W
- Weekly
- Happy Planner
- Weekly
- Days 2x3W
- Errands/To Buy 3.125x3W
- Calls/Emails/Bills to Pay 2.5x3W
- Focus 2.5×6.25W
- Monthly
- Day Boxes 1.5×1.5W
- Weekly
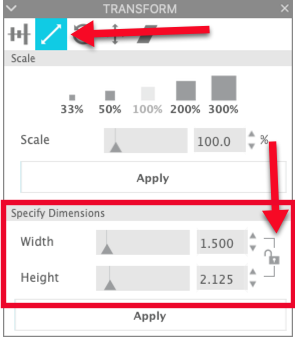
In the workspace, select the Draw tool and select the rectangle tool. Move the cursor into the workspace. Left click and drag to create a rectangle. Don’t worry about the size. We will adjust that in a minute. With the rectangle selected, click on the Transform tab. Click on the Scale tab. In the Specify Dimensions box, make sure the padlock is unlocked. This will allow you to change each dimension. Change the size of the box to 2.125″x1.5″. Press Apply.
With the rectangle selected, hold down the CTRL/CMD key and press the right arrow key on the keyboard. This will create a second rectangle to the right of the first. Repeat this step until you have 5 rectangles on the page.
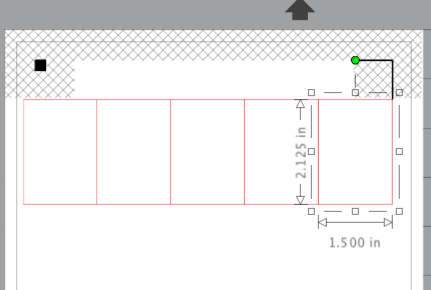
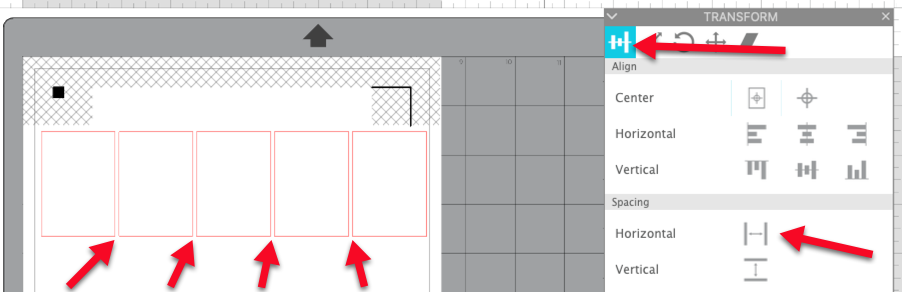
With the last rectangle selected, click and drag it over close to the print border you turned on earlier. Now select all of the boxes. In the Align tab of the Transform box, click on Horizontal in the spacing section. The boxes are now evenly spaced and there is a little distance between them.
Add Some Color
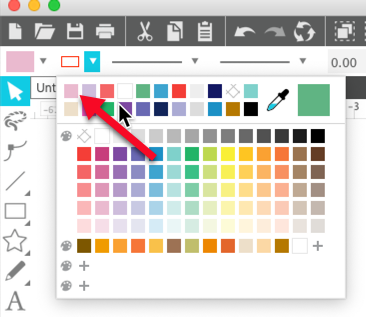
Let’s add some color to our stickers! Click on the first sticker and click on the Fill icon in the Quick Access toolbar. Select a color you like and click on the color chip.
I do not change the line colors for stickers because the default line size of -0- will not print. But if you prefer, you can also change the line color to match the fill color by clicking on the same color you just used. Notice that the color you just used for the fill is the first color in the line color palette.
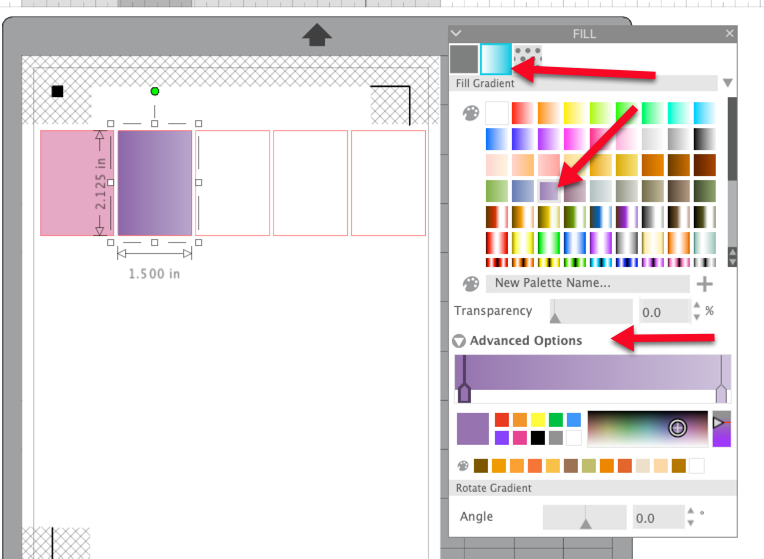
Select the next sticker. This time, click on the Fill panel in the right toolbar. Click on the second tab, the Gradient tab. Select one of the gradient color chips. Click on the triangle next to Advanced Options. Here you can change the look of the gradient fill … you can change the intensity of the color, the number of colors and the angle of the fill.
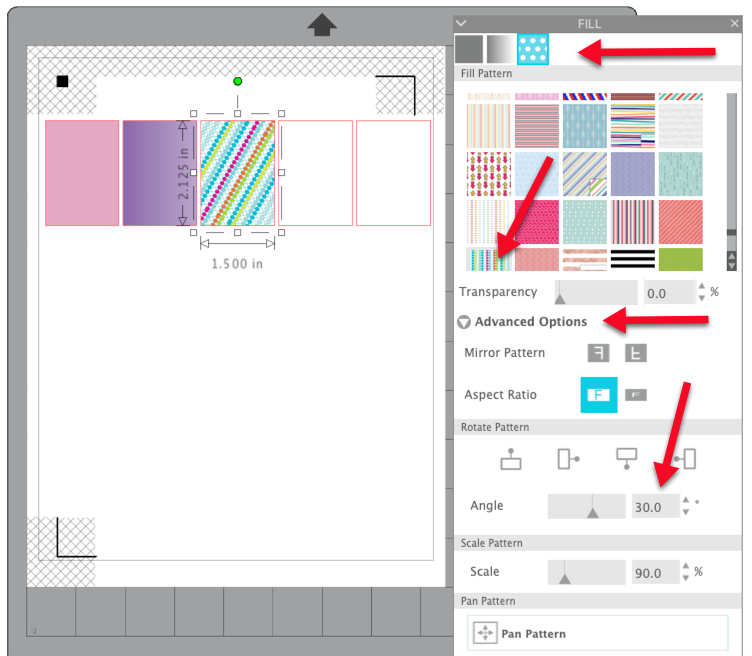
Click on the next sticker. This time, select the Pattern tab in the Fill panel. Scroll down and find a pattern you like and click on it to select it. Click on the triangle next to Advanced Options. You can control the angle and scale of the pattern. You can also pan around the pattern to locate the exact part of the pattern you wish to use.
Create a To-Do Sticker
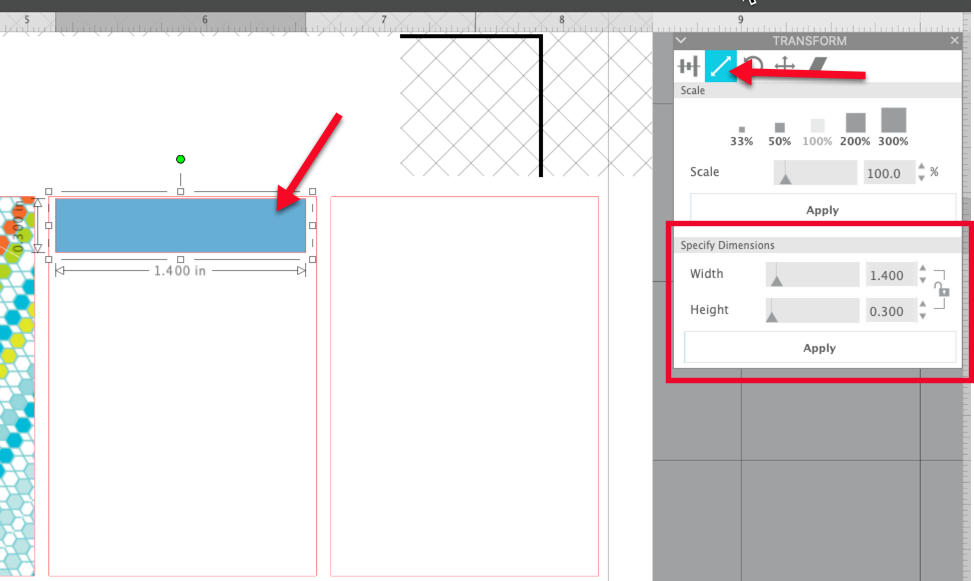
Now let’s create a To Do Sticker. Zoom in on one of the remaining blank stickers. Click on the Draw tool and select Rectangle. Move your cursor into the workspace and left click and drag to create a small rectangle at the top of the blank sticker. Click on the Scale tab in the Transform panel and change the size of this rectangle to 1.4″ wide and 0.3″ tall. Click on the Fill icon in the Quick Access Toolbar and add color to this rectangle.
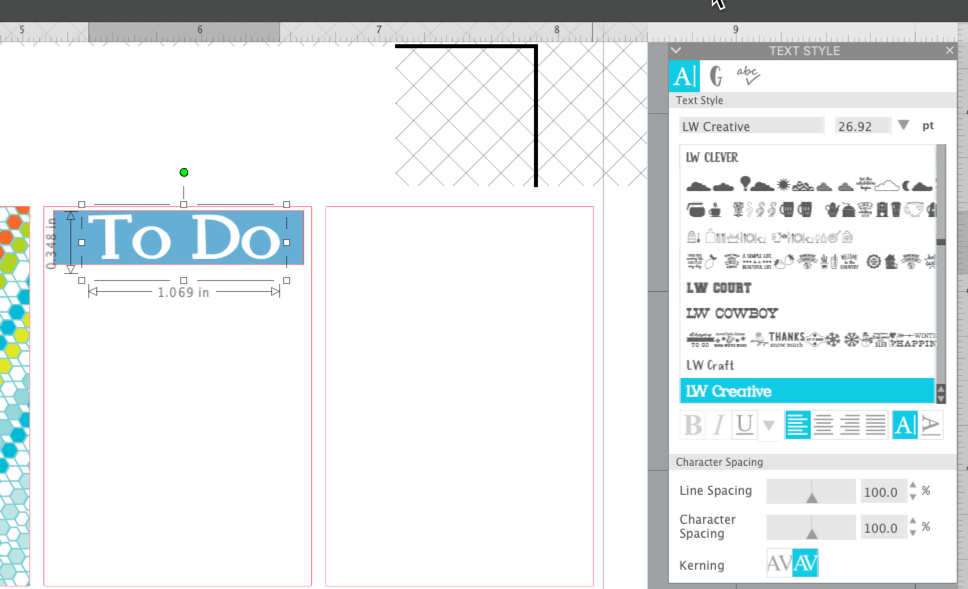
Click on the Text tool. Move the cursor into the workspace and click to add a text placeholder. Enter your text. Click on the Text panel in the right toolbar and select the font you want to use. Click on the Fill icon in the Quick Access toolbar and change the color of the text to white (or a color that will show on your rectangle).
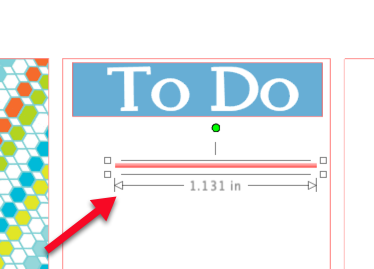
Now let’s add some lines for those to-do items. Click on the Line tool and bring the cursor into the workspace. Hold down the Shift key and left click and drag a line under the header box. I made my line approximately 1.131″ long. With the line selected, hold down the CTRL/CMD key and press the down arrow key 5 times.
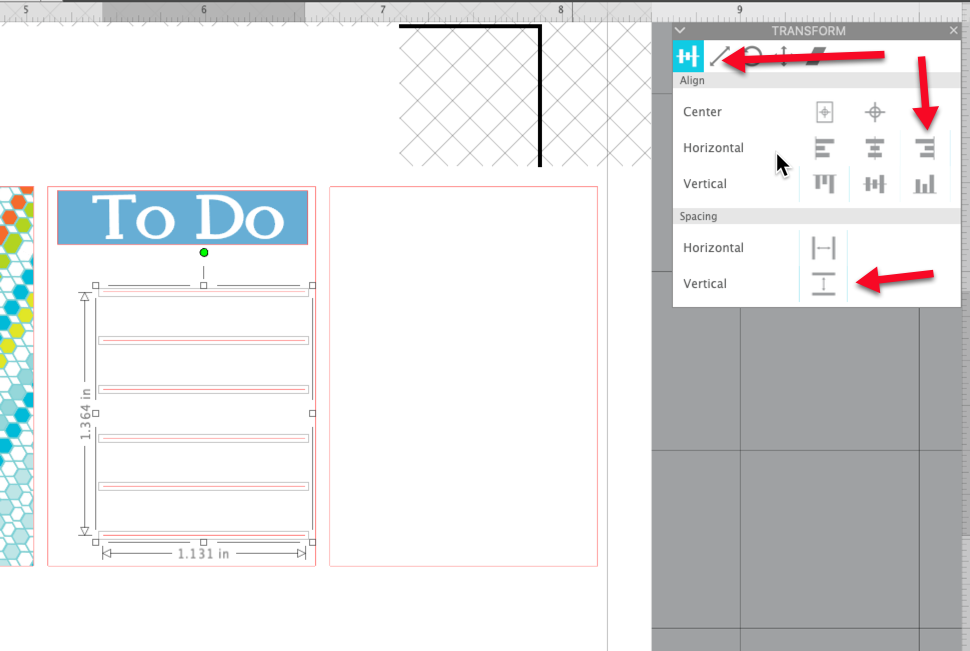
Left click and drag one of the lines down in the sticker, positioning it where you want the last of the lines to be. Left click and drag a box around the lines. Click on the Align tab in the Transform panel. Select Right justified. Click on Vertical in the Spacing section of the tab. The lines are now all justified and equally spaced in the sticker. Right click and select Group so the lines will all be grouped. This will make it easier to make changes or move them around later.
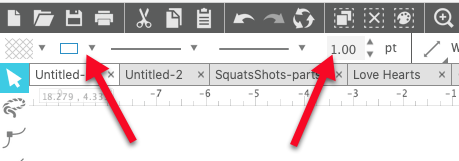
With all the lines still selected, let’s change the color. We will also add some weight to the lines so they will print. If you leave them at the default value of 0.0, they will cut, but not print. Click on the Line tool in the Quick Access toolbar and select the color you want for your lines. Then click on the up arrow next to the line weight and increase the value. I changed mine to 1.0.
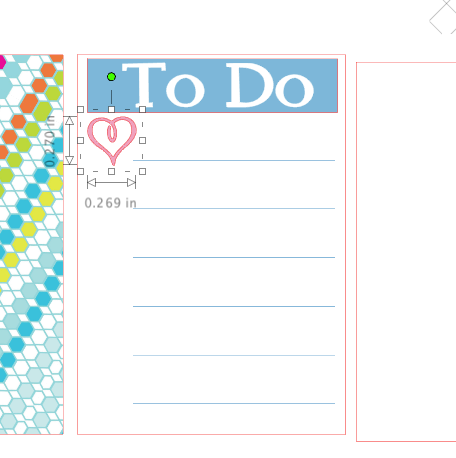
Now let’s add some decorative “bullets” to our list. You can use elements from dingbat fonts, designs or shapes to your list. I am going to use a design from the Silhouette Design store (#196471). I have the design in my Library, so I found it in my Library and double clicked on it to add it to my workspace. The design is pretty large when it comes in so I used the handles on the bounding box to decrease the size and dragged the design into position on my sticker.
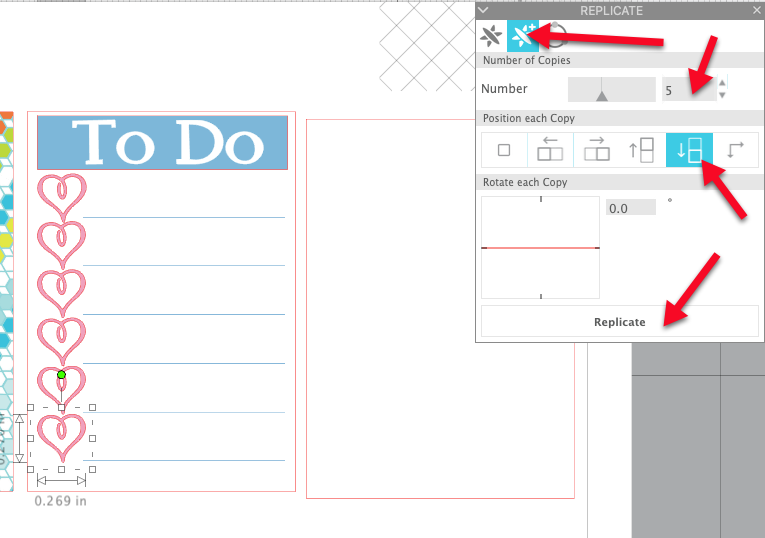
There are a number of ways to duplicate this heart. You can use the CTRL/CMD-down arrow method. But I want to show you another tool. Click on the Replicate panel icon in the right toolbar. In the Replicate panel, click on the second tab, Advanced Replicate. Change the Number of Copies to 5. Set the Position Each Copy to Below. Click Replicate. If the copies are not lined up exactly on the lines in a manner that suits you, click on each one to select it and use the down arrow on the keyboard to move them down. This will keep them perfectly aligned with each other.
Check your Cut Settings
Because we’ve created a lot of objects in the last box, we want to make sure they are printing, but not cutting. First, I selected all the hearts and grouped them. Then I dragged a box around the last sticker and selected group. Click on the Send tab and the Preview box.

There are a few things going on in my design that I need to fix. First of all, you can see that part of my first and last stickers is not outlined in dark red. This means they will not print. Remember way back at the beginning of this blog when we turned on the Show Print Border? We should have also turned on the Show Cut Border. To do this now, click on the Design tab and then click on the Page Setup panel and place a check in the Show Cut Border Box.
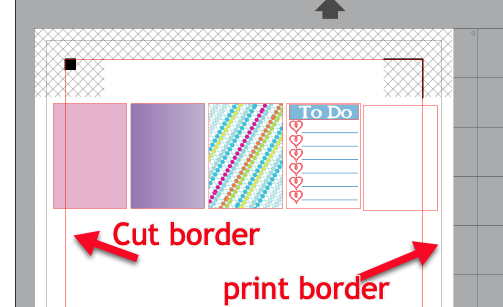
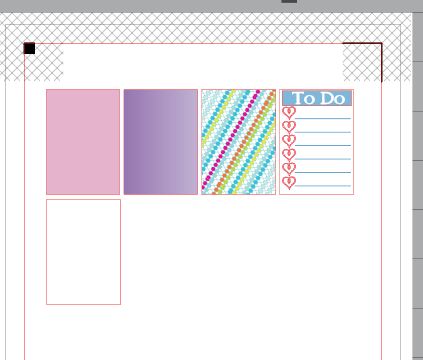
The print border shows in grey and clearly, my stickers would print just fine. However, the red line shows the cut border and the first and last stickers are outside the cut border. To fix this, I just moved the last sticker down, creating a new row of stickers. Then I dragged a selection box around the top stickers and moved them within the cut border.
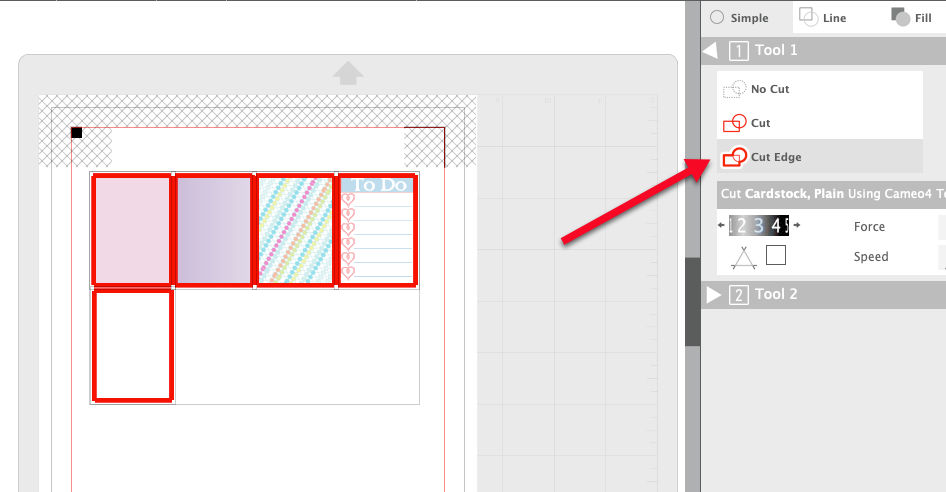
Go back to the Send tab so we can address one more potential problem with our stickers. Do you see how ALL the elements in the To Do sticker are dark red? We don’t want all those elements to cut. With all the design elements selected, click on Cut Edge. Now only the outlines will be cut.
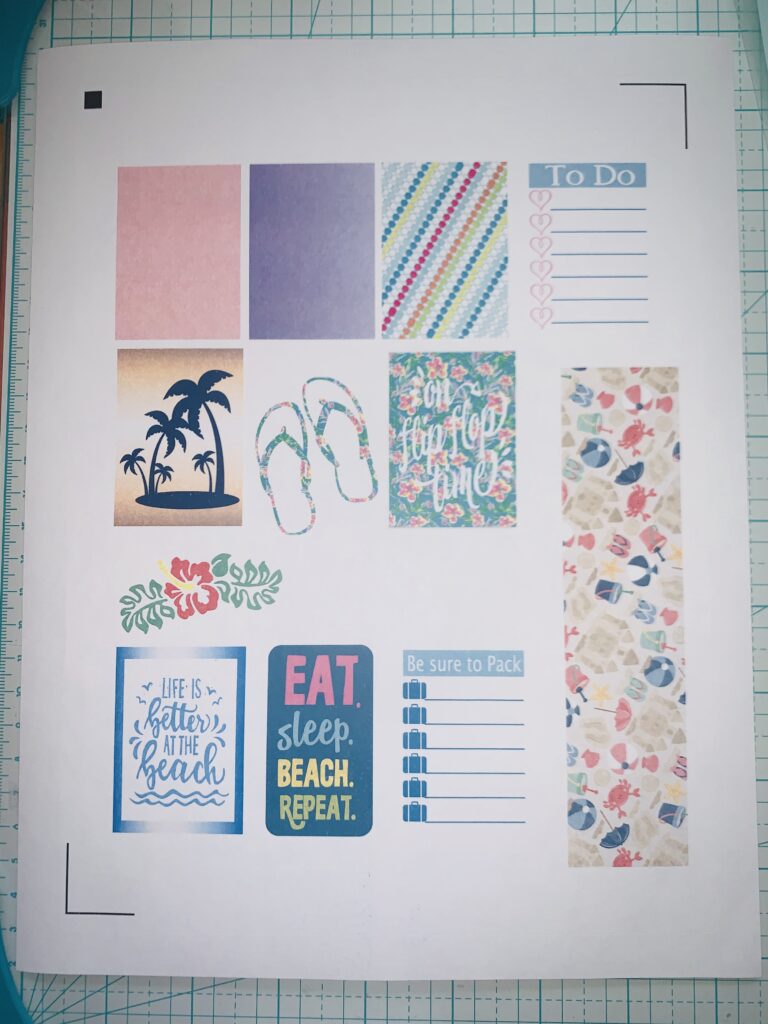
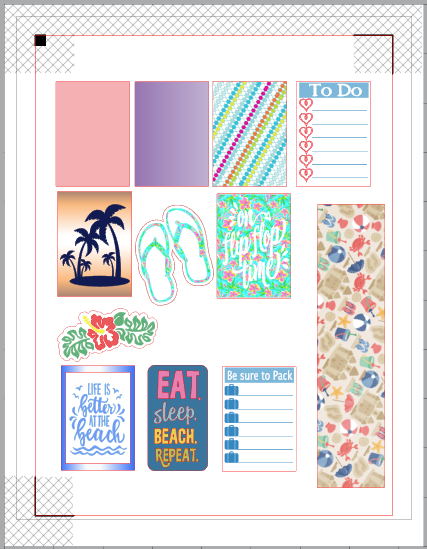
Now use your imagination and create more stickers of your own. I see to have beach travel on the mind, so here’s what my sticker page looks like. Some of these are designs from the Silhouette Design Store. Some include phrases from the Design store. Play!!!
Cut the Stickers
Now you are ready to print your stickers. I like to use sticker paper from OnLine Labels. They have a removable matte finish sticker that is great because I can move it or even remove it if I no longer want it in my planner. Once you print your sticker page, DO NOT move anything on screen or it will not line up wen you are ready to cut the stickers. After the page is printed, it is time to cut. I use a custom cut setting that I created for these labels. Before I created the custom setting, I used the preset Sticker Paper White. Even though I have a custom setting, I always do a test cut before I cut.
Test Cut tip: Before you cut the entire page of stickers, you should do a test cut. However, if you use the default test cut, it will cut in the top left corner and that may confuse your Cameo when it is trying to read the registration marks. Move the test cut down into a blank spot on the sticker paper to avoid this confusion.

Are you ready to create your own stickers? If you want to know more about creating custom stickers, let me know.
If you love the idea of planner stickers but are not quite ready to create your own, click here to download a planner sticker template I created for you. They are similar to the ones we just created but don’t include any proprietary designs.
If you enjoyed these tips, please join my Facebook groups … Libby’s Silhouette Group — Tips, Tricks, Tutorials and Projects, Libby’s Craft and Sewing Group and Running With Sisers – Juliet and Romeo. You can also find me on FB at Libby’s Loft.com. Please join and feel free to ask questions and share your creations! I look forward to seeing you there!!
Until Next Time,
Happy Crafting!!
Disclaimer: Posts on this site may contain affiliate links. Clicking on one of these links or making purchases at linked sites does not mean you pay more for your purchases. It means I may receive a small commission on your purchase. This commission helps defray the costs of this site and enables me to continue to provide you with new and exciting content.
Until next time,
Happy Crafting!!
Disclaimer: Posts on this site may contain affiliate links. Clicking on one of these links or making purchases at linked sites does not mean you pay more for your purchases. It means I may receive a small commission on your purchase. This commission helps defray the costs of this site and enables me to continue to provide you with new and exciting content.