Everyone knows that I LOVE rhinestones! But there are times when rhinestones are not the best alternative. If you want to make something “bling-y” for a small child but are concerned about safety, faux rhinestones are the answer! It’s also an easy way to get lots of color without all the hassle.
Disclaimer: Posts on this site may contain affiliate links. Clicking on one of these links or making purchases at linked sites does not mean you pay more for your purchases. It means I may receive a small commission on your purchase. This commission helps defray the costs of this site and enables me to continue to provide you with new and exciting content.
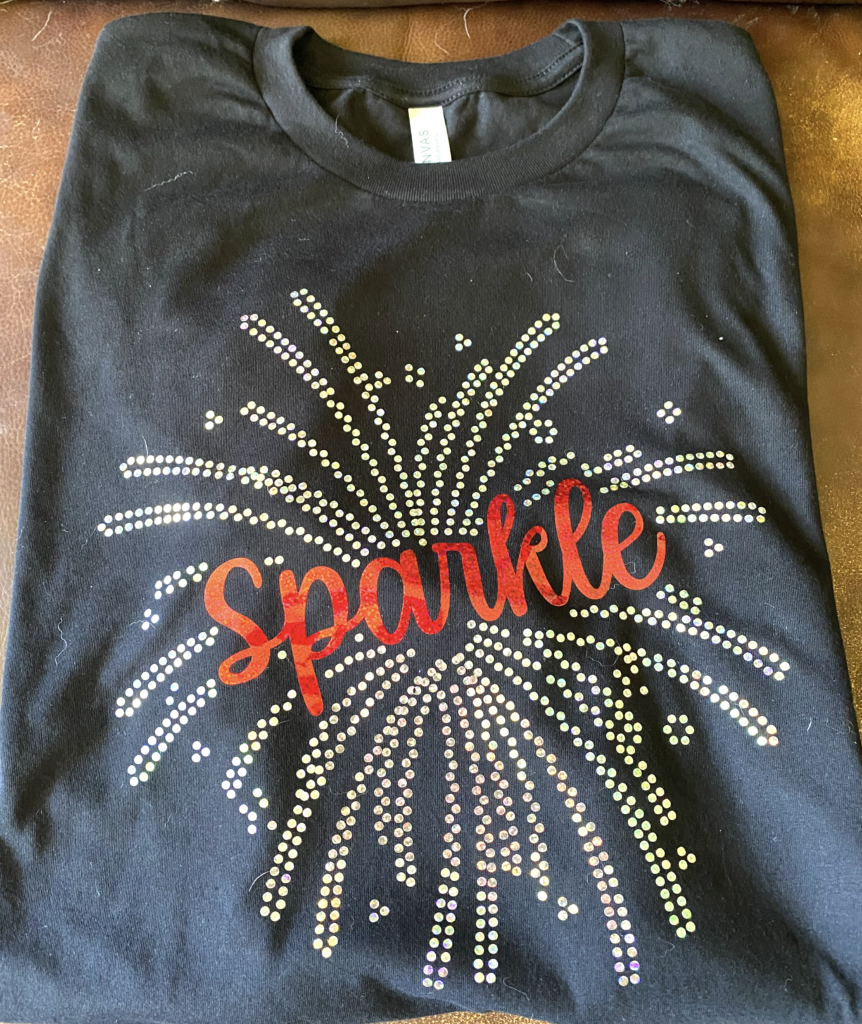
To create the image above, I used rainbow holographic heat transfer vinyl. Instead of weeding away the holes the way you do when weeding rhinestone flock, I kept the holes and discarded the excess.
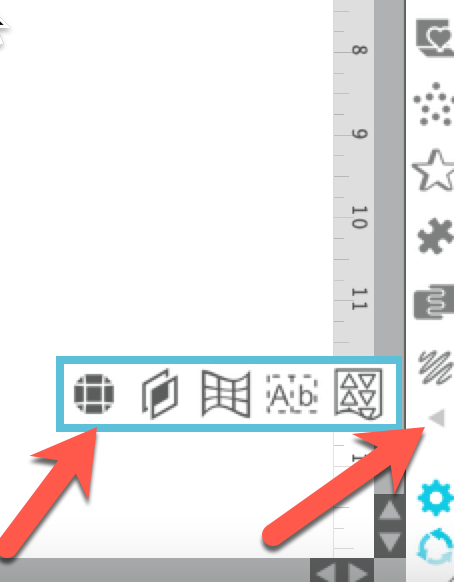
Creating your own rhinestone designs is easy. You need Designer Edition of Silhouette Studio or higher to access the rhinestone tools. You can locate the rhinestone panel in the right toolbar. If you do not see the rhinestone icon, it may be due to the resolution of your monitor. Look for a small triangle and click on the triangle. The rhinestone icon should be there.
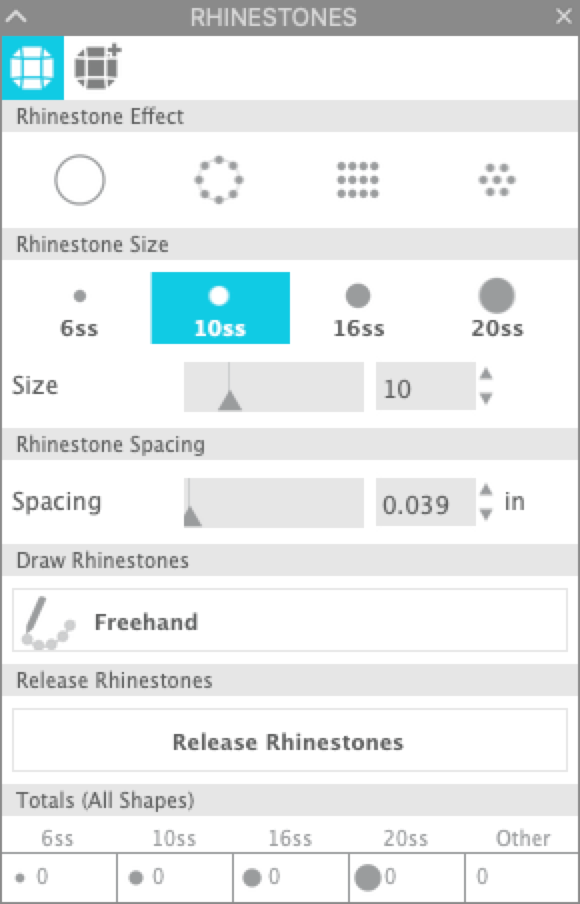
Click on the rhinestone icon and open the Rhinestone panel. You can learn all about all the icons in the rhinestone panel in my blog post called Rhinestones made easy.
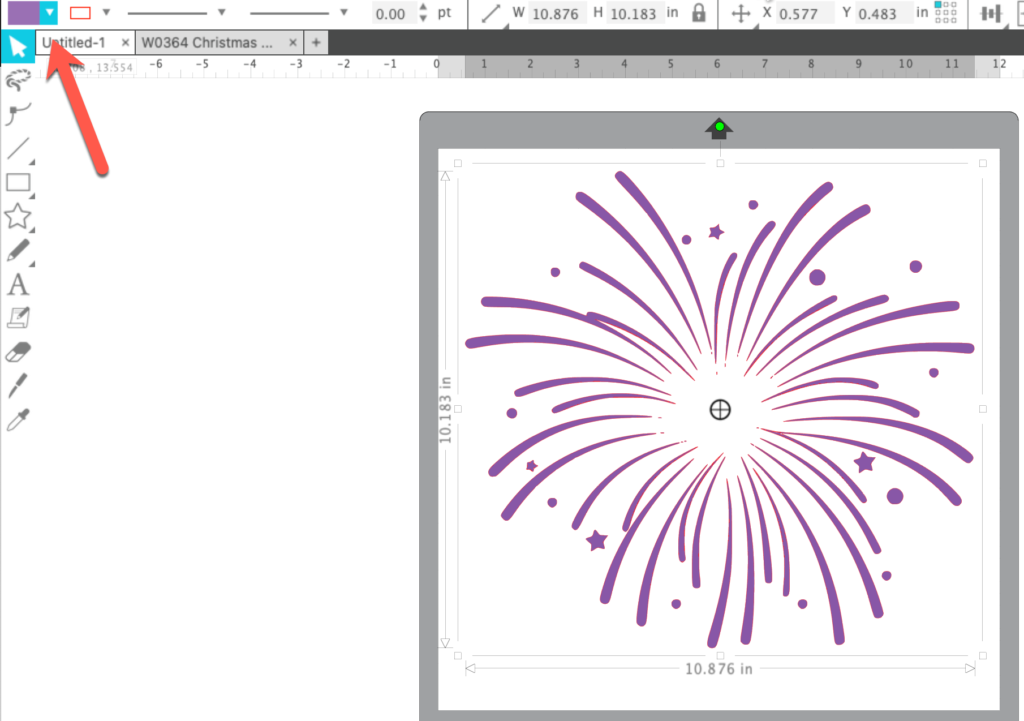
Let’s start by opening a design. I chose a design from Creative Fabrica called Fireworks Icon. Once downloaded, I opened the AI file because I have Business Edition. (If you have Business Edition, you can skip to the section called Import the AI file.)
Open and Trace the PNG
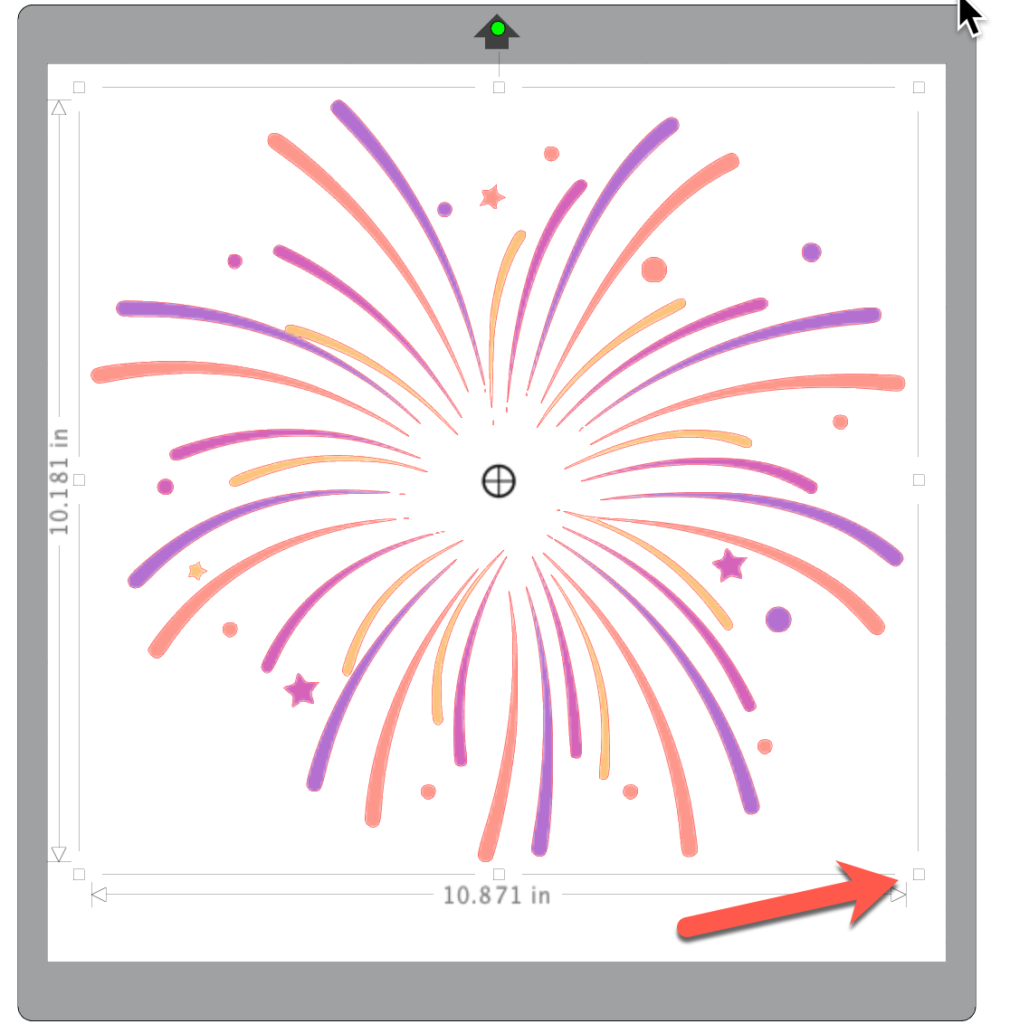
If you don’t have Business Edition, you should open the PNG file. If you do not have AutoTrace PNG files turned on, you can trace the design. The PNG file comes in to the software very small. Use one of the corner scale icons to left click and drag to make the file about 10.5″ wide.
With the file selected, click on the Trace icon. Click on Select Trace area and draw a box around the entire design. Nothing is read by the software. Adjust the Threshold until the design turns yellow.
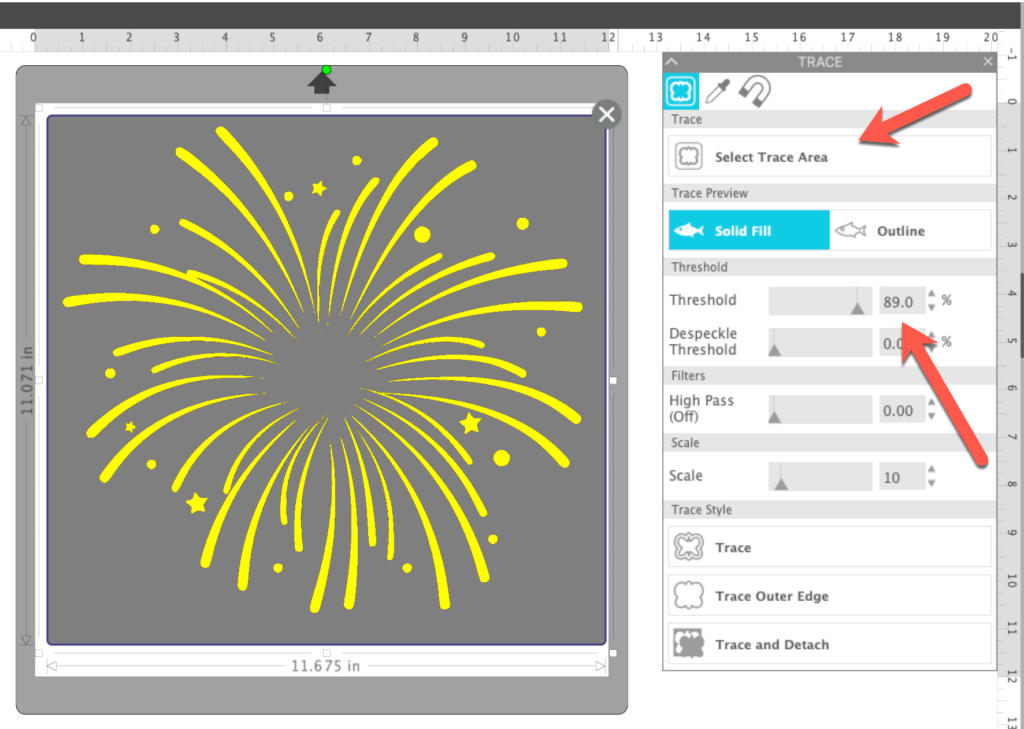
Click Trace and the software will trace the design. Click on the colored part of the design — that’s the original PNG. Press Delete on the keyboard to delete the PNG file since we no longer need it. With the newly traced design selected, use the Fill icon in the Quick Access Toolbar to add color to the design. (Now you can skip to the section called Add Text and Create an Offset.)
Import the AI file
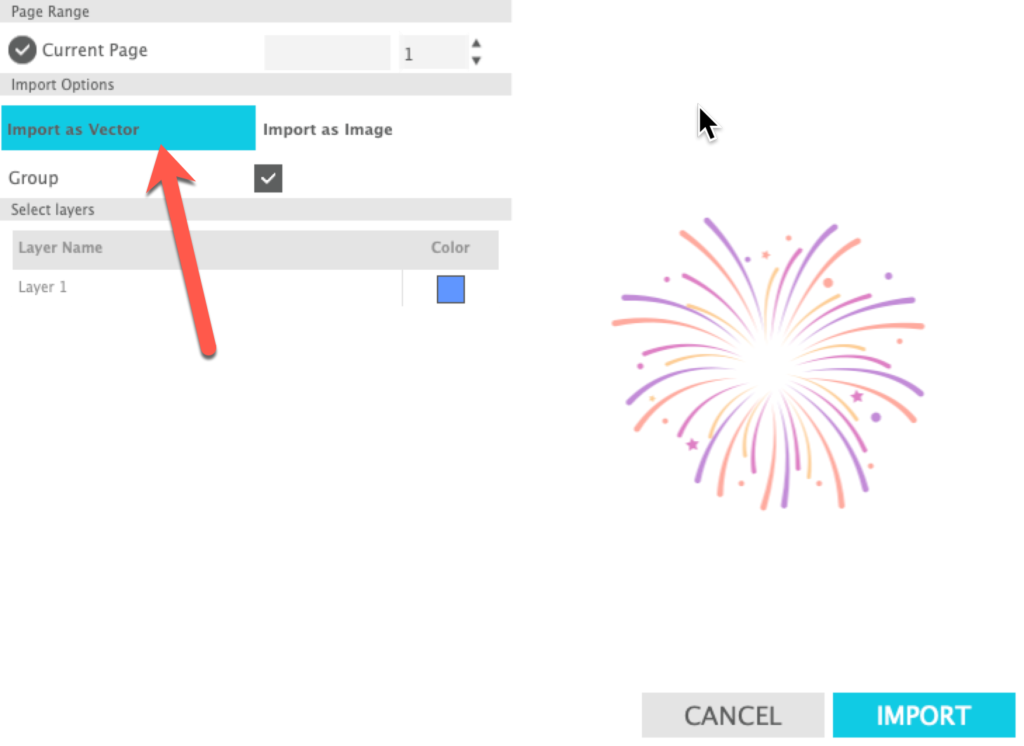
If you have Business Edition and are opening the AI file, you will select File>Open. You should see a dialog box that allows you to decide how to open the file. Select Import as Vector and click Import. The design will be traced, ready to use.
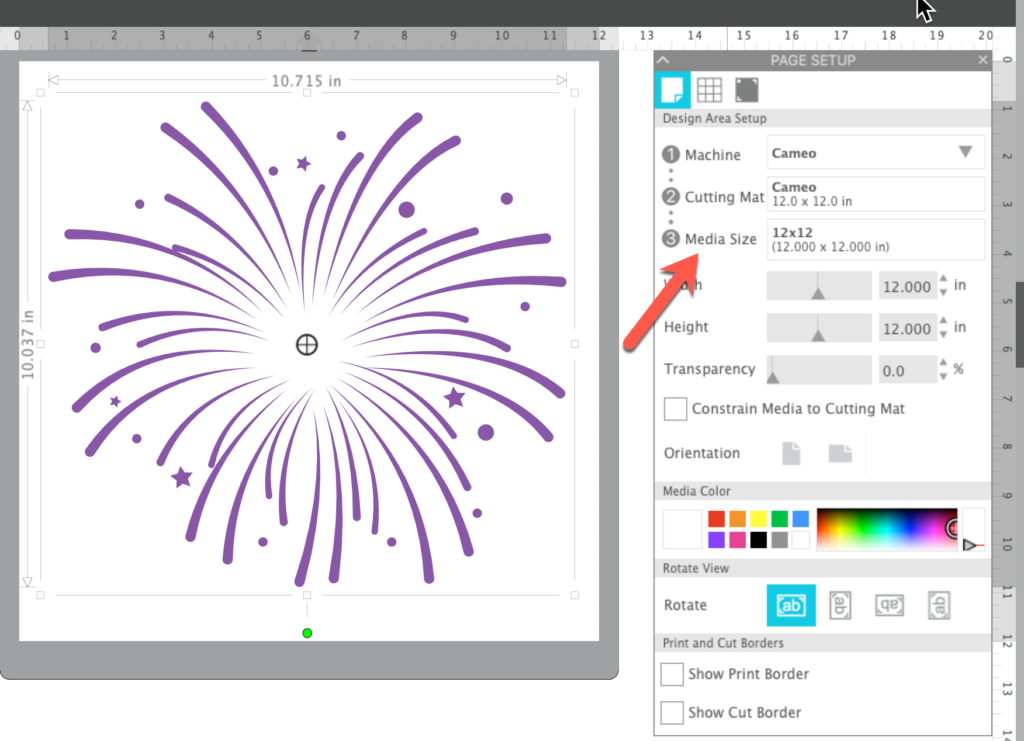
The file comes into the software with a media size that is larger than the 12″ width that most Cameos can cut. To fix this, click on the Page Setup panel and change the Media Size to 12×12. Use one of the corner handles and scale the design to about 10.5″. Use the Fill icon in the Quick Access toolbar to change the entire design to one color.
Add Text and Create an Offset
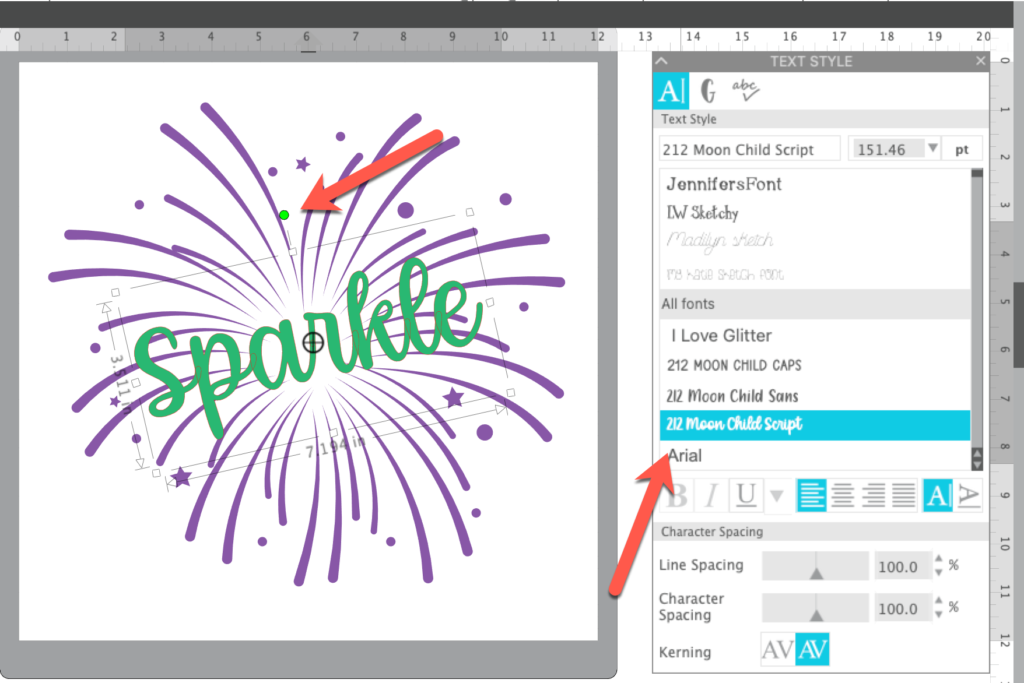
Now that we all have the file in the software, it’s time to continue creating the design. Let’s add some text. Click on the Text icon in the left toolbar. Move your cursor into the workspace and left click to get the blinking cursor. Type the word “Sparkle”. Click on the Fill color icon in the Quick Access toolbar to add color to the text.
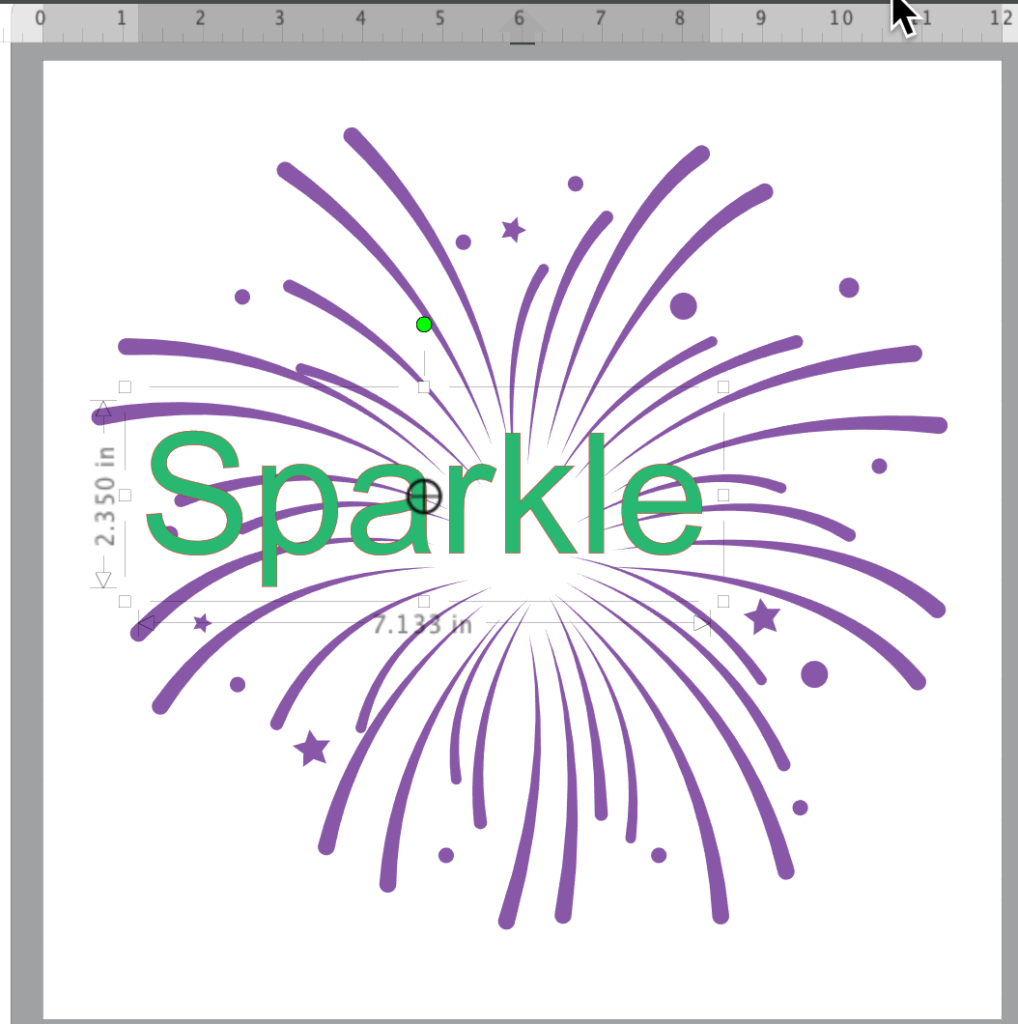
In the Text panel, I selected a font from the font dropdown. I selected 212 Moon Child Script — a font I got from Creative Fabrica. You can use any font you like. I enlarged the file using the corner handle and then rotated the design using the rotation handle at the top of the lettering bounding box.
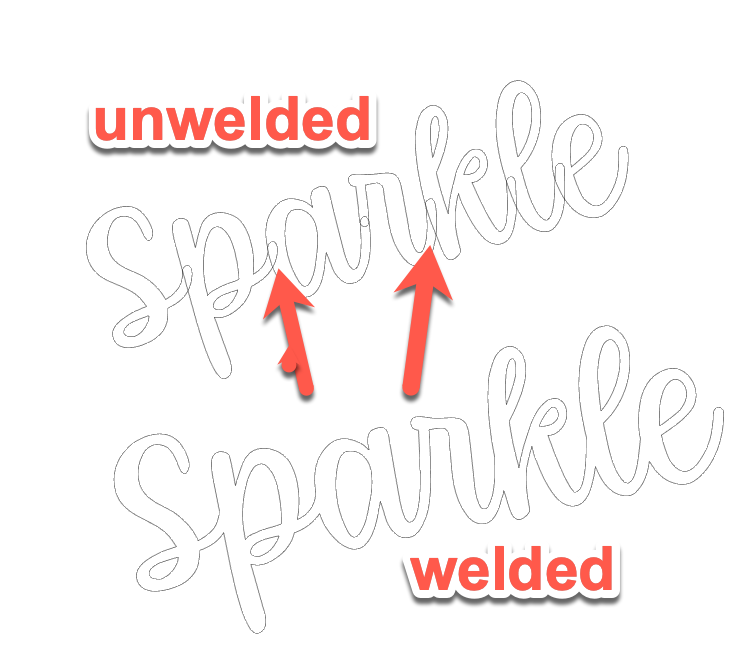
With the word selected, right click and select Weld. This will cause all the letters to be turned into one object and will eliminate the overlaps in the letters. If these are not eliminated, they will be cut and this is not what we want.
Once the word is welded, select the Offset panel. Click on Offset. Set the offset distance to 0.125 and click Apply. I added color to mine to show you how it will look. The pink around the original letters is the offset.

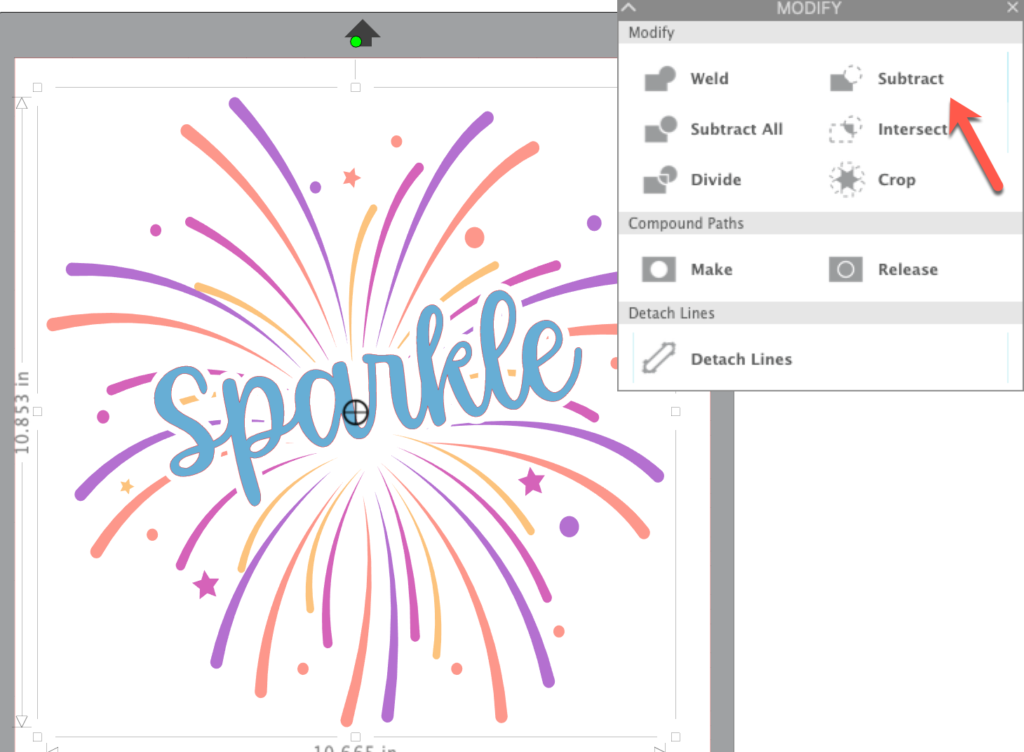
With the offset still selected, hold down the SHIFT key and click on the fireworks design. With them both selected, click on the Modify Panel and select Subtract. The offset will be subtracted from the fireworks design. This will make it easier to place the word when we get ready to make the shirt. It also provides a little space around the word so it is easier to read.
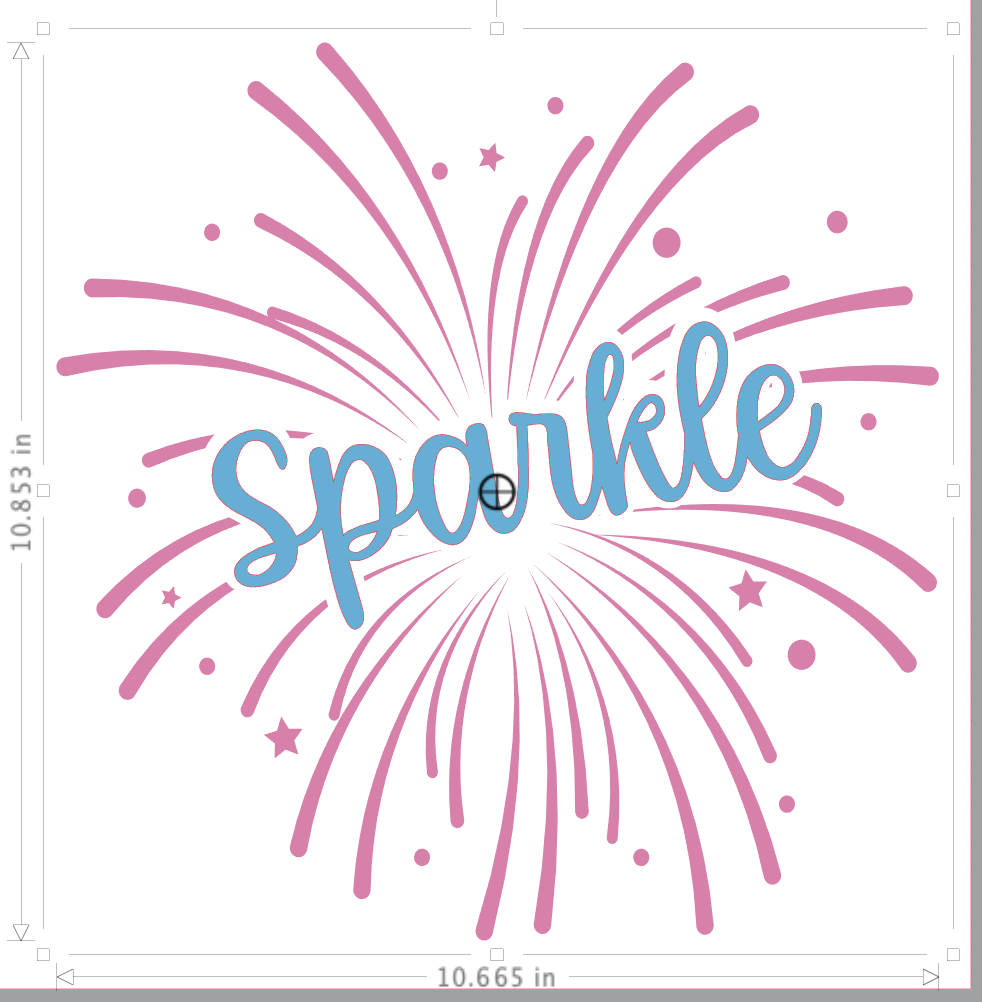
If desired, remove any small pieces of the design that will be too small to change to rhinestones. Once that is finished, group all the fireworks pieces together. I moved the word off to the side so it was easier to select all the fireworks pieces. Then I selected CTRL/CMD-G to group them. Change the color of the fireworks design so it is all one color if you did not do so earlier. This will make it easier when you are ready to cut the design.
Click on the rhinestone tab. Make sure that size 10ss is selected. Leave all the other settings at the default.
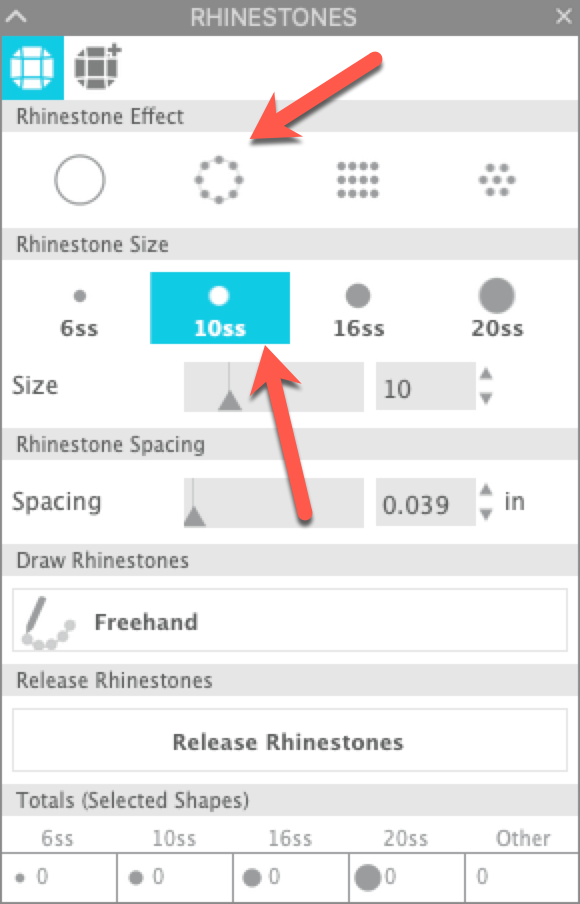
Click on the Edge icon in the Rhinestone Effect portion of the Rhinestone Panel. This will convert the design to rhinestones.

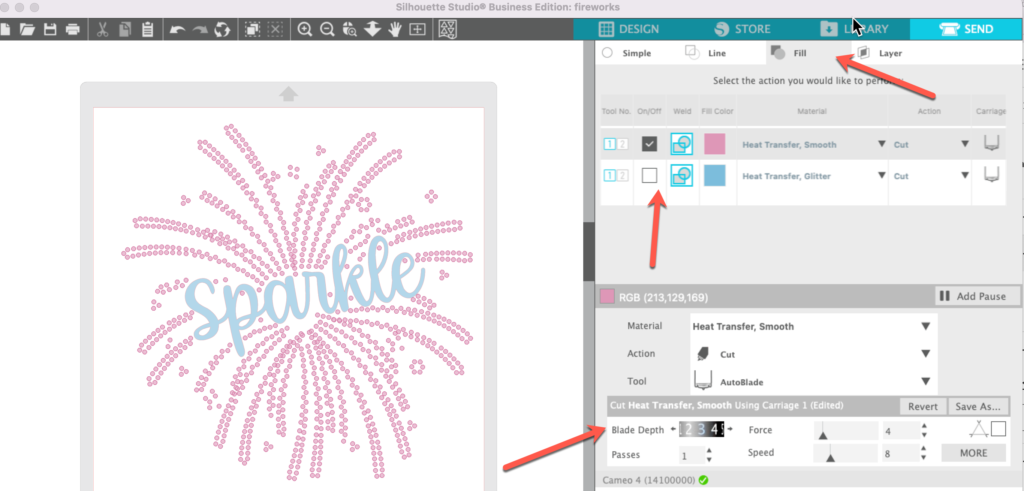
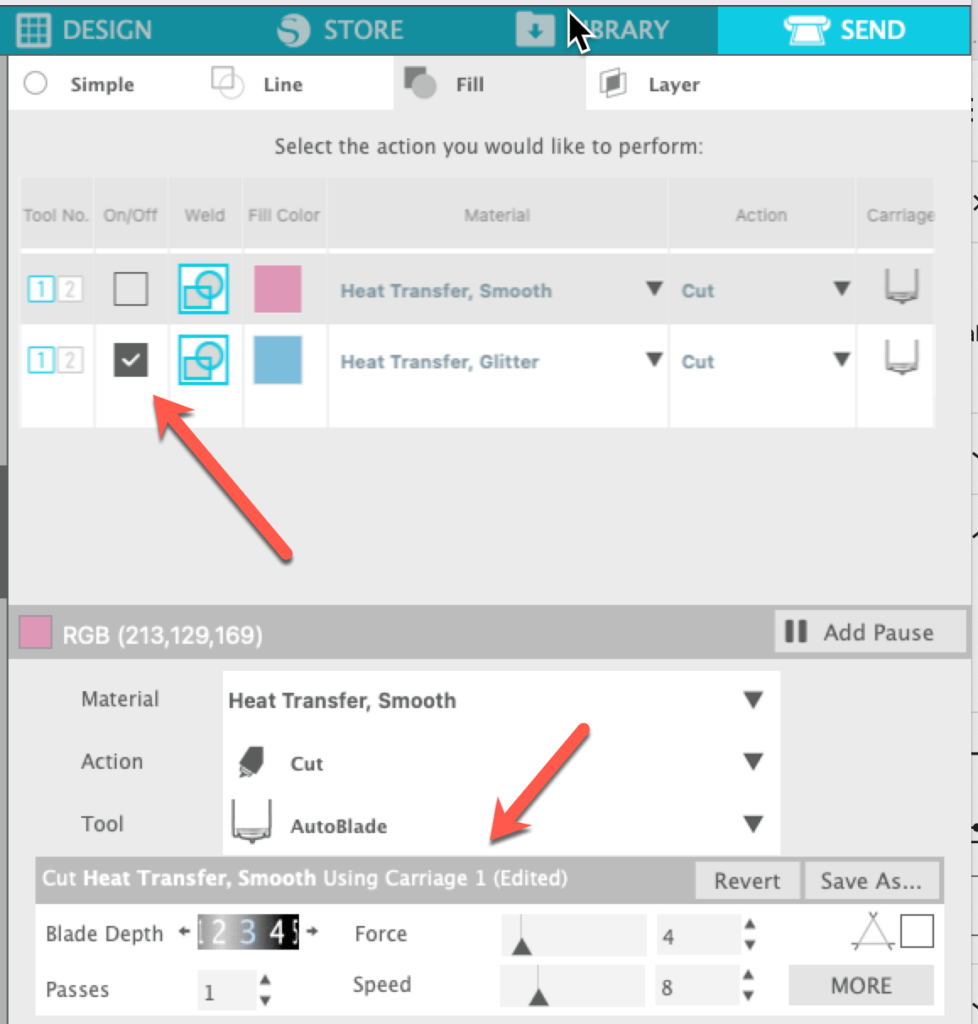
It’s that easy!! Now we are ready to cut the design. I like to use the Fill tab in the Send panel to cut designs with more than one color. With the Fill tab selected, change the Material type for each part of the design. The “rhinestones” are cut from holographic vinyl. I used the Heat Transfer Smooth setting and increased the blade depth by 1. Change the Material type for the word to Heat Transfer Glitter. I again increased the blade depth by 1. To cut the rhinestones, uncheck the color for the HTV Glitter.
Load the vinyl on the mat with the shiny side (carrier sheet) down on the mat. The back side of the vinyl should be facing up. Make sure that the material settings are correct and perform a test cut. If the test cut is correct, cut this part of the design. If not, adjust your settings and perform a second test cut. A good cut is one that cuts through the vinyl but does not cut through the carrier sheet.
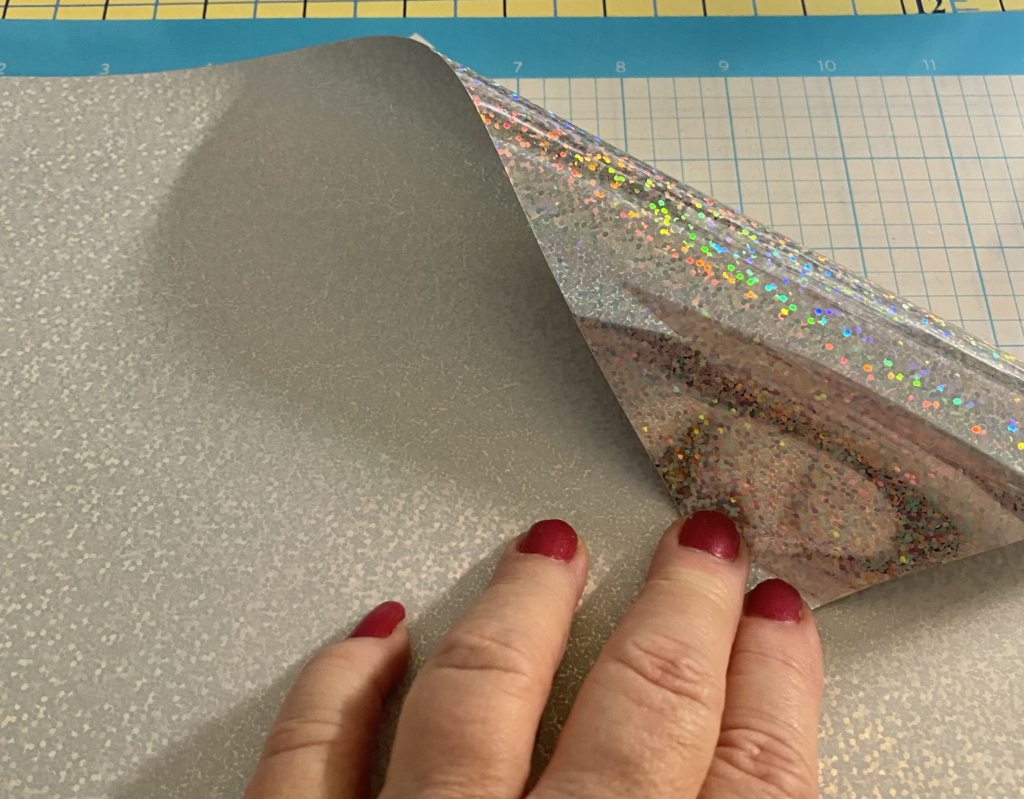
Once the vinyl is cut, weed it. This time, instead of discarding all the holes like you do when you cut a rhinestone template, you will keep the holes and discard the rest of the vinyl. Uncheck the “stones” in the Send panel and check the word. Make sure the settings change to Heat Transfer Glitter. Load your vinyl on the mat, shiny side down. Perform your test cut and when the test is good, cut the name.
With both designs cut and weeded, line up the fireworks design and press for 2-3 seconds at 305 degrees. Holographic vinyl is usually a cold peel, so allow the garment to cool before peeling the carrier sheet away. You want the carrier sheet to come easily away. Place the word on your garment. Cover the holographic vinyl back up — you can use the original carrier sheet or you can use parchment paper. Press the entire design for 10-15 seconds at 305 degrees. Allow to cool and then remove the carrier sheet.
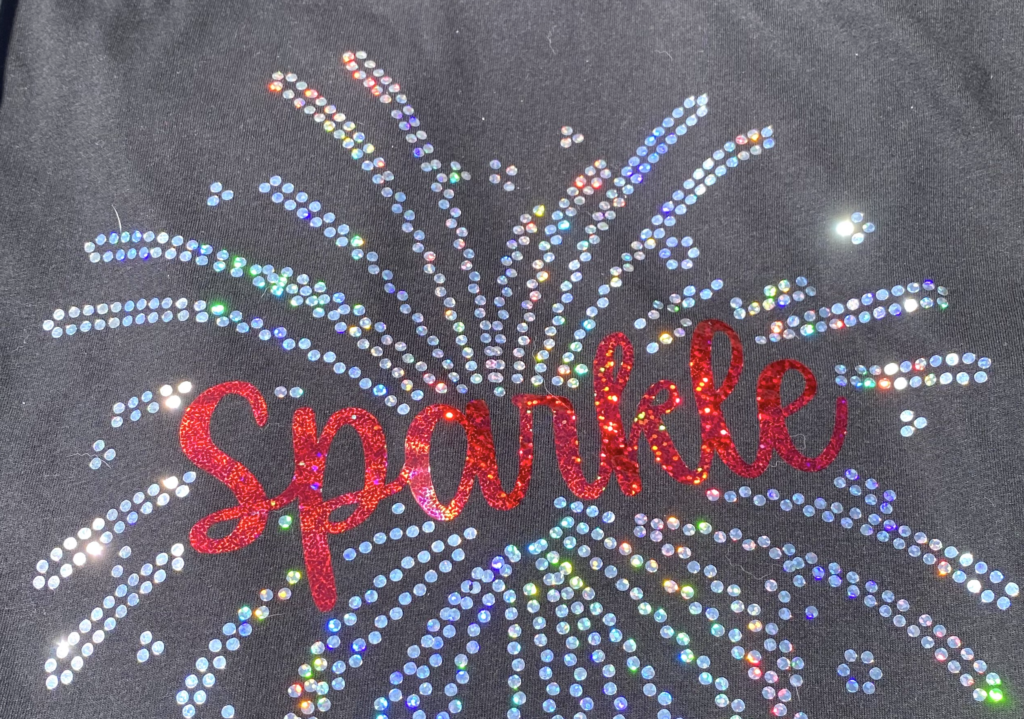
Here’s another photo taken outside so you can see just how “shiny” the faux rhinestones are in the light! It’s hard to get a good picture but I hope you get the idea.
I hope you will give faux rhinestones a try! It is fun and easy and sooo shiny!! Post photos of your designs in my Facebook groups so we can all see your creations!
If you enjoyed these tips, please join my Facebook groups … Libby’s Silhouette Group — Tips, Tricks, Tutorials and Projects, Libby’s Craft and Sewing Group and Running With Sisers – Juliet and Romeo. You can also find me on FB at Libby’s Loft.com. Please join and feel free to ask questions and share your creations! I look forward to seeing you there!!
Until Next Time,
Happy Crafting!!
Disclaimer: Posts on this site may contain affiliate links. Clicking on one of these links or making purchases at linked sites does not mean you pay more for your purchases. It means I may receive a small commission on your purchase. This commission helps defray the costs of this site and enables me to continue to provide you with new and exciting content.