It’s no secret … adding rhinestones to a design will take it to the next level … and we all know, it’s all about the bling!!
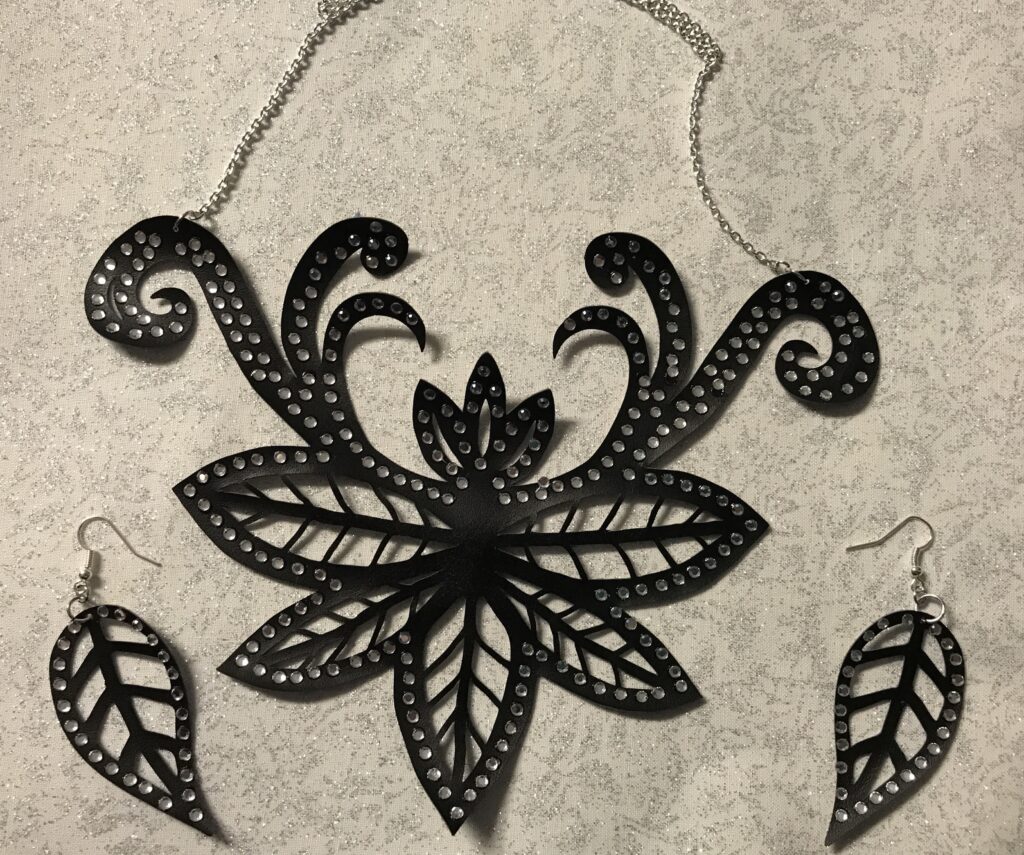
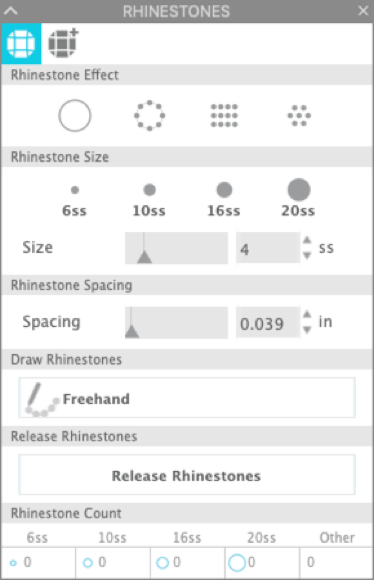
Creating your own rhinestone designs or adding rhinestones to an existing design is so easy when you own Silhouette Studio Designer Edition (or higher). Let’s take a look at the Rhinestone Panel, located near the bottom of the right tool bar.
Create a shape in your Silhouette Software. I used a flower shape from the Flexi-Shapes in v.4.2. Remember to convert the Flexi-shape to a path before trying to add rhinestones. To use the Rhinestone Effects, select the shape and click on the desired effect button in the Rhinestone Effects area of the panel.
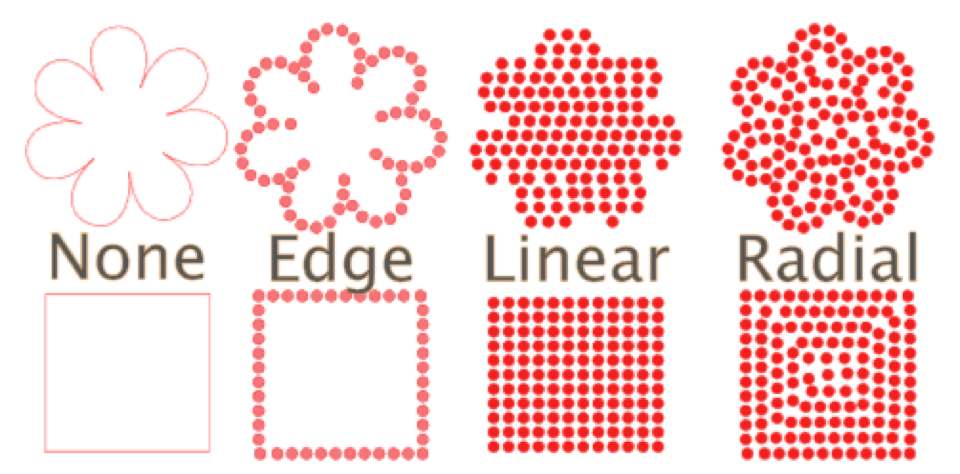
Let’s look at the Rhinestone Effects area of the Panel:
- None — leaves the shape alone with no rhinestones
- Edge – places a line of stones around the outside of the design
- Linear Fill – straight lines of stones beginning at the top of the design. Best for hard lines and edges.
- Radial Fill – starts at outer edge and fills. Best for circles and designs that taper.
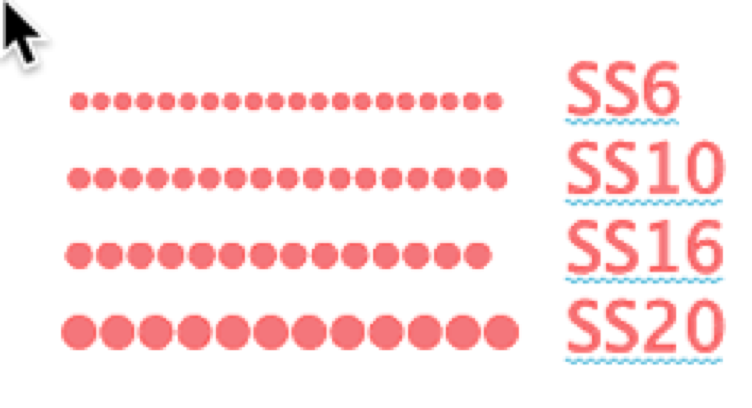
Rhinestones are sold by size and quantity. They are measured in “ss” units. The most commonly used sizes are:
- SS6 – 2mm
- SS10 – 3 mm
- SS16 – 4 mm
- SS20 – 5mm
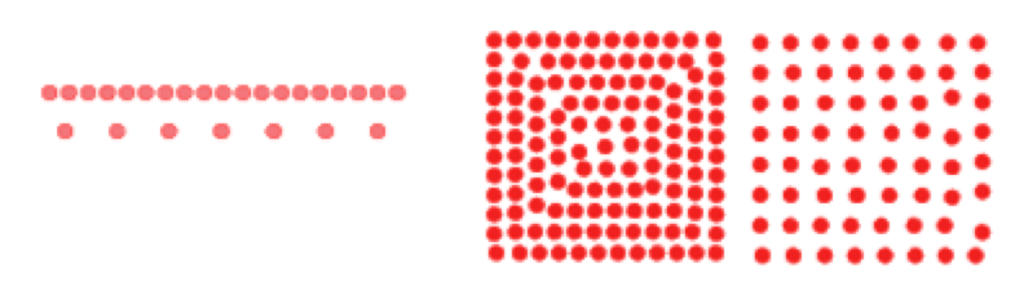
You can control the spacing between the stones by entering a specific value or by using the slider to adjust the spacing. Remember not to get your stones too close together or the stones will not have enough room to lay flat and evenly in your design.
The Freehand Command allows you to place individual stones by clicking on this option and then clicking in the workspace. But more importantly, it will function like the Freehand Drawing Command.
The Release Rhinestones command allows you to edit the placement of individual stones. When the stones are originally applied to a path, whether it is a shape or a path you create using the freehand tool, they are treated as one element. You cannot move the individual stones. Clicking on Release Rhinestones will break apart the underlying shape and allow you to manipulate each stone individually.
It’s important to remember that once you release the rhinestones from their path, they are no longer treated as rhinestones so some of the rhinestone tools such as spacing will not apply to them. Also remember that they no longer function as one unit, so you may need to group them to manipulate them.
Last but not least in the rhinestone panel is the Stone Total area. This area shows you how many rhinestones of each size are in your design. You can see the number of stones in the entire design or in individual elements of the design. This is helpful in purchasing stones and in pricing a design to customers. Even stones that have been released from the path are still considered rhinestones for purposes of stone count.
Well, that’s the rhinestone panel in a nutshell. I hope you will play with this panel and begin to create some beautiful bling designs of your own!
If you enjoyed these tips, please join my Facebook groups … Libby’s Silhouette Group — Tips, Tricks, Tutorials and Projects, Libby’s Craft and Sewing Group and Running With Sisers – Juliet and Romeo. You can also find me on FB at Libby’s Loft.com. Please join and feel free to ask questions and share your creations! I look forward to seeing you there!!
Until Next Time,
Happy Crafting!!
Disclaimer: Posts on this site may contain affiliate links. Clicking on one of these links or making purchases at linked sites does not mean you pay more for your purchases. It means I may receive a small commission on your purchase. This commission helps defray the costs of this site and enables me to continue to provide you with new and exciting content.
Happy crafting!!
Until next time,
One thought on “Rhinestones Made Easy”
Comments are closed.