Have you ever fallen in love with a design on a website and purchased it, only to find out when you opened it that there was no color in the design — only outlines??
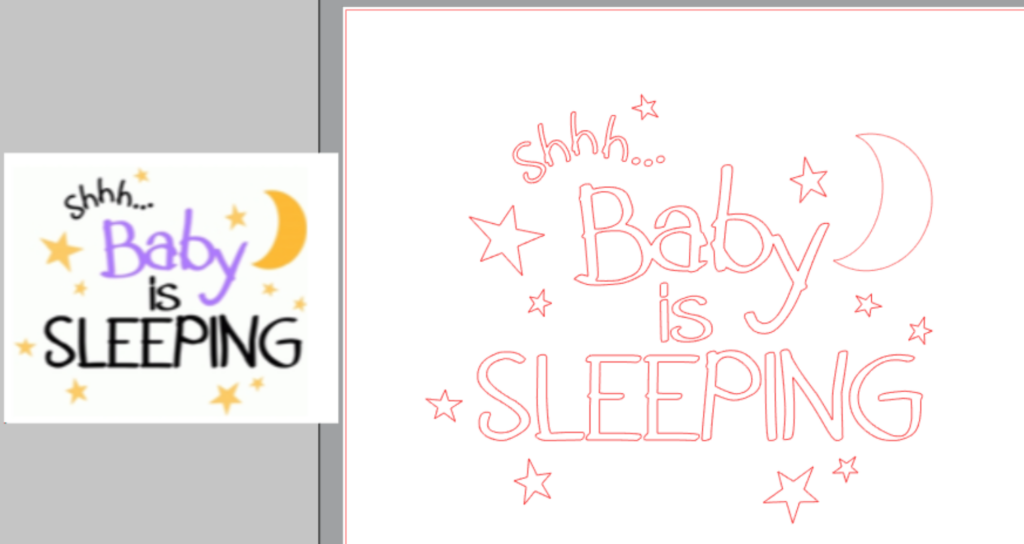
This is how this design (#47140) looks in the Silhouette Design Store.

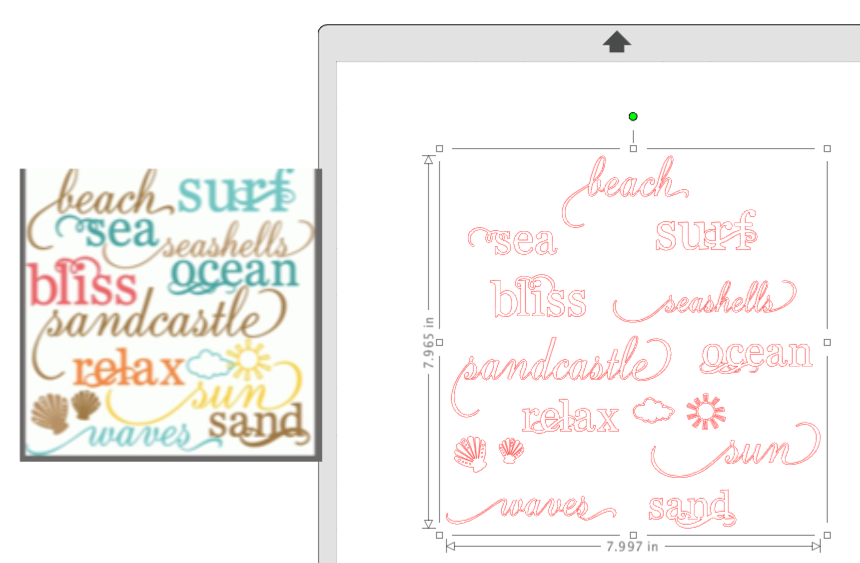
Looks great, right??? But here’s what it looks like when I open the design.

I liked the design because of the colors the designer used when it was created. I could go back and forth between the Design tab and my Library tab to check the colors, but that’s tedious. Let’s try a few other options …
Library Split Screen
In the lower left corner of the Design screen is an icon that looks like a file folder with an arrow pointing down. This is the Library Split Screen icon.
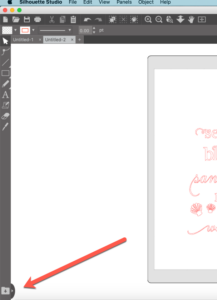
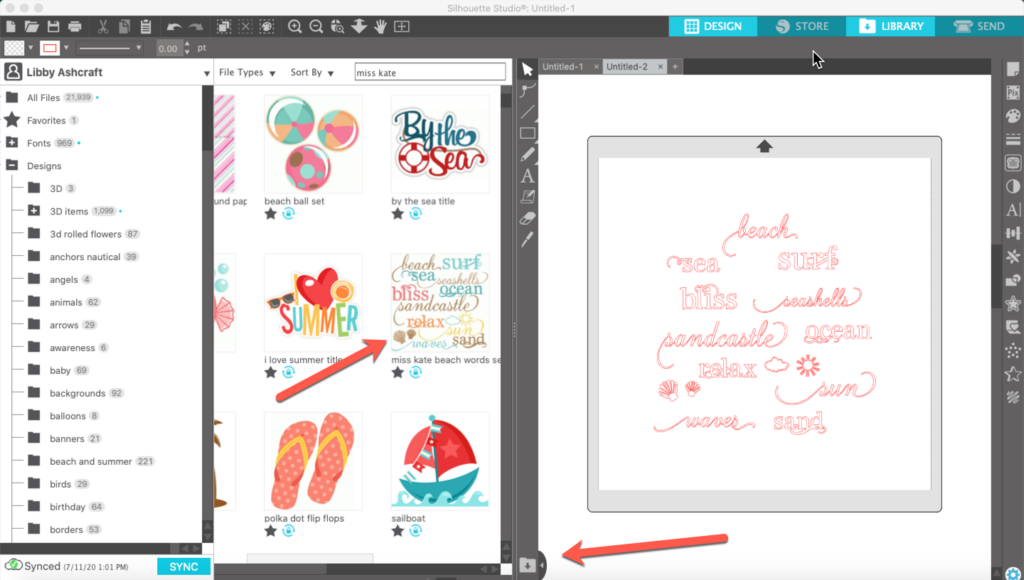
Clicking on this icon will split the screen and show your library on the left side of the screen and the design area on the right. You can scroll down to see the designs in your library and locate the color image of your design.
Click on the icon again and the library window is closed and your design window is no longer split.
Screen Capture
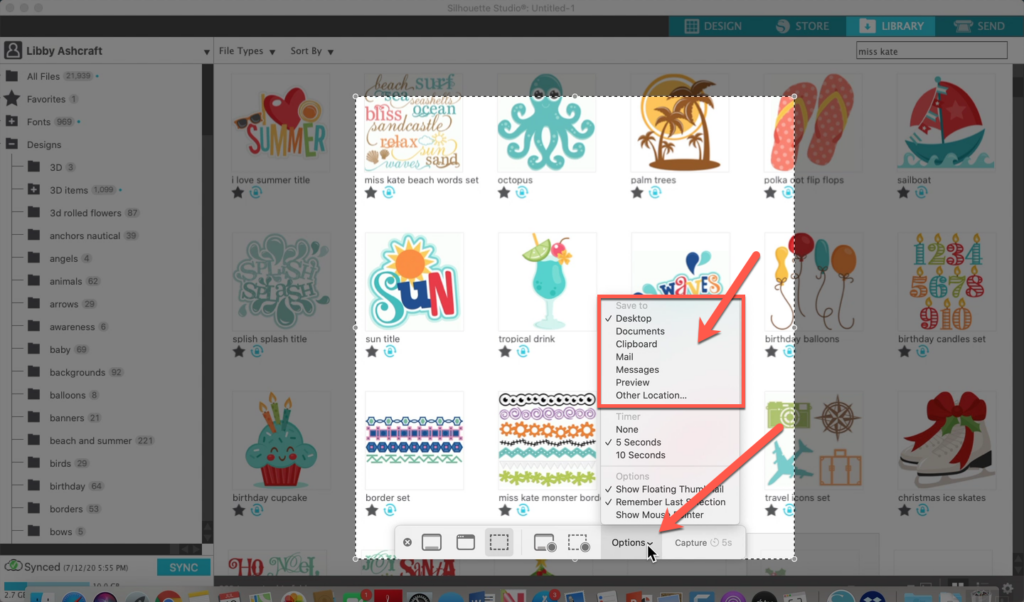
Another way to see the original colored version of the design is to do a screen capture. You can capture the entire window, just a part of a window or your entire desktop. Once you capture your image, you can paste it into Studio. All the designs used as examples are from the Silhouette Design store, but the same techniques will work if you get designs from places like Design Bundles or Creative Fabrica and many others.
Screen Capture on a Mac
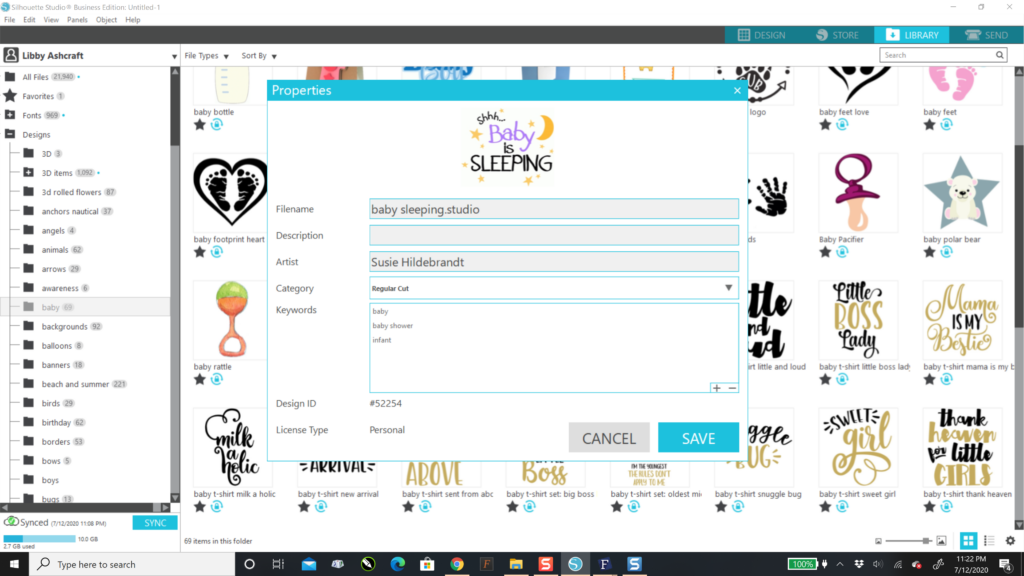
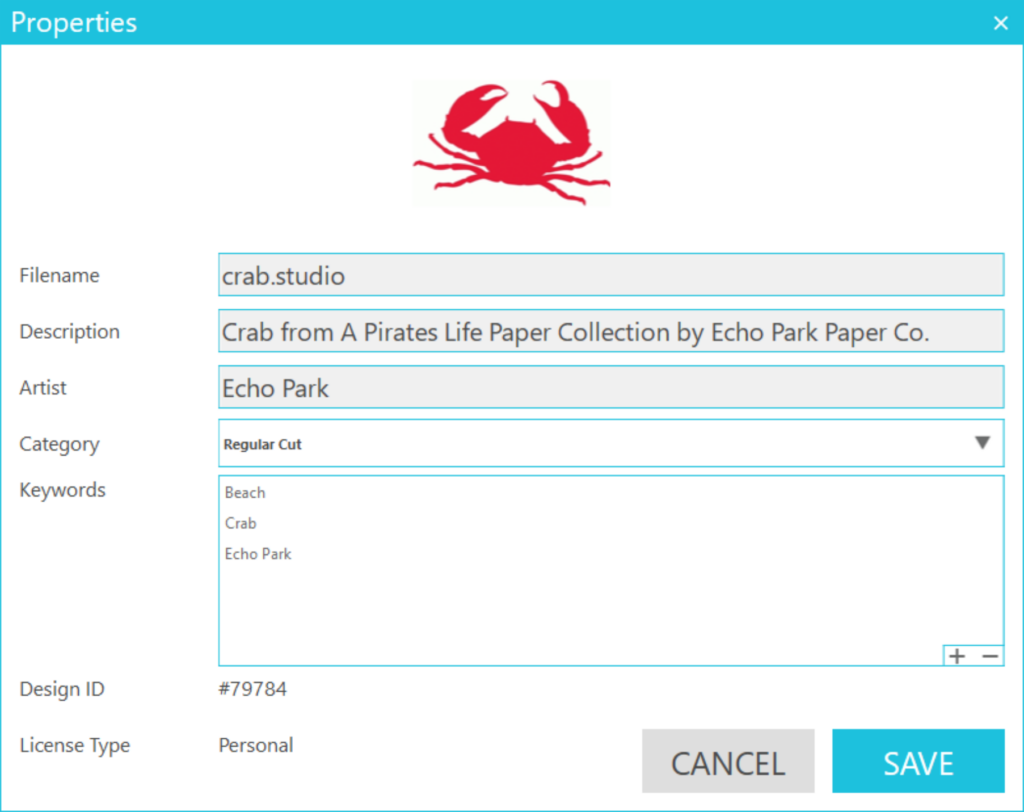
In your Library, right click on the design and select Properties. You will see all the details about the design and a color picture. You could also go to the Design Store and locate the design and use the image in the Design Store (it’s a little bigger than the one in Properties).

Once the image is displayed on your Mac, you can use one of these methods to create the screen capture.
- Use Shift-Command-3 to take a screenshot of the entire screen.
- Use Shift-Command-4 and then drag the cursor over there you want to capture — use this to capture just part of the screen.
- Use Shift-Command-4 and press the Spacebar to capture a specific window — press Shift-Command-4. Hit the spacebar.
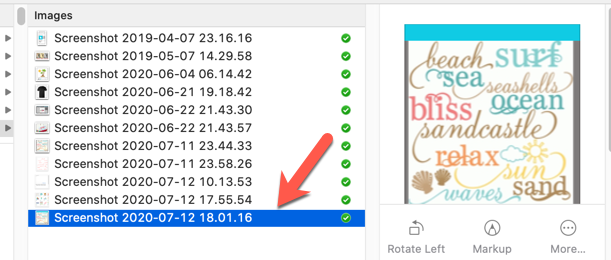
By default, screenshots will be saved to your desktop. They will be named “Screen Shot (date) at (time).png.”
If you have MacOS Mojave or later, you can change the default location of the screen ships in the Options menu in the Screenshot.app.
You can use the File>Merge command to bring the image into your current workspace or you can drag and drop the file directly into your workspace. You may have to scale the image up so it is large enough to use. This may result in a “fuzzy” image, but since you are not printing the image, this will not matter.
Screen Capture on a PC using PrtSc
There are a couple of ways to get a screen capture on your PC. The first is using the Print Screen key (PrtSc).
- Press the PrtSc key on the keyboard and the entire screen is copied to your clipboard. It can then be pasted into your programs. This might not be the most useful for our purposes today, but it’s good to know about it.
- Press ALT+PrtSC to copy the active window to your clipboard. It can then be pasted into your software. This worked great but I got more info than I really wanted … I just wanted the image.
- If you have the latest Windows update (called the Windows Creators Update), you can press the Windows Key+Shift+S. The Screen will dim and you can left click and drag to select just the portion of the screen that you wish to capture. This selection is also saved to the clipboard so you can paste it into your programs.
Screen Capture on a PC using Snipping Tool
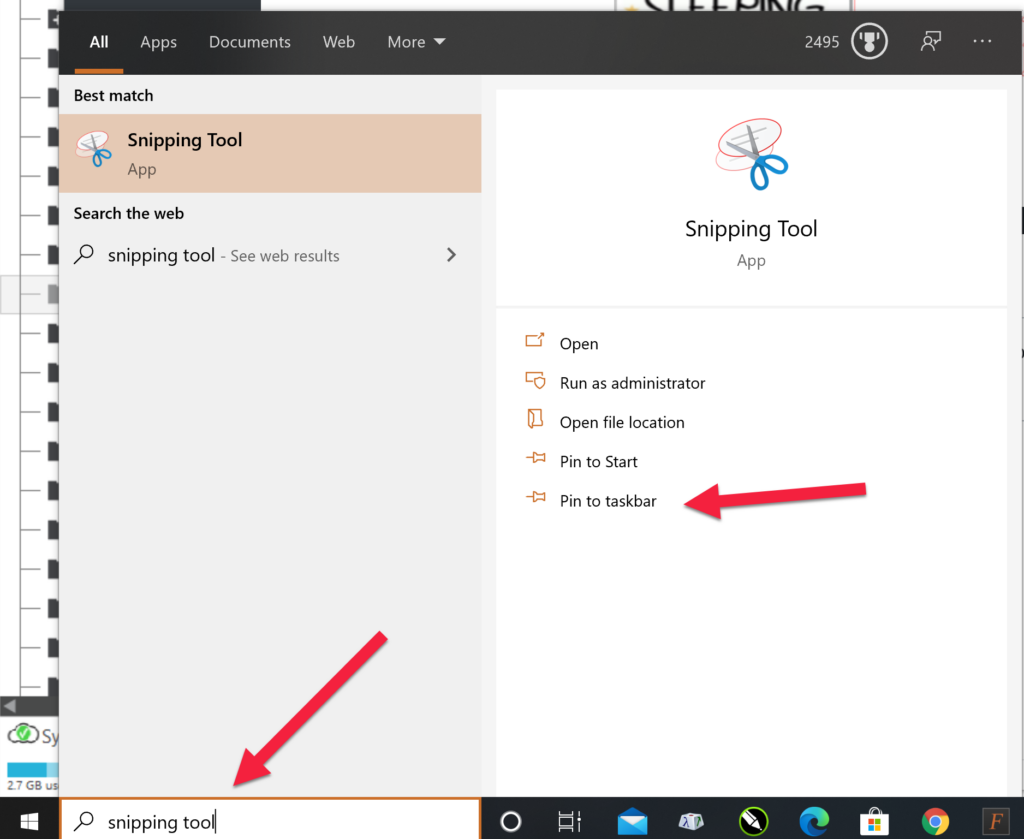
Windows 10 includes an app called the Snipping Tool. You can access the Snipping tool by clicking on the Start button in the taskbar and entering “snipping tool” in the search box. When I do this, I get this window … it allows me to select the snipping tool, but it also allows me to pin this to the Task bar so it is always available without having to click on the Start button and type “snipping tool”. You do not have to do this, but if you find yourself using it a lot, it is a time saver.
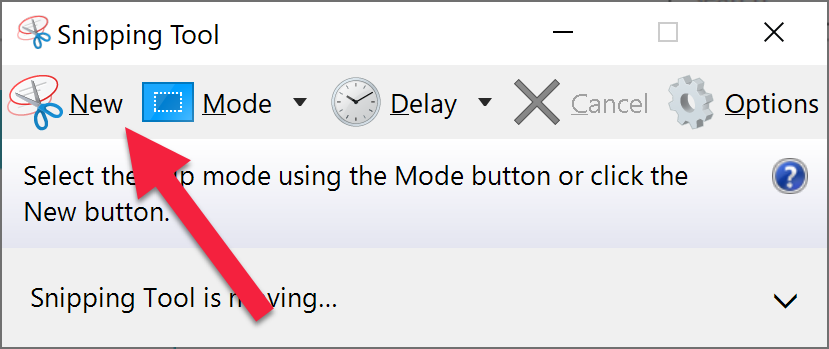
When you launch the snipping tool, you will see a dialog box. Press New to begin selecting your image.
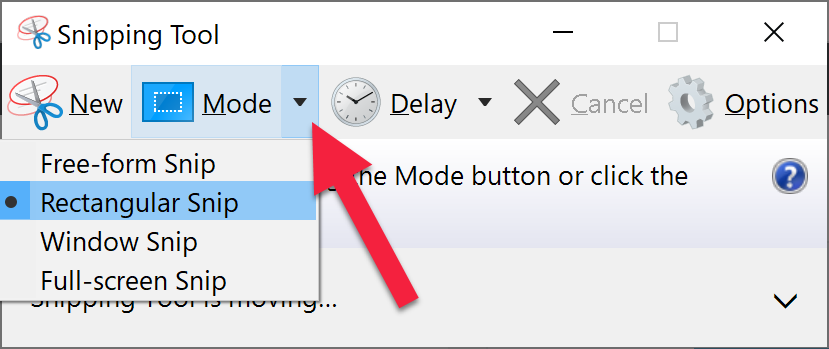
The default mode for selection is a rectangular selection. If you click on the Mode drop down, you get selection mode choices: free form (draw your own shape), rectangular, window or full screen. I usually just use the rectangular snip.
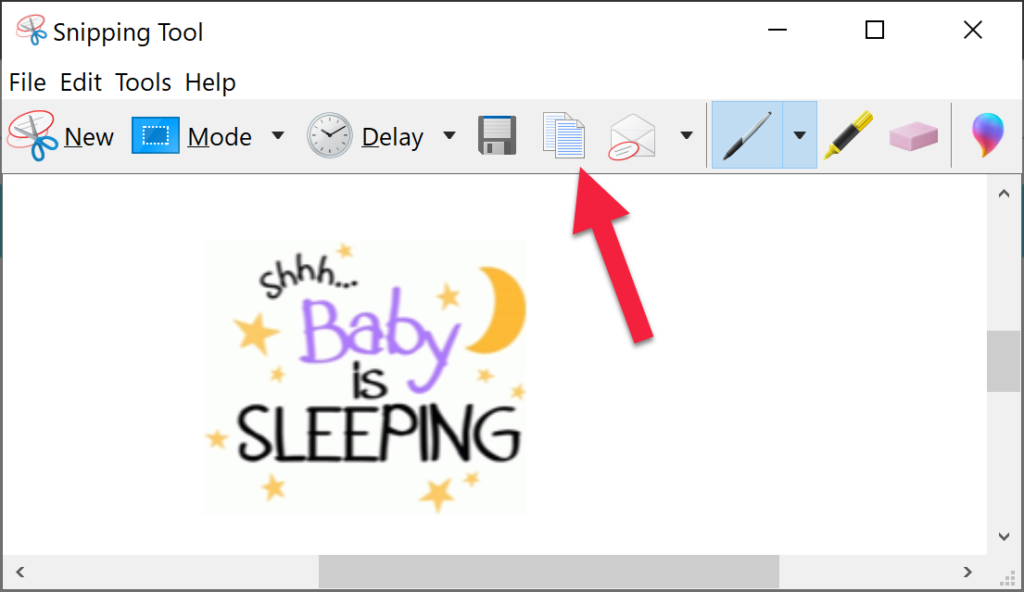
Once you have completed your selection, the Snipping window opens and you can edit the image or add annotations. When you have completed your edits, press the Copy icon. The image is now ready to be pasted into your software. You can also save the image, if desired.
Use your Screen Capture to Apply Colors
One of the added benefits of adding a screen capture to your workspace in Studio is the ability to use it to add color to your design. Select part of the image you wish to fill with color. With the design elements selected, click on the Fill icon in the top toolbar.
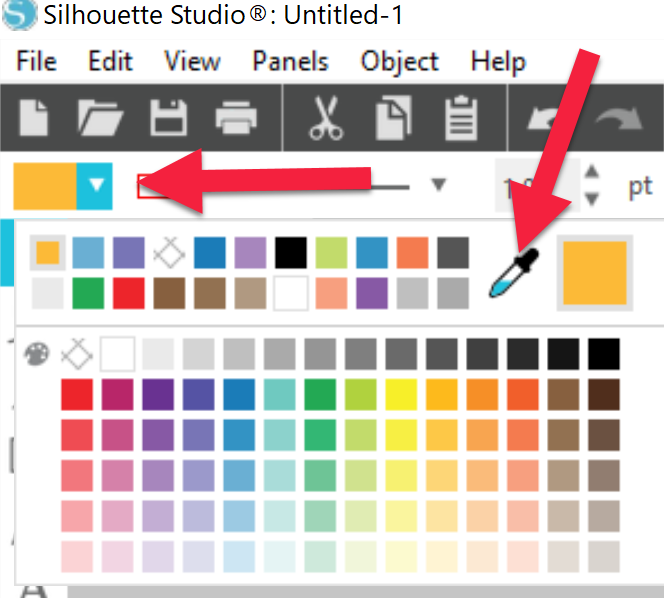
Click on the eyedropper and move your cursor down into the workspace. Left click on the part of the image you wish to use to select the color. The design elements will now be that color. You can continue this process until your entire design is filled with color.

Screen Captures using SnagIt Software
The screen capture options detailed above are all free. There is a program for both Mac and PC that will allow you to do great screen captures called SnagIt by TechSmith. This program is not free but is very robust. It allows you to capture entire windows or parts of windows. It will also allow you to do video capture of your screen. And there are lots of editing/annotation tools available. This is the edit screen on my PC. I use it on both the Mac and PC.

WOW! This post has become a lot longer than I thought it would be when I started …. I hope you made it all the way to the end and learned about using the eyedropper to grab the colors from your reference image!
If you enjoyed these tips, please join my Facebook groups … Libby’s Silhouette Group — Tips, Tricks, Tutorials and Projects, Libby’s Craft and Sewing Group and Running With Sisers – Juliet and Romeo. You can also find me on FB at Libby’s Loft.com. Please join and feel free to ask questions and share your creations! I look forward to seeing you there!!
Until Next Time,
Happy Crafting!!
Disclaimer: Posts on this site may contain affiliate links. Clicking on one of these links or making purchases at linked sites does not mean you pay more for your purchases. It means I may receive a small commission on your purchase. This commission helps defray the costs of this site and enables me to continue to provide you with new and exciting content.
Until next time,
Happy Crafting!!
Disclaimer: Posts on this site may contain affiliate links. Clicking on one of these links or making purchases at linked sites does not mean you pay more for your purchases. It means I may receive a small commission on your purchase. This commission helps defray the costs of this site and enables me to continue to provide you with new and exciting content.