Let’s continue our exploration of the Trace tools in Silhouette Studio. So far, we have looked at tracing basics and Trace by Color. Magnetic Trace requires Designer Edition or higher.
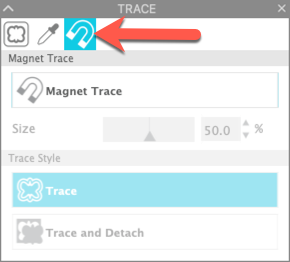
In a nutshell, to use the magnetic trace tool, you click around the image. Each click “clings to the image” and creates a trace point. Once your image is traced, the remaining background will be cropped out. The magnetic trace tool is found on the third tab in the Trace panel.
You will notice that there are not as many additional controls in this tab. That’s because you are going to control the trace when you place the points. At first glance this may sound like a lot of work, but there are times when this is the best way to trace an image. Look at the image below. There are a number of colors and additional objects in the image. I want to use just my dog, Dixie, in another photo.

Let’s try using the other tools first. With the design in the workspace, click on the Trace icon. In the Trace panel, click on Select Trace Area. Left click and drag a box around the part of the image you want to trace.
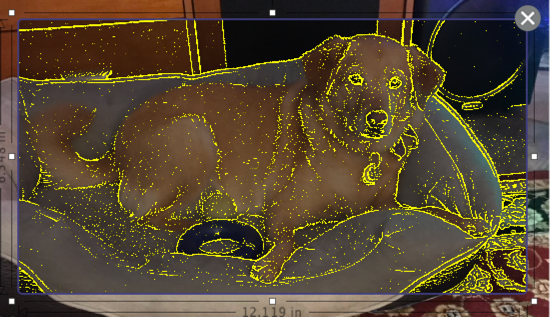
As you can see from all the yellow lines, the software is trying to create cut lines. This is not what I want. Next I tried Trace by Color.

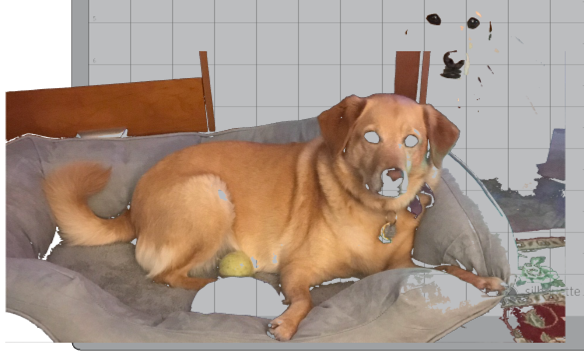
I had to adjust the tolerance to get most of Dixie selected. When I click Trace and Detach, here’s the result.
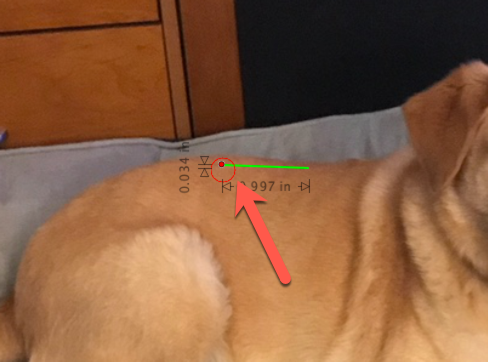
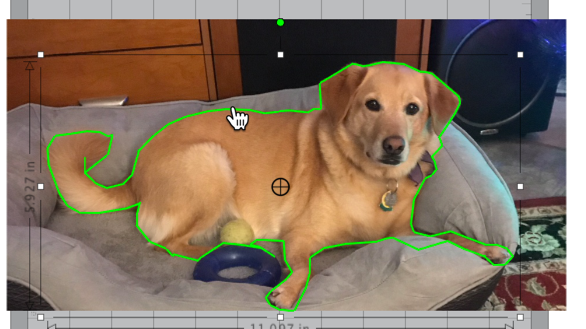
Now let’s try Magnetic Trace. When I clicked on Magnetic Trace in the Magnetic Trace tab and moved my cursor into the workspace, I got a red dot with a circle around it. Changing the Size in the Magnetic Trace tab changes the size of the circle around the red dot showing where you are placing points. In this photo, I made the outer circle smaller.
As I clicked around the image of Dixie, the cursor moved to the image like it was drawn by a magnet. Here’s my trace result.
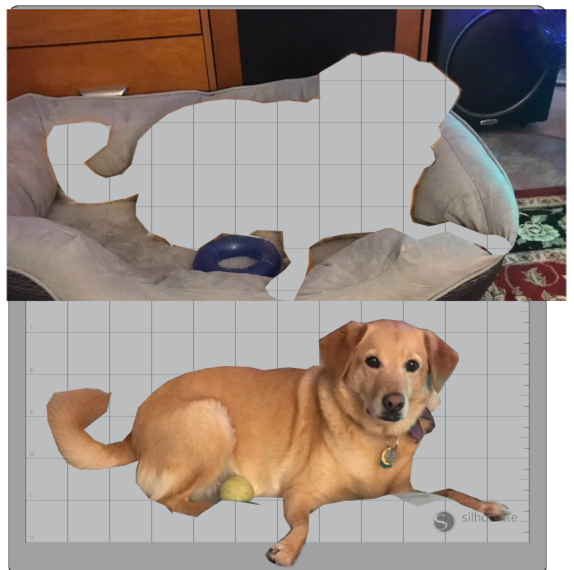
After I finished tracing, I selected Trace and Detach. Here’s the result.
And now, here’s Dixie at the lake fishing with the grandson!

If you look closely, Dixie is very bright and the grandson is more in the shadows. That’s easy to fix. Click on the Image Effects icon.
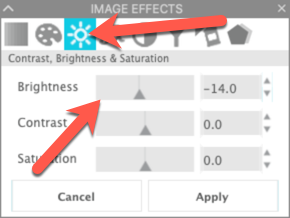
Select the Contract, Brightness and Saturation tab and adjust the Brightness. I lowered the brightness until it looked like Dixie was in the evening shadows.

So there you have it, a practical use for Magnetic Trace! I hope you find this information useful.
If you enjoyed these tips, please join my Facebook groups … Libby’s Silhouette Group — Tips, Tricks, Tutorials and Projects, Libby’s Craft and Sewing Group and Running With Sisers – Juliet and Romeo. You can also find me on FB at Libby’s Loft.com. Please join and feel free to ask questions and share your creations! I look forward to seeing you there!!
Until Next Time,
Happy Crafting!!
Disclaimer: Posts on this site may contain affiliate links. Clicking on one of these links or making purchases at linked sites does not mean you pay more for your purchases. It means I may receive a small commission on your purchase. This commission helps defray the costs of this site and enables me to continue to provide you with new and exciting content.
Until next time,
Happy Crafting!
Disclaimer: Posts on this site may contain affiliate links. Clicking on one of these links or making purchases at linked sites does not mean you pay more for your purchases. It means I may receive a small commission on your purchase. This commission helps defray the costs of this site and enables me to continue to provide you with new and exciting content.