A few weeks ago Siser announced a new product, EasyColor™ Direct to Vinyl™. It is designed to be compatible with your ink jet printer …. yes, I said your ink jet printer!! Everything I printed had beautiful color and a great matte finish! It provides great color and works on both dark and light fabrics — my t-shirts are 100% cotton! One of the best things about this product is that it is not heavy and plastic-y feeling.
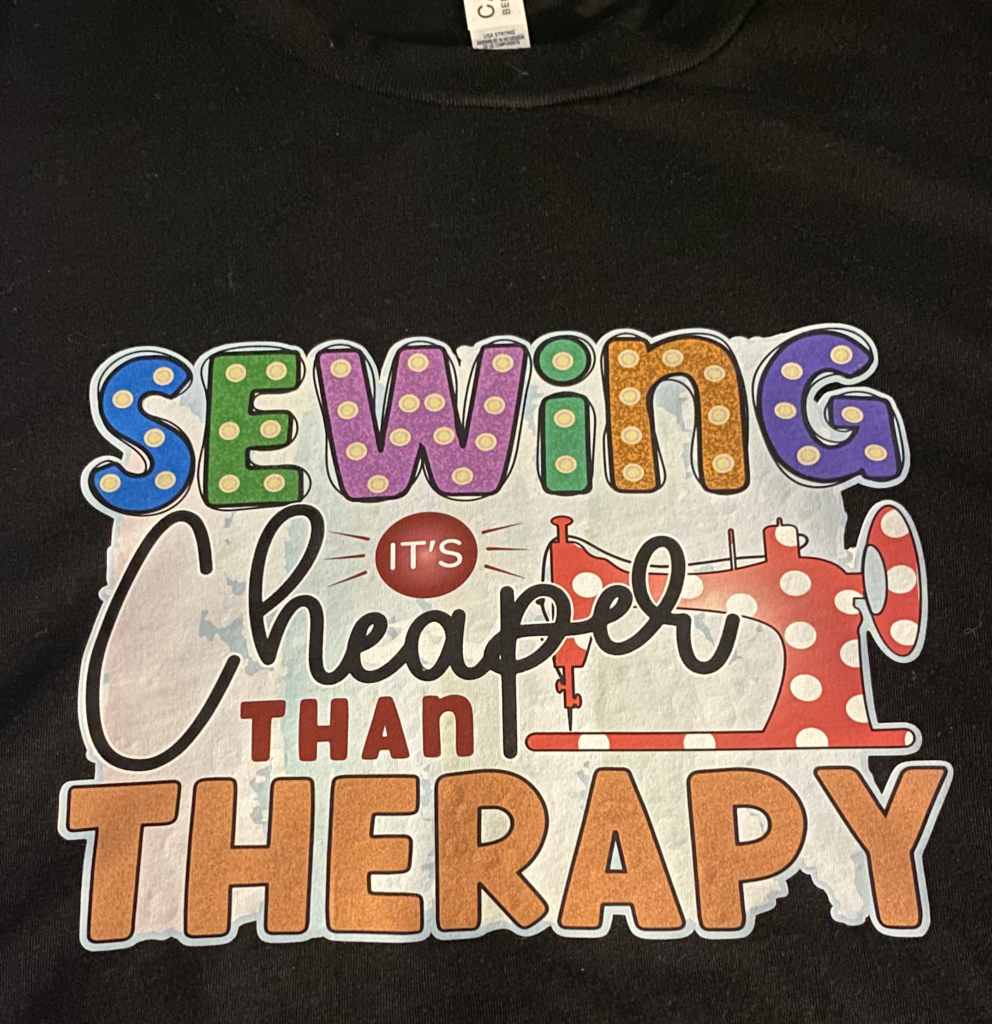
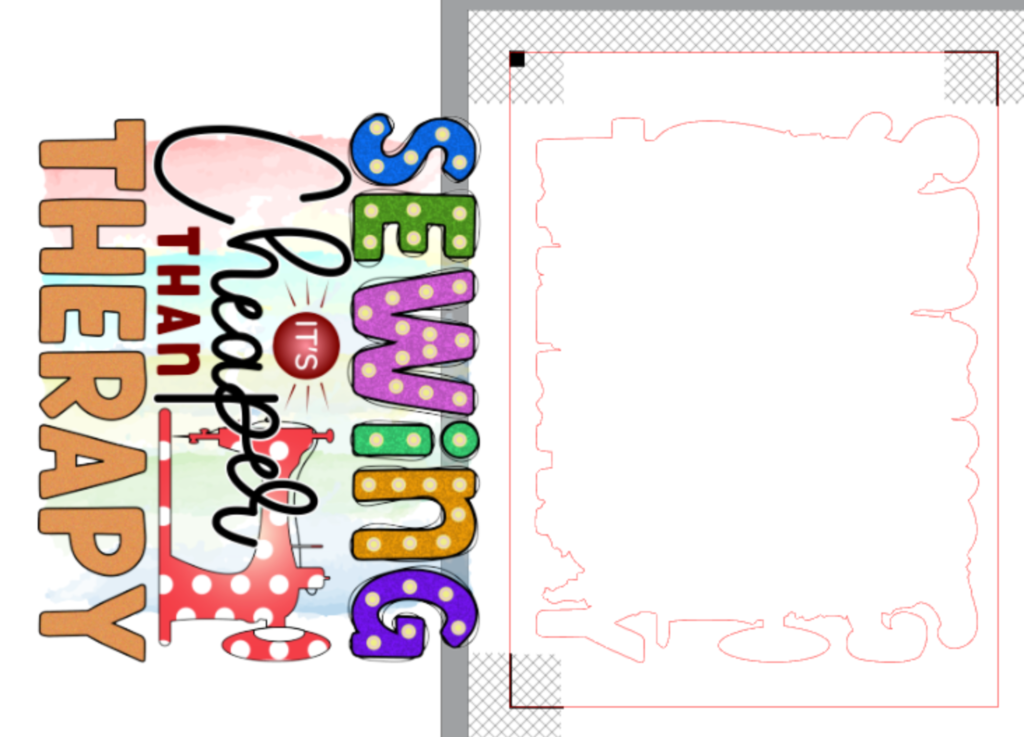
Using EasyColor™ DTV was so easy! First I selected my design and brought it into Silhouette Studio. This design came from Creative Fabrica. It is a PNG file, which is perfect for sublimation. It is also great because it can be opened by all levels of Silhouette Studio.

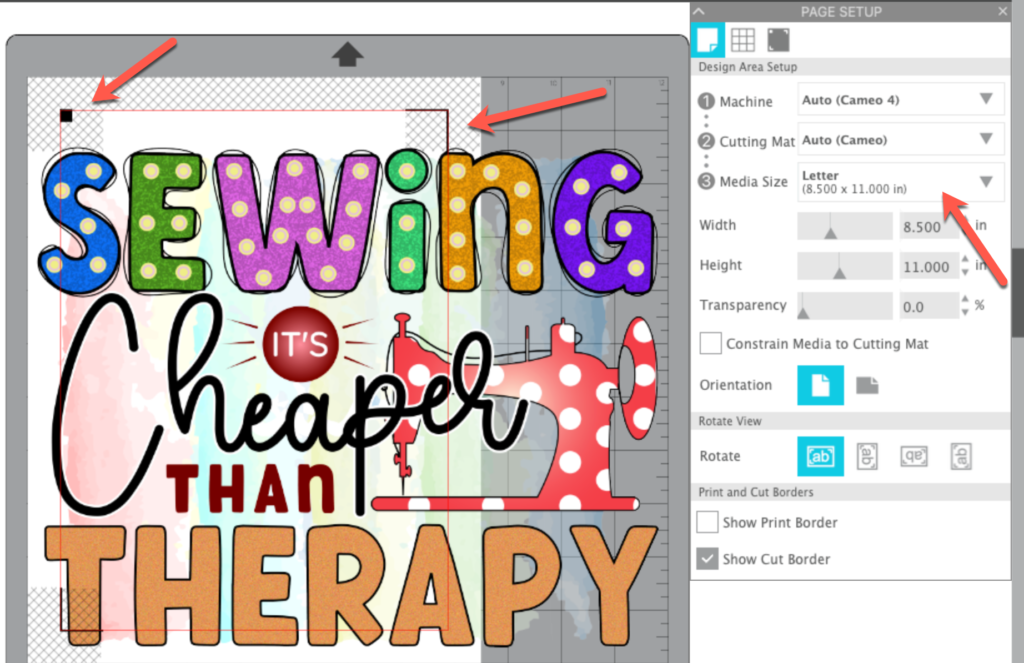
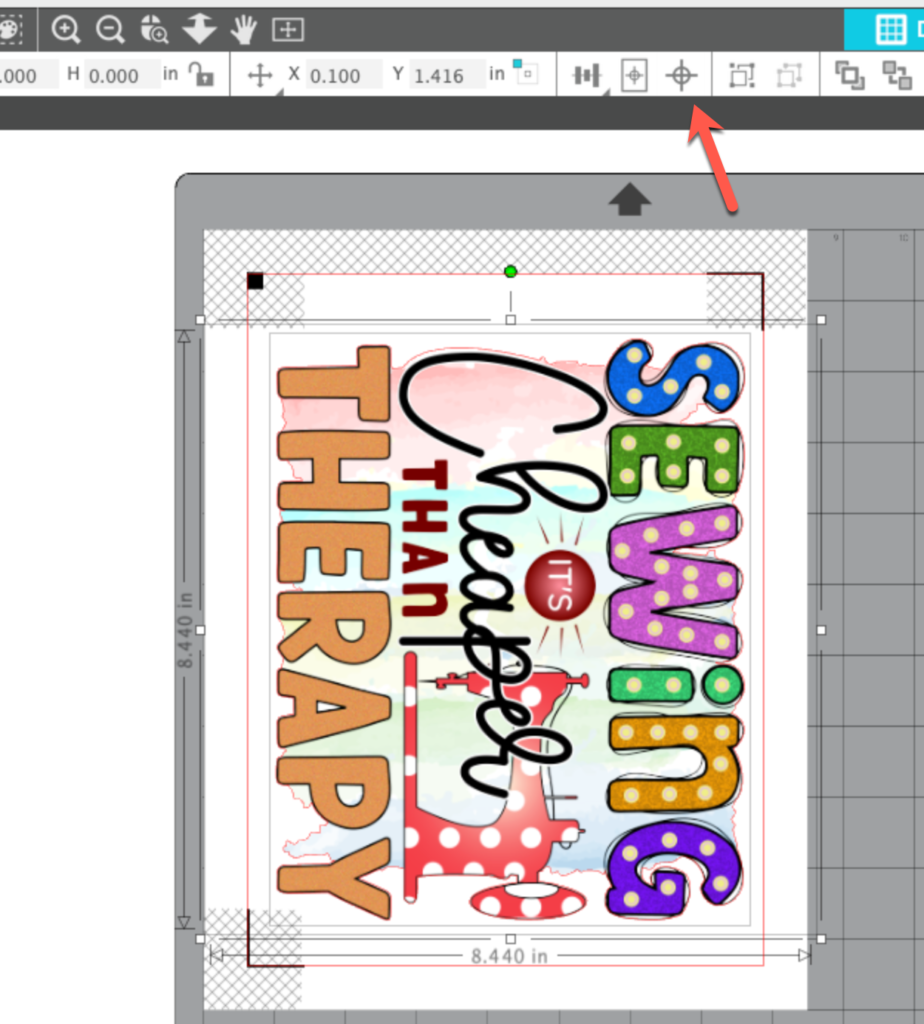
I knew I was going to use my Canon TS 9521C for this project and it even though it prints larger, the EasyColor™ DTV is only 8.5″ wide. First, I set the page size to 8.5″ x 11″ in the Page Setup Panel. I made sure Show Cut border was selected so I would know the cutable area. I then added the registration marks to my page by pressing the “m” key on the keyboard.
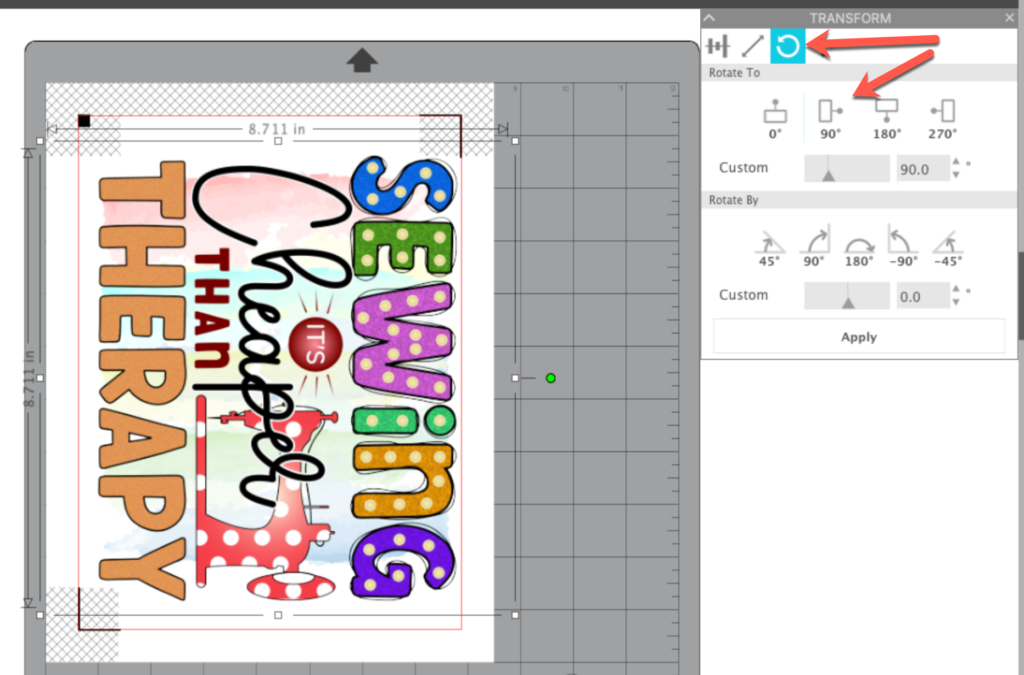
I used the scaling handles on the design and left clicked and dragged the design to make it smaller. Then I used the rotation tab in the Transform Panel and rotated the design 90 degrees. I finished sizing the design, making sure no part of the design was in the hash marked area.
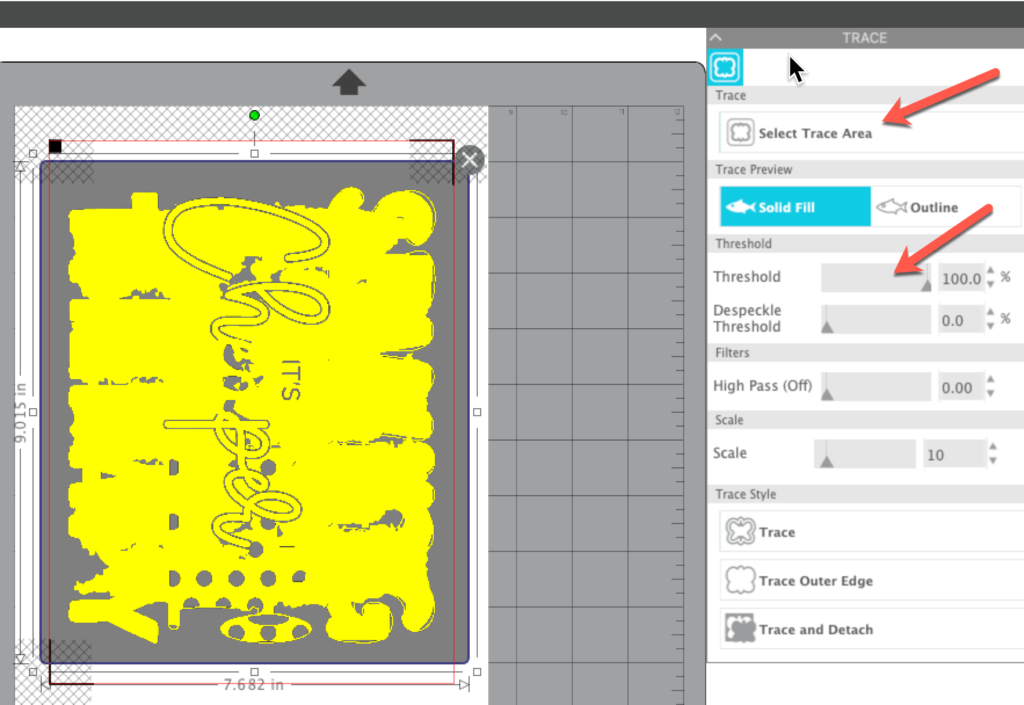
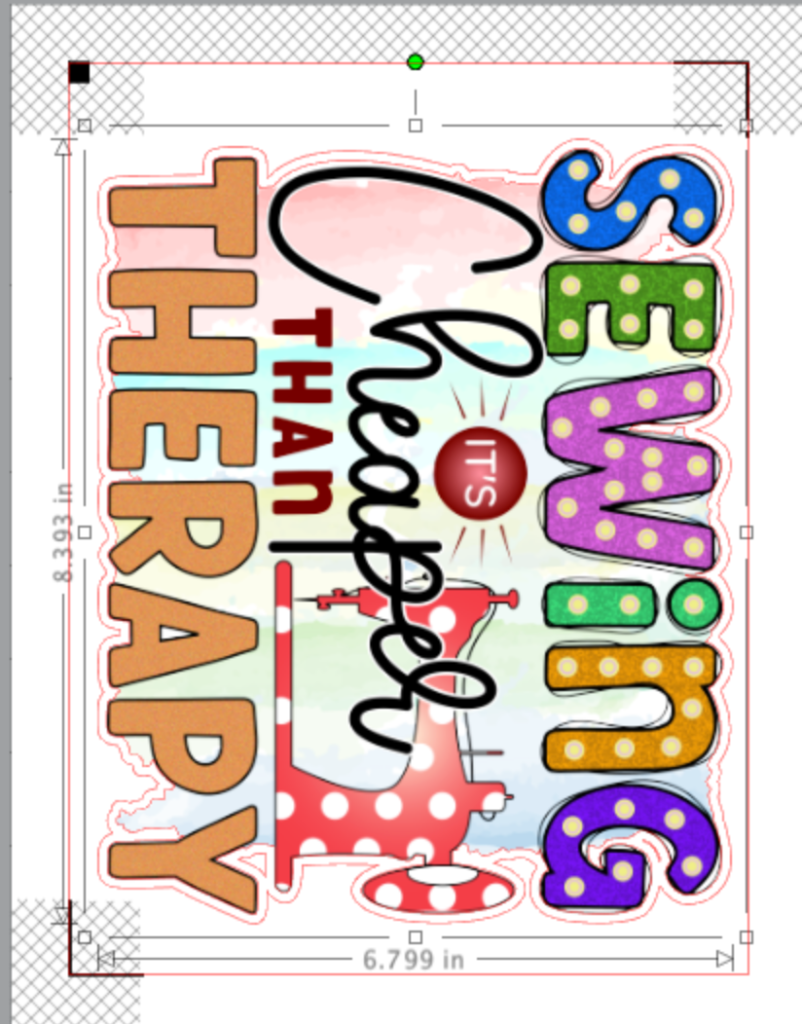
Before I cut the design I decided I wanted to have a small border of color around the outside of the design. This would serve two purposes – add a little color around the black elements so they would show up on a black shirt and also provide a “fudge factor” so no white would show around the edges of the design. To do this, I had to trace the design so the offset would be around the design elements, not a box around the whole area. I selected the Trace panel and selected the Trace area. I had to increase the Threshold to 100% in order to get all the background colors.
Once the entire design was selected, I used the Trace Outer Edge option to minimize the amount of “extra” that was traced. I really just wanted an outline around the design.

Part of wording inside the design was traced, so I released the compound path and deleted the parts I did not want to cut. I used a combination of deleting unwanted areas and using point editing to remove unwanted parts of the design.
Once I had the simplified outline, I moved the printed part of the design back inside the outline I just created. I selected both the design and the outline and used the Center Align tool in the Quick Access Toolbar to center them on each other. Then I moved them back onto the mat area.
Now I could add the small offset. I selected the cut lines I created in the steps above and clicked on the Offset panel. I clicked Offset and set the distance to 0.10 and clicked apply.
I selected the offset and changed the color by clicking on the Fill icon in the Quick Access Toolbar and using the eyedropper to select one of the colors in the background of the design.

With the offset selected, I changed the line color to the same blue as the Fill color. Then I right clicked and selected Send to Back. Finally, I selected the original trace line and deleted it.
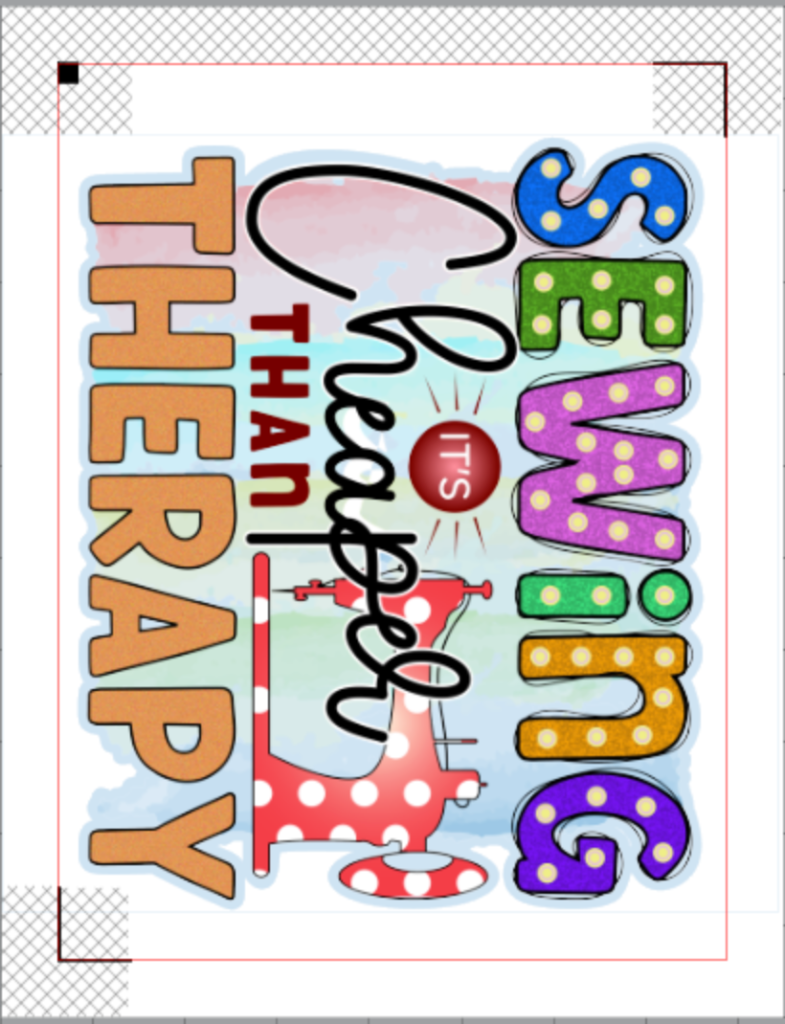
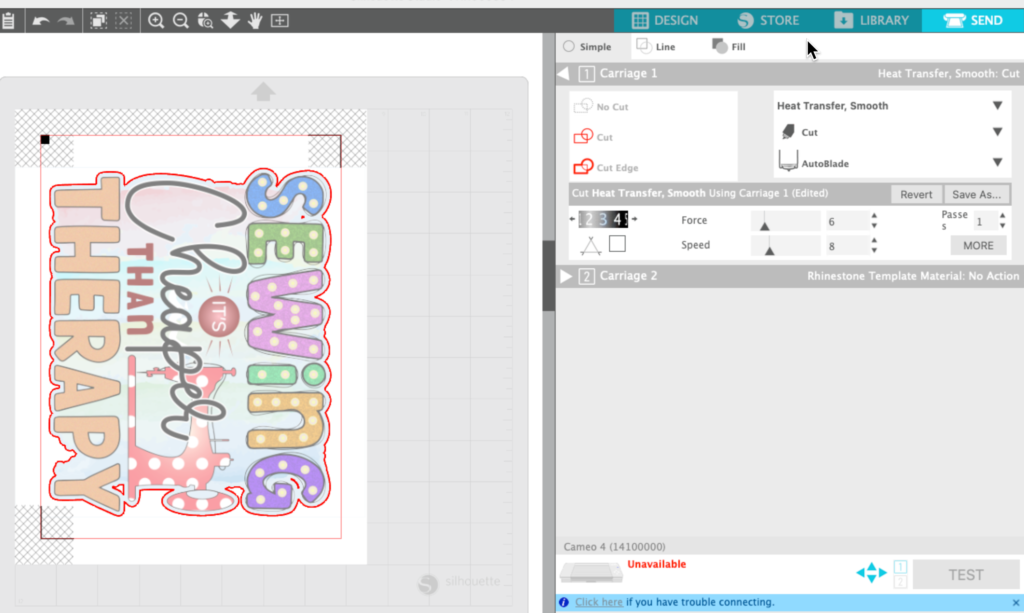
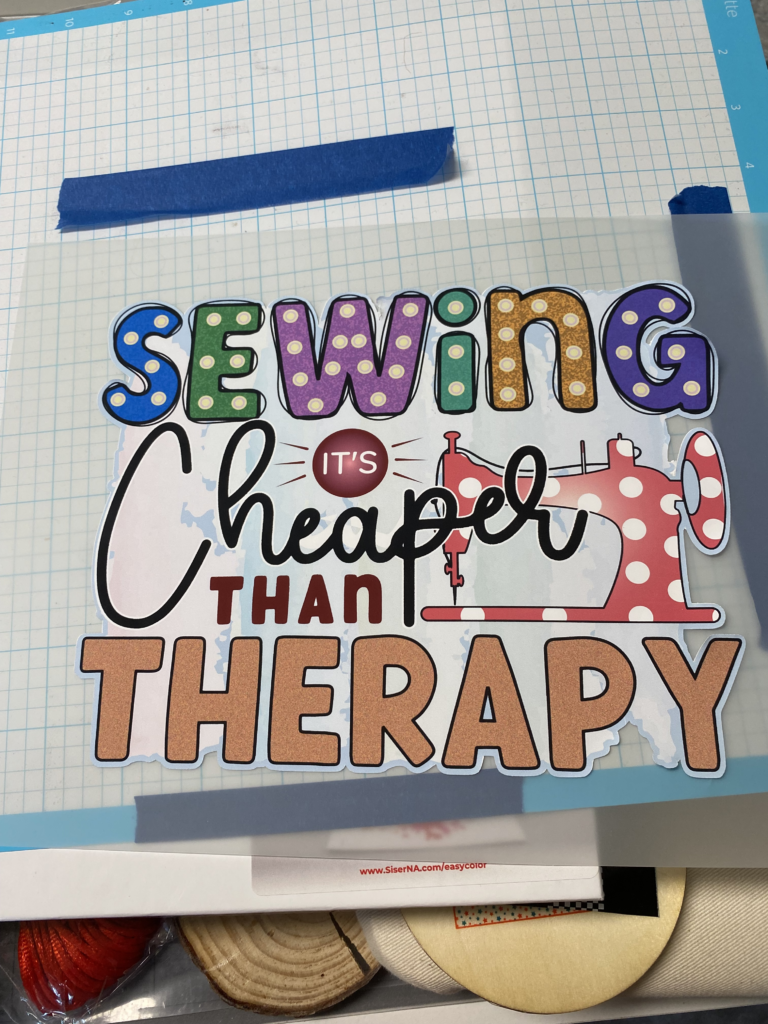
There is a lot of work in this design, so I saved the design before continuing. I clicked on the Send panel to check my design. Notice that the dark red line is just around the outside edge of my design, just as I wanted.
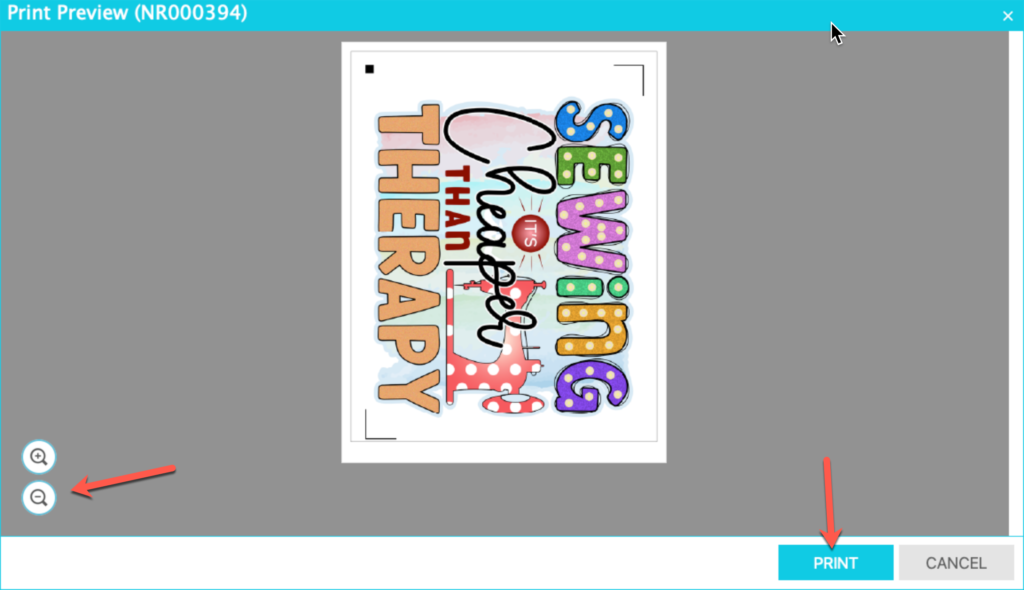
Return to the Design tab and select Print from the File menu. In the Print Preview window, you can use the “-” button to view the entire design at one time. Make sure that your design will print properly. Once you are certain it is correct, press Print and you will be able to select your printer.
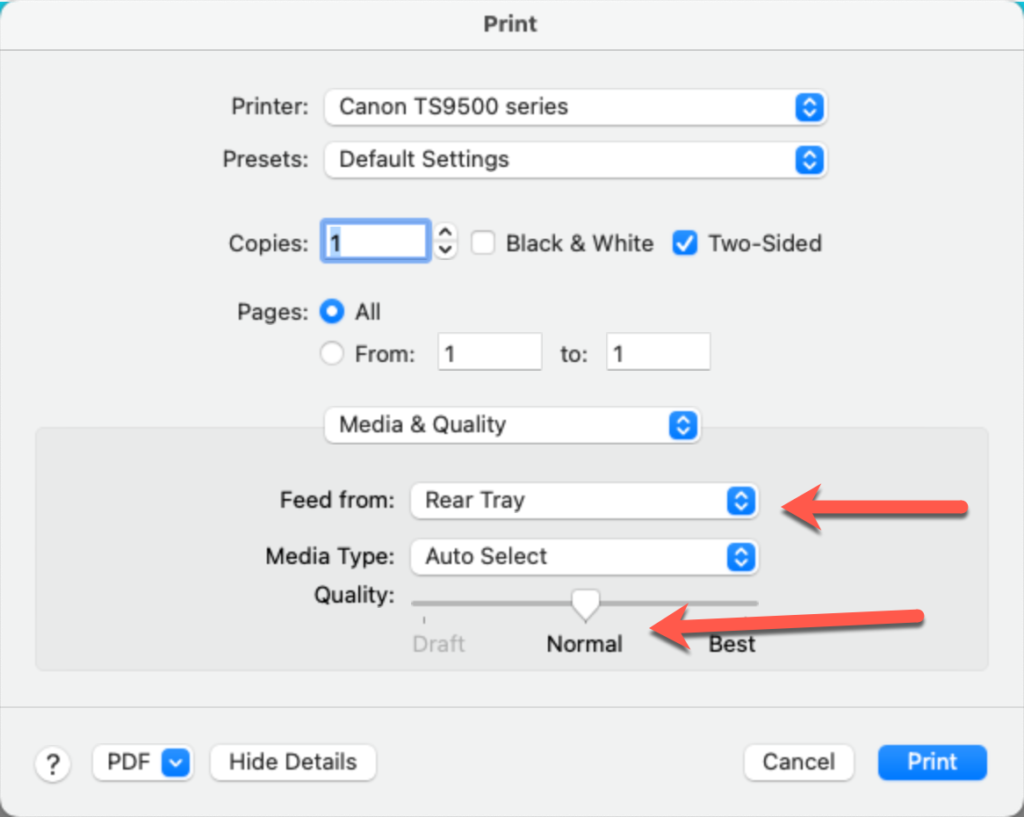
In the Print Dialog box, select your printer. Make sure that your Quality is set to normal. You do not want to increase the quality as it places too much ink on the page and it can cause your colors to run. If you have a Rear Feed printer, it is better to use the rear feeder to print specialty papers because they move straight through the printer instead of being turned in the printer.
Print your design. When placing your EasyColor™ DTV in the printer, make sure that your design will print on the “whiter” side of the paper — the matte side. Once the design has printed, I waited a few minutes to ensure that the ink was dry. I then placed it on the mat in the same position as on the Design tab. I confirmed my settings at the SiserNA website. You can find a chart here showing the cut settings and application settings for EasyColor™ DTV. You can also find settings in the Siser App for your phone. For my Silhouette, the settings are Material: Heat Transfer Smooth, Auto Blade set to 3, Force 6 and Speed 8. These are, of course just a recommendation and you need to do a test cut to ensure a good cut. Make sure you move the test cut down on the page so it does not cut in the top left corner as that can interfere with the Cameo reading the registration marks. (This is a different image because I forgot to take a photo of the “Therapy” design before cutting.) Once your test cut is good, cut the design.
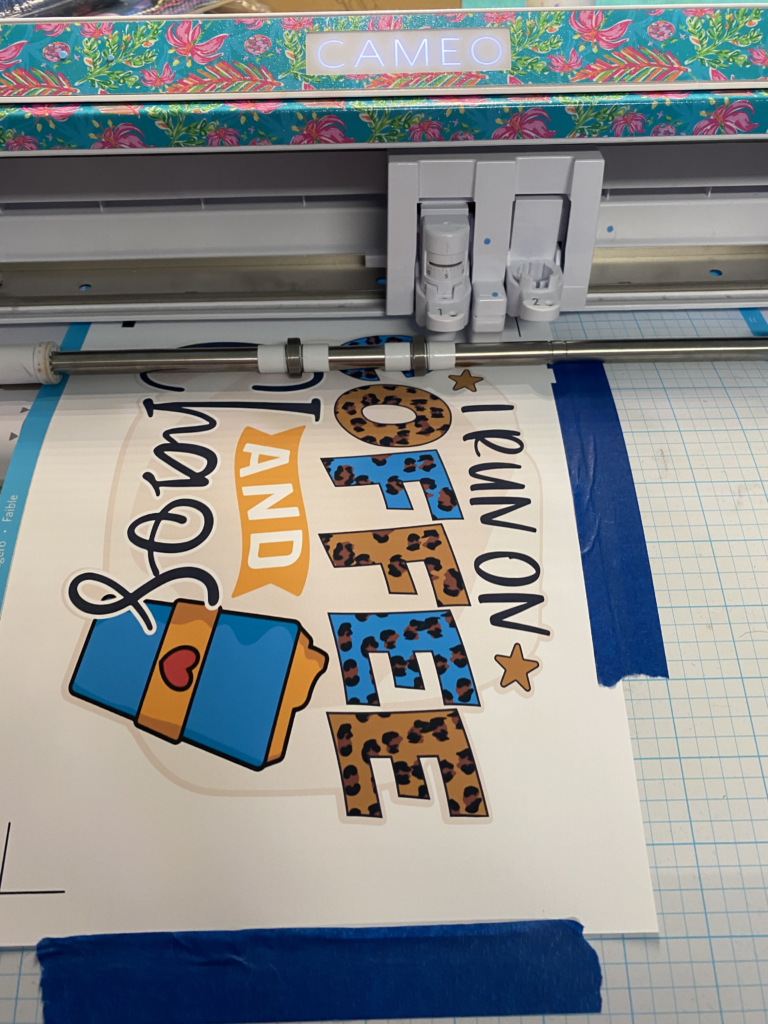
Once it is cut, remove the page from the mat and weed the excess away. In this photo you can see where I moved my test cut to the right side of the page so it would not interfere with the Cameo reading the registration marks.
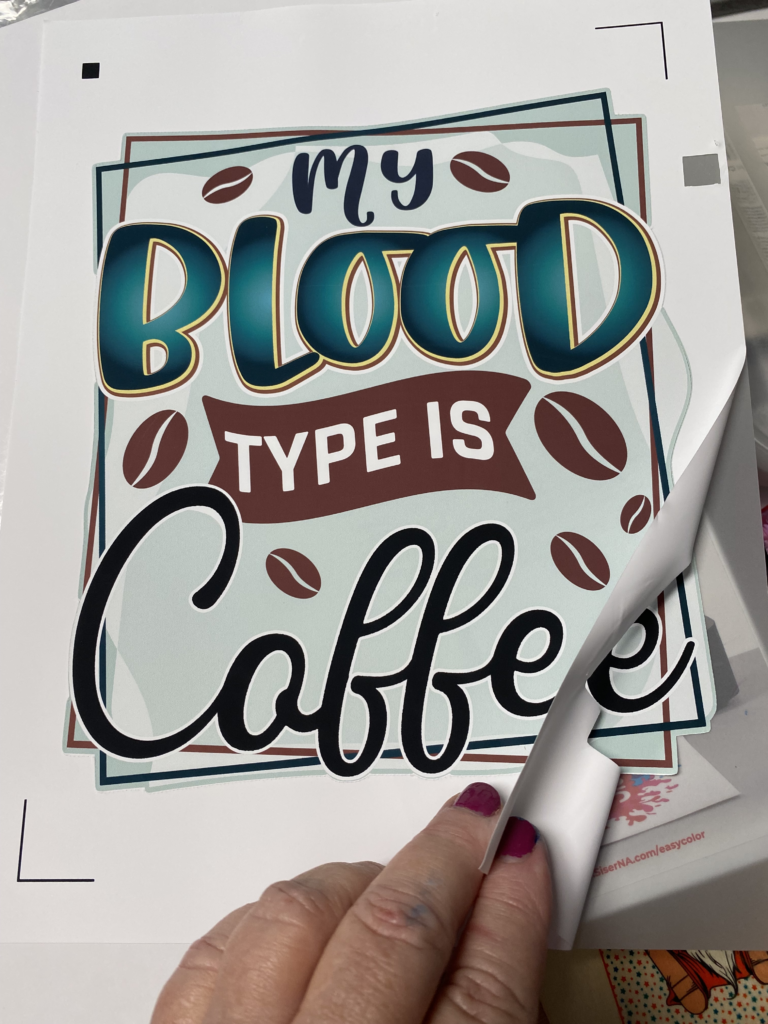
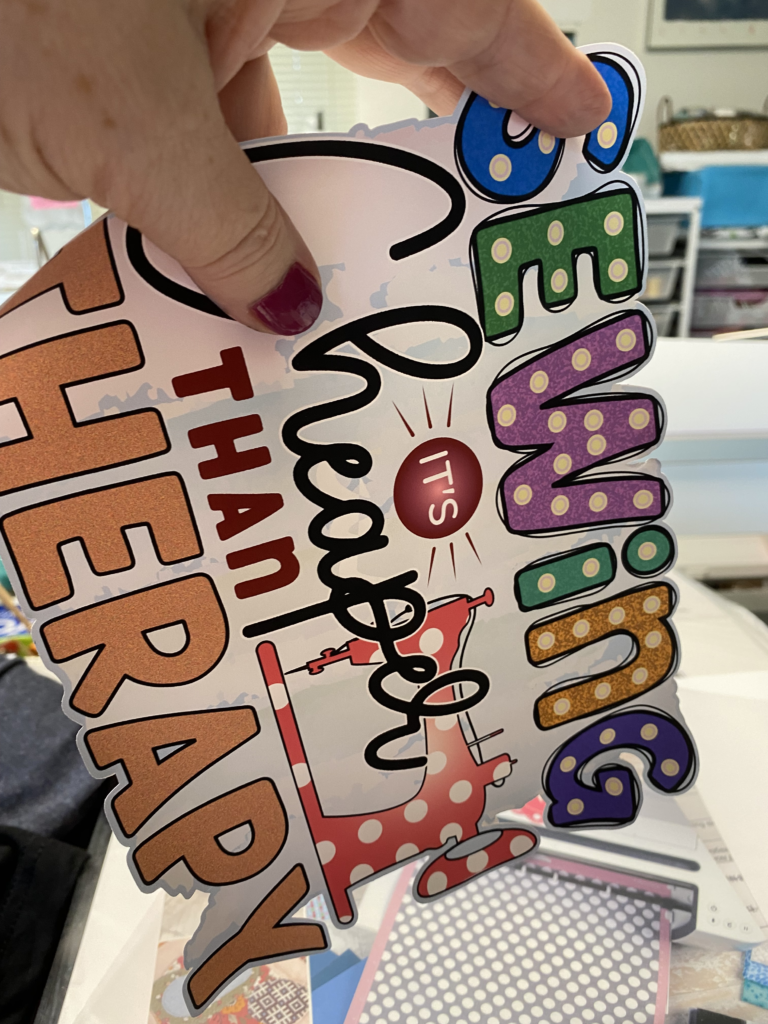
Here is what my design looked like when completely weeded. The white by the “C” is actually a light pink that does not photograph well. You can see the light blue outline around the entire design that I created using the offset.
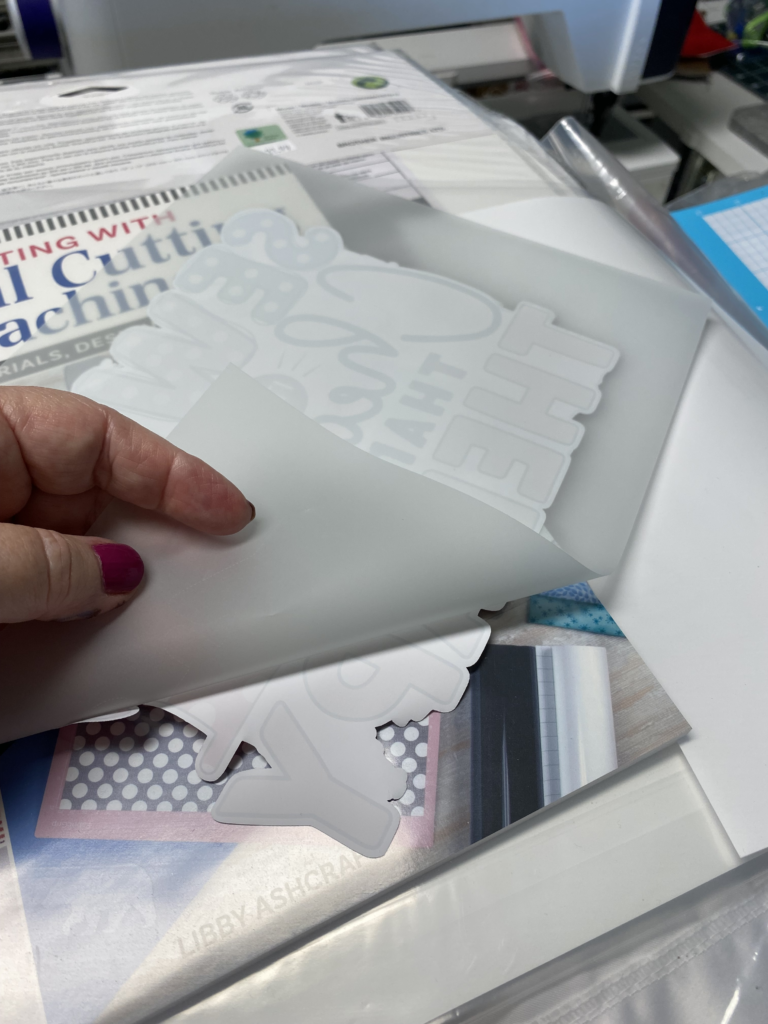
Because this is all one piece, I did not need to use a mask. I simply turned the design over and removed the backing from the DTV — removing the backing from the design and not vice versa helps reduce curling. I removed the backing in a diagonal direction instead of straight down or across — it works better for regular vinyl so I used this technique here as well.
Once it is removed from the backing, the design is ready to place on the shirt. It will seem very pliable and may even curl a bit but don’t worry! When you place it on the shirt and press, it will be fine.
I pre-pressed the shirt for 3 seconds to remove the moisture and get a flat space to place my design. I centered the design on my shirt and covered it with a piece of parchment paper. I pressed it at 310 degrees for 15 seconds with a medium pressure. DTV is a warm peel.

Siser recommends that you wait 24 hours before washing the garment but also recommends that you wash the garment before wearing. I did not do this as I packed these garments to take on a trip almost before they had cooled! When I did wash them, there was a little extra black “bleed” on one of my designs but when washed again, it disappeared. Here are the laundry recommendations from Siser.

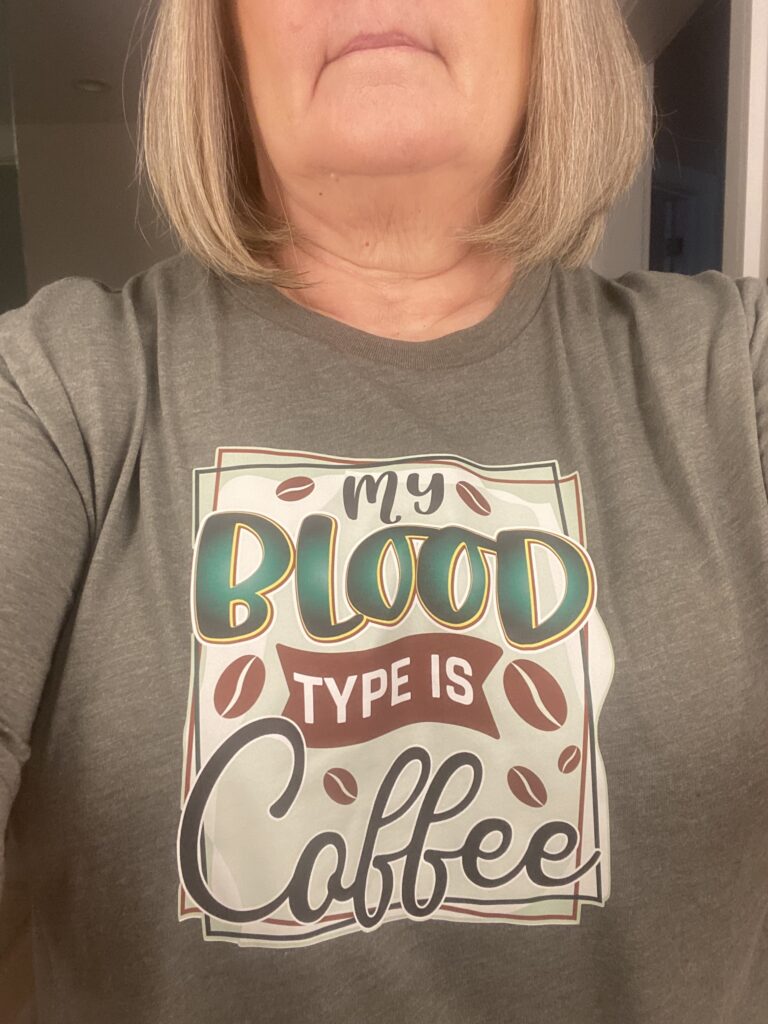
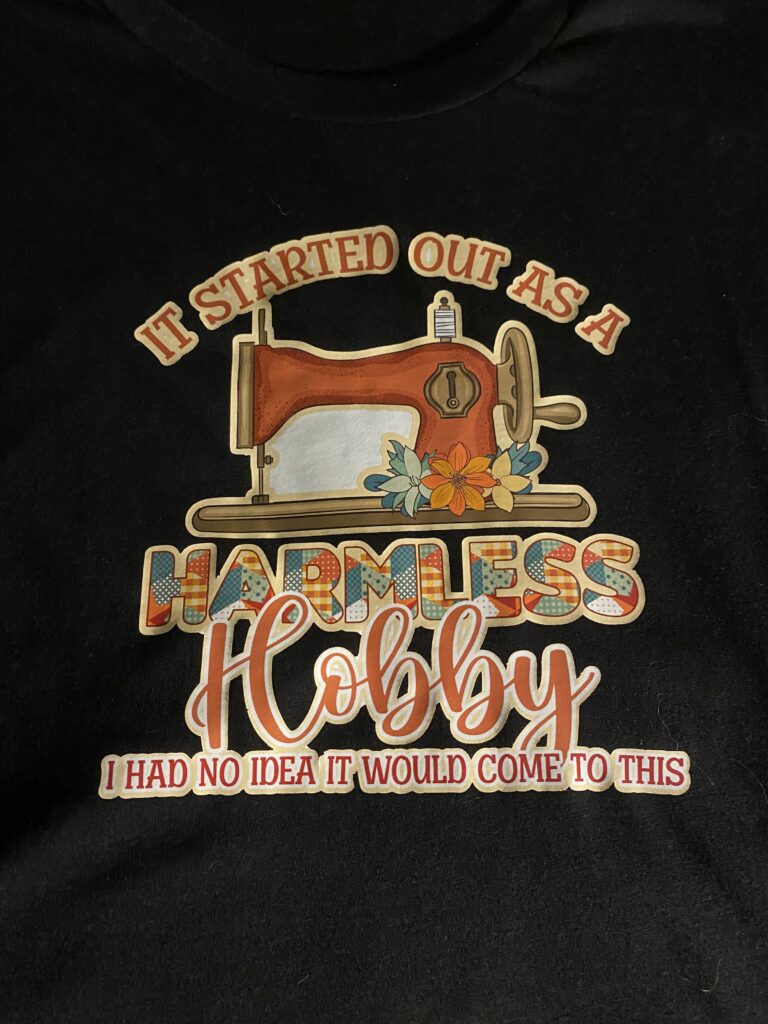
Here are the garments I created using EasyColor™ Direct to Vinyl™. I had so much fun creating these and working with EasyColor™ DTV. I cannot wait to create more!

I hope you will try EasyColor™ DTV! It is so easy to use and the colors are so vibrant! Mine have now been washed 3 times and still look great! Please post photos of your creations in the FB groups!! I’d love to see what you create!
Until Next Time,
Happy Crafting!
If you enjoyed these tips, please join my Facebook groups … Libby’s Silhouette Group — Tips, Tricks, Tutorials and Projects, Libby’s Craft and Sewing Group and Running With Sisers – Juliet and Romeo. You can also find me on FB at Libby’s Loft.com. Please join and feel free to ask questions and share your creations! I look forward to seeing you there!!
Until Next Time,
Happy Crafting!!
Disclaimer: Posts on this site may contain affiliate links. Clicking on one of these links or making purchases at linked sites does not mean you pay more for your purchases. It means I may receive a small commission on your purchase. This commission helps defray the costs of this site and enables me to continue to provide you with new and exciting content.
Disclaimer: Posts on this site may contain affiliate links. Clicking on one of these links or making purchases at linked sites does not mean you pay more for your purchases. It means I may receive a small commission on your purchase. This commission helps defray the costs of this site and enables me to continue to provide you with new and exciting content.