I have two great sublimation printers … an Epson F170 and a Sawgrass SG500. Both of them are amazing printers but they have one flaw … they only cut 8.5″ wide! They will cut 8.5″ x 11″ or 8.5″ x 14″ and that works great for most things, but I recently had a need to cut something that is 10″x10″. Unfortunately, the design was one piece so it wasn’t easily divided.
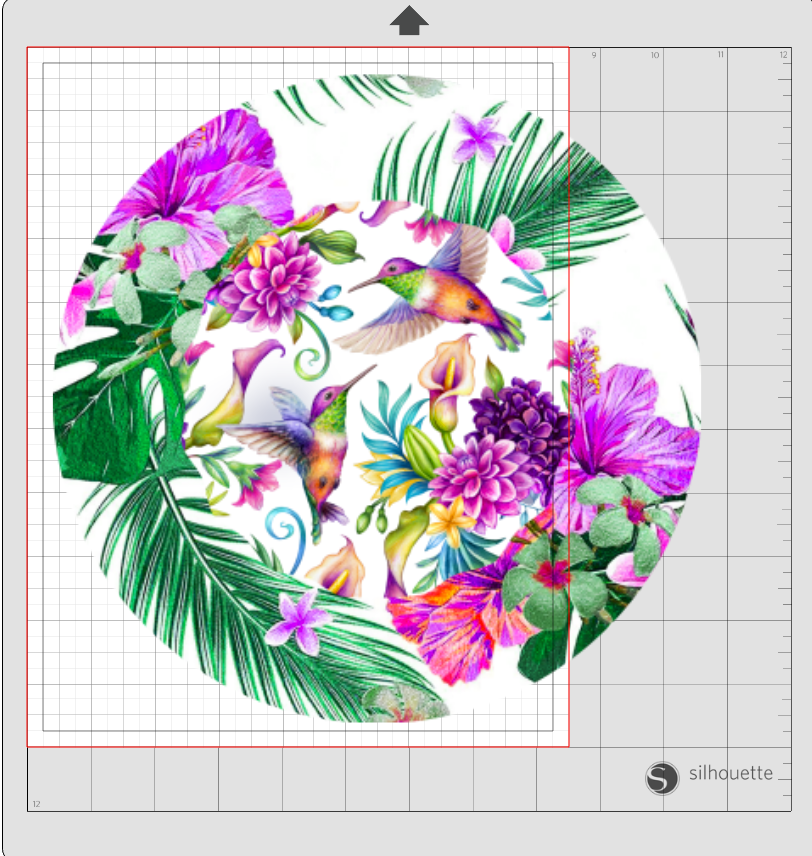
I knew I would have to divide this somehow, so first I set my media size to 8.5″x11″ and turned on the print border so I could see exactly how much of the design would be printed on a sheet of paper. It is the grey line you see just inside the red line.
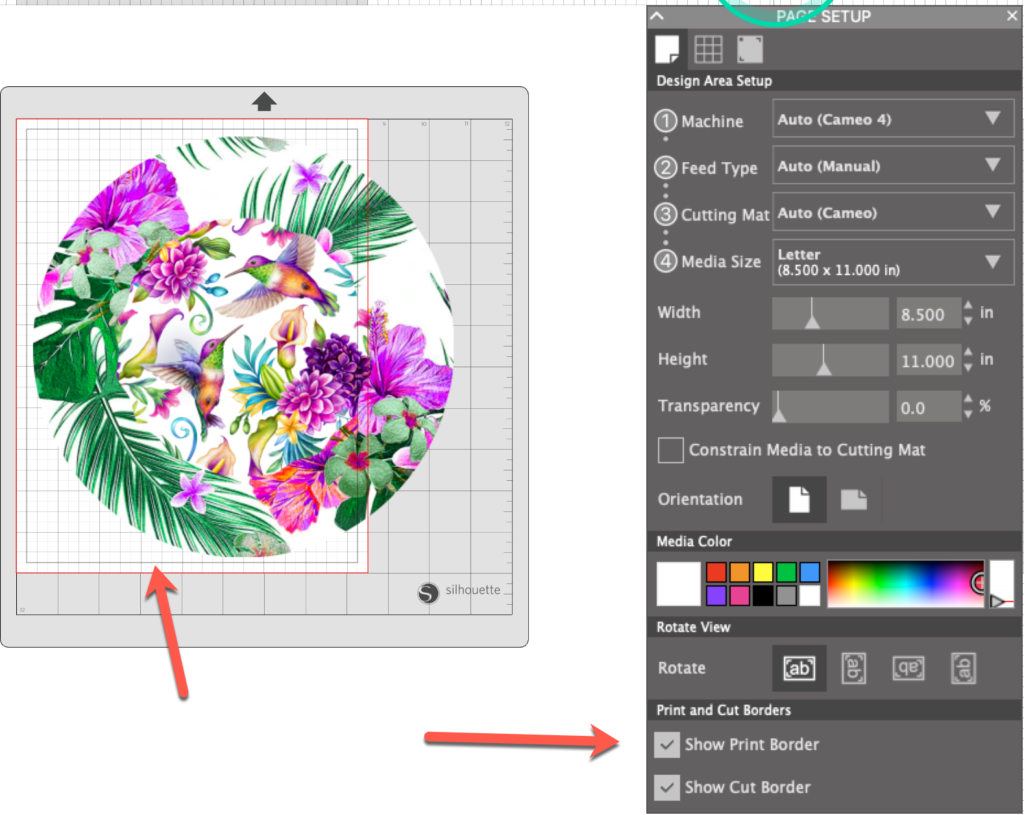
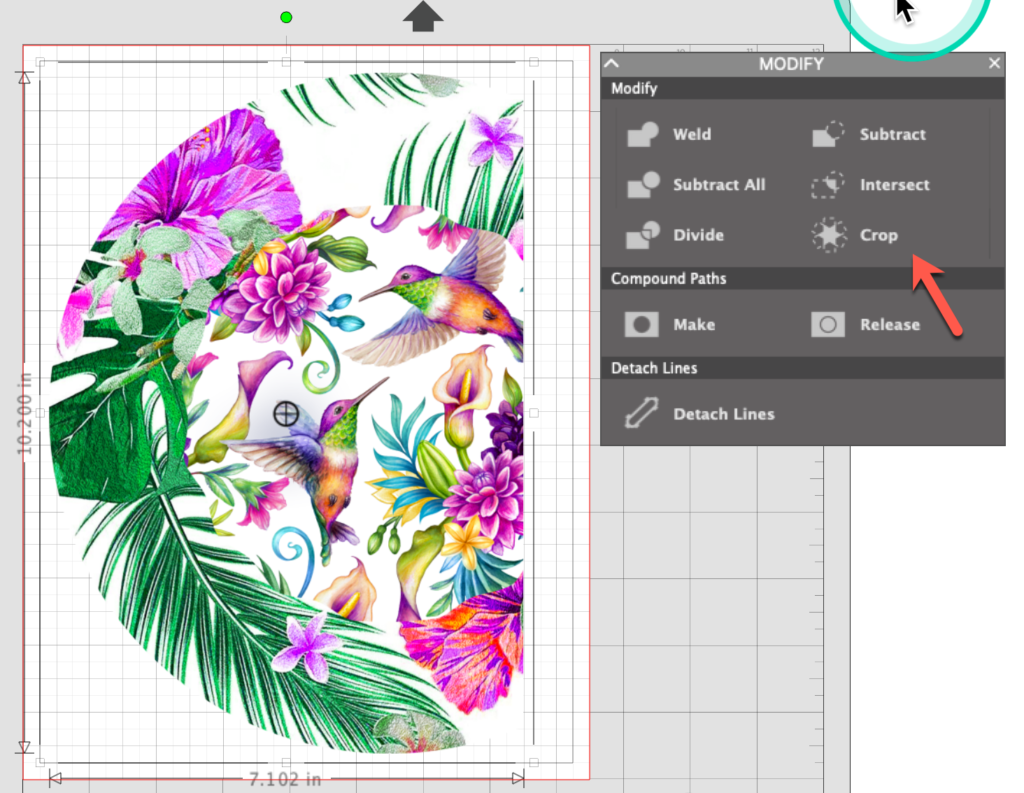
I decided I would try cutting the design so that could print it. I decided I needed an overlap of the two sections so that I could line them up. I lined the design up in the cut area. In the Page Setup panel, I clicked on the Grid Settings tab and clicked to turn on Snap to Grid.
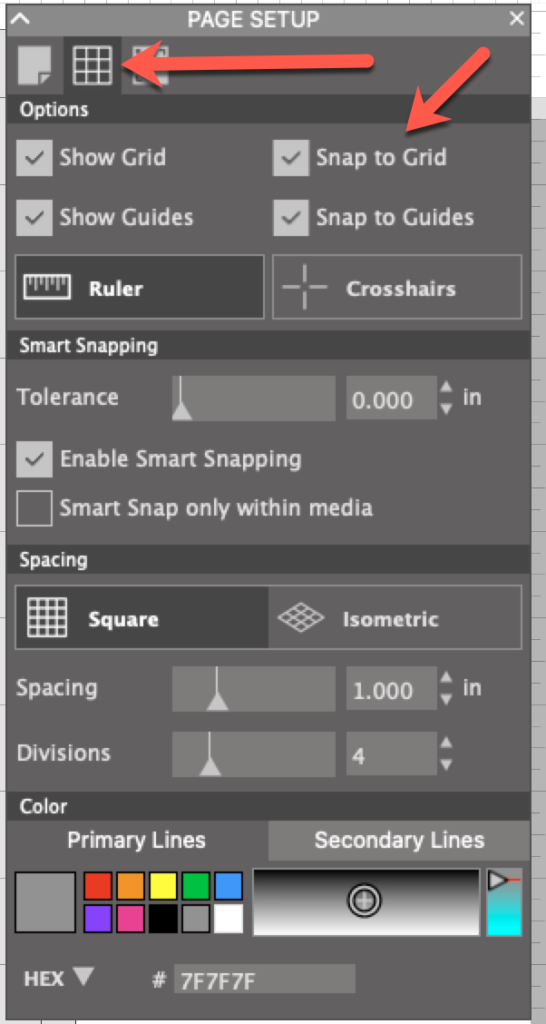
Then I drew a rectangle that covered almost all of the cut area. I added color to mine here so you can see it. Because I had turned on Snap to Grid, it lined up with the grid lines on the mat. I stopped near the 7.5″ grid line and the rectangle snapped into place.
I sent the rectangle to the back (right click and select Send to Back). This is another reason I added color to the rectangle – so when I sent it to the back, I could make sure it was actually behind the image.
I selected both the rectangle and the image. In the Modify Panel, I selected Crop.
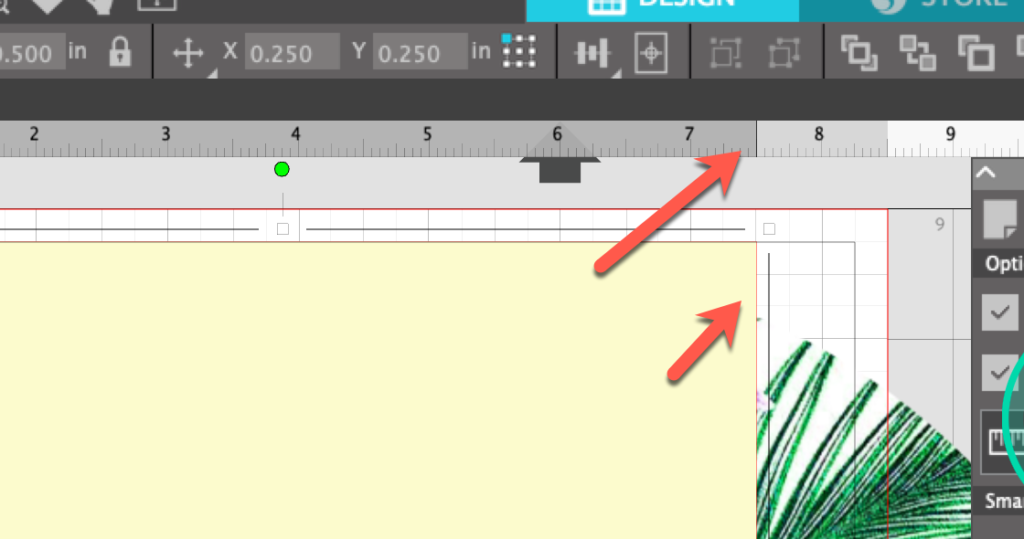
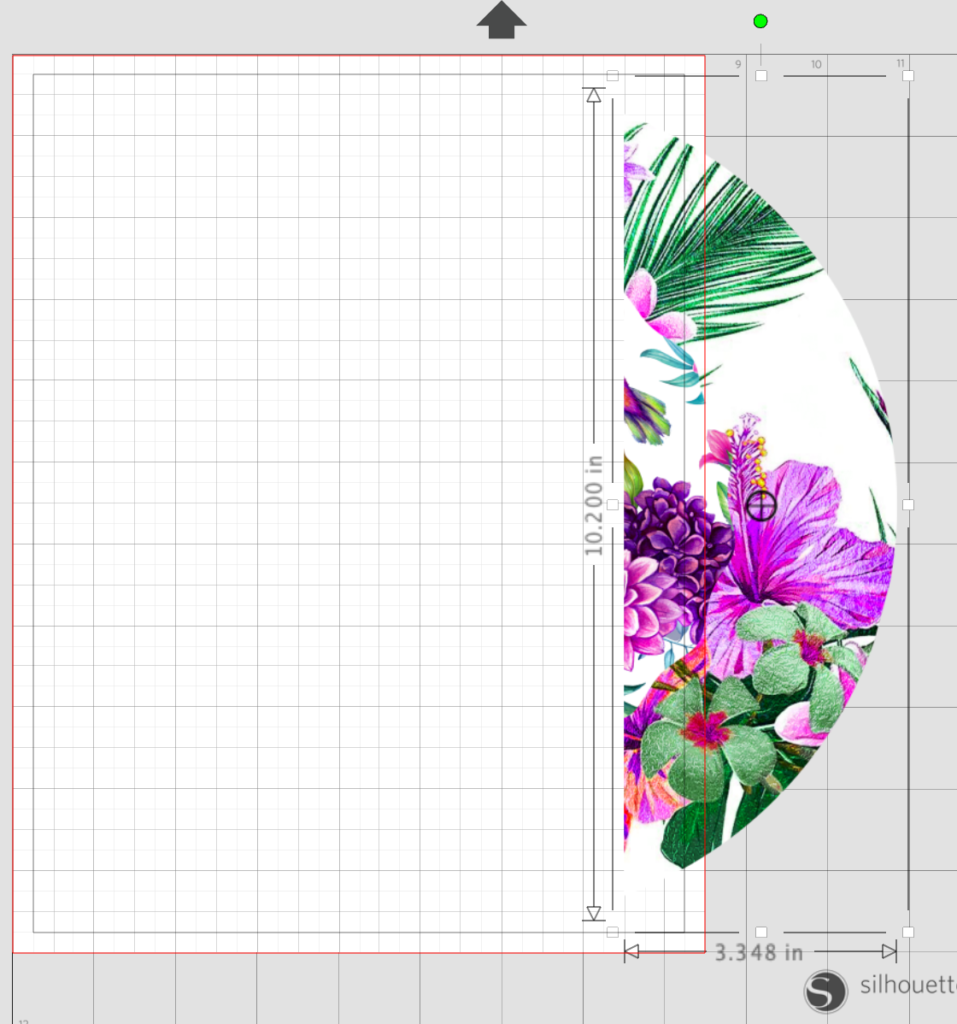
I selected the cropped image and selected Copy. I opened a new workspace and selected paste. The cropped image was now in the new document. Then I went back to the original image and selected Undo (CTRL/CMD+Z) until the design whole again. I then moved the rectangle so the left edge was at the 7.0″ grid line (snap to grid made it possible to get it exactly in place). I decided this would give me a 1/2 inch overlap for lining up the two parts of the design. I then selected the rectangle and the image and selected Crop from the Modify panel.
I moved this part of the design into the print area and printed this image. I went to the workspace with the larger part of the design and printed it as well. I placed the larger part of the design on my blank and pressed it according to the manufacturer’s instructions for my blank (360-380 degrees for 60 seconds). After it was pressed and cooled, I added the smaller piece of the image, overlapping it a bit and pressed it. You can see the white line where I did not get it quite lined up but you can also see the band where the two pieces overlapped.
So I tried again. The next one was did not overlap with color but there was a little paper overlap. The larger part of the design was pressed and then the smaller one was added. I lined it up as close as possible to the larger part of the design and pressed. You can see a faint line here where they met up. Also, the smaller side is a little bit lighter than the larger part.

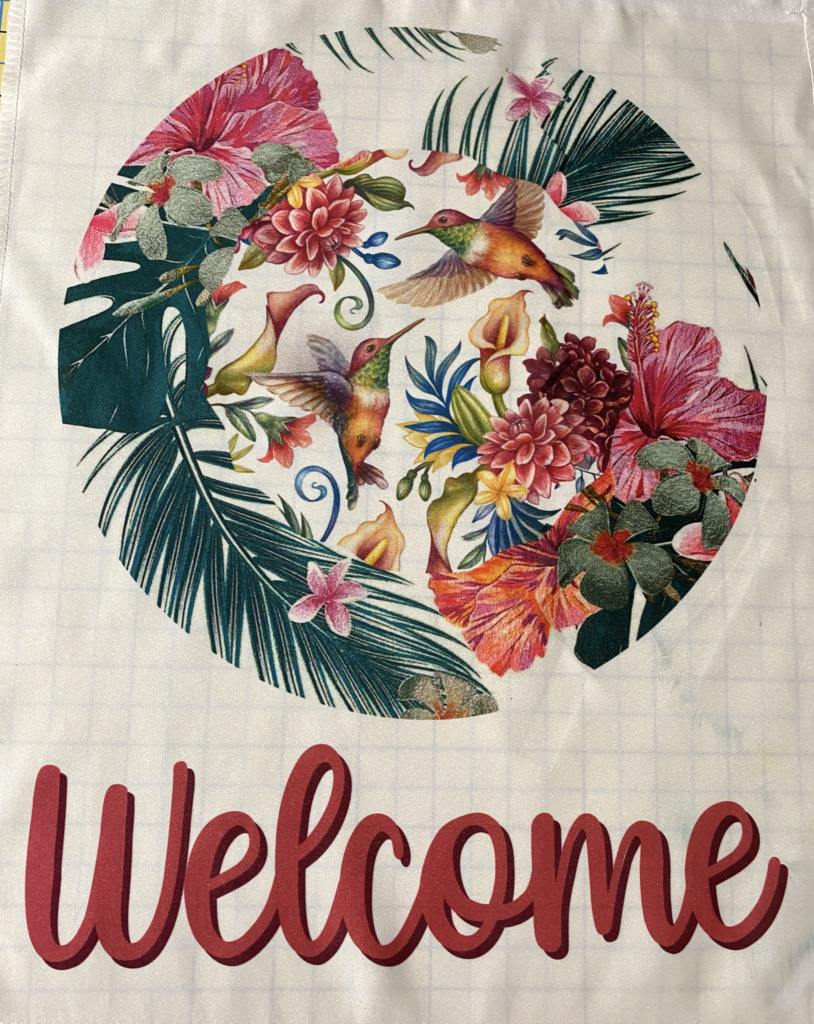
So I tried again. This time I took a page from my embroidery life and when i created the rectangle, I edited it so it had a jagged edge on one side. I applied the jagged edge to the right side of the large image piece and to the left edge of the small image piece. I pressed the large part of the image. I pieced the small piece, matching up the jagged edges and taping it in place as i went.
I used a light box to help me see exactly where the two pieces lined up. Since this was fabric, using the light box made matching the edges easier. I pressed the smaller piece to the design and also added some text. There is a small amount of color blow out where the first part of the design moved a bit when I lifted the lid of the press but, more importantly, the line where I joined the two parts is almost invisible!!
So, here is what I learned so far. Overlapping the two parts of the image with colored parts in both pieces is not a good thing. Overlapping with just paper can possibly cause one side to be a little lighter than the other side — I am not 100% sure on this one but something sure caused the color difference! And finally, I learned that using a jagged edge makes it easier to line up the design and causes a less definite line so there is a little more “fudge room”. I also learned the you can, indeed, press the same blank more than once without ruining the first press in subsequent presses. Lastly, I learned I need to do more testing! So stay tuned for more test results!
If you enjoyed these tips, please join my Facebook groups … Libby’s Silhouette Group — Tips, Tricks, Tutorials and Projects, Libby’s Craft and Sewing Group and Running With Sisers – Juliet and Romeo. You can also find me on FB at Libby’s Loft.com. Please join and feel free to ask questions and share your creations! I look forward to seeing you there!!
Until Next Time,
Happy Crafting!!
Disclaimer: Posts on this site may contain affiliate links. Clicking on one of these links or making purchases at linked sites does not mean you pay more for your purchases. It means I may receive a small commission on your purchase. This commission helps defray the costs of this site and enables me to continue to provide you with new and exciting content.
Until next time,
Happy Crafting!!
Disclaimer: Posts on this site may contain affiliate links. Clicking on one of these links or making purchases at linked sites does not mean you pay more for your purchases. It means I may receive a small commission on your purchase. This commission helps defray the costs of this site and enables me to continue to provide you with new and exciting content.
Libby, this is very interesting. I don’t have a sublimation printer but I have been playing with Siser Easy Color DTV and I’m going to try your method (jagged edge) to see if I can produce a wider image. Thanks for your testing and explanation!