When you create a new design in Silhouette Studio, the Page Setup panel opens automatically. The Page Setup Panel is where you will configure your workspace for your current project. There are 3 tabs in the page Setup Panel — Page Area Setup, Grid Settings and Registration Marks. Let’s start with the Page Area Setup Tab.
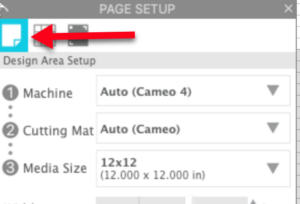
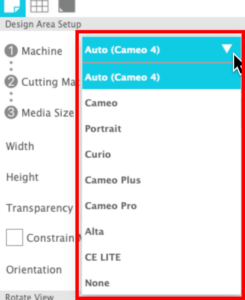
Machine — Here you will select the machine you will be using. You can choose from the Cameo, Portrait, Curio, Cameo Plus, Cameo Pro, Alta, or CE Lite or None. Note: if you want to design for your Curio, you will have to have plugged a Curio in to your computer to be able to access the Curio mats.
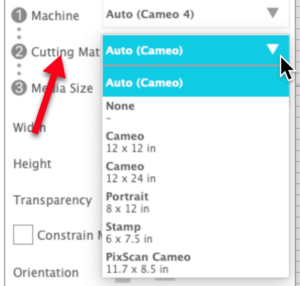
Cutting Mat — once you have selected a machine, you can select the mat you want to have displayed. The choices in the mat dropdown will be dependent on the machine you have selected. This is handy so you don’t design or a mat that will not work with your machine. Here are the mat choices available when I selected Cameo in the Machine dropdown.
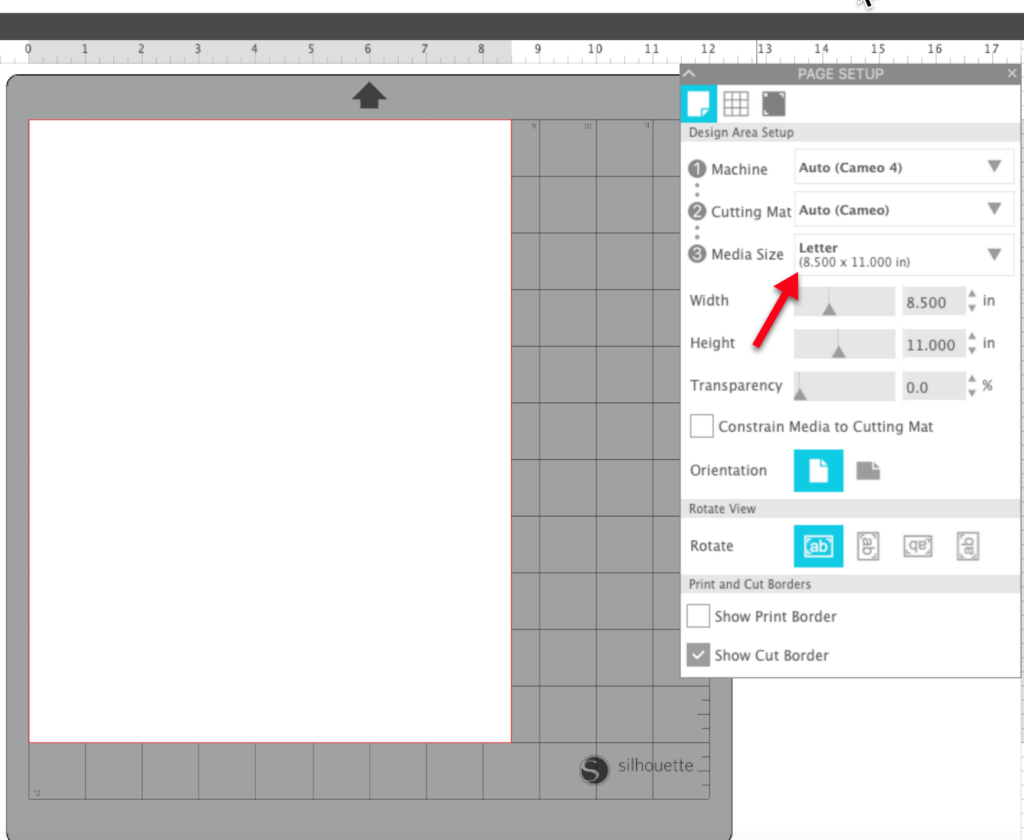
Media Size — There are a variety of most common media sizes already in the software for you to select. These will vary depending on which machine you selected from the machine dropdown.
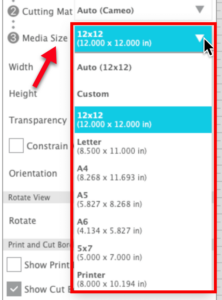
When you select a media from the dropdown, a white area the size of your media will appear on the virtual mat. I selected Letter (8.5×11) from the dropdown for the example below.
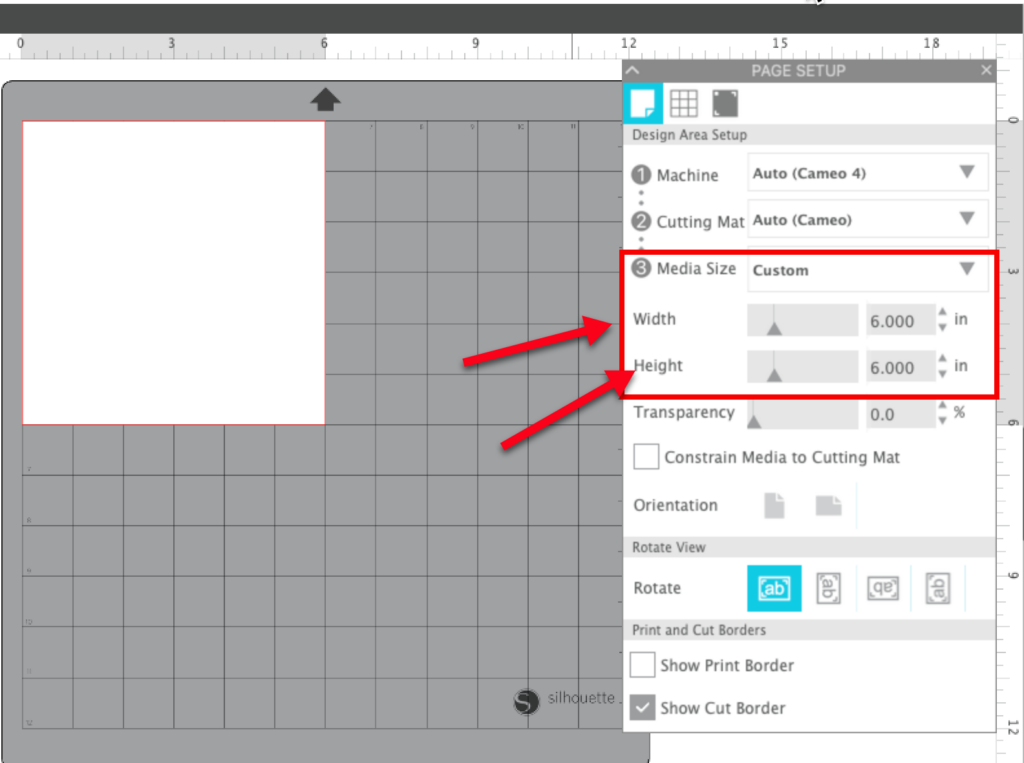
Width and Height — You can also manually set the size of your media area by entering values in the Width and Height areas. You can use the up/down arrows or the sliders to change the size. You can also enter a value directly in the dimension boxes. Remember that the width cannot be larger than your machine will cut (8.5″ for a Portrait and 12″ for the Cameo, Cameo 3, and Cameo 4; 15″ for the Cameo Plus and 24″ for the Cameo Pro). The white area on the mat will change to reflect the custom size you entered.
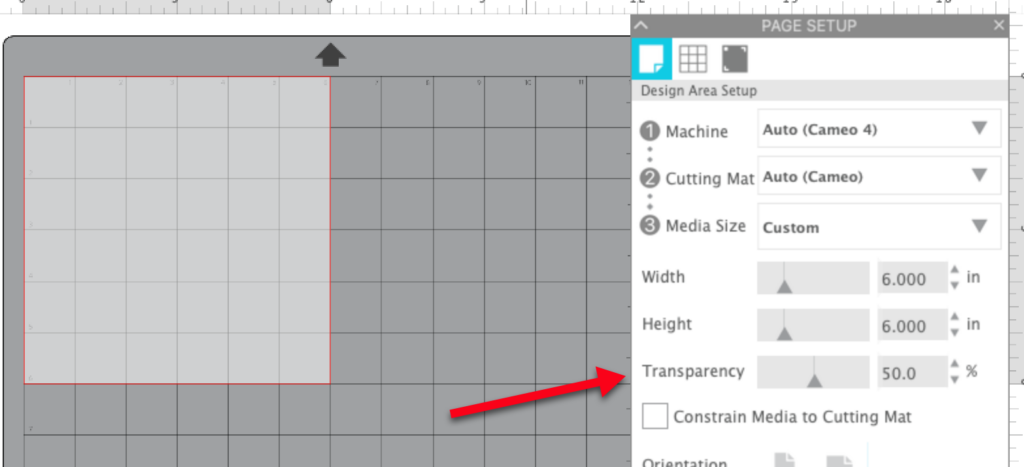
Transparency — Adjusting the Transparency will change the visibility of the media on the mat. Increasing the transparency will allow more of the virtual mat to show through the media. Here I have increased the transparency to 50%. Changing the transparency so you can see the grid is especially useful when you want to place a variety of materials on the mat to cut at the same time.
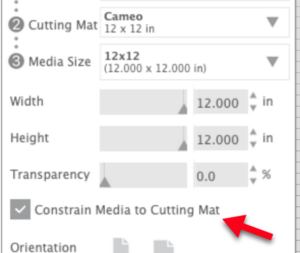
Constrain Media to Cutting Mat — When you select this option, the software will not allow you to set the width or height to a number larger than the selected mat size. You can make the width and height smaller than the mat, but cannot make it larger. Notice that the sliders for width and height are moved all the way to the right and you cannot move them to increase those dimensions.
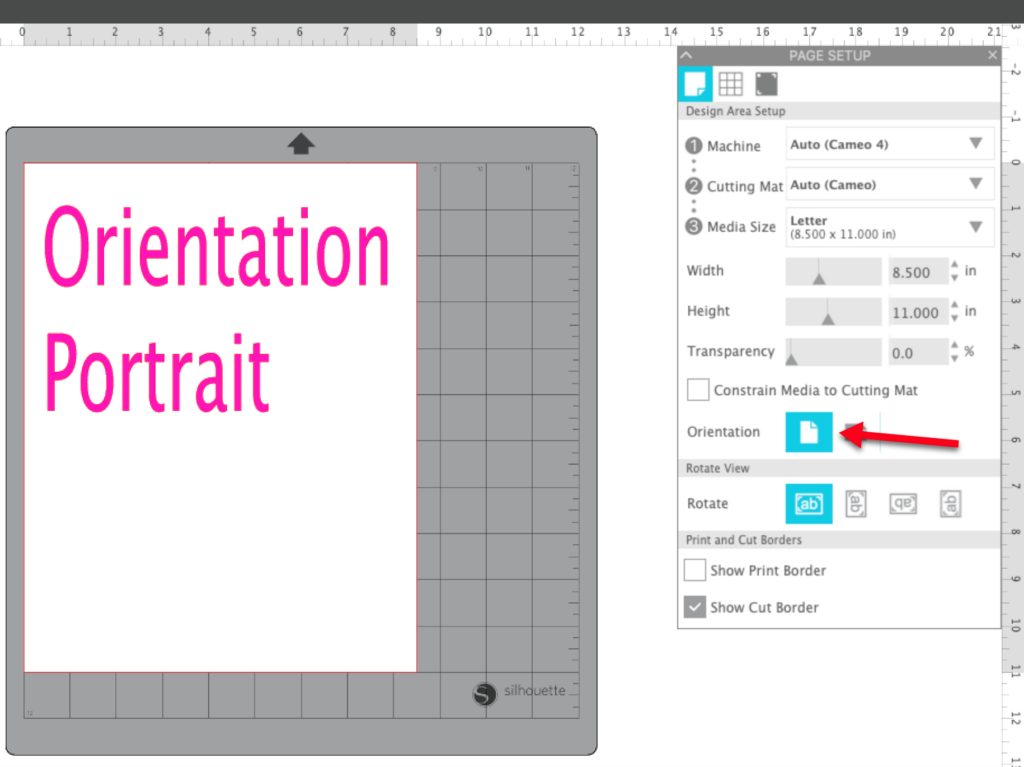
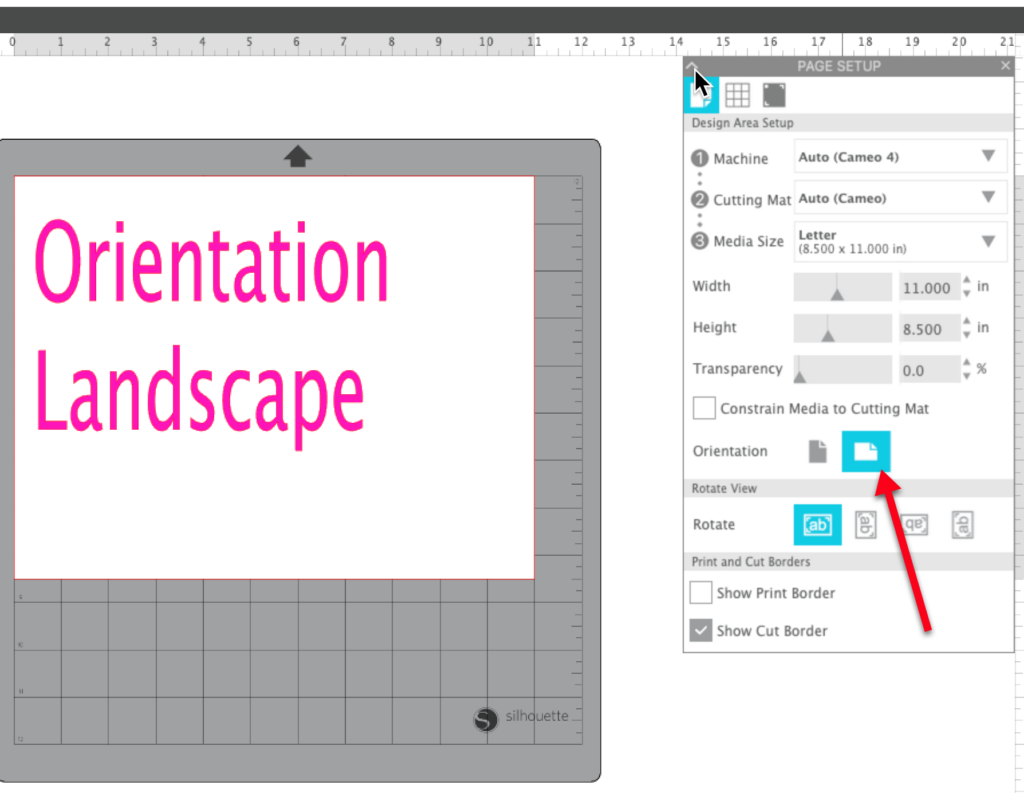
Orientation — This setting controls the orientation of your media on the mat. If you have a 12×12 mat and media selected, this option is greyed out (not available). If you have a media size smaller than your mat, this controls whether our media is set to Portrait (tall) or Landscape (wide). The top page is Portrait and the second image is Landscape.
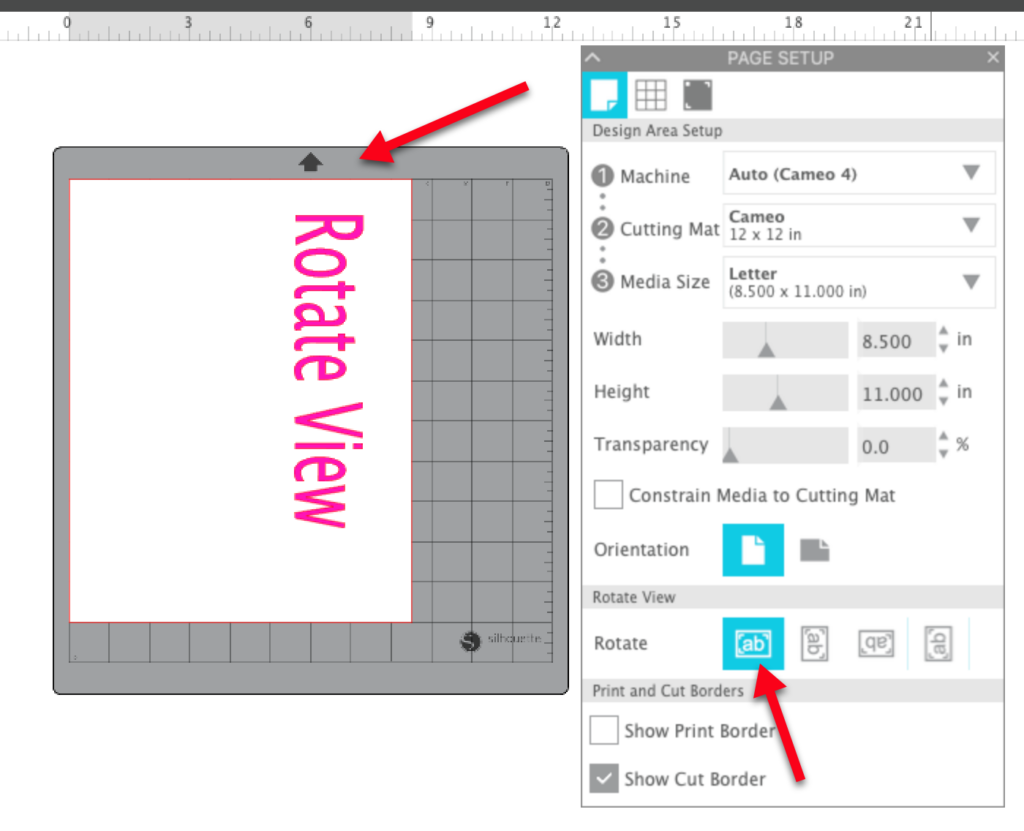
Rotate View — This does not change the way that your design is sent to the cutter, it just changes the way that you view it on the screen. The black arrow always at the top of the mat when the mat goes in to the machine so changing it on the screen using rotate view doesn’t change the way it goes into the machine. This is your normal view.
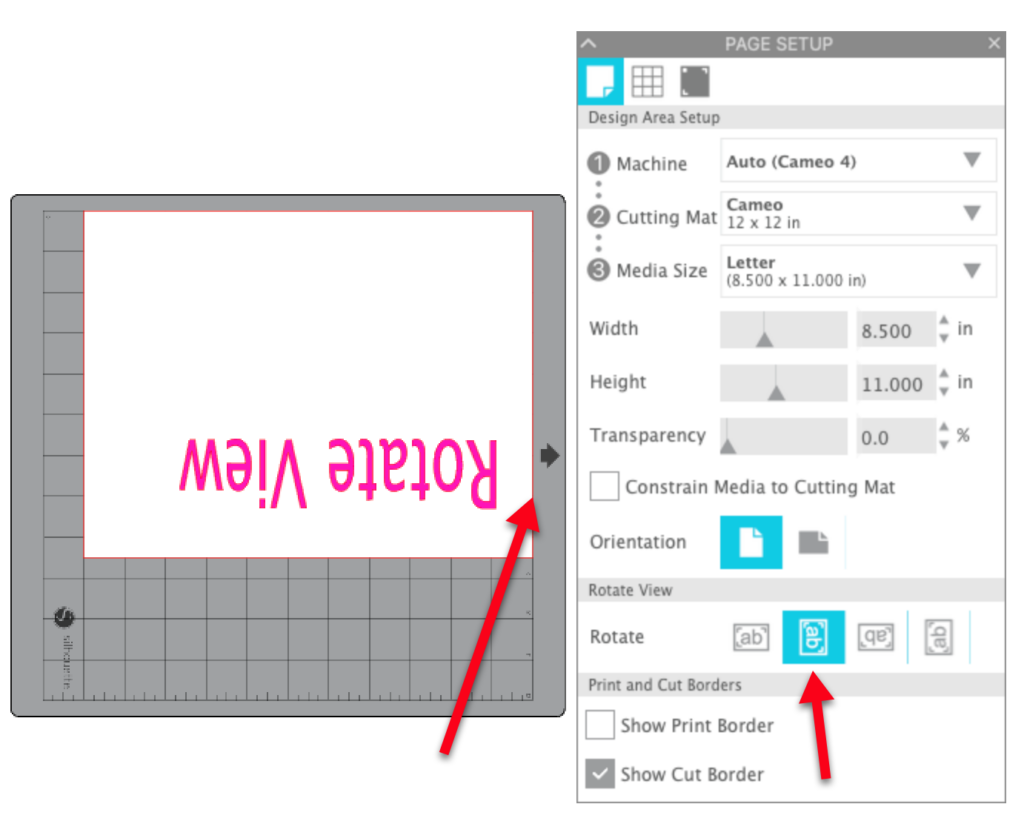
Here the view has been rotated 90 degrees. This puts the black arrow on the right side of the screen. Remember this changes your view on the screen only — it does not change the way the mat goes into the machine. This is especially important when you are placing materials on the mat — be sure to put them in the right place!
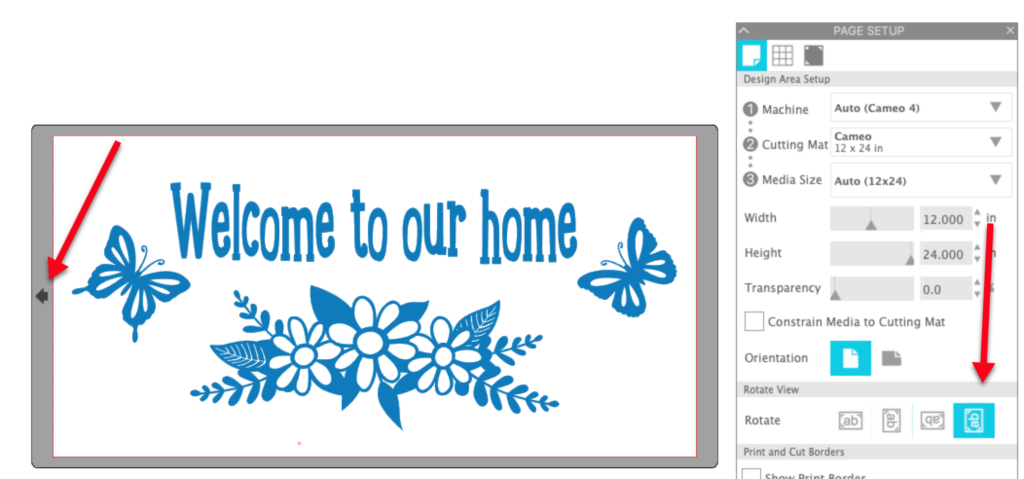
The Rotate View option can be helpful is you are designing on a large mat like a 12×24 mat. This allows you to see the text rightsize up instead of “standing on its head”. Notice that the width of the media is still set to 12″ and the height is set to 24″ — this is because the mat is 12″ wide by 24″ tall.
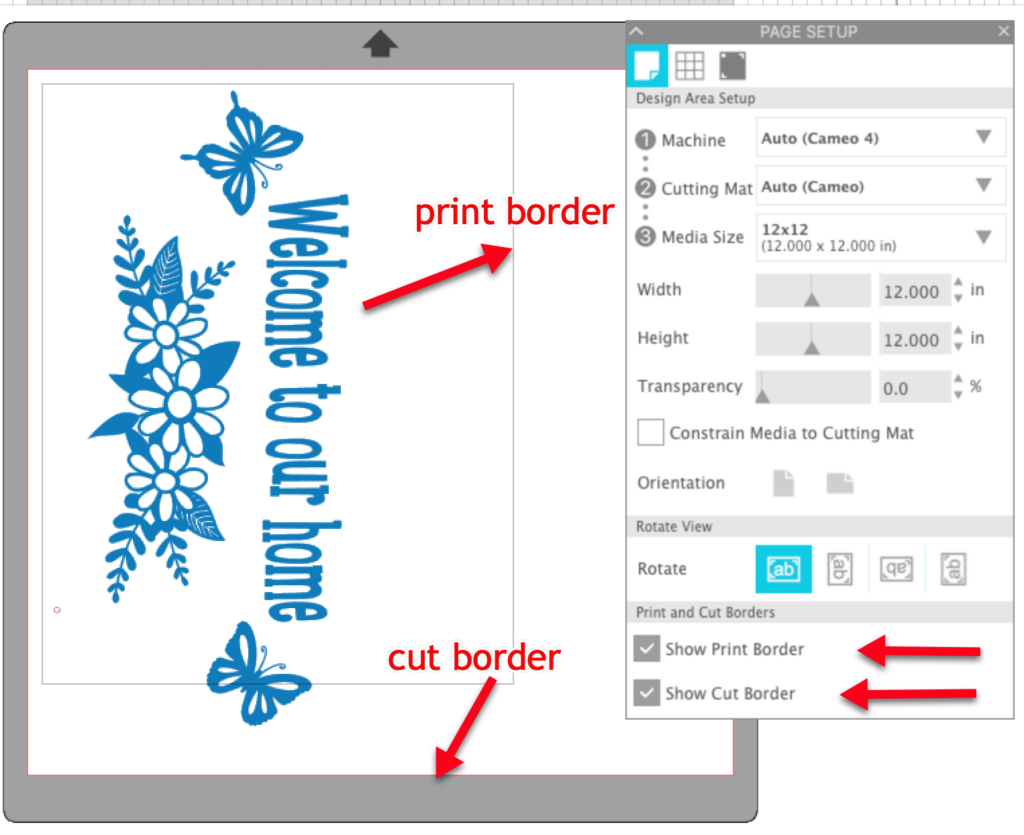
Print and Cut Borders — checking these boxes displays the print border and the cut border. The print border is determined by the printer recognized by your computer. It does not impact the cut area. The print border is a grey line. The cut border is determined by the media you have selected. This shows you the maximum area available for cutting using the selected media. The cut border is a red line. I like to leave my cut border checked all the time. These two settings become very important when you are doing a print and cut job. We’ll talk about them more when we talk about the Registration Marks tab in the Page Setup Panel.
As you can see, the Page Setup panel plays an important role in what you see on the screen as you create. The ability to customize the view in the mat area will make your designing so much easier!
Watch for upcoming posts about the other two tabs in the Page Setup Panel — the Grid Settings tab and the Registration Marks tab.
If you enjoyed these tips, please join my Facebook groups … Libby’s Silhouette Group — Tips, Tricks, Tutorials and Projects, Libby’s Craft and Sewing Group and Running With Sisers – Juliet and Romeo. You can also find me on FB at Libby’s Loft.com. Please join and feel free to ask questions and share your creations! I look forward to seeing you there!!
Until Next Time,
Happy Crafting!!
Disclaimer: Posts on this site may contain affiliate links. Clicking on one of these links or making purchases at linked sites does not mean you pay more for your purchases. It means I may receive a small commission on your purchase. This commission helps defray the costs of this site and enables me to continue to provide you with new and exciting content.