Someone posted a question about a design pack for initial key fobs and as soon as I saw the design pack, I knew I had to have it! I needed a quick way to personalize some gifts and the key fobs will be perfect!!
Affiliate links may be used in the following blog post and as an Amazon Affiliate, I may earn a small commission from qualifying purchases.
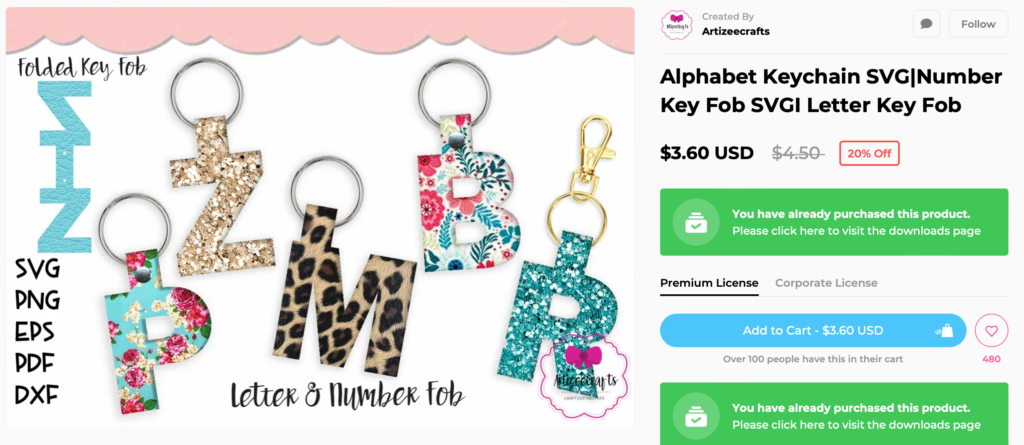
The Design pack is called Alphabet Keychain SVG/Number Key Fob from Design Bundles. Here’s what the bundle looks like when you find it on Design Bundles.
When you download the design pack, it will include designs with and without the holes as well as a number of file formats. If you have only the Basic level of Silhouette Studio, use the DXF file. It is a cut-ready file and does not have to be traced. If you have Designer Edition or higher (or a Brother Scan ‘n Cut), use the SVG file. It is also a cut-ready file.
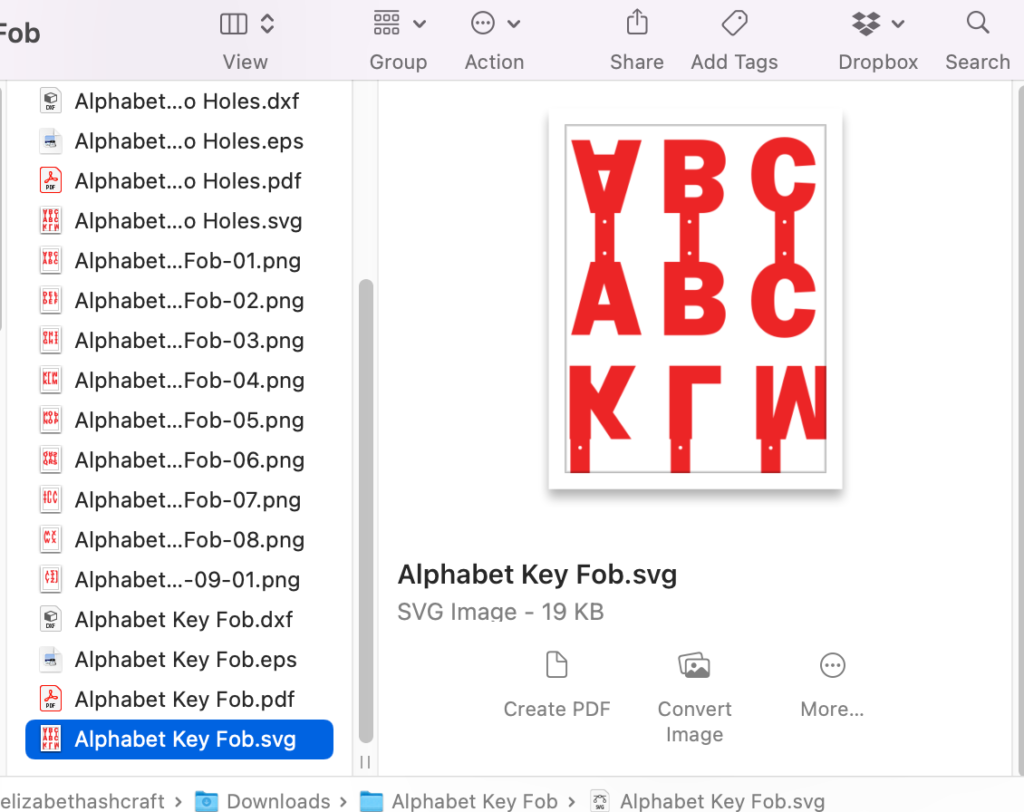
Opening the SVG file in my Silhouette Studio software, I discovered that all the letters of the alphabet are included in one file. Each letter is individual so there is no need to ungroup them. Just select the letters you don’t want and delete them (or select the letter you want to use and copy it to a new workspace).
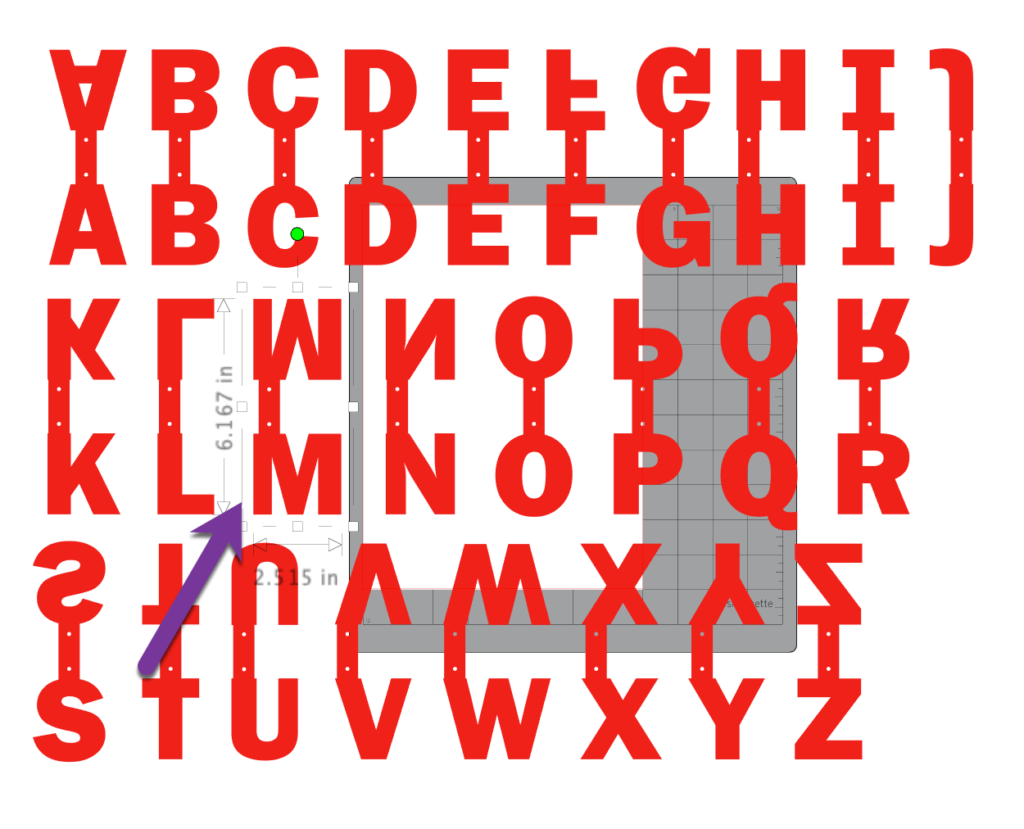
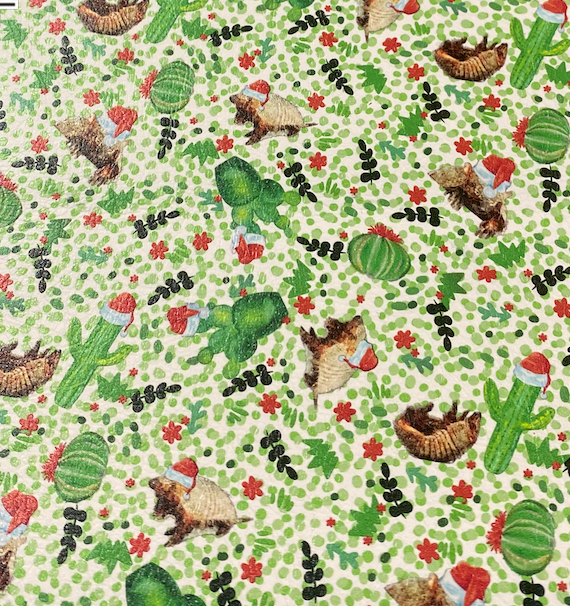
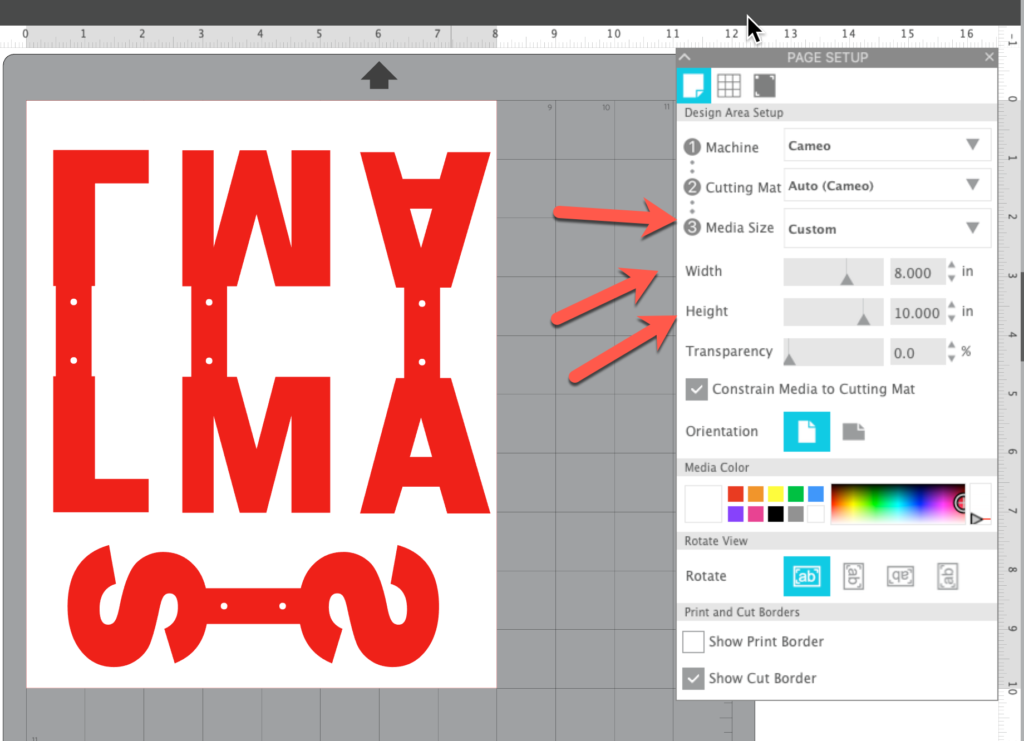
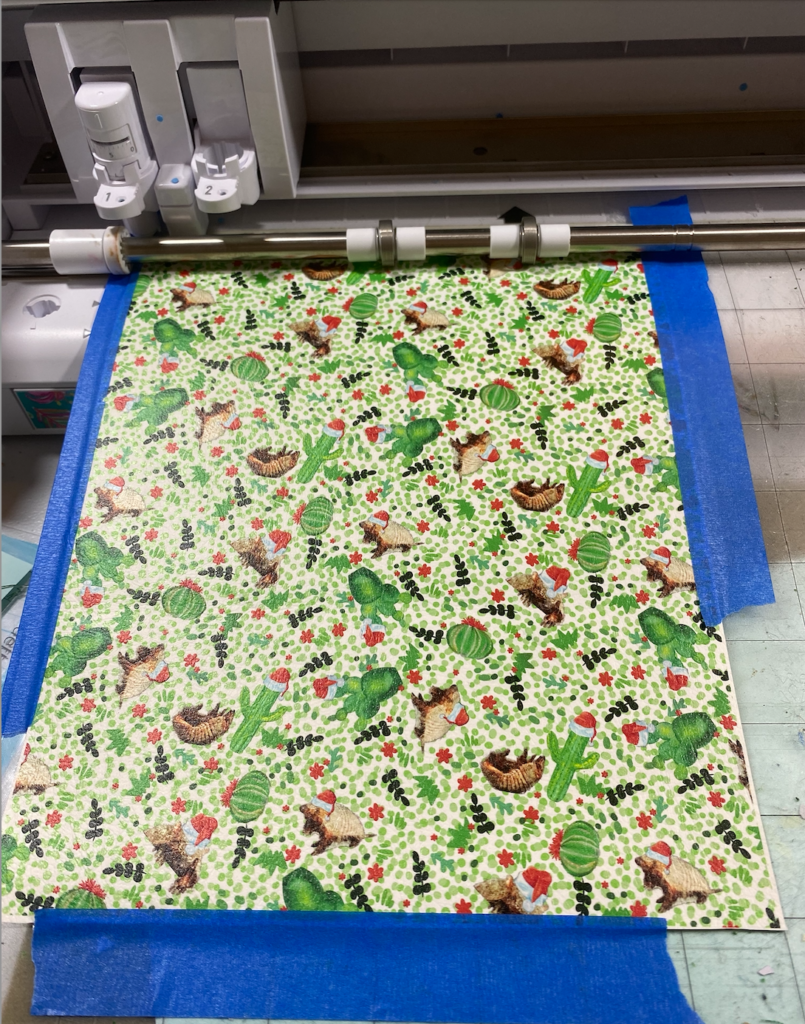
I knew I was going to use a Christmas leatherette that I purchased from Craft Chameleon so I set my Media Size to 8×10″. The leatherette I am using is called Merry Armadillo Christmas! It is so cute and so Texas!!
I am making several of these, so I loaded up my workspace, making sure to stay inside the media area I designated.
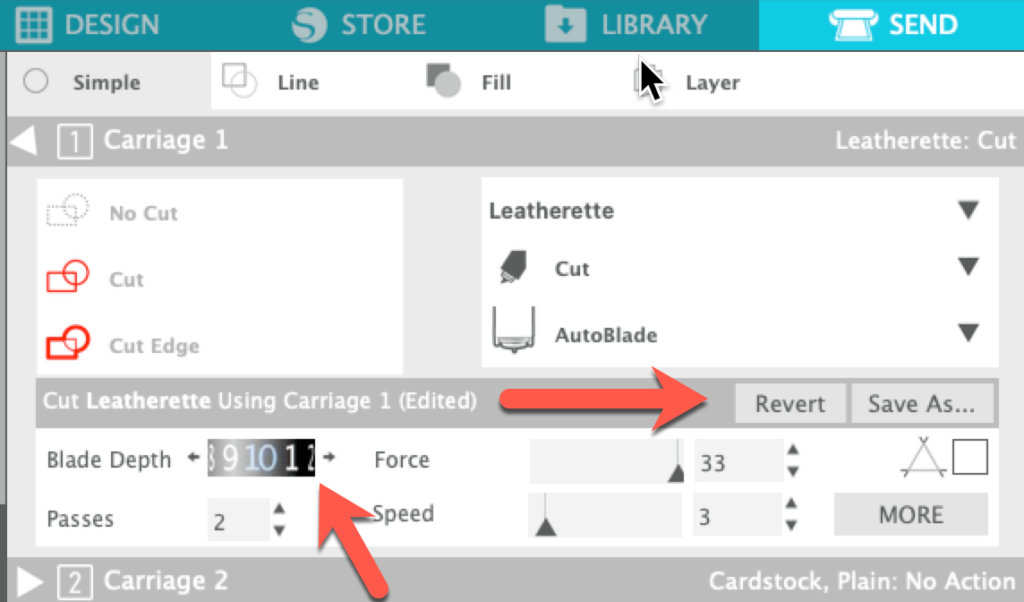
In the Send panel, I made sure that all my key fobs had dark red lines and were going to cut. Then I selected my media. I stared with the leatherette preset. I knew that I had been increasing my blade depth by 1 for most cuts, so I changed it and did a test cut. I loaded my mat and did my test cut. (My mat is old and not as sticky as it used to be so I used painter’s tape to help hold my leatherette in place on the mat.)
Unfortunately, the test did not cut completely through the leatherette. I did a series of tests and wound up with the blade increased to 10 to cut through this dense leatherette. Notice that the setting says “Revert” as a visual reminder that I made a change to the preset. I am not saving this new setting because each leatherette will be different.
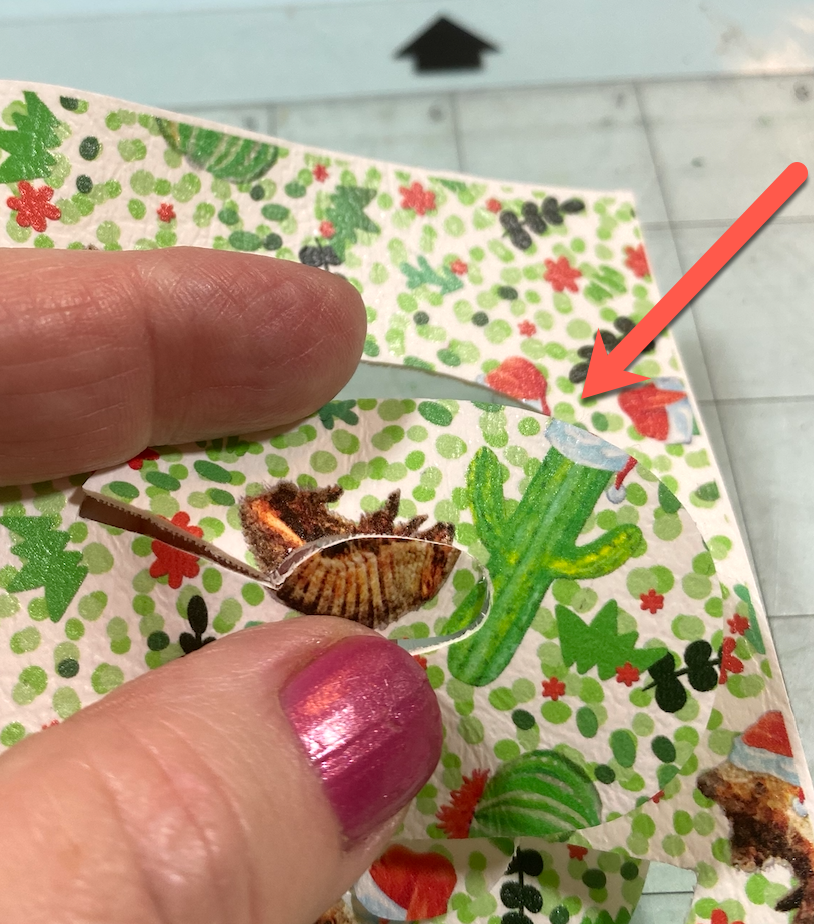
Once I had the correct settings and a good test cut, I cut my shapes. I had a few spots where the blade did not cut completely through the knit backing on the leatherette. The spots were small and I was able to trim them with a pair of small scissors.
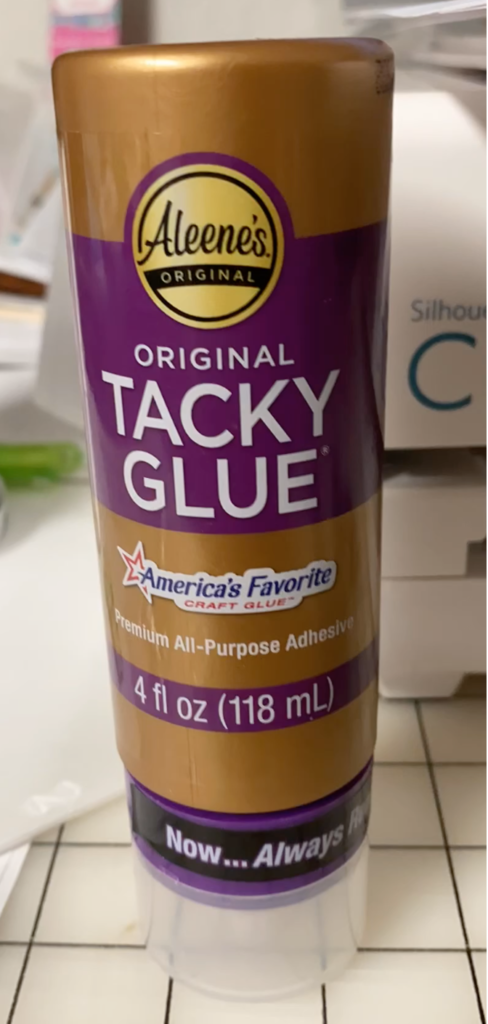
I tested a couple different adhesives and a double stick tape for completing this project. I found that Aleene’s Always Ready Tacky Glue worked great! I like this one because it is tip side down so it is “always ready”!
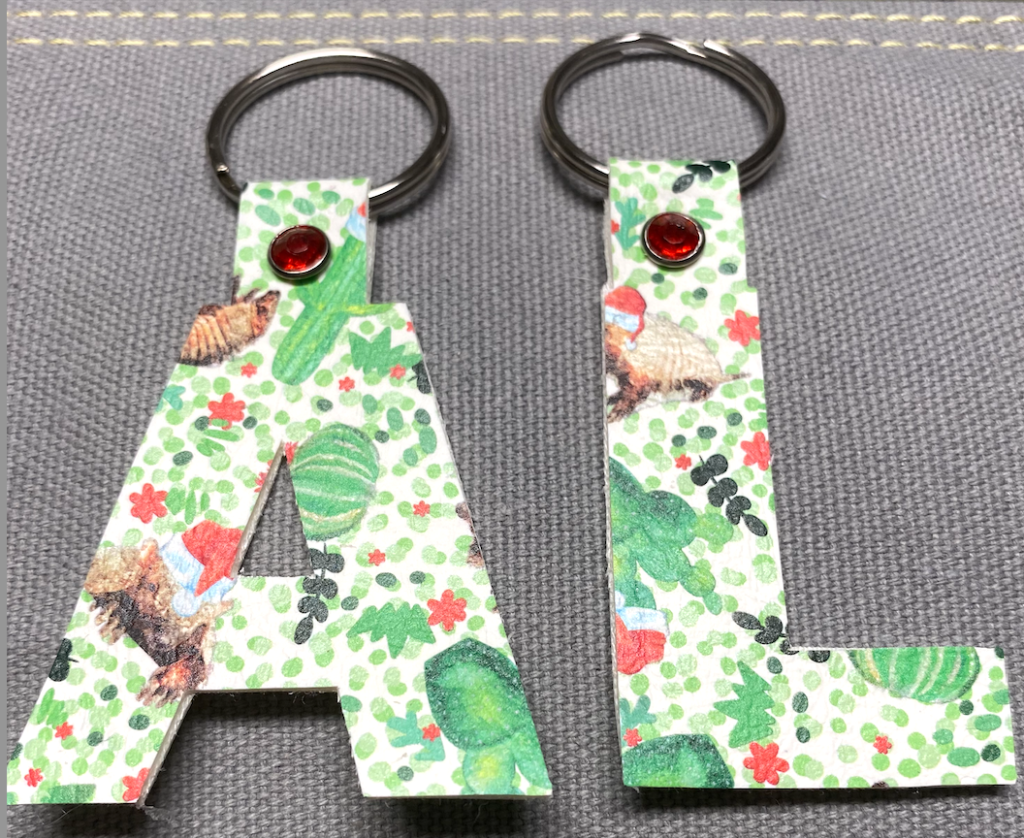
I slipped a split key ring onto the key fob and then applied my glue, making sure to get it close enough to the edges so they would adhere well. I found it helped to use a bamboo skewer to hold the initial in place as I applied the glue.
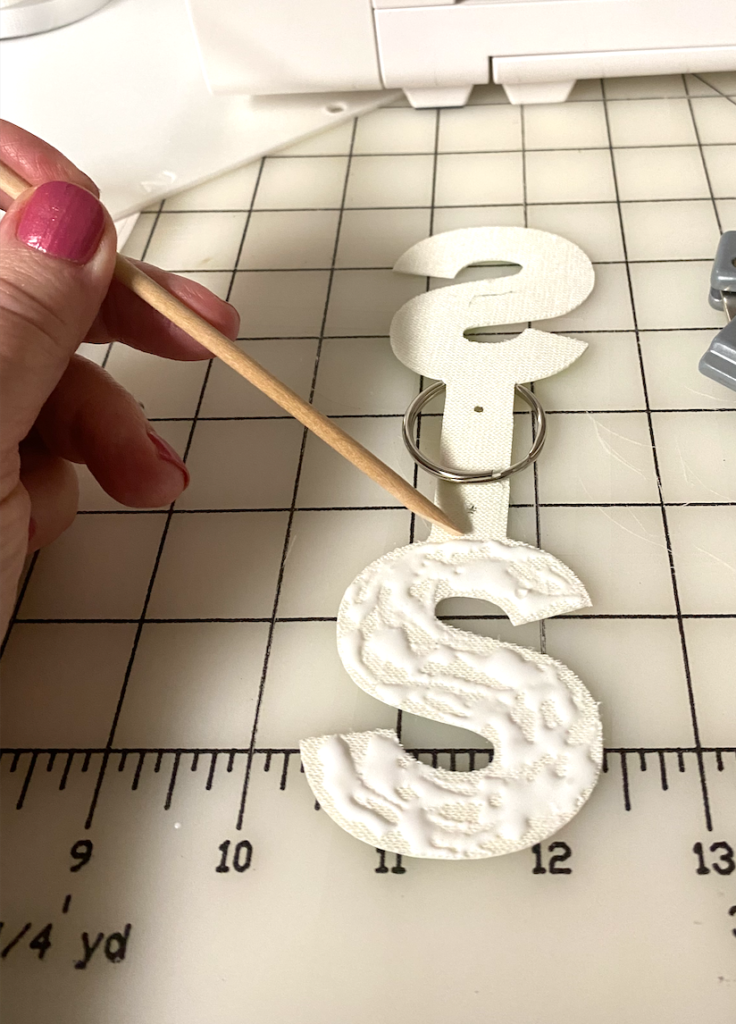
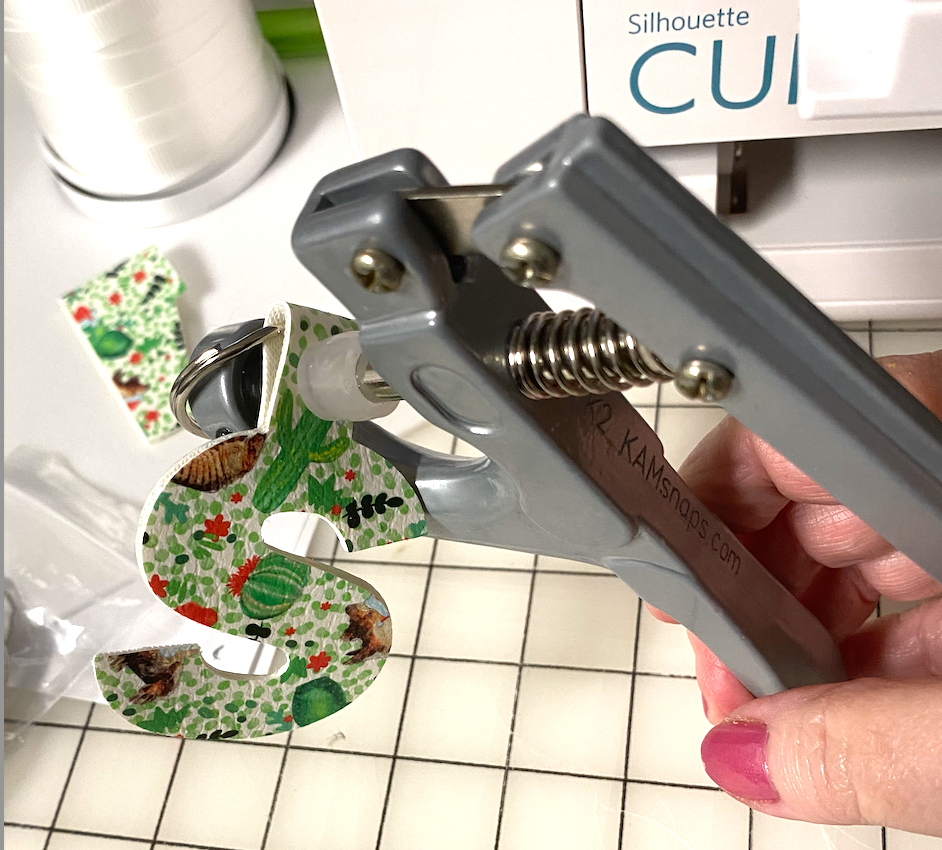
Making sure to keep the ring out of the way of the glue, I pressed the two initials together and held them for just a minute to help the glue adhere. There is a small hole in the key fob for a rivet or other snap. I used a rivet setting tool and crystal rivets that I purchased from Gayle’s Nest.
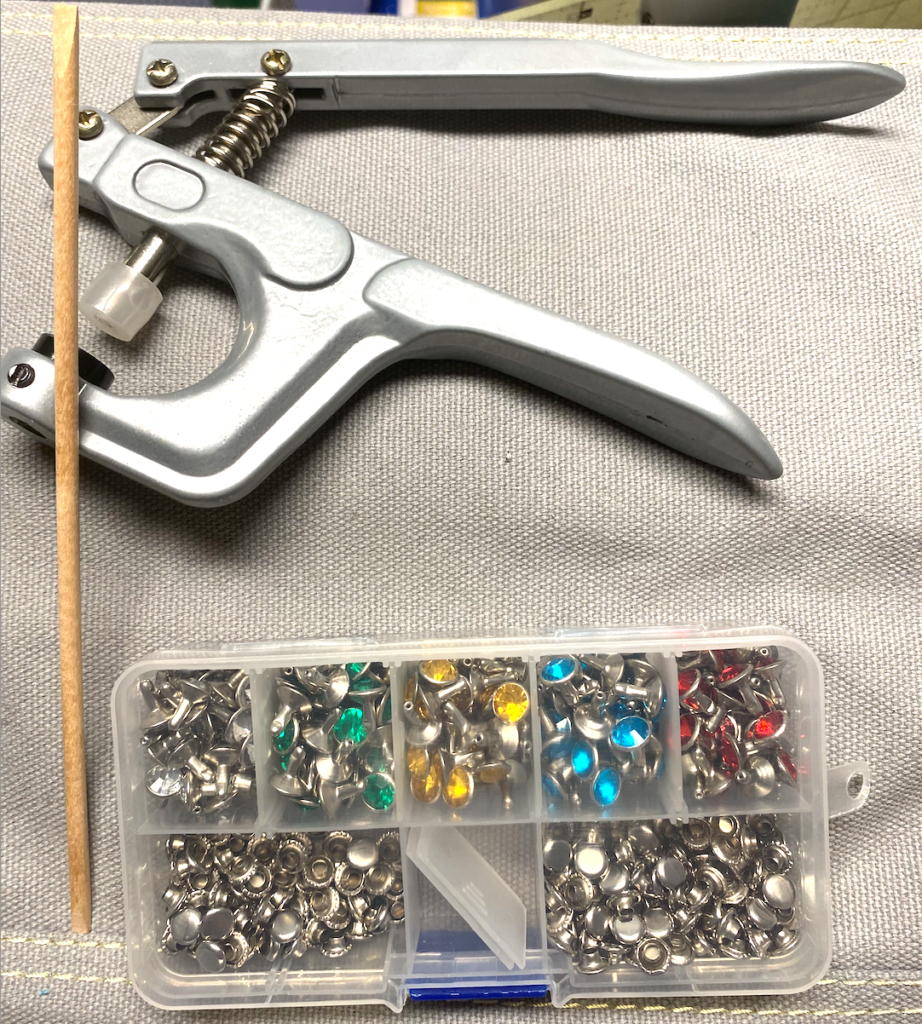
Make sure you keep the split ring out of the way when you use the rivet setting tool to attach those crystal rivets!
Once the rivet is set, you are finished!! Quick and easy key fobs in just a few minutes!!
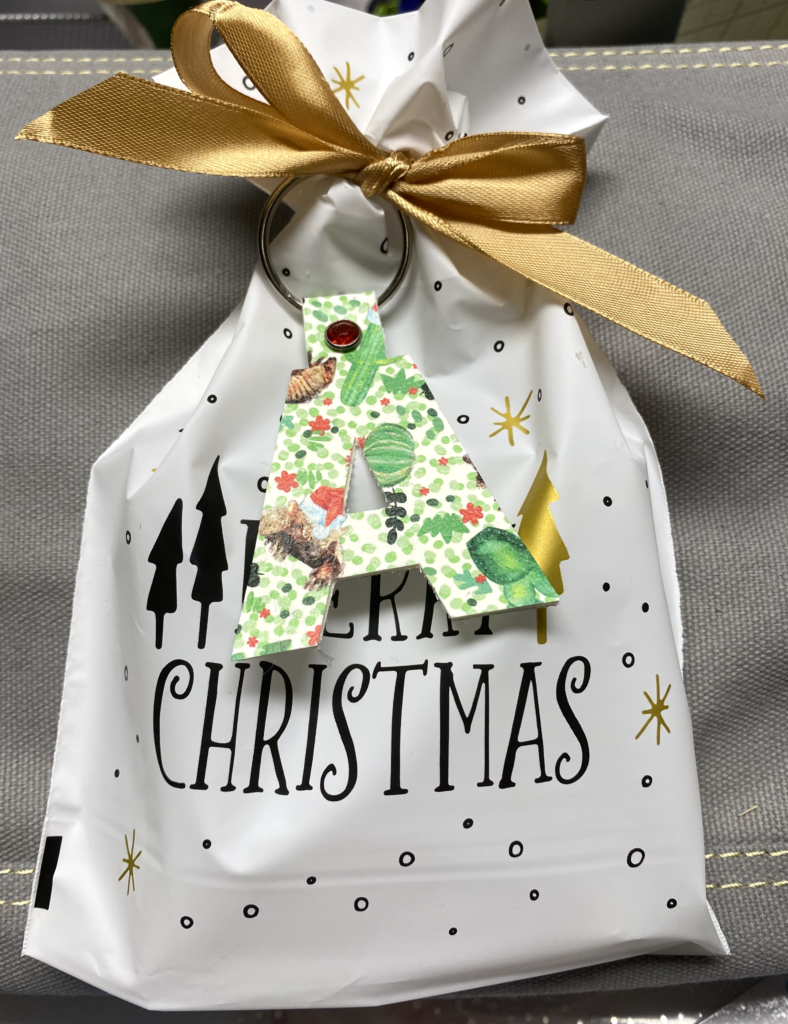
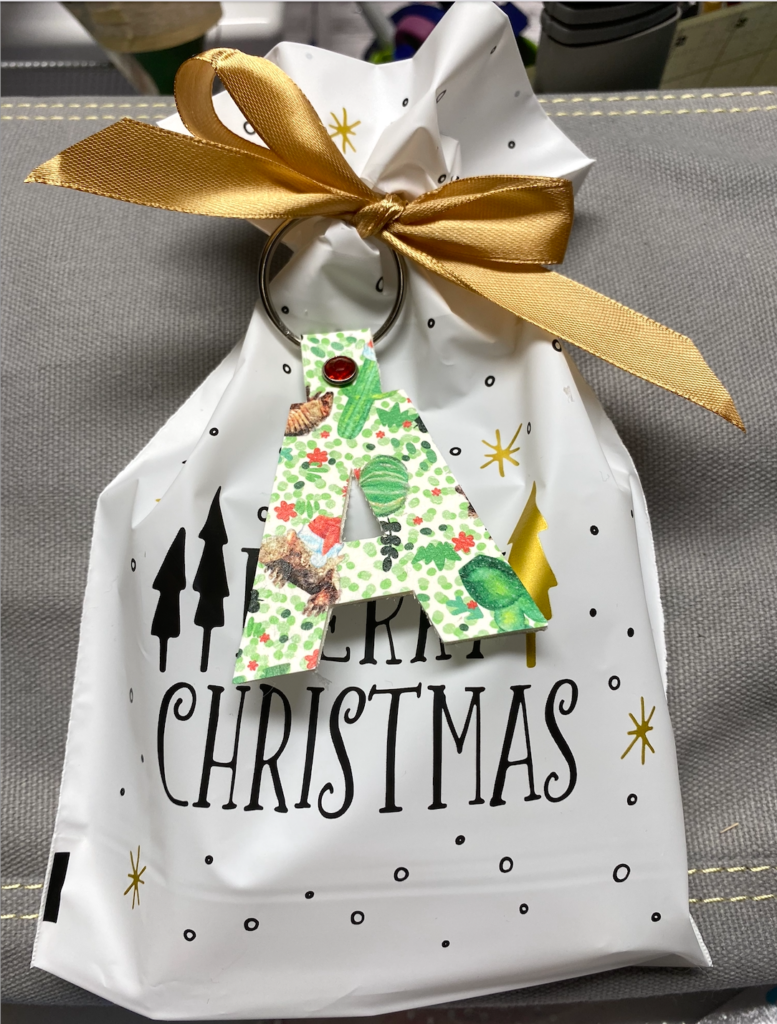
I used mine as gift tags for bags for a gift exchange (shhhhh… don’t tell the members of the exchange about these!). Aren’t they so cute!!
I hope you liked this quick gift project and will try it for yourself! I cannot wait to see what your projects look like! Be sure to join the FB groups below and post photos of your finished projects!!
If you enjoyed these tips, please join my Facebook groups … Libby’s Silhouette Group — Tips, Tricks, Tutorials and Projects, Libby’s Craft and Sewing Group and Running With Sisers – Juliet and Romeo. You can also find me on FB at Libby’s Loft.com. Please join and feel free to ask questions and share your creations! I look forward to seeing you there!!
Until Next Time,
Happy Crafting!!
Disclaimer: Posts on this site may contain affiliate links. Clicking on one of these links or making purchases at linked sites does not mean you pay more for your purchases. It means I may receive a small commission on your purchase. This commission helps defray the costs of this site and enables me to continue to provide you with new and exciting content.
Until Next Time,
Happy Crafting
Disclaimer: Posts on this site may contain affiliate links. Clicking on one of these links or making purchases at linked sites does not mean you pay more for your purchases. It means I may receive a small commission on your purchase. This commission helps defray the costs of this site and enables me to continue to provide you with new and exciting content.