I just love adding a seasonal look to soap dispensers! Just create your design and apply the vinyl to an overhead transparency sheet. These inserts are so quick and easy to create and will give a custom look to your kitchen or bathroom. I got my bottles from Specialty Bottle. They have a wide variety of bottles and other containers. I first saw this project at an event with Hope Yoder many years ago. Thanks, Hope for the great project!
Let’s create a the design.
You can do this in any software. I will be using my Silhouette Studio software, but you can also do this in CanvasWorkspace.
- Measure your bottle. I measured the narrow part of the bottle, the wide bottom part and the length of the bottle.
- Create a new workspace. We are going to create the template for the transparency.
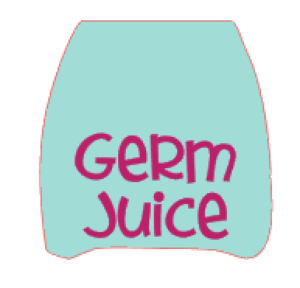
- In your software, create a rounded rectangle. I will be using my Fill tool to add color to each of the elements we create so they are easier for you to see. You do not have to do this, but I find it helps me as I create.
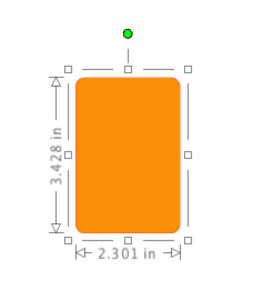
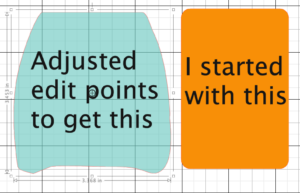
- Double click on the rectangle to access the edit points. Use the edit points to adjust the rectangle so it fits your measurements gathered earlier. I found it helpful to turn on the grid to get the measurements just right. There is also a small indention in the bottom of my bottle, so I curved the bottom up to accommodate that.
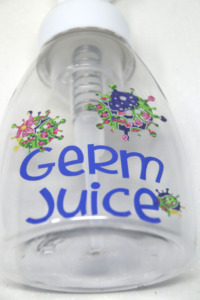
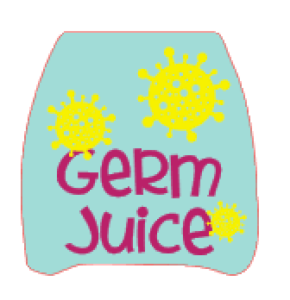
- Now for some fun! I decided to create a cute bottle for the bathroom that my grandson uses. I found a cute design in the Silhouette Design Store (#325410 Virus by Paige Evans) that will be just perfect for this project! Merge the design into your workspace.

- Click on your text tool and add some text to your design. I used the font called PN Adorable Print.
- Select the germ design you added to your workspace. Adjust the size so it fits on your template. I copied and pasted the design 2 extra times and adjusted the size. Honestly, this design has some really small shapes that could be difficult to weed. I will probably ignore them when it comes to weeding time.
- Save your design.
Now it’s time to cut your vinyl and template material.
- Place your first color vinyl on your mat. Do a test cut and adjust your settings, if necessary. Cut this color. I used a printed vinyl from Sparkleberry Ink for my “germs”.
- Cut your second color vinyl, again making sure you do your test cut!
- The overhead transparency paper is a thicker than your adhesive vinyl. I started with a Cardstock Heavy setting in my Silhouette and made adjustments. I used two different cutters and the settings were different on each one. My Scan ‘n Cut is a DX model so it automatically adjusted the settings for me. Cut the transparency film.
Putting it all together
- Decide whether you want your lettering behind the “germs” or in front, if your design requires this.
- Put transfer tape on the first color vinyl and apply the vinyl to the overhead transparency. Carefully smooth the vinyl onto the transparency.
- Place transfer tape on your second color vinyl and apply to the transparency. Use your squeegee if necessary, to help the vinyl adhere well.
- Gently roll the decorated transparency and slip it into your bottle.
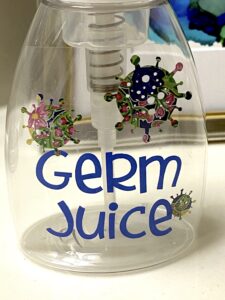
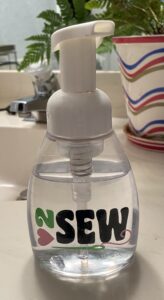
Here’s another bottle I created several years ago.
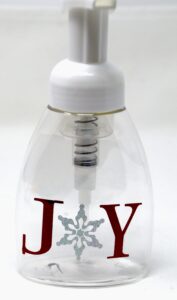
Once you have the template, the possibilities are endless!!
Soap Recipe
Use 1 part foaming hand soap refill. Get the kind that is clear or a little “blue”. Don’t get the orange kind … it does not look as nice in your clear bottle. The blue/clear kind looks transparent when you mix it
Add 4 parts water and mix well.
And that’s it! I hope you like this quick and easy project!
If you enjoyed these tips, please join my Facebook groups … Libby’s Silhouette Group — Tips, Tricks, Tutorials and Projects, Libby’s Craft and Sewing Group and Running With Sisers – Juliet and Romeo. You can also find me on FB at Libby’s Loft.com. Please join and feel free to ask questions and share your creations! I look forward to seeing you there!!
Until Next Time,
Happy Crafting!!
Disclaimer: Posts on this site may contain affiliate links. Clicking on one of these links or making purchases at linked sites does not mean you pay more for your purchases. It means I may receive a small commission on your purchase. This commission helps defray the costs of this site and enables me to continue to provide you with new and exciting content.
Until Next Time,
Happy Crafting!
Disclaimer: Posts on this site may contain affiliate links. Clicking on one of these links or making purchases at linked sites does not mean you pay more for your purchases. It means I may receive a small commission on your purchase. This commission helps defray the costs of this site and enables me to continue to provide you with new and exciting content.