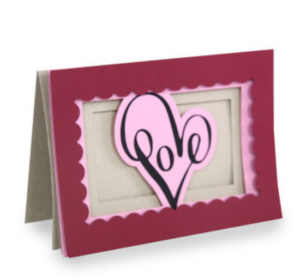
I just LOVE this cute shadowbox card by Carina Gardner (Silhouette Design Store #115791). Better yet, it was easy to create! Remember, you can download the SVG file from the Silhouette Design store to use this design with your non-Silhouette cutter.
Open the design in your workspace. You may need to ungroup your design in order to separate the individual parts so you can begin cutting.
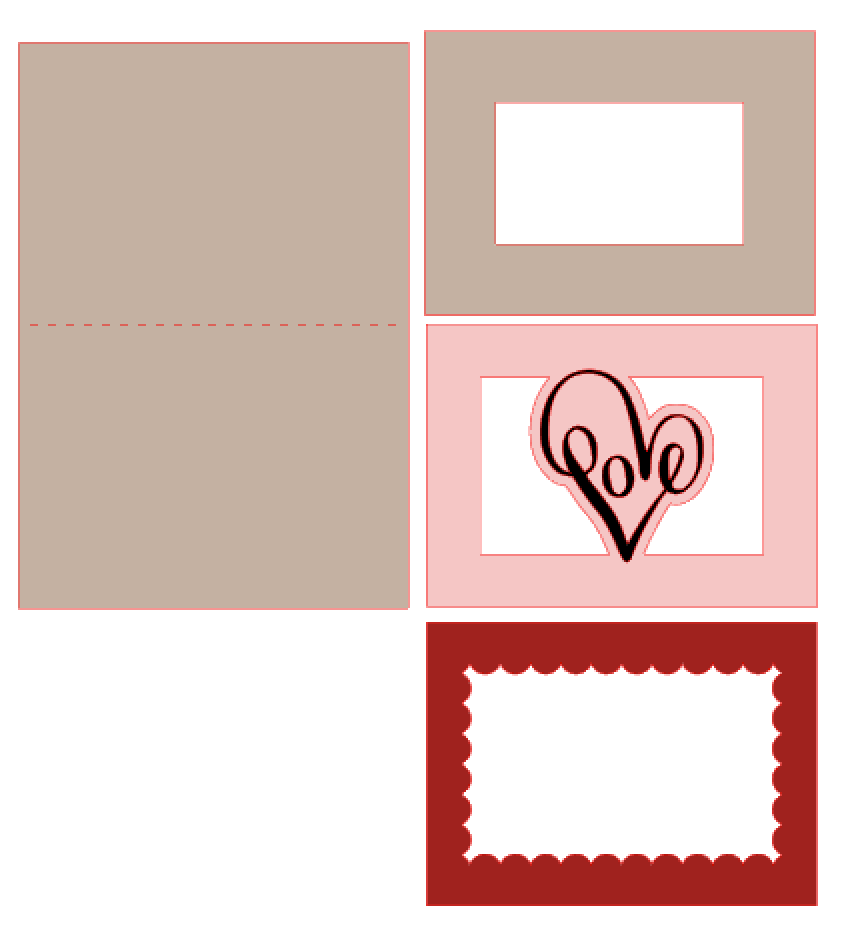
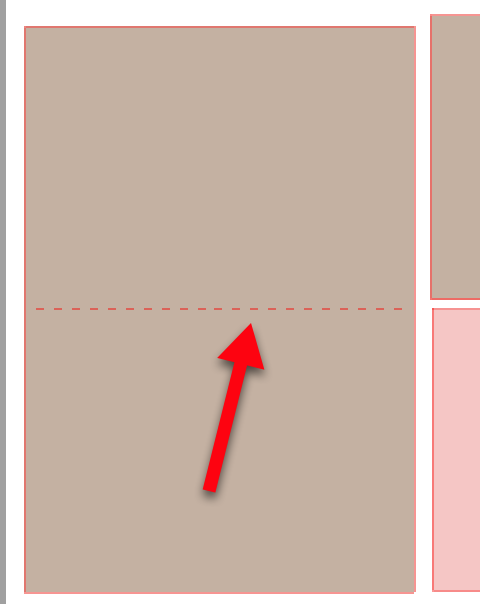
When ungrouping, make sure that the dotted line (fold line) in the card does not separate from the card. If it does, select these two items and group them.
Move the elements you will not be cutting off to the side of the virtual mat. Make sure the elements that are left on the mat will fit on your cardstock. If using a Cameo, start with Cardstock Textured or Cardstock Heavy as your material and do a test cut to check your settings. Cut the card and back piece of the shadowbox (they are brown in the design so you can see them).
Move the card and back piece off the workspace and move each of the other elements onto the mat and cut them. You can cut more than one at a time if you want to do so. If you are using a Scan ‘n Cut, this is a great time to use the Scan Mat feature to check the placement of your designs on the mat.
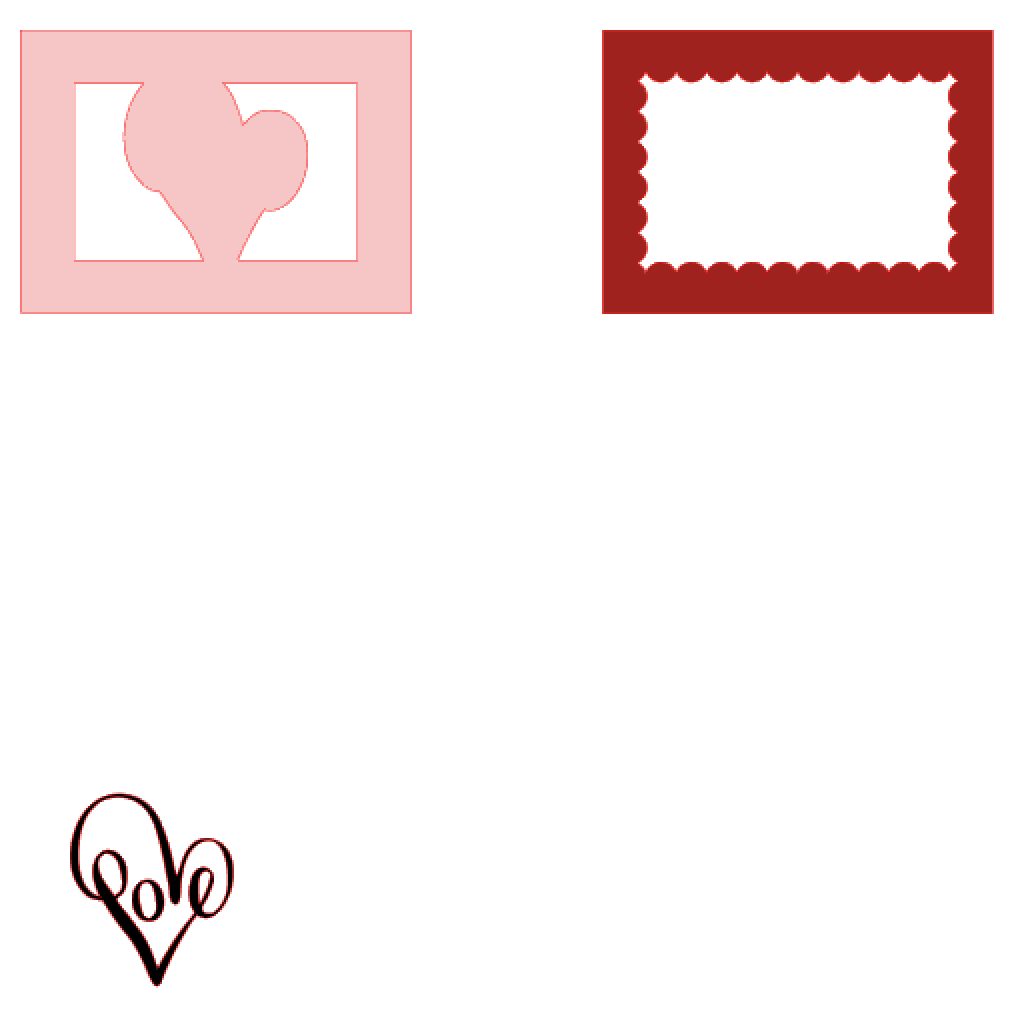
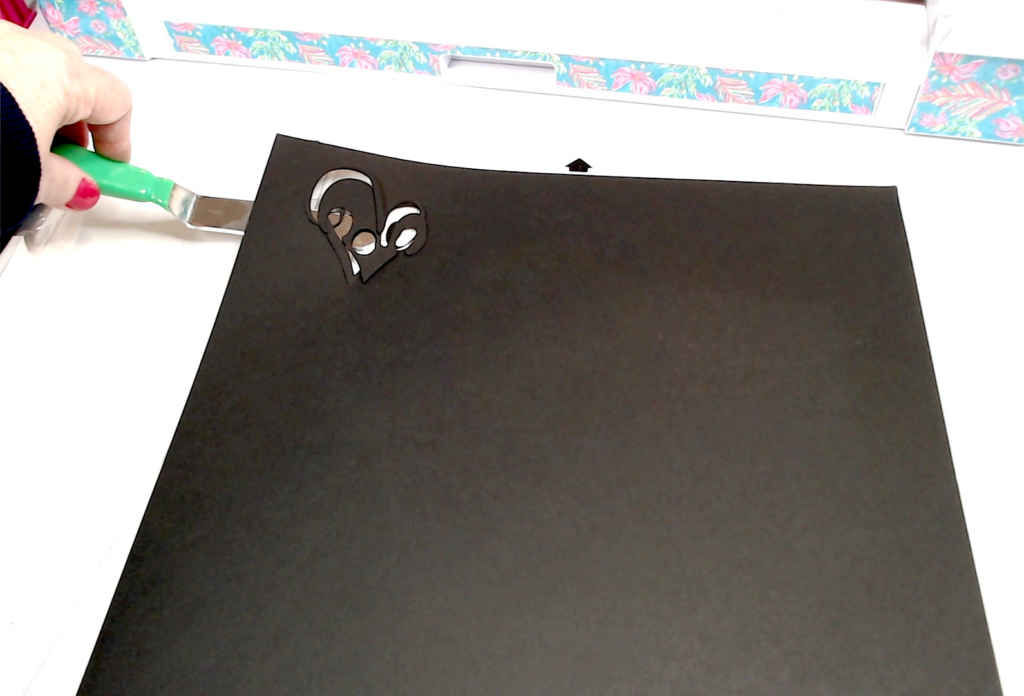
As you are lifting your design off the mat, you may find it helpful to turn the mat over and remove the mat from the paper. This will help reduce any curling of the paper. I also like to use a spatula to remove more delicate designs from the mat.
With all the design elements cut, you are ready to begin the assembly of the card.

I used glue to attach the word “Love” to the light pink part of the card. To add dimension to the card, I placed small pieces of foam on the back of the darker pink piece that will go on top of the lighter pink one. Notice in this photo that I use a bottle with a very thin tip to apply the glue so I don’t get too much glue on the card, especially in small areas.
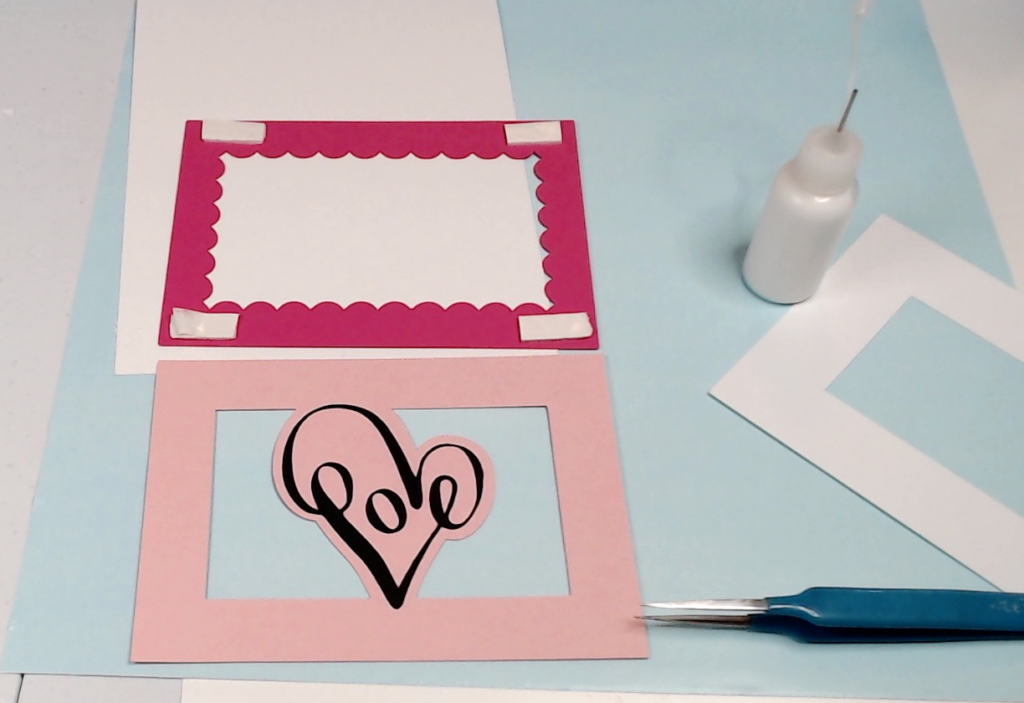
Remove the paper backing from the foam and place the dark pink part of the card on top of the light pink piece.
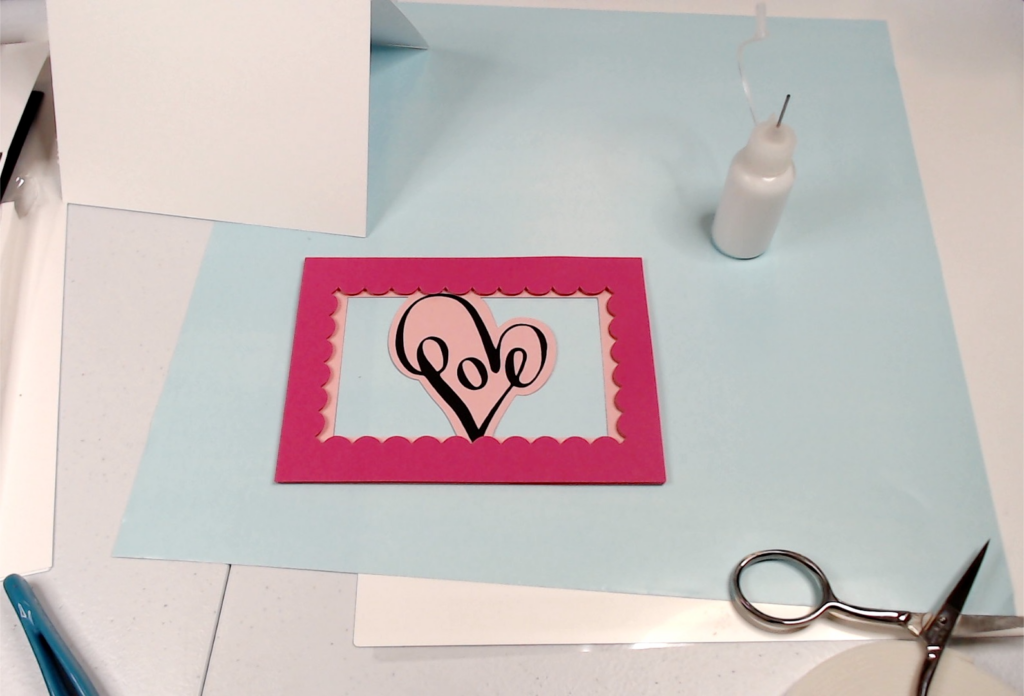
I placed foam on the back side of the light pink part of the created unit and applied it to the white backing piece and adhered the entire pink unit to the white backing piece using the foam pieces.
I used my tape runner to add strips of tape to the completed front unit and adhered it to the card piece. You could also use glue for this step.
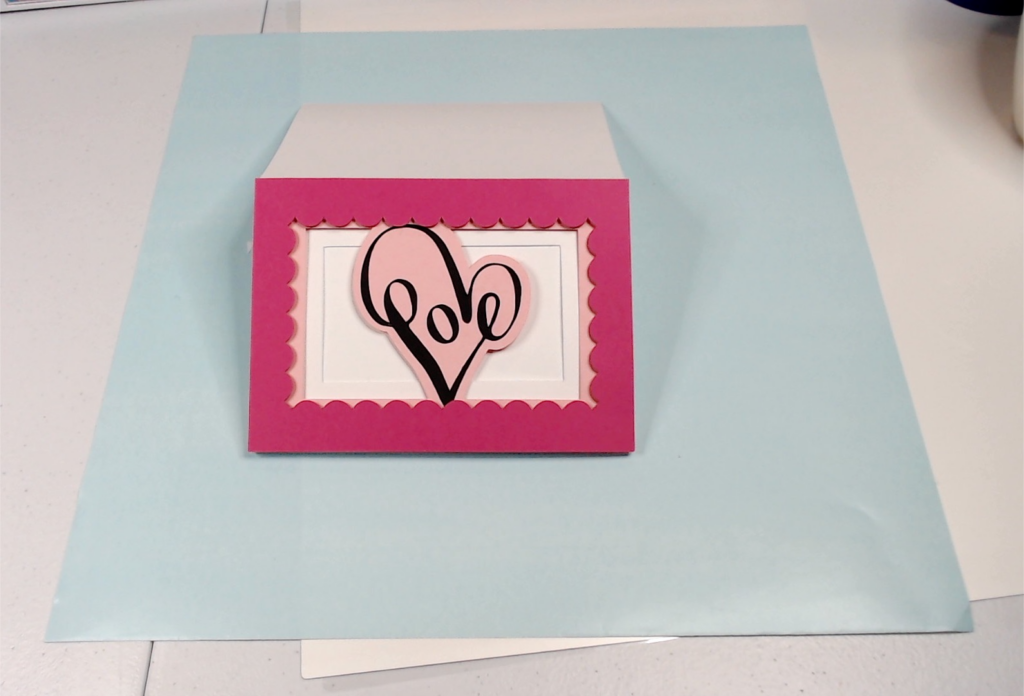
And just that quick, you have a cute dimensional card!
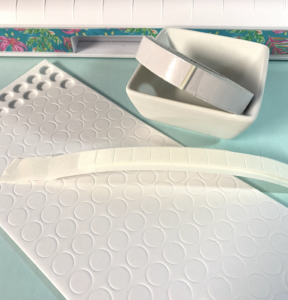
Tip: Foam is available in strips, squares and circles and using them can bring depth and dimension to your paper projects.
This card was quick and easy to create! And using the foam strips gives it that added dimension that takes it above and beyond “store bought” cards! I hope you like it!
If you enjoyed these tips, please join my Facebook groups … Libby’s Silhouette Group — Tips, Tricks, Tutorials and Projects, Libby’s Craft and Sewing Group and Running With Sisers – Juliet and Romeo. You can also find me on FB at Libby’s Loft.com. Please join and feel free to ask questions and share your creations! I look forward to seeing you there!!
Until Next Time,
Happy Crafting!!
Disclaimer: Posts on this site may contain affiliate links. Clicking on one of these links or making purchases at linked sites does not mean you pay more for your purchases. It means I may receive a small commission on your purchase. This commission helps defray the costs of this site and enables me to continue to provide you with new and exciting content.
Until Next Time,
Happy Crafting!
Disclaimer: Posts on this site may contain affiliate links. Clicking on one of these links or making purchases at linked sites does not mean you pay more for your purchases. It means I may receive a small commission on your purchase. This commission helps defray the costs of this site and enables me to continue to provide you with new and exciting content.