Looking for a quick holiday gift? Want to keep everyone from “borrowing” your phone charger? Create quick phone wraps using your Silhouette software.
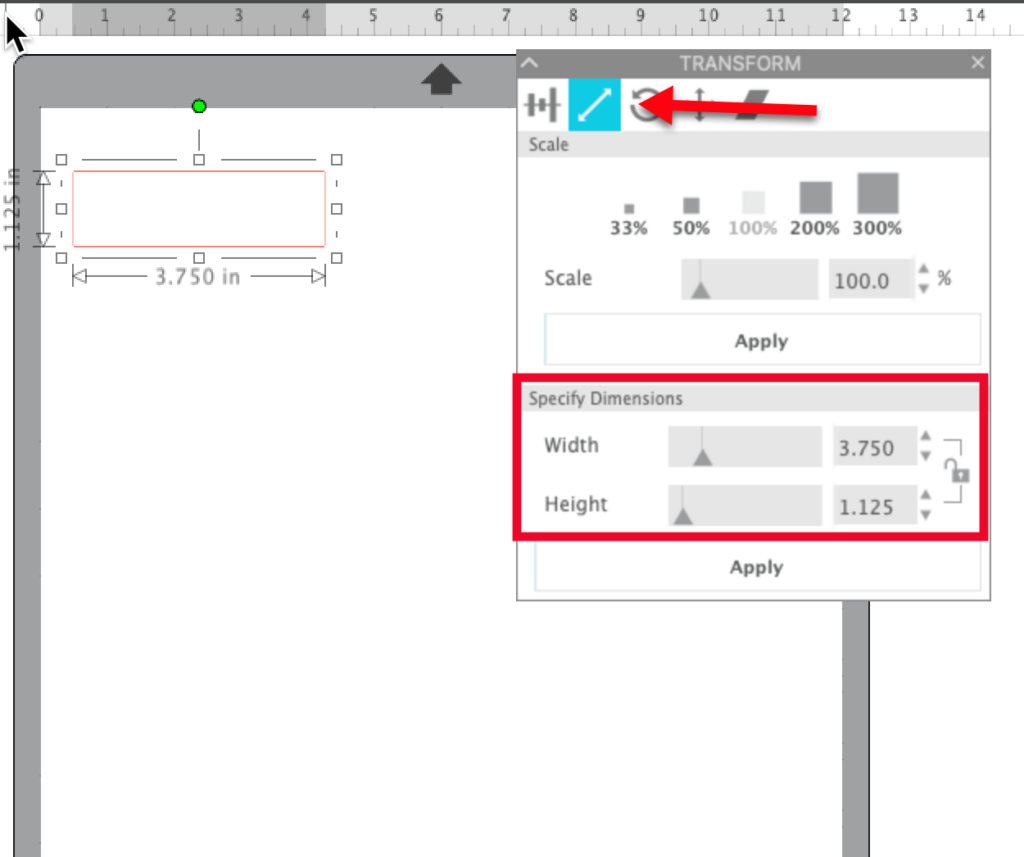
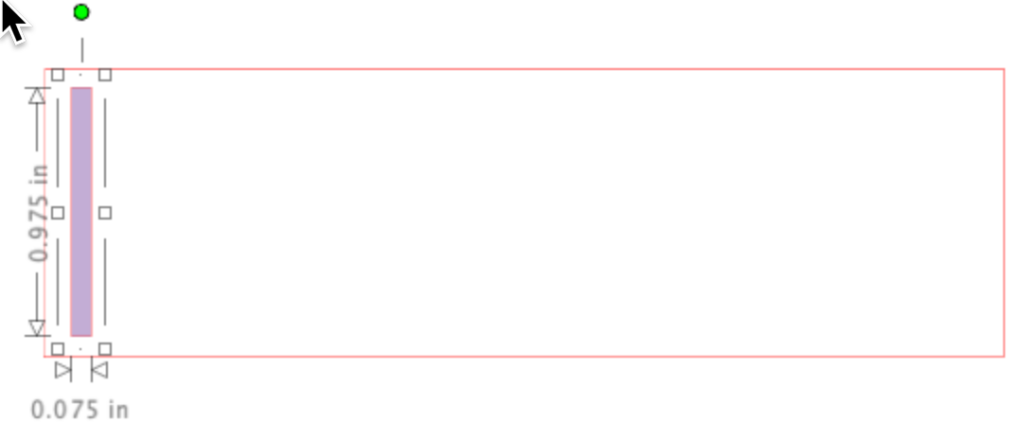
Let’s get started! Measure your phone charger so you know how big to make the wrap. I measured my grandson’s Samsung charger and it was 4.25″ x 1.25″. My iPhone charger block is 3.75″ x 1.125″. Use the rectangle tool in the Draw tools to create a rectangle by left clicking and drawing a rectangle. Select the Scale tab in the Transform Panel to set the dimensions to match the measurement for your charger.
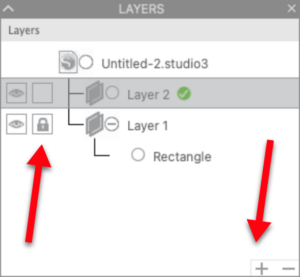
If you have Business Edition of Silhouette Studio, you can use the Layers panel to lock this template in place so you don’t move it. To do that, click on the Layers panel and click in the Lock box. A padlock will appear. Now you can use the rectangle as a template and not have to worry about it moving. Click the “+” in the lower right corner of the Layers panel to create a new layer.
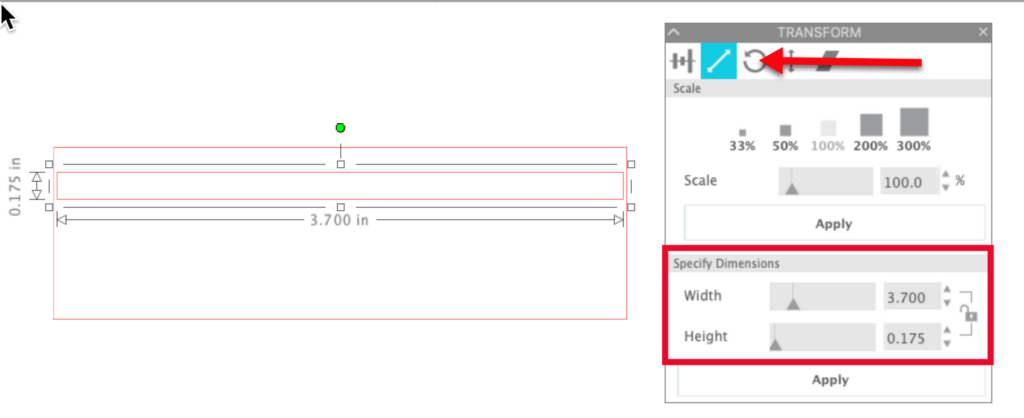
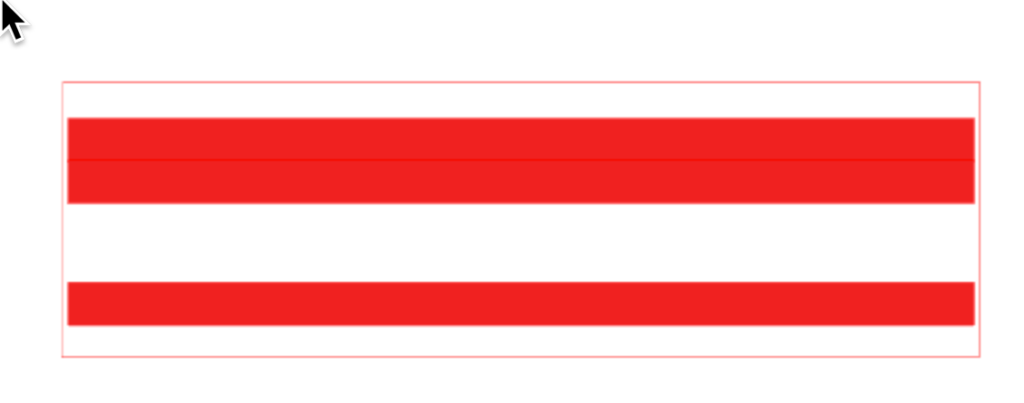
If you don’t have Business Edition, don’t worry, you can still create the wraps. To create the first wrap, I started with a series of thin lines. To create the first line, click on the Draw tool and select the rectangle. Left click and drag in the workspace (inside the template). Use the Scale tab in the Transform panel to adjust the size of the rectangle to 3.7″ wide x 0.175″ tall.
Click on the Fill icon in the top toolbar and select a color to fill your rectangle. This will help when selecting the shape and also for helping you verify the order of objects in the workspace. With the rectangle selected, hold the CTRL/CMD key down and press the down arrow on the keyboard. Another rectangle will be placed in the workspace immediately below the first. Repeat this step so you have 3 small rectangles. Left click and drag the last rectangle down in the template to where you want it to be.
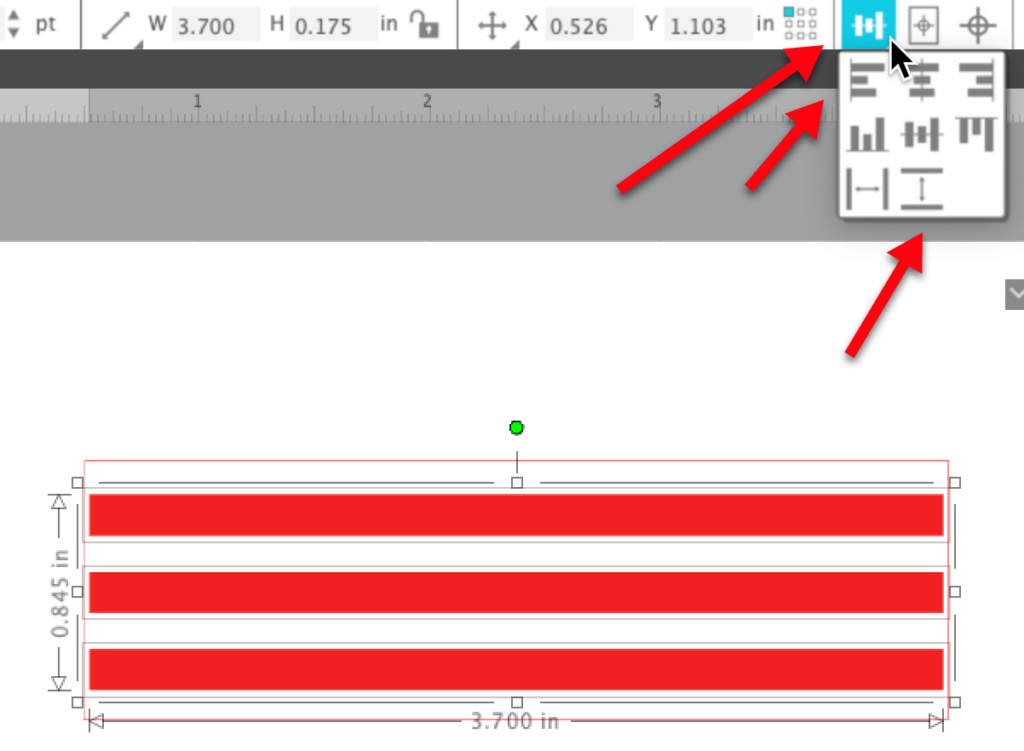
Left click and drag a box around all three colored rectangles (or select one, then Shift+Left Click to select the other two). Click on the Align tool in the top toolbar and select Align Left. Then click on the Distribute Vertically icon to evenly space the rectangles. With them still selected, use CTRL/CMD+G to group the rectangles. Now they will remain aligned and can be manipulated as one item.
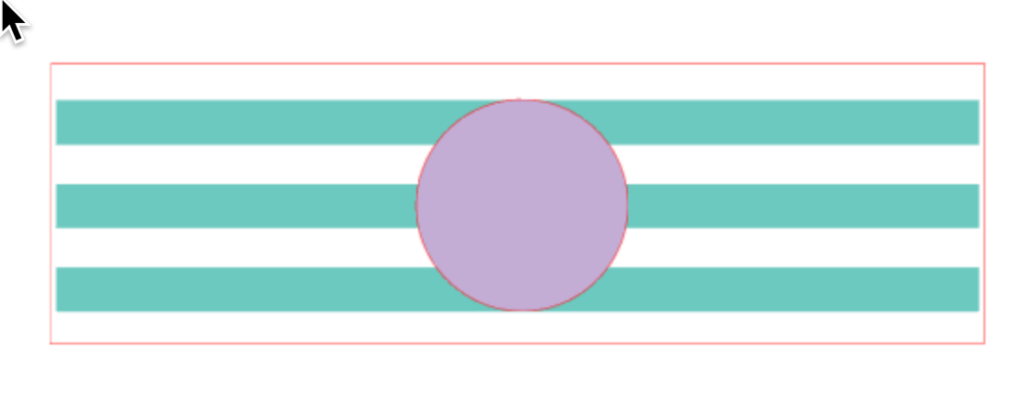
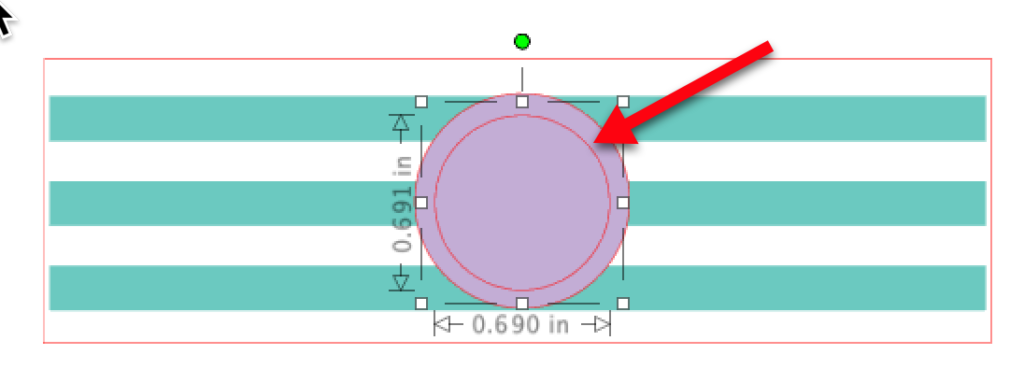
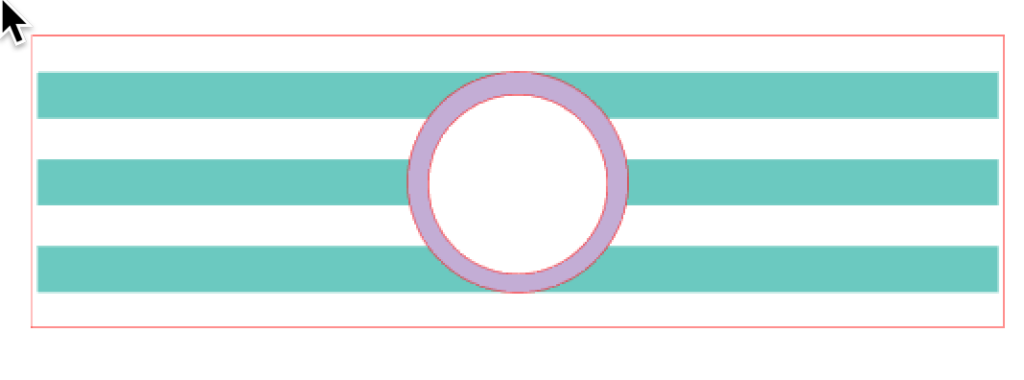
Click the Draw tool in the left toolbar and select the Ellipse tool. Move the cursor into the workspace. Hold down the shift key and left click and drag to draw a circle. I started at the top of the top rectangle and drew to the bottom of the bottom rectangle. I changed the color of my rectangles and added color to my circle so it is easier for you to see.
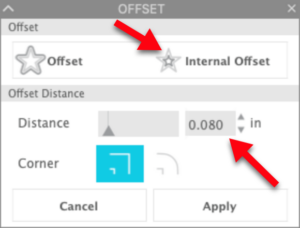
With the circle selected, click on the Offset panel icon in the right toolbar. Click on Internal Offset and set the distance to 0.08. Click Apply.
A smaller circle will be placed inside the original one.
With this smaller circle still selected, hold down the Shift key and select the original circle. Right click and select Make Compound Path from the menu. The two circles will become one ring.
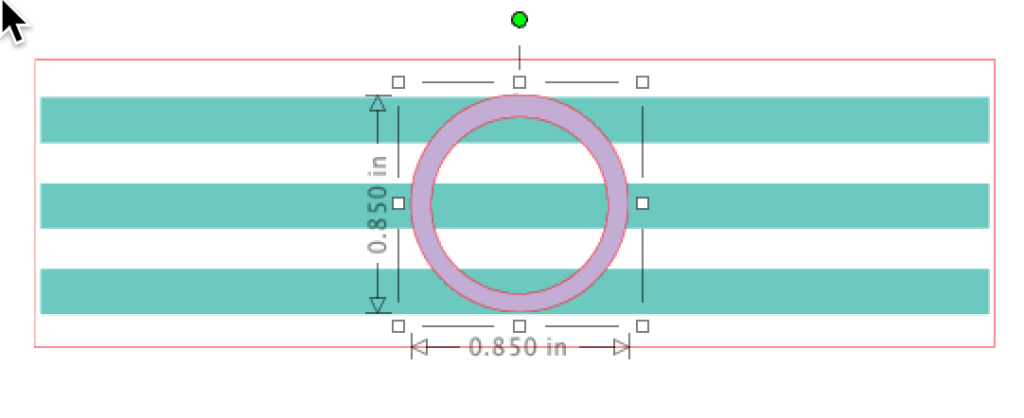
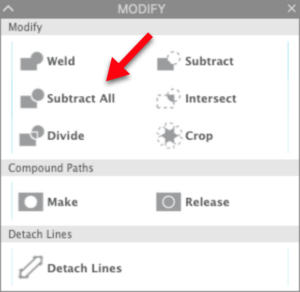
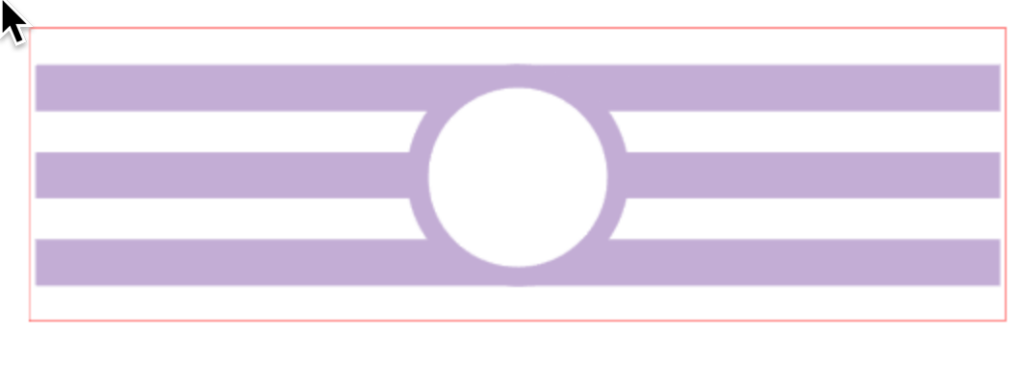
Select the rectangle group and the circle ring. Click on the Align tool in the top toolbar. Select Align Center and Align Middle to center the circle ring on the rectangles. With the shapes still selected, click on the Modify panel and select Subtract All.
Nothing will appear to have happened. But if you move the circle, you will see that its shape has been subtracted from the lines.
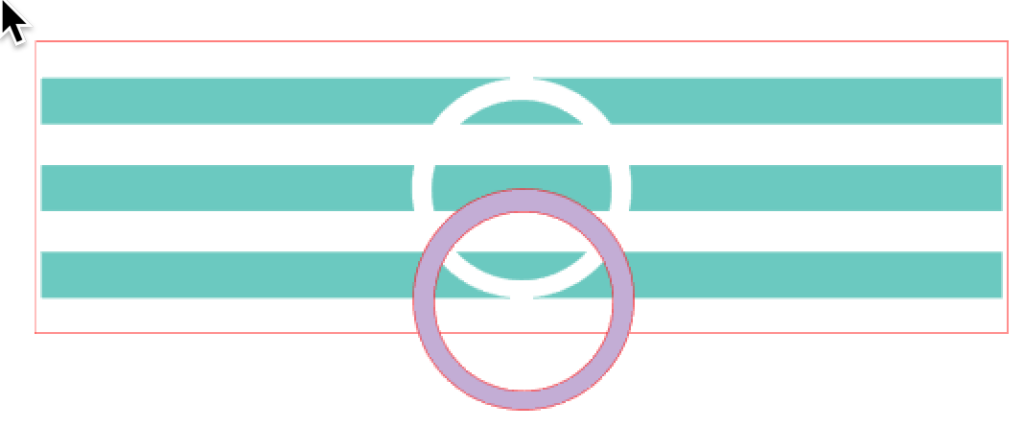
If necessary, select the rectangles and right click and select Ungroup. Click on the small pieces inside the ring and press the delete key on the keyboard to delete them, leaving the middle of the ring empty.
Select the colored bars and the circle ring. Right click and select Weld. They will now become one item. They will also all become one color.
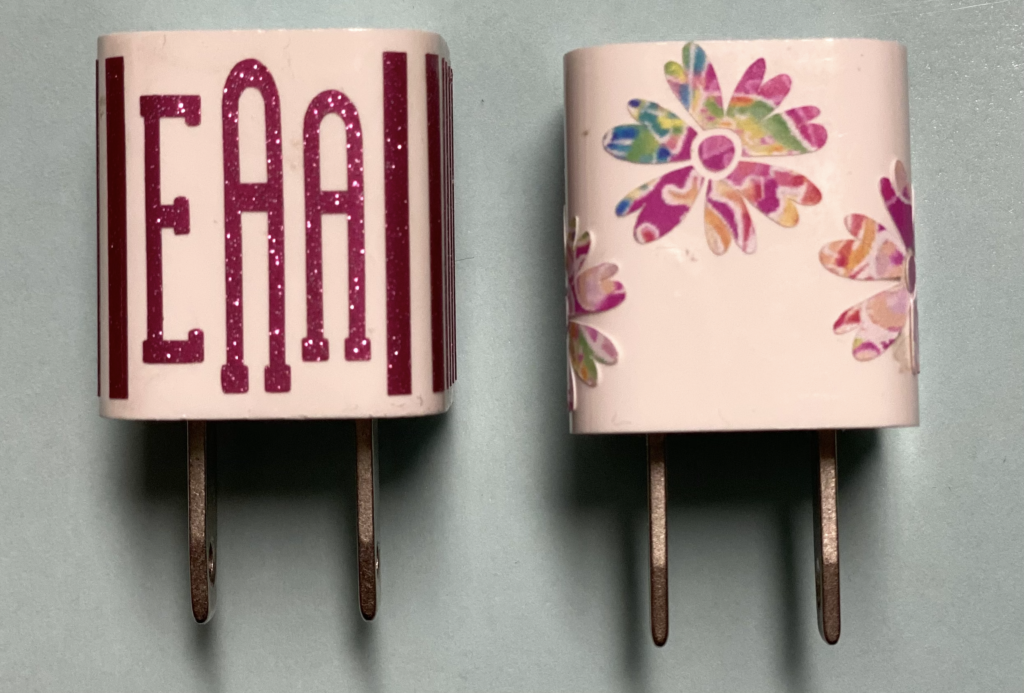
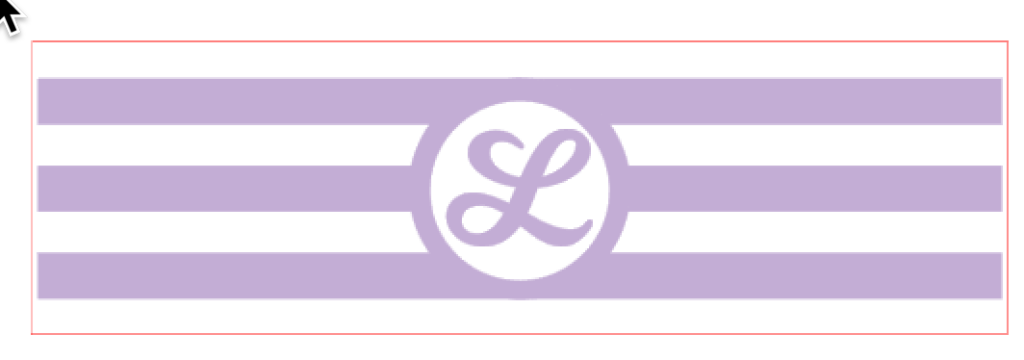
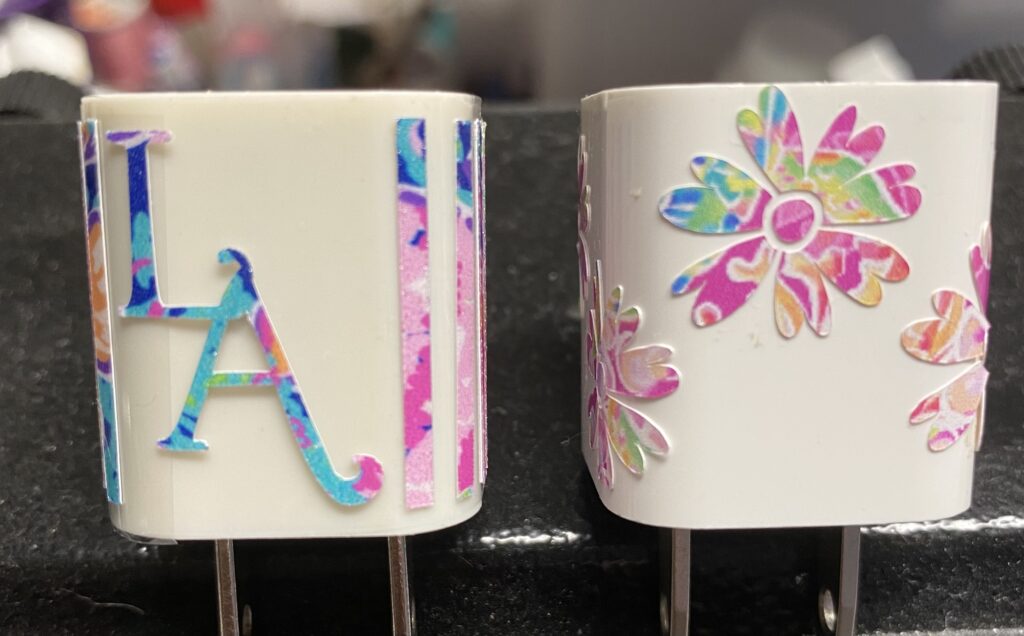
Left click and drag this group down so it is no longer in the template. You can now use the original rectangle template to create another charger wrap. I added an initial to show you how you can further personalize this wrap.
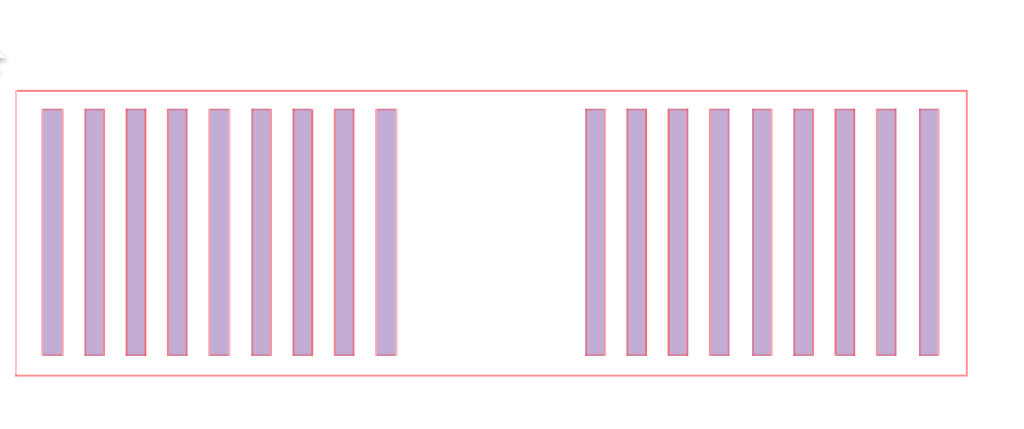
Now let’s create another wrap. Using the rectangle draw tool, create a small rectangle, taller than wide inside the template. In the Scale tab of the Transform panel, change the size of the rectangle to 0.095″ tall and 0.075″ wide. Use the Fill Color icon in the top toolbar to add color to the rectangle.
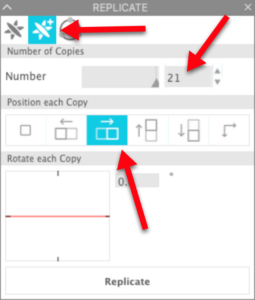
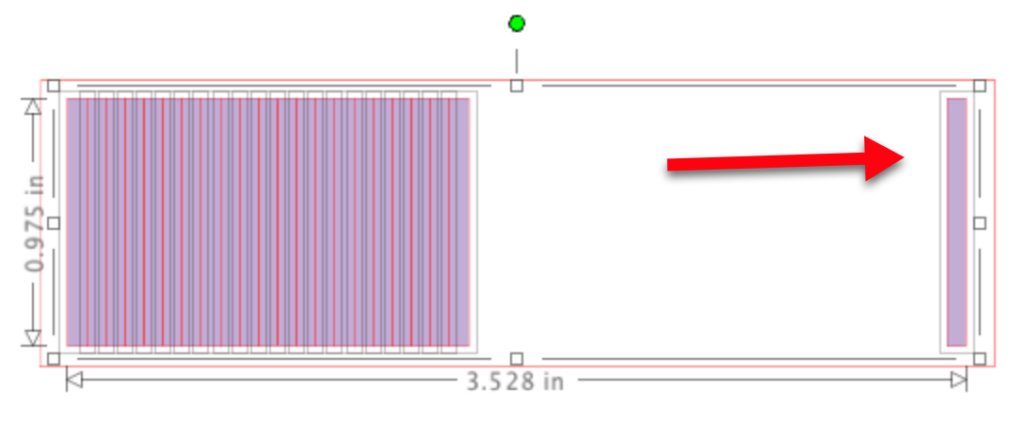
Click on the Replicate panel in the right toolbar. Click on the Advanced Replicate tab. Set the number of copies to 21. Select To the Right in the Position Each Copy section of the panel and click Replicate.
All the copies will be placed right next to each other. Select the last rectangle in the group and move it to the far right in the template.
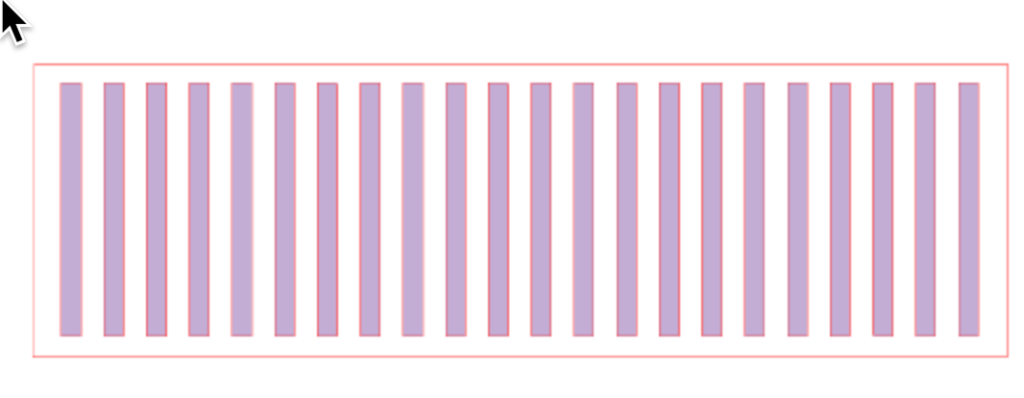
Left click and drag a box around all the colored rectangles to select them all. Click on the Align icon in the top toolbar. Select Align Bottom. Then click on Distribute Horizontal to evenly distribute the rectangles.
Count over nine rectangles from the left edge. Select the next rectangle. Shift left click and select the next 3 rectangles so you have a total of four rectangles selected. (I changed the color of mine for better visibility.)
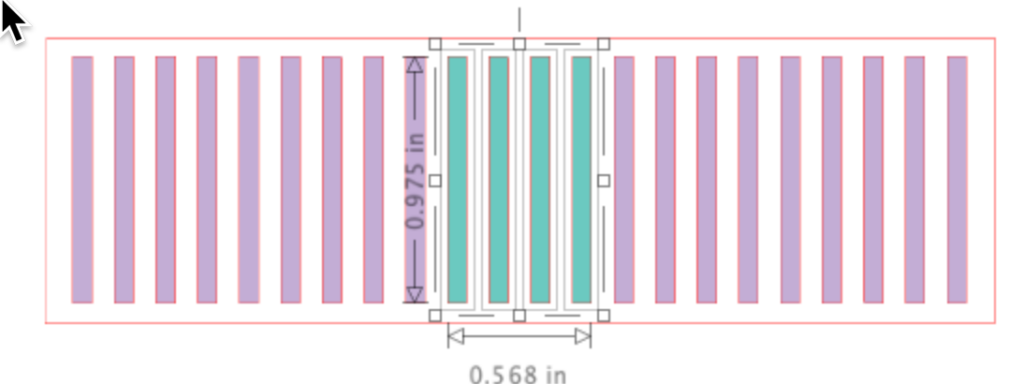
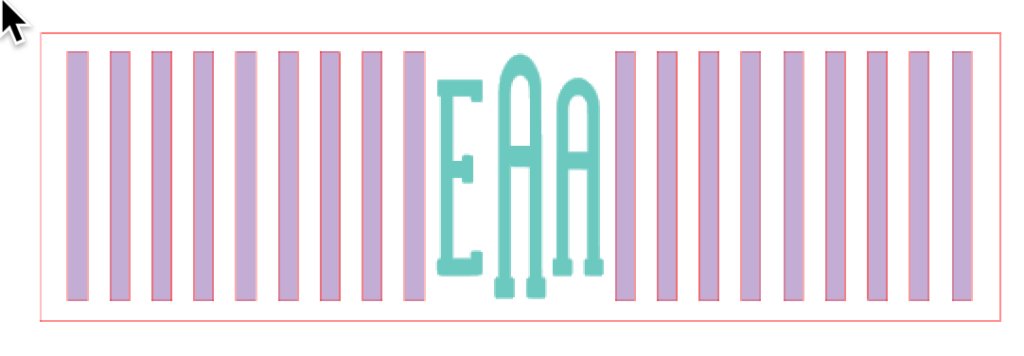
Press the Delete key on the keyboard to delete these letters. You now have an empty space in the middle of the wrap so you can add some initials. Before you do that, left click and drag a box around all the colored rectangles and group them by right clicking and selecting Group from the menu.
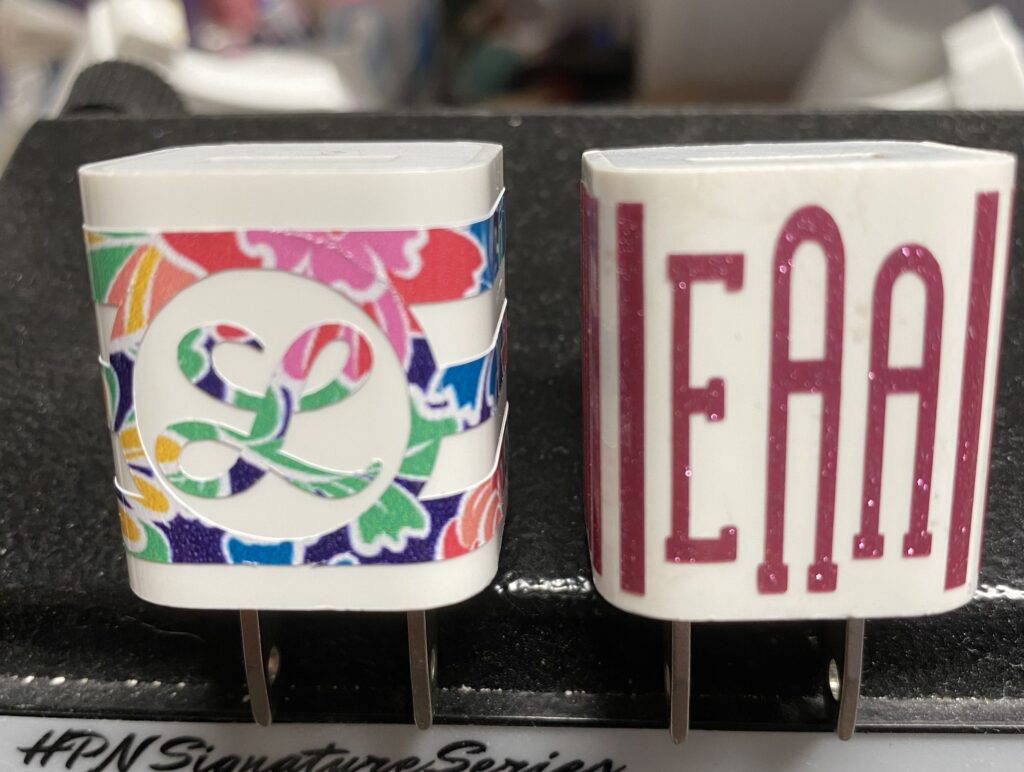
Now add you can add a monogram to the wrap. I used a font by Lori Whitlock, LW Skinny type, to create this monogram.
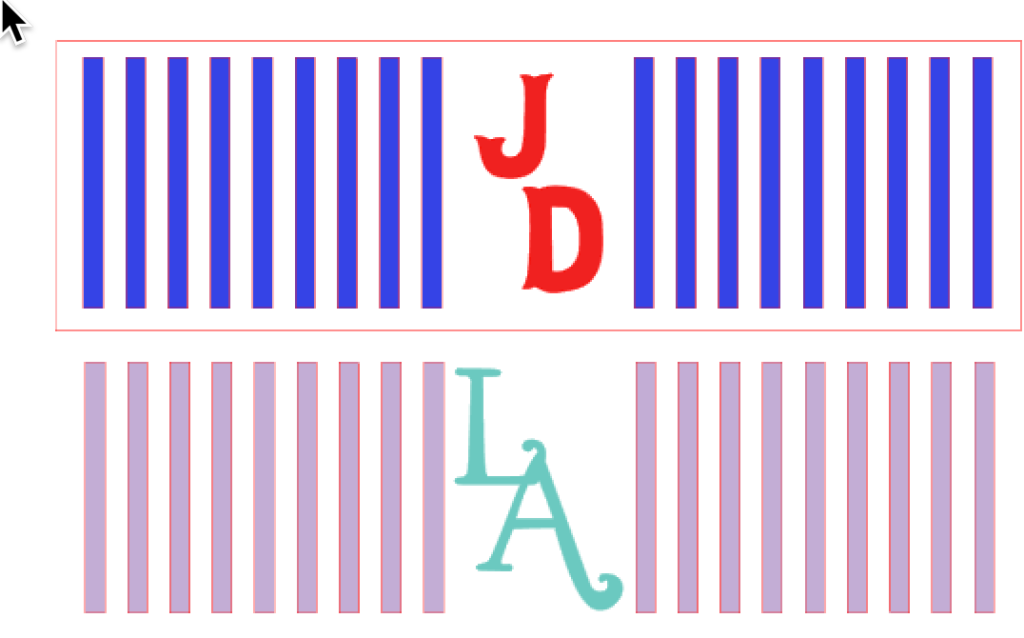
Be creative with the initials. Here’s another couple options.
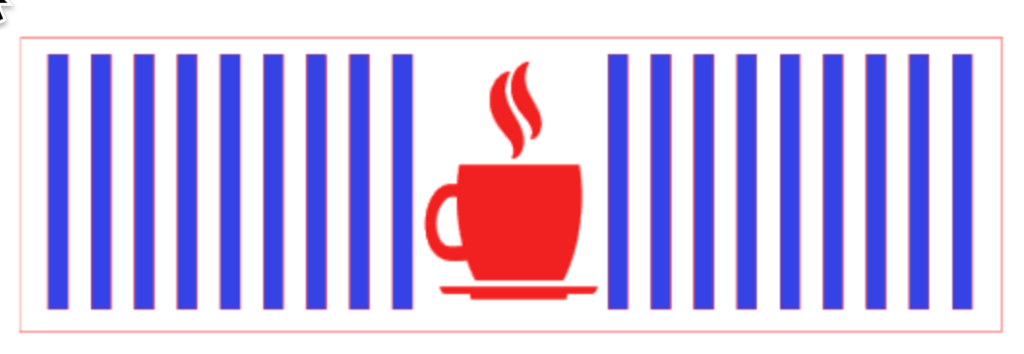
You can also use a shape or a letter from a dingbat font in the center instead of initials. Here I used a letter from Lori Whitlock’s Coffee Dingbats font.
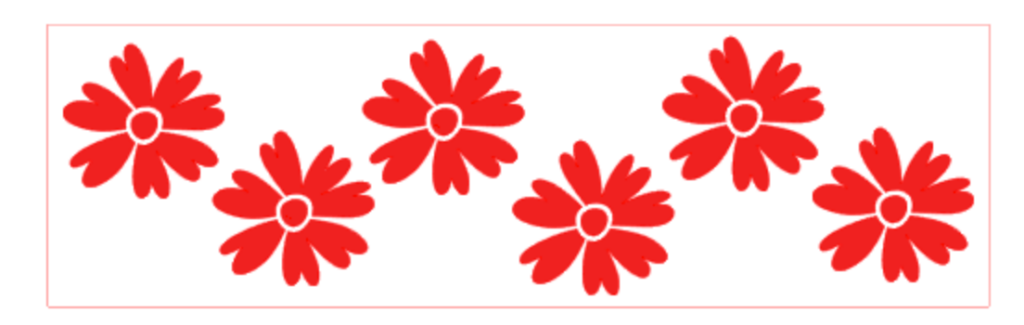
Let’s create one more quick wrap. Move the last wrap off to the side of the workspace so we can use the template one more time. Select a Dingbat font or other shape. I used the letter “I” from Lori Whitlock’s Flower Dingbats font. I placed one flower and then duplicated the flower until I had a total of 6 flowers and randomly spaced them in the template.
Once you have created your wraps, you are ready to cut. I used a variety of different adhesive vinyl colors and prints to create my wraps. I was having so much fun creating and cutting wraps … until I ran out of chargers!! What do you think?

Be sure you save the wraps so you can use them again and again!
If you enjoyed these tips, please join my Facebook groups … Libby’s Silhouette Group — Tips, Tricks, Tutorials and Projects, Libby’s Craft and Sewing Group and Running With Sisers – Juliet and Romeo. You can also find me on FB at Libby’s Loft.com. Please join and feel free to ask questions and share your creations! I look forward to seeing you there!!
Until Next Time,
Happy Crafting!!
Disclaimer: Posts on this site may contain affiliate links. Clicking on one of these links or making purchases at linked sites does not mean you pay more for your purchases. It means I may receive a small commission on your purchase. This commission helps defray the costs of this site and enables me to continue to provide you with new and exciting content.
Until next time,
Happy Crafting!
Disclaimer: Posts on this site may contain affiliate links. Clicking on one of these links or making purchases at linked sites does not mean you pay more for your purchases. It means I may receive a small commission on your purchase. This commission helps defray the costs of this site and enables me to continue to provide you with new and exciting content.