Let’s talk more about blades today! There are a number of blades available for your Silhouette Cameo, Portrait and Curio … but how do you know which one to use for the product you want to cut?
Cameo 4 and Portrait 3
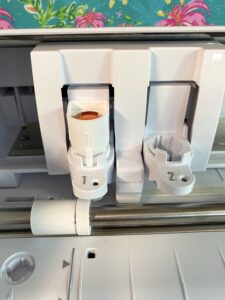
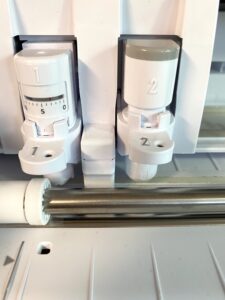
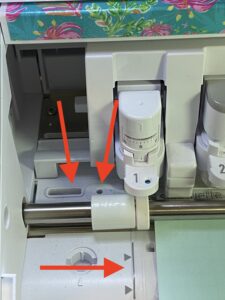
If you have a Cameo 4 or a Portrait 3, this how your blade will look when it is correctly installed.
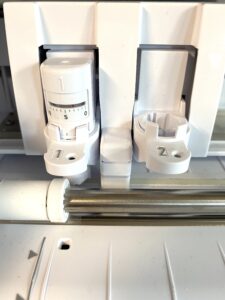
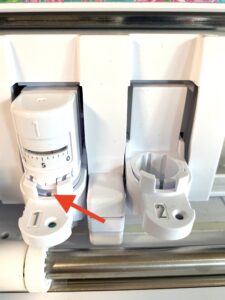
Make sure the blade is snugly down in the housing with no space between the blade and the housing. Even the smallest gap can result in bad cuts. Here’s what you do NOT want it to look like.
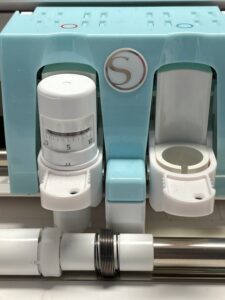
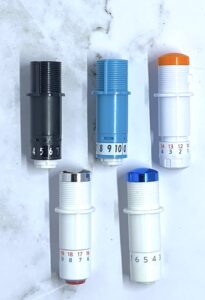
You also have the option of using a variety of blades in tool holder #1 — you should have received an adapter (or set of adapters) with your machine. The Cameo 4 comes with all 4 adapters and the Portrait 3 comes with one black adapter.
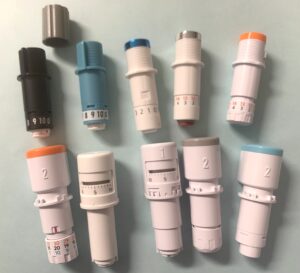
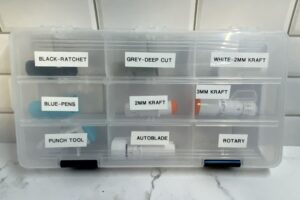
Each adapter works with specific blades … and they all go in tool holder 1 — notice the “1” on them to help you remember which tool holder to use. You can use the ratchet blade, the Premium blade, the 2mm Kraft blade, the fabric blade, and the deep cut blades with the proper adapter.
- Black Adapter — Ratchet and Fabric blades, Premium blades (new style with “T” on it)
- Blue Adapter — Sketch pens
- Grey Adapter — Deep Cut and Premium blades** (old style without “T” on it)
- White Adapter — 2mm Kraft Blade
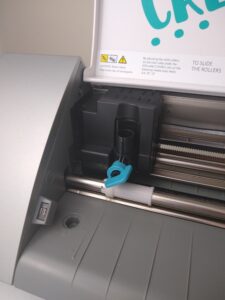
Position the blade in the adapter and close the adapter. Make sure the ridge on the blade is securely in the groove in the adapter.

Insert the holder with the adapter and blade with the “1” facing you. Just as with the autoblade, make sure the adapter is al the way down in the housing, with no gaps.
Specialty Blades including the Rotary Blade, the 3mm Kraft Blade and the Punch tool are used in the Tool 2 slot in the housing. These blades are designed to take advantage of the increased downward force available when using tool 2. These blades all have a “2” on them to help you remember which spot in the housing to use.
Cameo 3 and Portrait 2
The Cameo 3 and the Portrait 2 were also use auto blades. These blades are not the same as the autoblade for the Cameo 4 and Portrait 3 and are not interchangeable.
Just as with the Cameo 4 and Portrait 3, you need to make sure that you have the blade inserted in the housing with no gap between the blade and the housing.
You can also use a variety of other blades with the Cameo 3 and the Portrait 2. You can use the ratchet (black) blade, the fabric blade, the 2mm Kraft blade, the premium blade, and the deep cut blade in these cutters without the need for adapters.
Cameo 1, Portrait 1 and Original (SD) Cameo
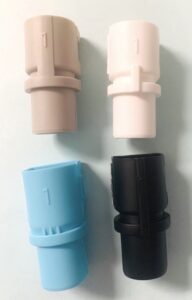
These cutters do not use auto blades or some of the specialty blades. You can use the ratchet, fabric and premium blades with these cutters. (Thanks to my friend EllyMae Habets for the photo!)
When you insert these blades, make sure to turn the fin so it locks the blade in place.
Troubleshooting Your Blade
Ok, so you have the correct blade for your machine but it is not cutting correctly. Let’s look at a few quick troubleshooting steps.
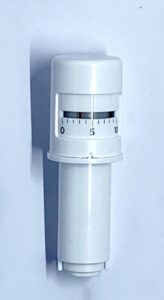
Make sure the blade is in the housing correctly. There needs to be no gap between the blade and the housing. If it is a manually adjusted blade, make sure you have remembered to adjust it to the correct depth …. I may have forgotten to do this a time or two!

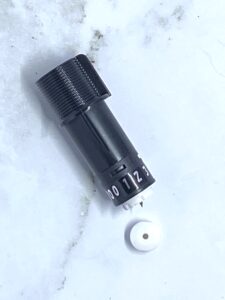
Check your blade for debris. Remove the blade from the cutter and turn it upside down. Check to be sure there is no debris on the outside of the blade. Use the Blade Adjustment tool to loosen and tighten the blade cap. (You can also use this tool when manually adjusting the blade setting on both manual and auto blades.)
Unscrew the small blade cap on the bottom of the housing and remove any debris from inside the blade housing. Once it is cleaned out, screw the blade cap back on securely. Do not over-tighten it.
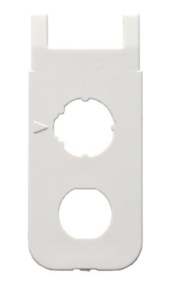
If you are using an autoblade and it is not adjusting properly, check to be sure that you have your mat inserted correctly — you do not want it to cover up the hole used by the cutter for making blade depth adjustments.
Check the settings in the software to be sure you have the correct material selected (I may have forgotten to do this once or twice!). I have found that I am having to adjust my blade depth by 1 in order to get a good cut. Check the setting using the Test Cut feature and make any adjustments necessary and then test again!

Which blade for which material?
Confused about which blade to use for which material? Here’s a list of most common materials and the recommended blade. It is by no means all inclusive, and is intended as “a good start”. Remember that not all brands are the same so you may need to make adjustments. I keep a separate blade for vinyl, glitter, paper, and fabric.
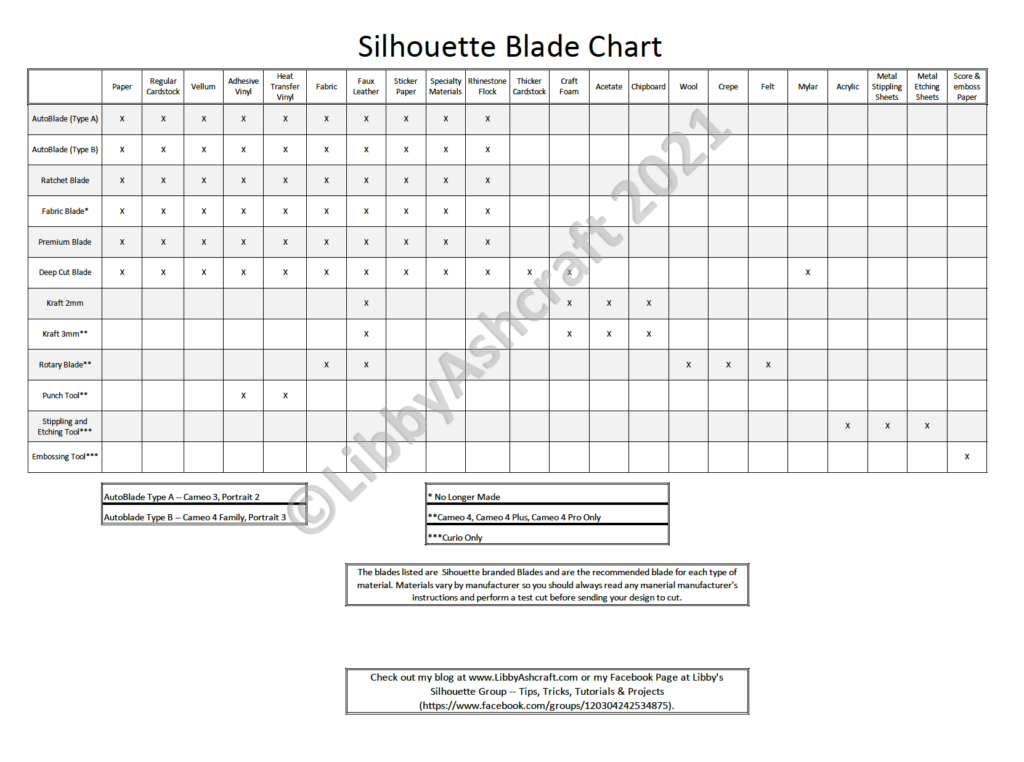
This is a holdover from my sewing life … you never cut paper with your fabric scissors!!
For a more detailed description of each blade, check out my post called Blades, Blades, and More Blades. It includes photos of each blade, the specs and recommended materials for each blade.
If you enjoyed these tips, please join my Facebook groups … Libby’s Silhouette Group — Tips, Tricks, Tutorials and Projects, Libby’s Craft and Sewing Group and Running With Sisers – Juliet and Romeo. You can also find me on FB at Libby’s Loft.com. Please join and feel free to ask questions and share your creations! I look forward to seeing you there!!
Until Next Time,
Happy Crafting!!
Disclaimer: Posts on this site may contain affiliate links. Clicking on one of these links or making purchases at linked sites does not mean you pay more for your purchases. It means I may receive a small commission on your purchase. This commission helps defray the costs of this site and enables me to continue to provide you with new and exciting content.