
In the new update (Update 1.169) to Embrilliance, there is a wonderful feature called Rotation Point! I love this feature because it opens up so many options for designing! In the previous versions, designs rotated around the center point of the design …. like there was a push pin in the center of the design that it would spin around. Now you can move the push pin to achieve exciting new looks!
The Rotation Point feature is a feature in Stitch Artist, but Embrilliance did not forget those of us who are not digitizers! There is a new object in the Alignments Library called “rot”. It is a rotation point design. Using this alignment tool allows you to set a new rotation point for objects in your design. It also gives you the ability to use the same rotation points for more than one item. Let’s give it a try!!
I downloaded a free design from the Embrilliance website that was created by the talented Lisa Shaw. The design was part of a project posted on April 23, 2020 called “Stay Strong and Stitch On“. You can find the post (and the free design) by clicking here.
Use the Rotation Point to Create a Clock Face
- Create a new workspace in Embrilliance, if necessary.
- Select Merge Stitch File from the File Menu. Locate the file called Daily Plan. Double click on the file to place it in the workspace.

- Click on the coffee cup in the workspace. The entire coffee cup and the steam are selected.
- Right click and select Copy.

- Click on the New icon in the top toolbar. A new workspace is created.
- Right click and select Paste.
- With the coffee cup selected, click in the top toolbar and change the units of measure to mm, if necessary.
- Make sure the padlock is locked. Change the height of the cup to 32mm. Press the Enterkey or the Tab key to set the size change.

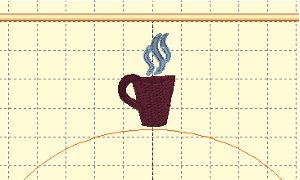
- Select Merge Working File from the File menu and locate the file called circle1.be. Double click on the file to place this file into the workspace.
- Left click and drag the coffee cup up to the top of the circle, in the 12:00 position.
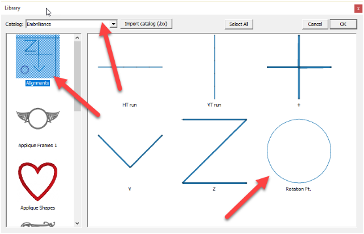
- Click on the Merge Designs icon in the top toolbar. In the Catalog dropdown, select Embrilliance.
- Click on Alignments in the left preview window. Click on the Rotation pt. icon in the right preview window. Double click on the rotation point to place it in the workspace. It is placed in the center of the design and is pretty small. Use one of the corner handles to increase the size a bit. Use the Center Designs in Hoop tool to get it back into the center of the workspace.
- Right click on the coffee cup. Select Copy.
- Right click and select Paste. The new coffee cup is placed directly on top of the original coffee cup.
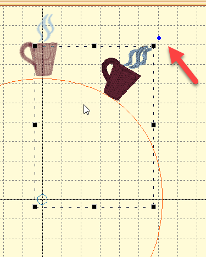
- With this coffee cup selected, hold down the CTRL key and click on the rotation point so they are both selected.
- Left click and drag the rotation handle to the right along the circle. Stop when the coffee cup is in about the 1:00 position.
- Right click and select Paste. A new coffee cup is placed on top of the original.
- With the new coffee cup selected, CTRL left click on the rotation point. Use the rotation handle to move the new coffee cup to the 2:00 position.
- Left click on the top coffee cut. Hold down the CTRL key and left click on each of the other two coffee cups.
- Use the keyboard shortcut CTRL+G to group these three items.
- Right click on the group and select Copy.
- Right click and select Paste.
- With the group selected, hold down the CTRL key and left click on the Rotation point.
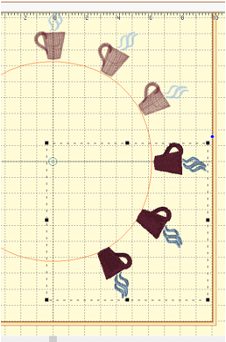
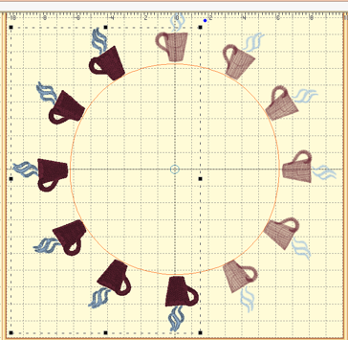
- Use the rotation handle and rotate the cups so they fill the 3:00, 4:00 and 5:00 positions.
- Right click on the group and select Copy.
- Right click and select Paste.
- With the new group selected, hold the CTRL key and select the rotation point. If you cannot select the rotation point by clicking on it in the workspace, scroll up in the Objects panel and click on it there. Be sure to hold the CTRL key when you select it.
- Use the rotation handle and rotate this group of coffee cups so it completes the rest of the group around the circle.
Add Some Text
- Click on the Create Letters icon. A text placeholder will be placed in the workspace.
- In the Properties panel, click on the Multi-Line Text icon.
- In the Text box, enter “It’s”. Press the Enter key.
- Type “Always”.
- In the font dropdown box, select the font called Dallas. (It is part of Embrilliance’s Font Collection 1.) When you select it, your text will appear in the workspace in the selected font.
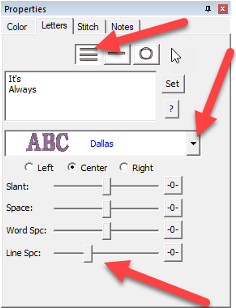
- Use the Line Space slider to decrease the space between the two lines of text.
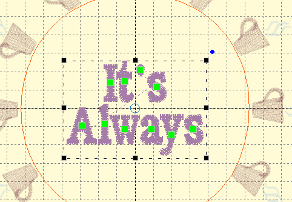
- Left click and drag the text up into the top half of the circle. If necessary, use a corner handle to adjust the size of the lettering so it fits nicely in the space.
- Right click on the text and select Copy.
- Right click and select Paste.
- In the Text box, delete the text and enter “Time”. Press Set.
- Left click and drag the text up toward the bottom of the circle.
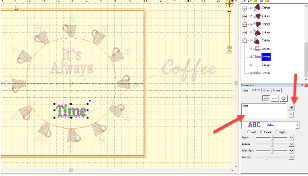
- Right click and select Paste.
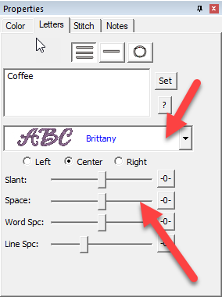
- In the text box, change the text to “Coffee”. Press Set.
- Left click and drag the text down toward the center of the circle.
- Change the font to Brittany (Also part of Font Collection 1).
- Adjust the size of the word using a corner handle.
- Adjust the space between the letters so they are touching.
Line Everything Up
- In the Objects panel, left click on the first group of letters. Hold the shift keydown and left click on the last group of letters.
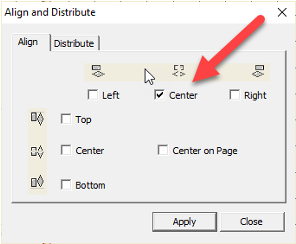
- Click on the Align and Distribute icon. Select Center in the top alignment area. Click Apply.
- Click Close.
- Use the keyboard shortcut CTRL+G to group the words together.
- In the Objects Panel, click on the bottom coffee cup. Hold the shift key and click on the coffee cup underneath the rotation point. Hold the CTRL key and click on the first coffee cup.
- Use the CTRL+G keyboard shortcut to group the coffee cups.
- With the coffee cup group selected, hold the CTRL key and click on the word group in the workspace.
- Click on the Center Designs in Hoop icon.
- Click on the Circle element in the Objects Panel.
- Press the Delete key on the keyboard.
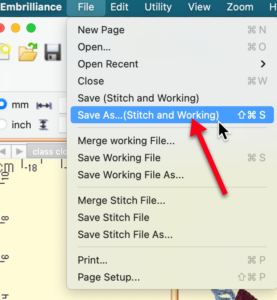
- Select Save As (Stitch and Working) from the File menu. This will save your stitch file and also the .be file that is the working file. Saving the working file will allow you to open the file and make changes to the design, if needed.
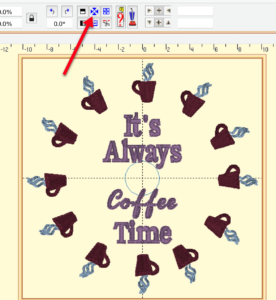
And that’s it … here’s your finished clock face! So quick and easy!!

I hope you enjoyed this tutorial … check back for more projects!
If you enjoyed these tips, please join my Facebook groups … Libby’s Silhouette Group — Tips, Tricks, Tutorials and Projects, Libby’s Craft and Sewing Group and Running With Sisers – Juliet and Romeo. You can also find me on FB at Libby’s Loft.com. Please join and feel free to ask questions and share your creations! I look forward to seeing you there!!
Until Next Time,
Happy Crafting!!
Disclaimer: Posts on this site may contain affiliate links. Clicking on one of these links or making purchases at linked sites does not mean you pay more for your purchases. It means I may receive a small commission on your purchase. This commission helps defray the costs of this site and enables me to continue to provide you with new and exciting content.