 We all love those “special” characters (a.k.a. glyphs) that make our text look so great. But how do you access them in Silhouette Studio?
Using Silhouette Studio Designer Edition (or DE+ or Business Edition)
I will tell you that the easiest way to access these characters is to upgrade the Basic Silhouette Studio to at least Designer Edition. This will give you quick easy access to these characters in the Glyphs tab of the Text Style Box.
-
- Start from scratch:
- Click on the Text tool and then click in the design space to open a text box.
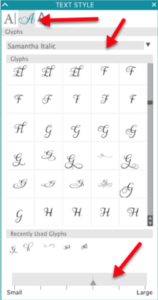
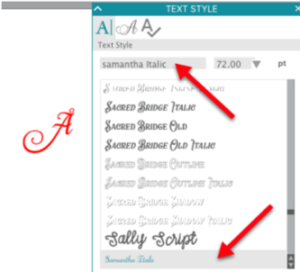
- Click on the Text Style box on the right side of the screen. Click on the second tab, the Glyphs tab.
- Make sure that the font you want to use is selected. Scroll down in the Glyphs box and locate the letter you wish to use. Click on the letter and it will be inserted in your text box. You can continue in this way until you have all the special characters added.
- Start with a word already in the workspace.
- Start from scratch:
- Highlight the letter you wish to change.
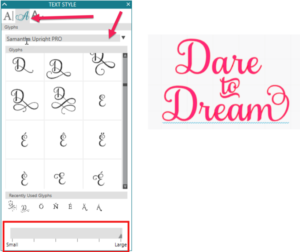
- Click on the Glyphs tab in the Text Style box.
- Make sure your font is selected in the font dropdown. Scroll down and locate the letter you wish to insert. Click on the letter to insert it in your word.
Using a Mac and Silhouette Studio Basic Edition
If you have a Mac and the basic edition of Silhouette Studio, you can still access the glyphs and other special characters in a font.
- Open the application called Font Book on your Mac.
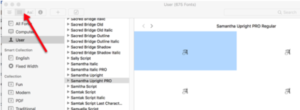
- Scroll down and locate the font you want to use.
- Click on the second icon at the top so that the individual letters are displayed in the preview window.
- Scroll down the right side of the Preview Window and locate the letter you want to use. Click on the letter to select it. Use CMD-C to copy the letter.
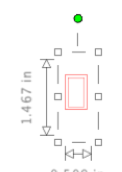
- Return to Silhouette Studio. Use CMD-P to paste the letter into the workspace. If you have not already selected the font, you will see a box instead of the letter.
- With the “letter” selected, click on the Text Style icon. Select the font you want to use and the letter should change to l
 ook like the letter in Font book.
 - Continue locating the individual letters and using Copy/Paste to place all the letters in your Silhouette Studio workspace.
Using a PC and Silhouette Studio Basic Edition
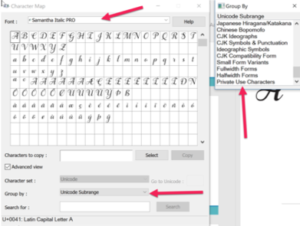 Open the application called Character Map on your PC.
- Select the font you want to use from the dropdown list.
- Select Unicode Subrange from the Group By dropdown.
- In the flyout window, scroll down and select Private Use Characters to see all the
 additional characters.
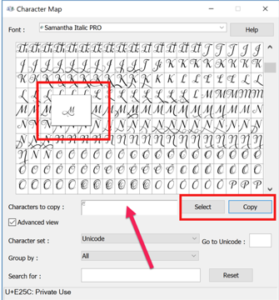
 - Scroll down and locate the letter(s) you wish to use.
- Click on the letter and a box will display the letter.
- Click on Select and the letter is placed in the Characters to Copy box.
- When you have all the characters you want to use, click Copy.
 Open Silhouette software.
- Paste the special characters into place.
- You can work with one letter at a time or several letters at once.
More options
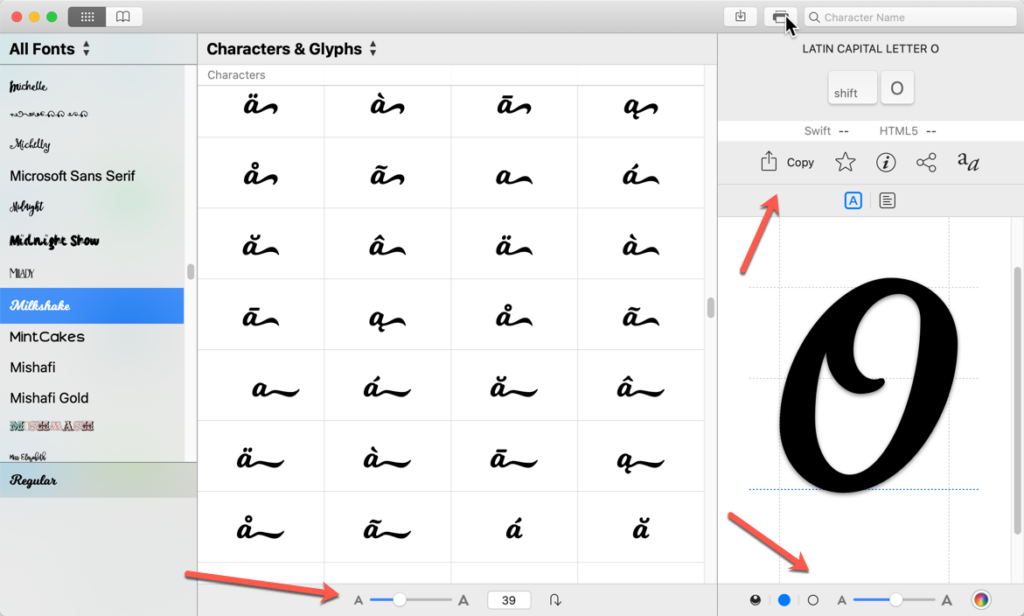
Ultra Character Map is a great program available for the Mac that has more features than Font Book. It’s great because I can access all my fonts and increase the size of the display of the group of fonts on the left and the individual characters on the right. I can select the individual letters and copy and paste them into Silhouette Studio.
Nexus Font is a similar program available for the PC that will allow you to see your text in the font you select before you copy and paste. It also lets you copy and paste letters to use in your Silhouette software. I can see exactly how my text will look in all the fonts installed on my computer.
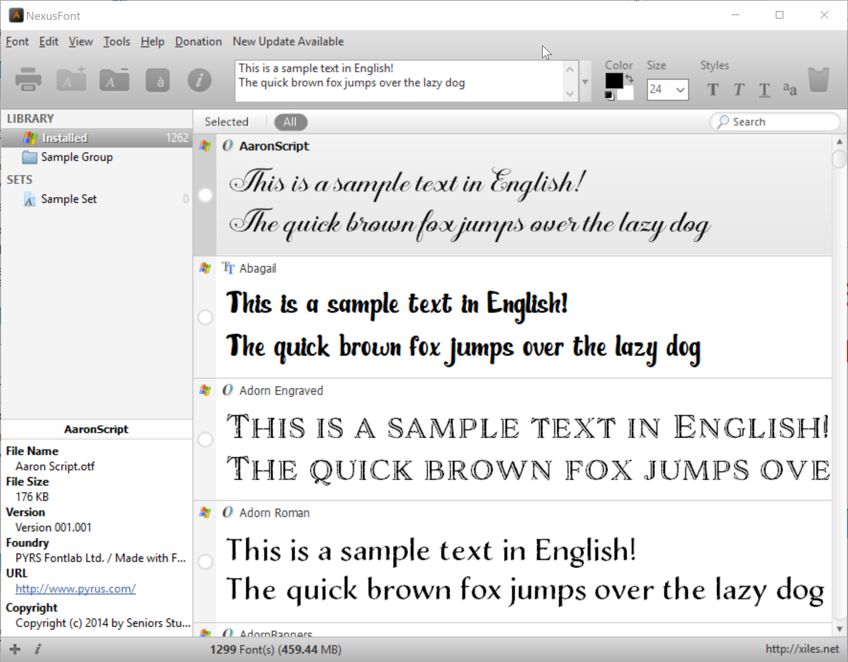
If you click on the CharMap icon in the top toolbar, you will see a window similar to the Windows Character Map window. You can increase the size of the window, which will make the thumbnails of the letters larger. Also when you click on a letter, it shows a larger preview on the right side of the window. If the preview is the character you want to use, click Select. Continue selecting characters until you have all you want and then select Copy. You can now paste these characters into your Silhouette Studio.

Working with special characters adds so much variety and dimension to your text … hope you enjoy using glyphs and characters in your designs!
If you enjoyed these tips, please join my Facebook groups … Libby’s Silhouette Group — Tips, Tricks, Tutorials and Projects, Libby’s Craft and Sewing Group and Running With Sisers – Juliet and Romeo. You can also find me on FB at Libby’s Loft.com. Please join and feel free to ask questions and share your creations! I look forward to seeing you there!!
Until Next Time,
Happy Crafting!!
Disclaimer: Posts on this site may contain affiliate links. Clicking on one of these links or making purchases at linked sites does not mean you pay more for your purchases. It means I may receive a small commission on your purchase. This commission helps defray the costs of this site and enables me to continue to provide you with new and exciting content.
Until next time,
Happy Crafting!