BMP, JPG, GIF, PNG, TIFF, RAW, CDR AI, EPS, SVG, FCM, Raster, Vector… it’s all part of the file extension alphabet soup! Let’s take a look at what all those extensions mean and how we can use them.
Raster Files
Raster images are composed of horizontal and vertical rows of pixels, similar to a cross-stitch grid. The quality of these images diminishes when they are sized — they can become grainy or distorted, aka “pixelated”. Raster images do not contain cut lines — they have to be traced to create cut lines for use with your electronic cutter.
These are the some of the most common types of raster images and how they are normally to be used:
- JPG – web and print photos and quick previews
- GIF – animation and limited color transparency
- PNG – transparency with millions of colors
- TIFF – high quality print graphics and scans
- RAW – unprocessed data from digital camera
- PSD – layered Photoshop document
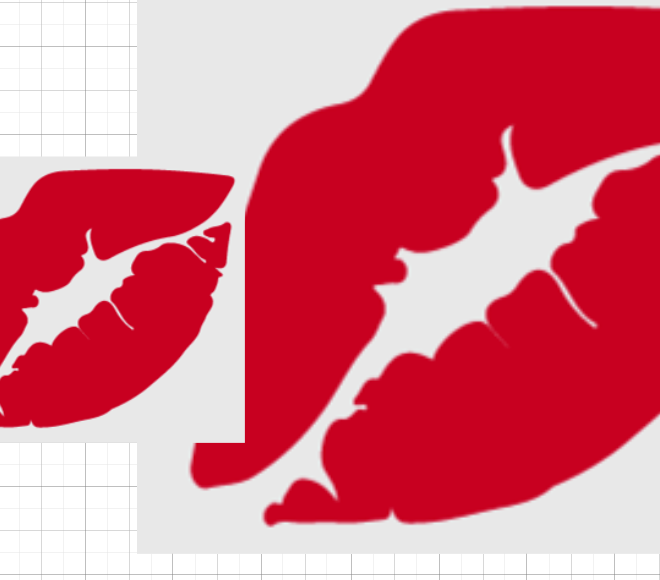
Here’s a pair of lips in a PNG file. The lines look clean and crisp.

Now here are the same lips when I zoom in to get a close look at the lines. The lines are jagged … in that grid kind of format I mentioned earlier.

Let’s take a look a this image in Silhouette Studio. If I want to use this image as a print and cut, I do not have to trace it — I can just use File>Open or File>Merge to bring the image into the workspace. If I want to use it as a cut file, I will have to trace it to create the cut lines. Let’s look at it as a print and cut first. The image on the left is the original size and the one on the right has been increased 200%. You can see the jagged lines in both images.
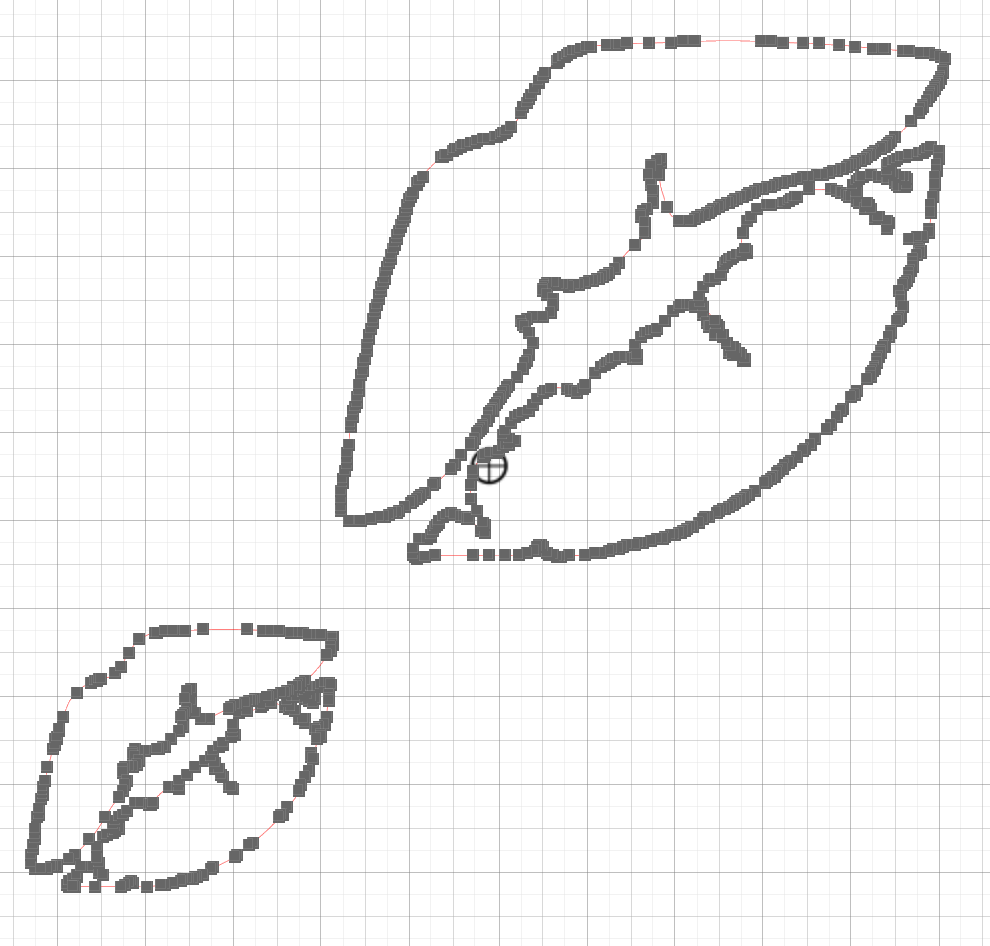
When I trace the images, they both appear to have pretty straight lines but when you look at the images in the point editing mode, you can see how many nodes were created when these images were traced. When you send your design to cut, the blade will use each of these points — this is why the design may cut slower or why it may sound like it is jammed.
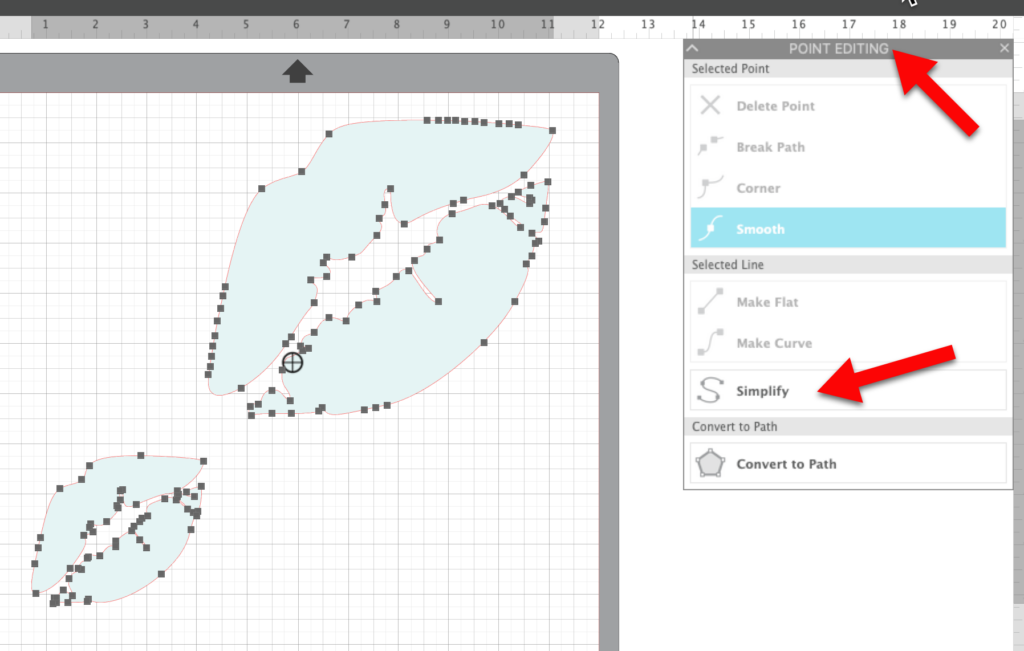
In Silhouette Studio, you can use the Simplify command in the Edit Points panel to try to reduce the number of points without having to manually remove them. Sometimes using the Simplify command several times can produce good results without damaging the shape of the design. I used the Simplify command four times and you can see the number of nodes has been significantly reduced. Unfortunately, Studio is the only software that has the Simplify command as of this writing. In CanvasWorkspace you have to select and remove the extra nodes manually.
The file l used was a PNG, but you would get similar results with any of the raster formats mentioned above. You can see how working with files that start as rasters can be less than optimal. Tracing is a great tool but sometimes the work to clean up a traced file can take a lot of time.
Many raster files also have a background. This can cause problems for you as you layer objects in your workspace. This shows as a white (usually) box around your image. PNG files can be saved with a transparent background. This means that only the area right around the image has any color. Files with a background can also b e more difficult to trace, especially if there is not a clear color difference between the background and the image. So always try to get a PNG with a transparent background if possible.
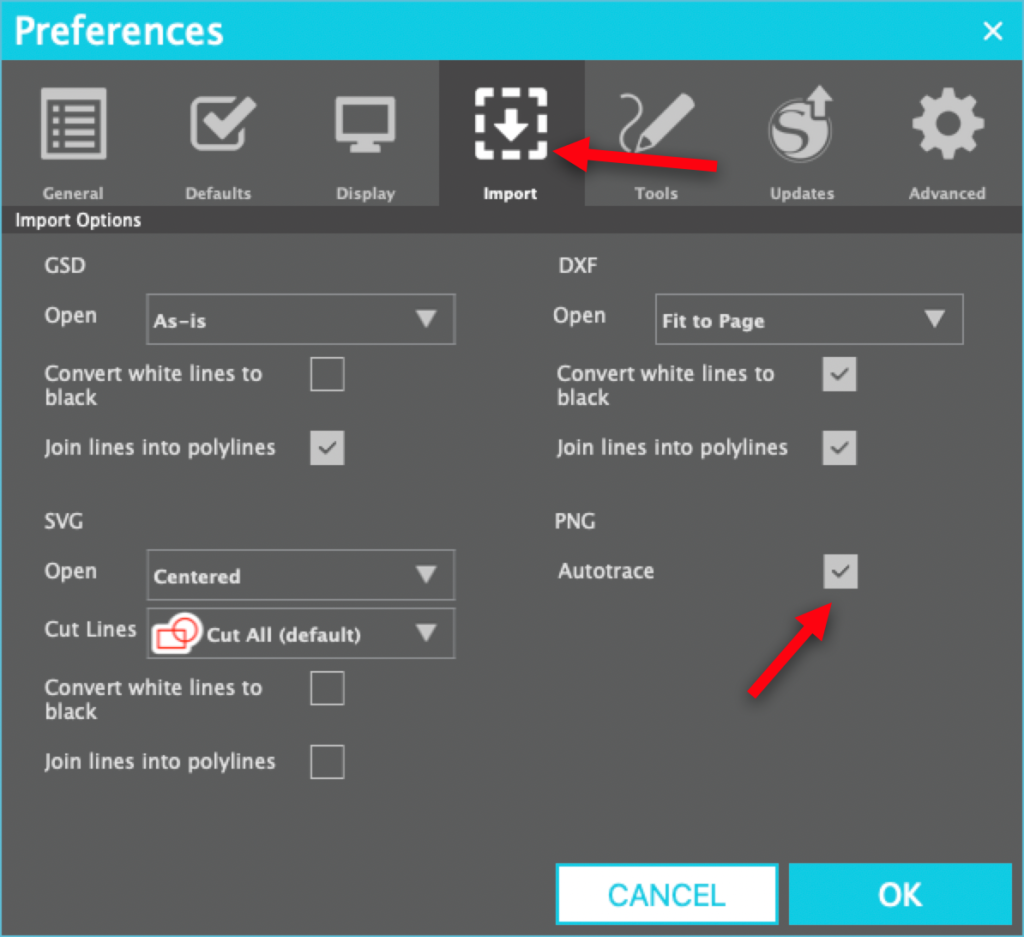
PNG AutoTrace
Beginning in version 4.2 of Silhouette Studio, you can turn off a feature in the settings called PNG Autotrace. This features allows the software to automatically trace a transparent background when you open it.
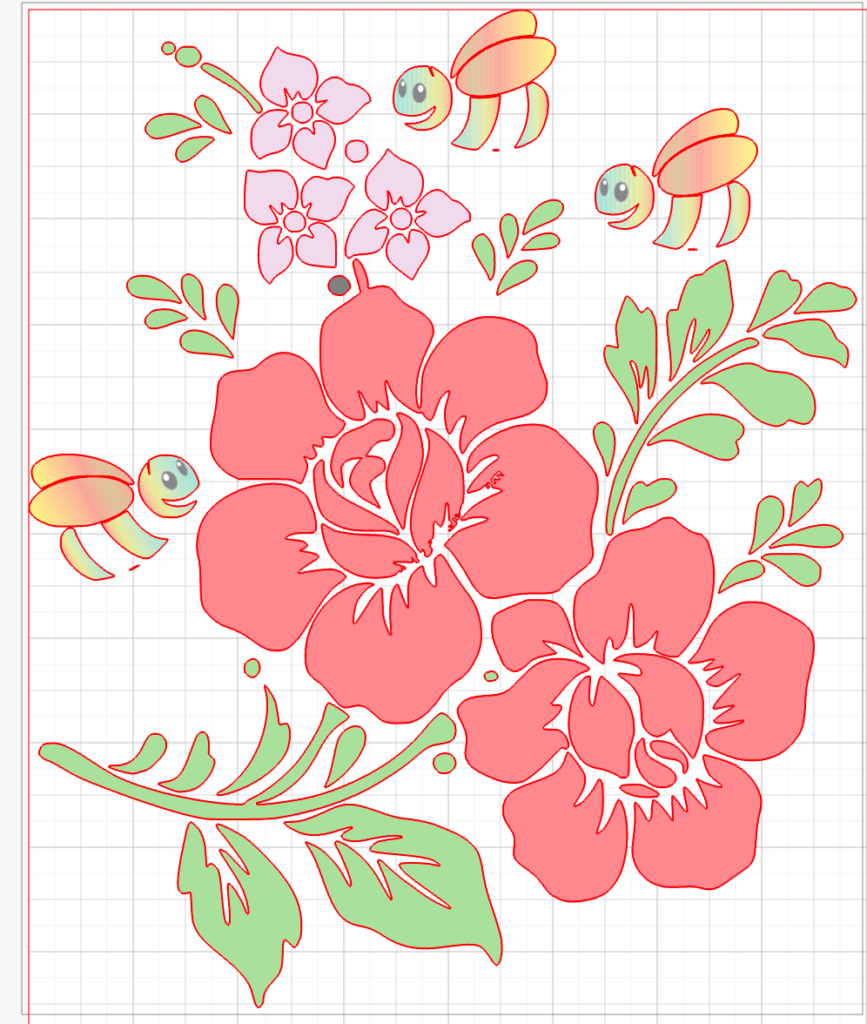
Here you can see the red cut lines that were automatically created when I opened this design.
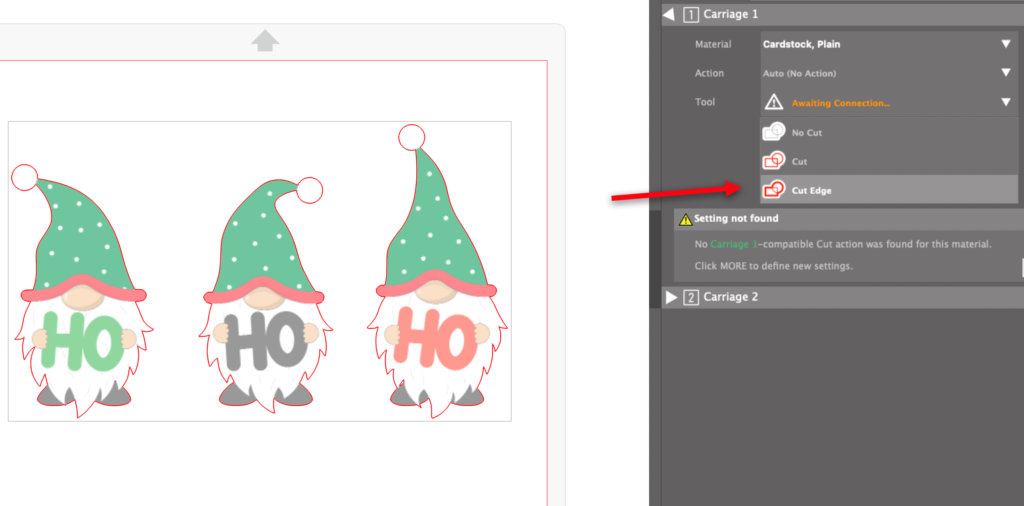
In early versions of this feature, you needed to check your image to be sure exactly what was traced. Often the software traced lines within a design. If you want to cut each part of the design individually, that works great. If you are tracing the PNG for a print and cut, then you only want the edge of the shape to be traced. You will want to check this in the Send panel before you send your design to cut. If necessary, select Cut Edge so only the outside of the shape is cut.
A word of warning — using the AutoTrace feature with very complex images can take a long time, or even cause your software to close. How well the AutoTrace feature works for you will depend on the size of the design and the amount of RAM and processor speed of your computer. For this reason, I usually only turn this feature on when I need it.
Vector Files
Vector files are made up of paths, shapes and objects that are created by programs like Adobe Illustrator, CorelDraw and even Silhouette Studio & CanvasWorkspace. This means that when you change the size of the image, it recalculates so you get a nice smooth clean line — every time!
These are some of the most commonly used vector files:
- CDR — created using CorelDraw (Open with Silhouette Studio Business Edition)12
- AI — created using Adobe Illustrator (Open with Silhouette Studio Business Edition)
- SVG — Scalable Vector graphic created by programs like CorelDraw, Adobe Illustrator, Silhouette Studio (Open with Silhouette Studio Designer Edition and above)
- DXF — used by AutoCad and Silhouette Studio Basic edition and above
- GSD — used by Craft Robo
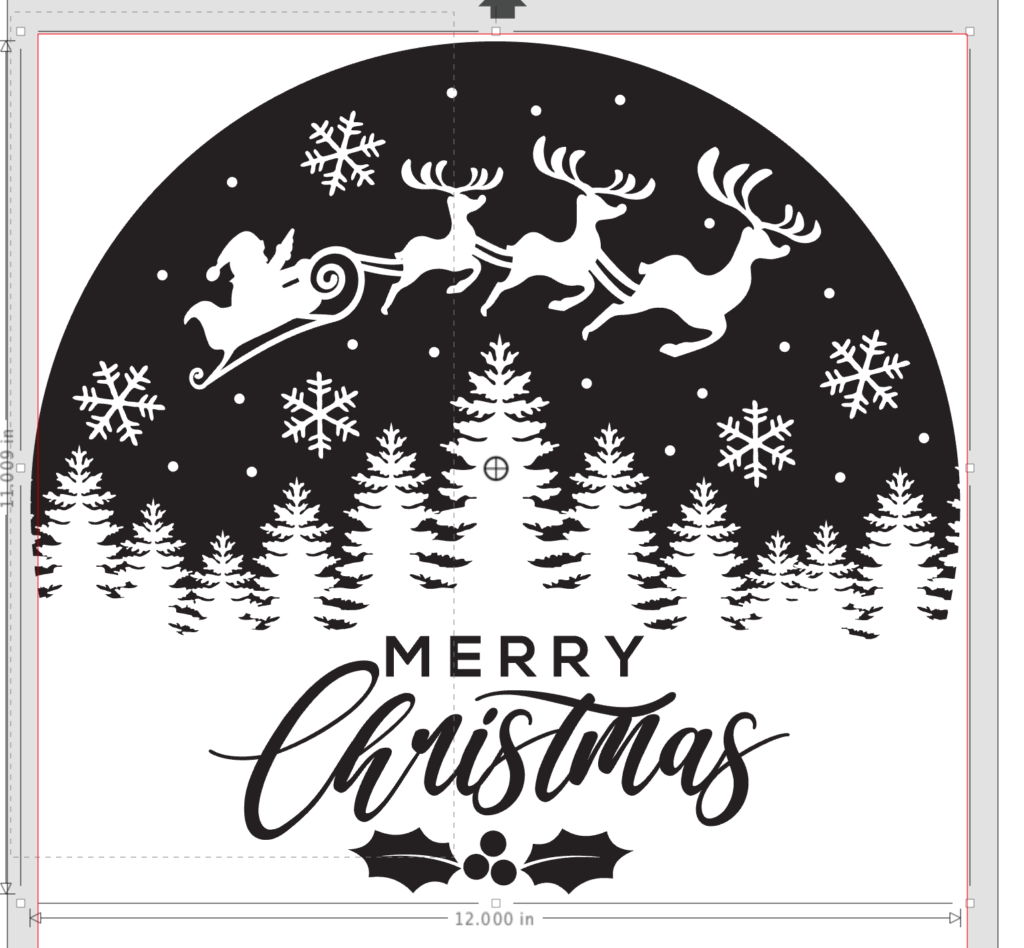
Vector files are usually cut ready. This means they do not have to be traced. When you import the vector file into your software, the cut lines are already there. Unlike raster images, vector files do not conform to a grid so they do not pixelate. Here’s an example of a vector file. This file is 3.3″ x 3.6″ when I open it in my software.

Now here’s the same design when I enlarge it. I enlarged it to 11″x12″. There is no pixelation.
And when I zoom in even farther, you can see that the image is still not pixelated.
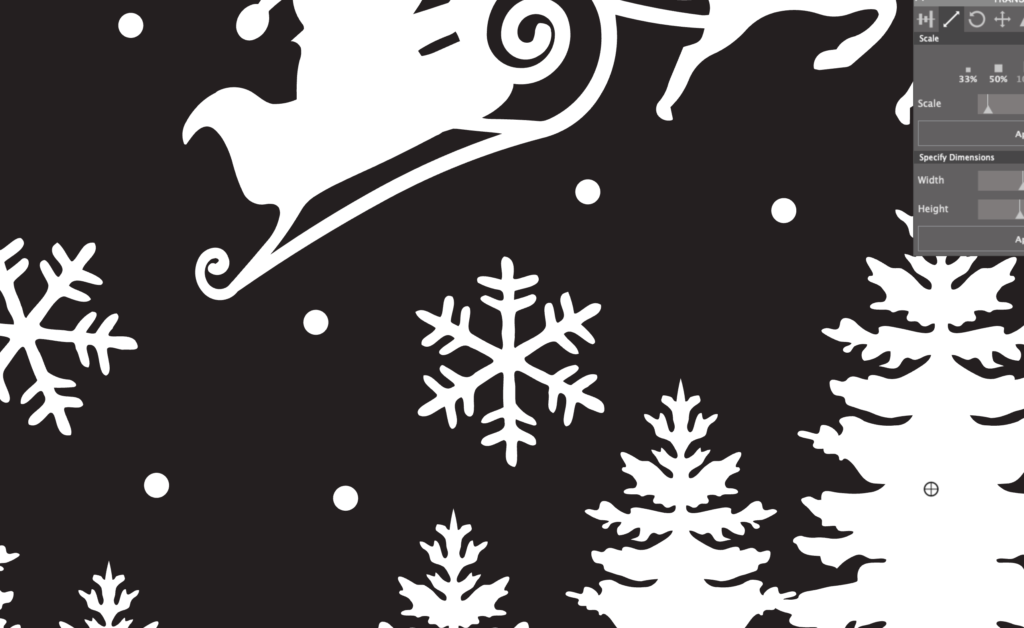
Additionally, the file is much more simple than the raster image we looked at earlier.

Embroidery Designs
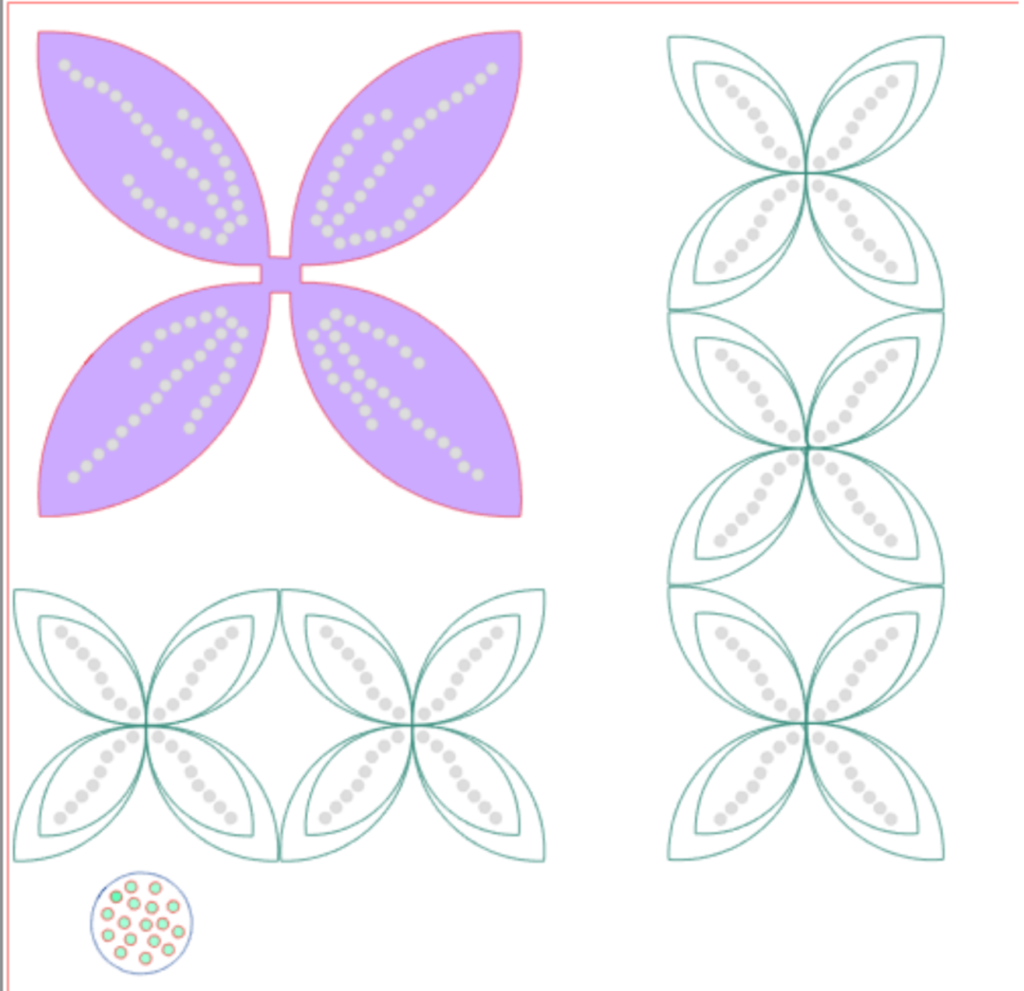
If you have Designer Edition Plus or Business Edition of Silhouette Studio, you can open some embroidery files. File formats you can open include: PES, DST, EXP, JEF, and XXX. Opening embroidery designs will allow you to isolate placement lines for machine embroidered appliqué. You can also use the embroidery files as a backdrop for adding embellishments like rhinestones.
Here I used the file as a backdrop and added rhinestones to the design. You can see how I did this by clicking here.
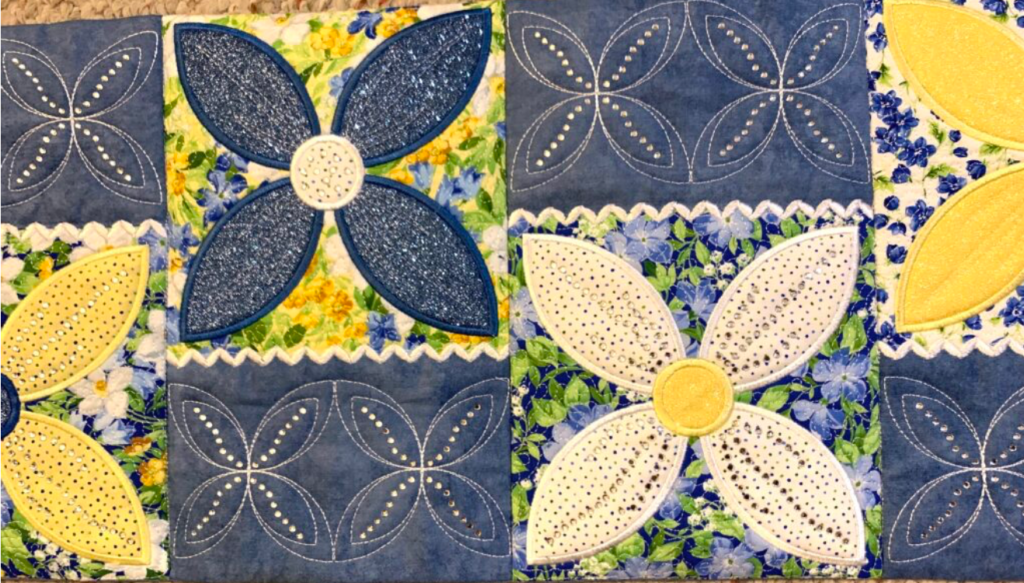
Here’s what the design looked like when I stitched it out. I also used the embroidery design to create cut files for some of the petals. Here is the tutorial for adding rhinestones to these designs.
Hopefully this ill help you through the “alphabet soup” that is file types so you can decide which file to use to achieve the best results in each situation.
If you enjoyed these tips, please join my Facebook groups … Libby’s Silhouette Group — Tips, Tricks, Tutorials and Projects, Libby’s Craft and Sewing Group and Running With Sisers – Juliet and Romeo. You can also find me on FB at Libby’s Loft.com. Please join and feel free to ask questions and share your creations! I look forward to seeing you there!!
Until Next Time,
Happy Crafting!!
Disclaimer: Posts on this site may contain affiliate links. Clicking on one of these links or making purchases at linked sites does not mean you pay more for your purchases. It means I may receive a small commission on your purchase. This commission helps defray the costs of this site and enables me to continue to provide you with new and exciting content.
Until Next Time,
Happy Crafting
Disclaimer: Posts on this site may contain affiliate links. Clicking on one of these links or making purchases at linked sites does not mean you pay more for your purchases. It means I may receive a small commission on your purchase. This commission helps defray the costs of this site and enables me to continue to provide you with new and exciting content.