Recently a friend asked me to put initials wine glasses for the bridesmaids in her daughter’s wedding! I knew I could use conical warp to get the initials straight on the wine glasses so, of course, I said yes!
Posts in this post may contain affiliate links. Clicking on these clinks does not mean you will pay more for the product — it just means I may receive a small commission if you make a purchase.
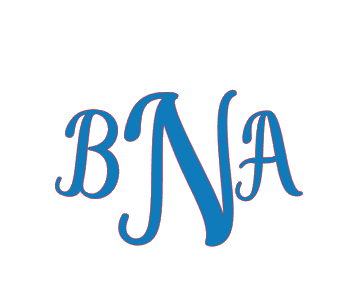
Conical warp is an awesome feature that allows you to edit a design going on a curved object so it looks straight. You will need to upgrade your Silhouette Studio software to at least Designer Edition Plus or Business Edition to get this feature, but it is well worth it! You can learn all about the specifics of conical warp in this post. I started by selecting a font for the monograms — this took me a long time because I can never make up my mind, can you? Anyway, I finally selected Galistan font from the Silhouette Store and entered the letters for the first and middle names. I included several spaces between the letters to allow for the larger last name initial to be added in just a minute.

Now I added the initial for the last name. I used the scale icon in the lower right corner to increase the size so it looked good with the first two initials. I moved it into place to check for sizing.
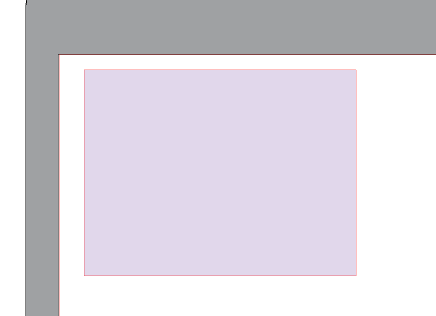
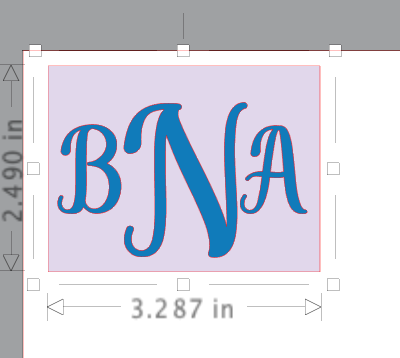
Once I had the letters placed in a pleasing manner, I was ready to size them to fit the wine glass. First I added a box using the draw tools. I used the scale handle to resize the box so it was about 2.5″ tall and about 3.3″ wide. The design space on my wine glass is about 3.0″ tall and a little over 3″ wide. Having this box as a reference will help me get the initials the right size. I selected the three letters and grouped them together using CTRL/CMD+G and scaled them so they fit in the box.
Because I created the box after I created the letters, it is on top of the letters. This is why I added color to the box, so I could see which item was on top. To fix this, I selected the box and right clicked. I selected Send to Back and the initials were now on top of the box. Again, I used the scale handle to size the letters so they would fit nicely inside the box (and on my wine glass).
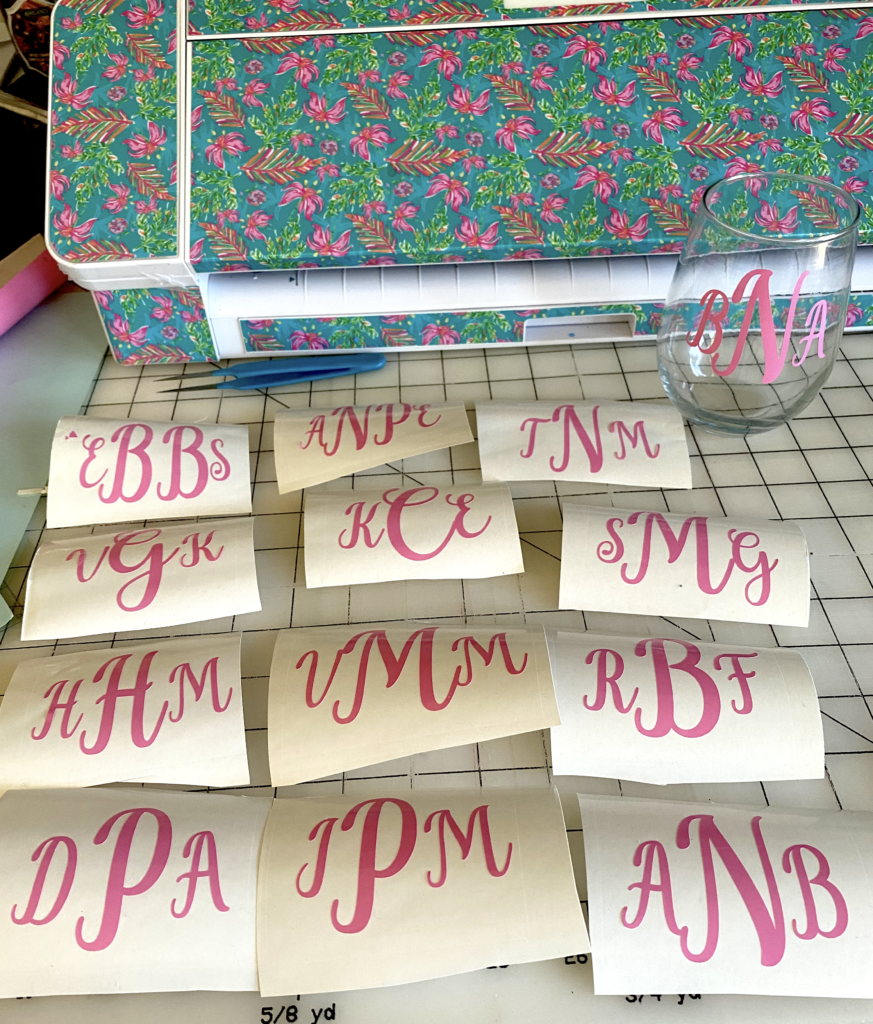
Next, I copies the letters because I knew I had to create 12 more sets of initials. I placed the extra set of initials off to the side to use in the next steps. I also moved the box to the side because I only need it for sizing purposes right now.
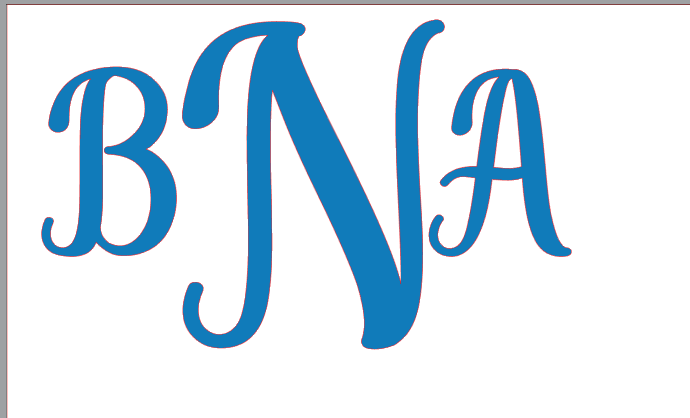
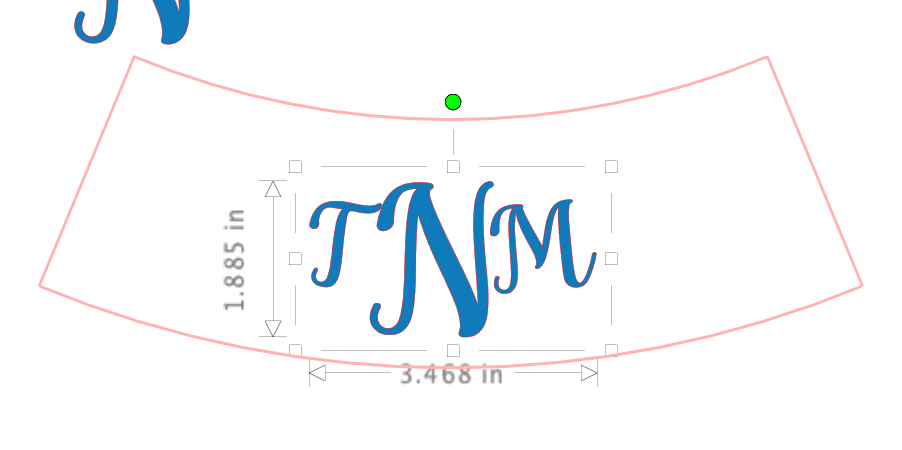
Before I could use the conical warp, I had to convert the letters to a path. I did this by right clicking and selecting Convert to Path. The next step is to use conical warp to slightly warp the initials so they that when they are applied to the glass, they will be straight. I moved the initials down toward the center of the workspace and I clicked on the Warp panel icon in the right toolbar and selected the third tab, conical warp.
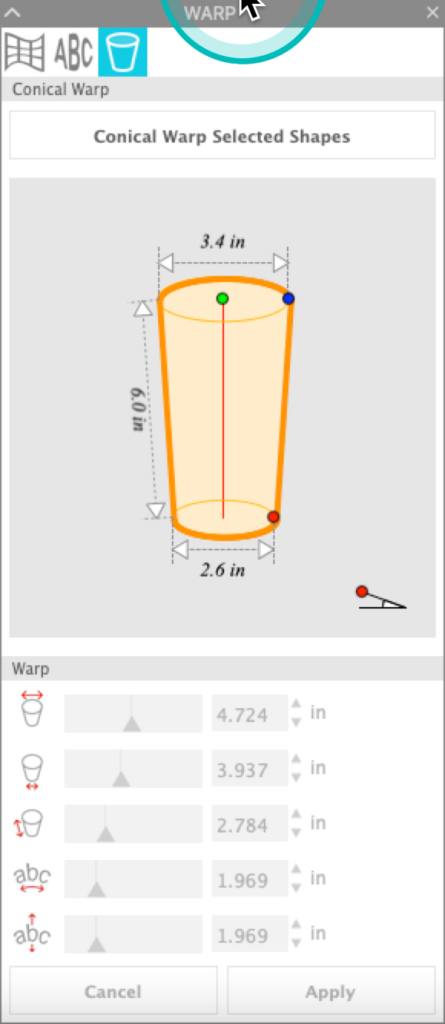
With the initials selected, I clicked on Conical Warp Selected Objects. A red shape is placed around the initials representing the default shape. Now you see why I moved the initials to the middle of the screen.
The next step was to verify the measurements of my cup and enter the dimensions in the appropriate spot in the lower part of the panel. You can set the measurements by entering them in the box or using the up/down arrows to size them. As you enter each dimension and press the tab key, the red box around the initials changes as does the preview photo in the Warp panel.
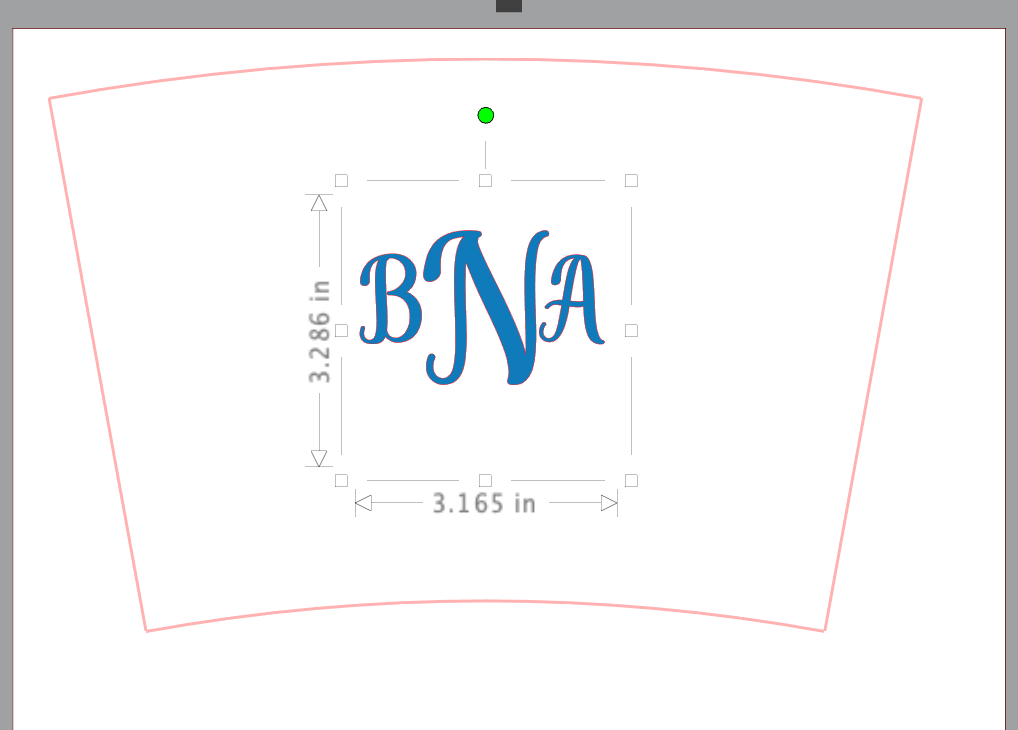
The final thing I did was check the spacing of the design in the red box to be sure it was placed approximately where I wanted it. You can change the vertical spacing of the initials using the last control in the conical warp panel. Use either the up/down arrows or the slider to see the initials move up and down. When everything is right, click Apply. The letters will be warped. Use Ctrl/CMD+G to group the letters again.
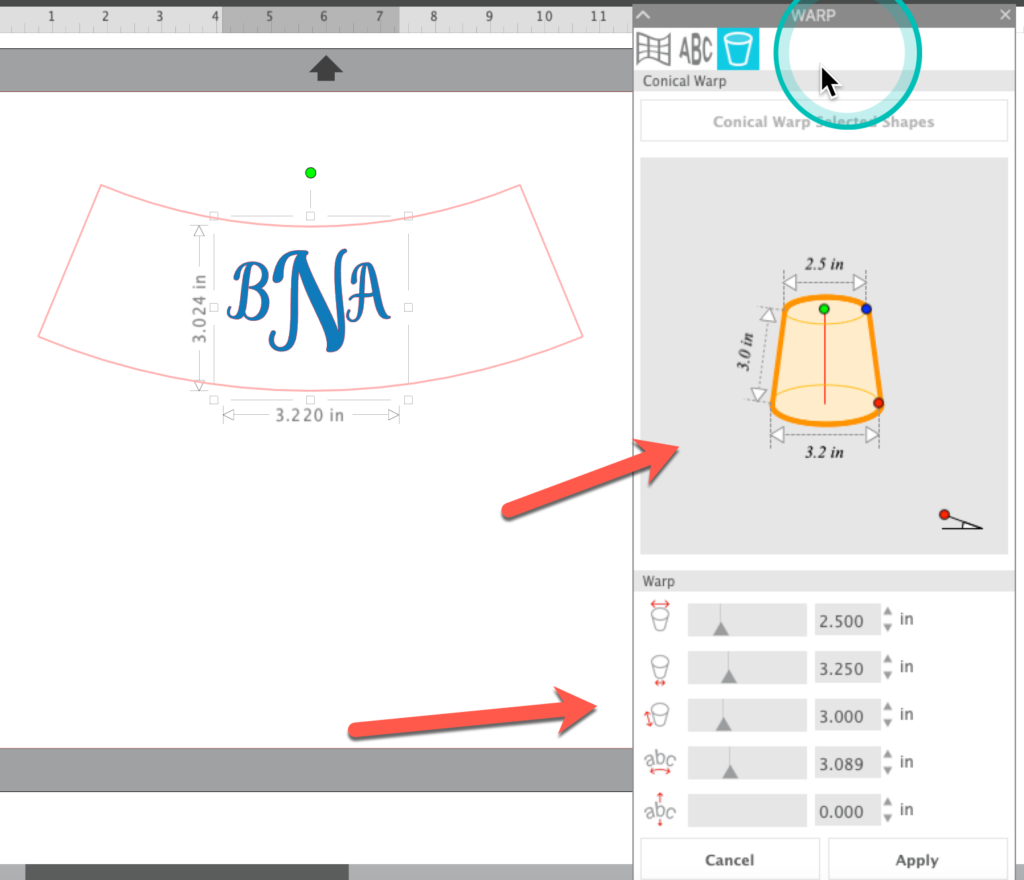
I moved this set of letters up to the top of my workspace. I selected the extra set of initials I made earlier and used CTRL/CMD+C to copy them. I then pasted them into the workspace. I ungrouped the letters and double clicked on the smaller initials and entered the new initials. I repeated this for the larger initial (if needed). I converted them to a path and then clicked on the Conical Warp Selected Object button in the Warp panel. I reentered the measurements. In this case, I needed to adjust the placement in the warp template.
I used the slider to move the initials up a little in the template and pressed Apply. With the letters still selected, I grouped them and moved them up in the workspace next to the first set of letters.
I completed this process for all the sets of initials. I then moved the square I created to size the monogram back into the workspace. I made sure it was behind the first set of initials. Then I copied and pasted it into the workspace and moved it to cover the second set of initials. I selected it, right clicked and selected Send to Back. I then adjusted the size of the box so the entire monogram was in the box. I am going to use the box as a weeding box so needed to be sure it did not cover the initials.

I repeated the steps until I had all the initials created and a weeding box behind them.
I was ready to cut the vinyl. I clicked on the send tab and checked to be sure that all the initials and the weeding boxes would be cut. I selected Vinyl Glossy as my medium and was ready to perform my test cut.
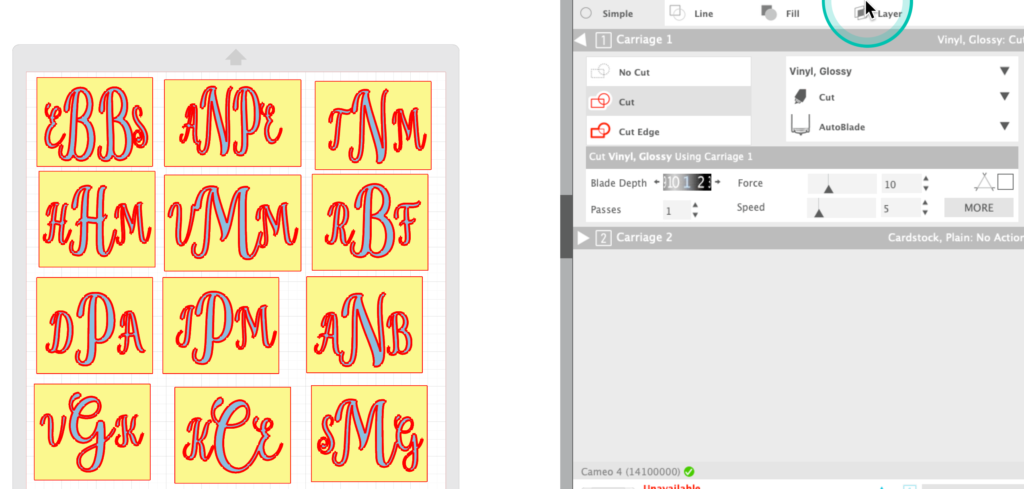
I performed a test cut, checking the cut to make sure it cut through the vinyl but not through the backing. I also checked to be sure that the cut was not so deep that it left an impression in the backing – that can make the vinyl more difficult to weed. Because I was using a Cameo 4, I knew I needed to adjust the blade depth by 1, so I did that before I performed my test cut. The test was good so I cut the vinyl.
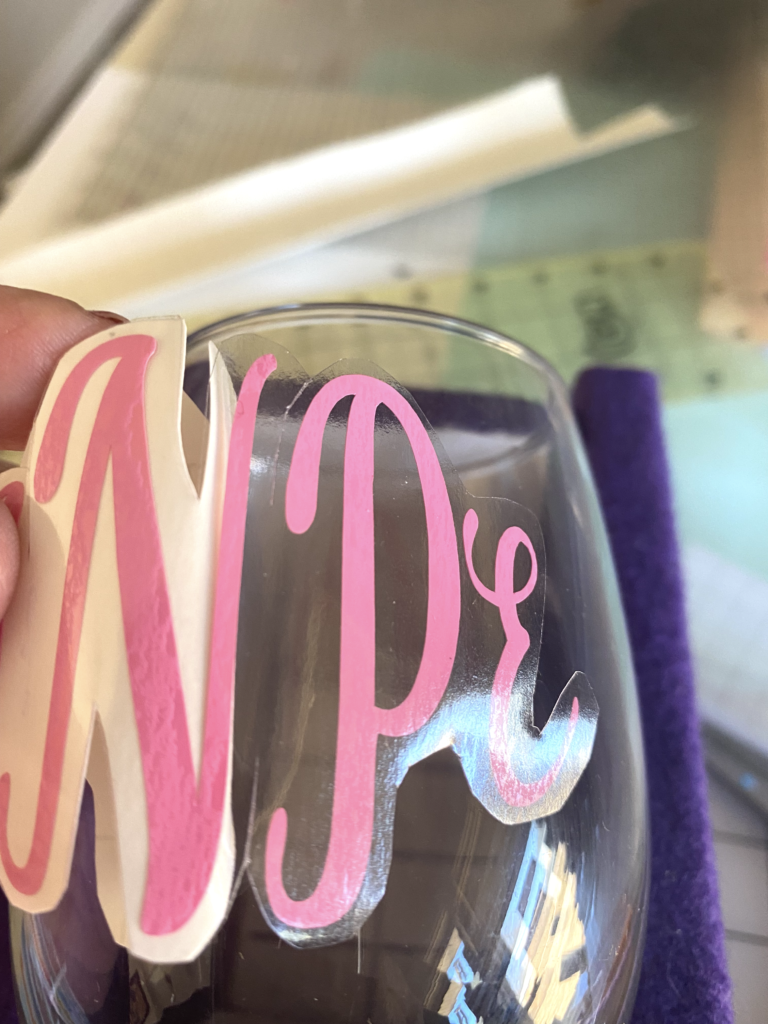
I placed transfer tape on a set of initials and trimmed around the initials getting close to them. I also cut down between the initials to make it easier to place them on the conical wine glass.
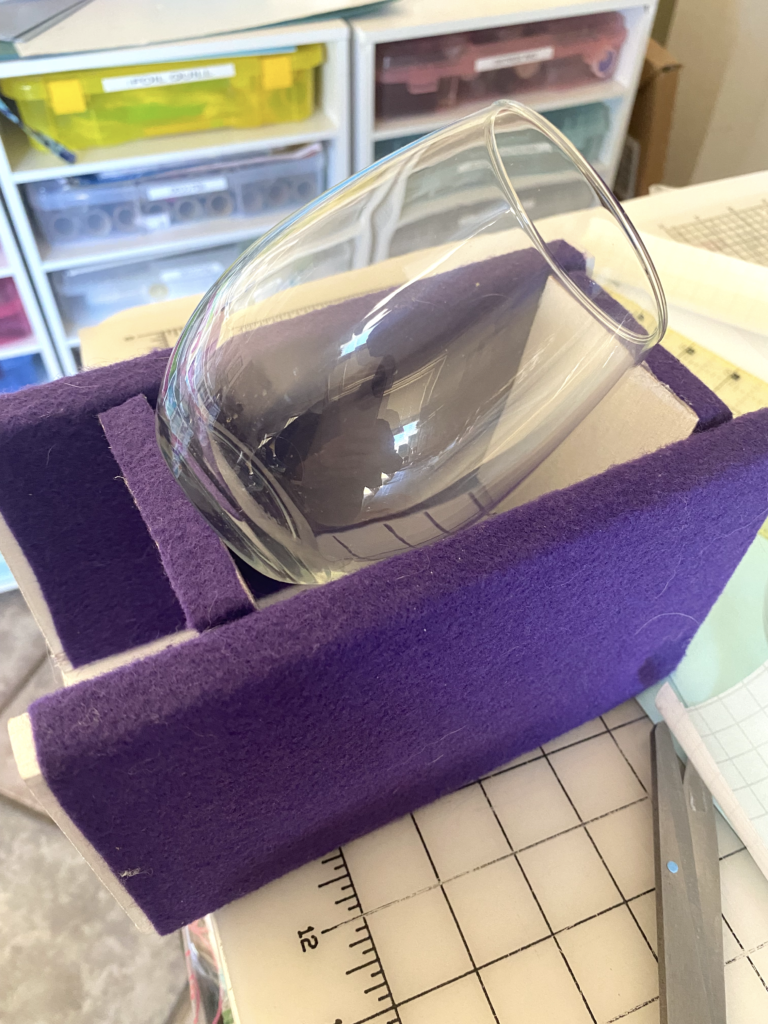
I have a cradle to place my glasses in to make it easier to place vinyl on them. I purchased it many years ago and it has served me well. It holds the glass still so it does not slip. I have also made them out of pool noodles (but that’s a story for another day).
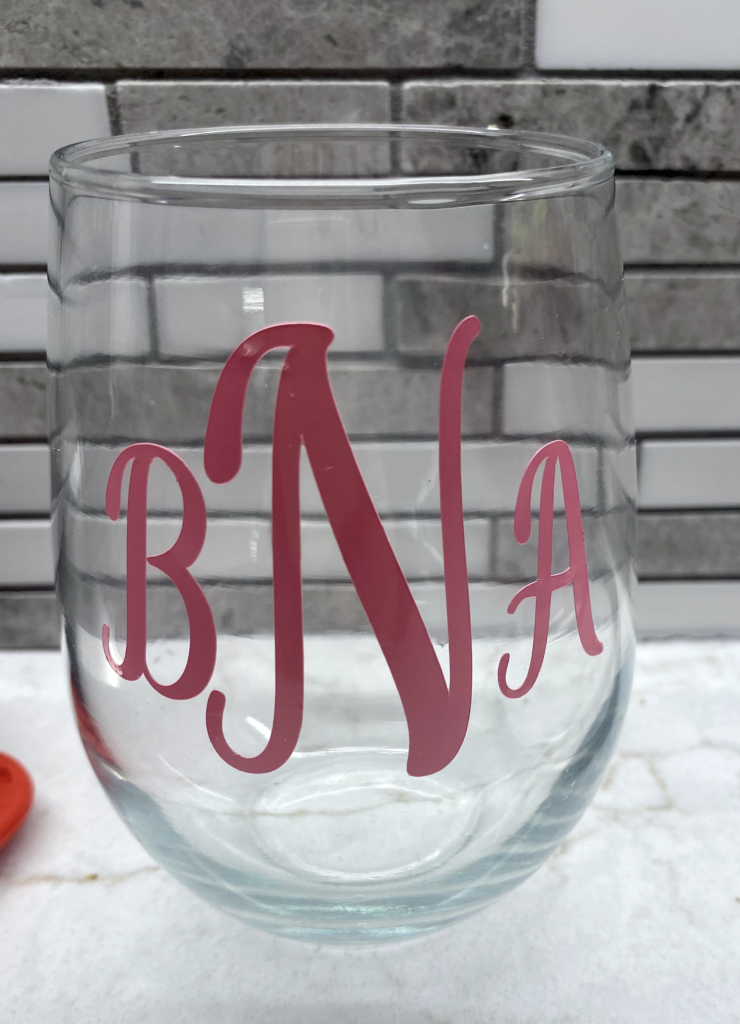
I removed the backing for the monogram and centered it over the glass. Starting in the middle, I adhered the monogram to the middle and then went to one side, pressing securely to adhere the vinyl to the glass. Having the slits in the transfer tape made it easier to get the vinyl onto the glass with no bubbles or wrinkles.
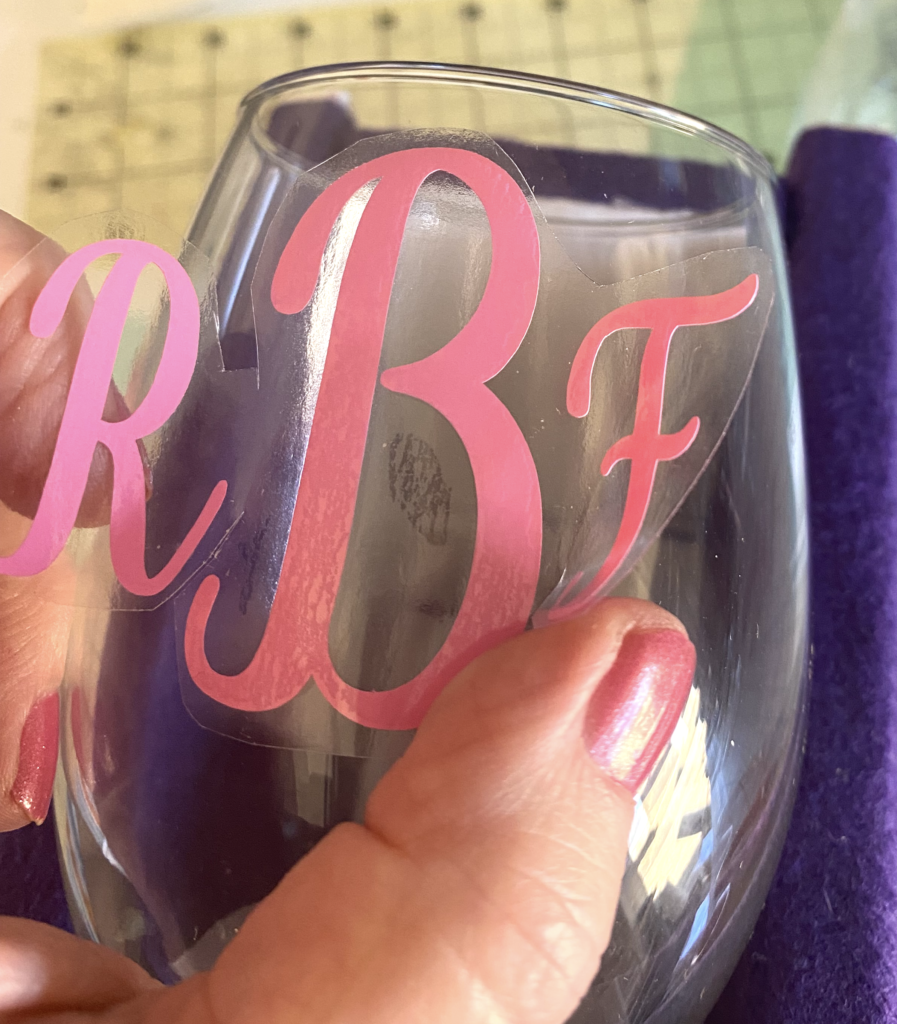
If uncovering the entire backing makes you a little nervous, you can also remove the backing from one side of the monogram and adhere it to the glass and then remove the other side.
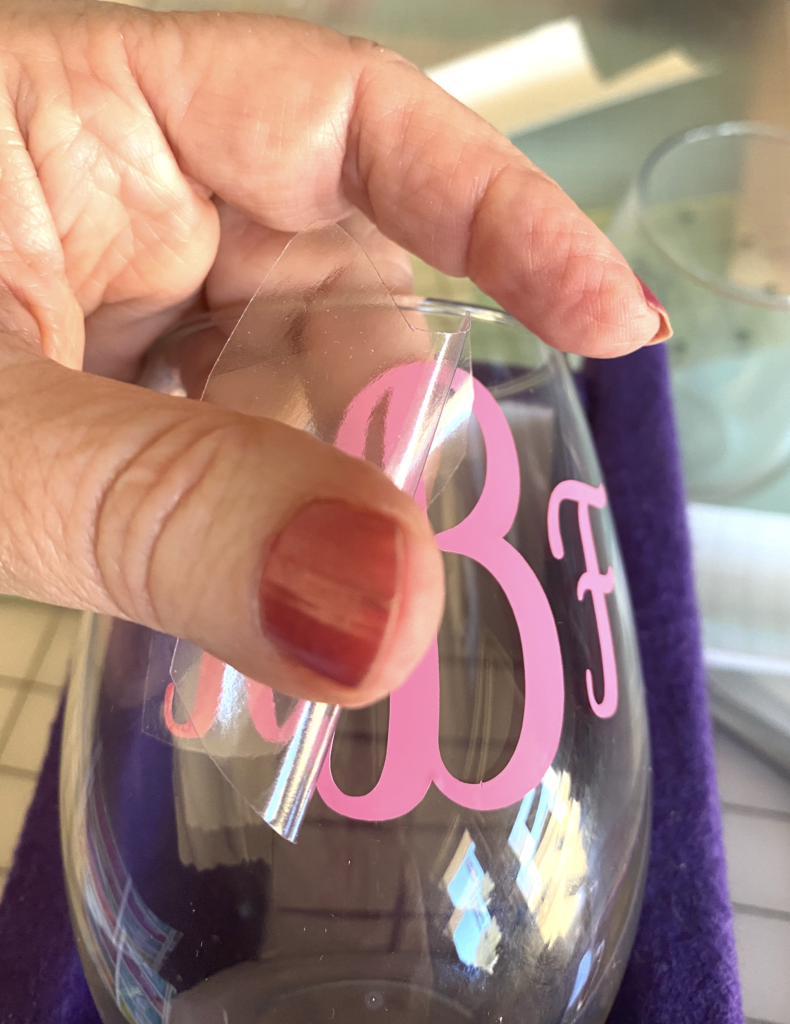
Once I has the vinyl and transfer tape adhered to to the glass, I burnished it well with my fingers to make sure it was secure. I then rolled the transfer tape off the glass at an angle “just in case” there were some places I had missed when burnishing.
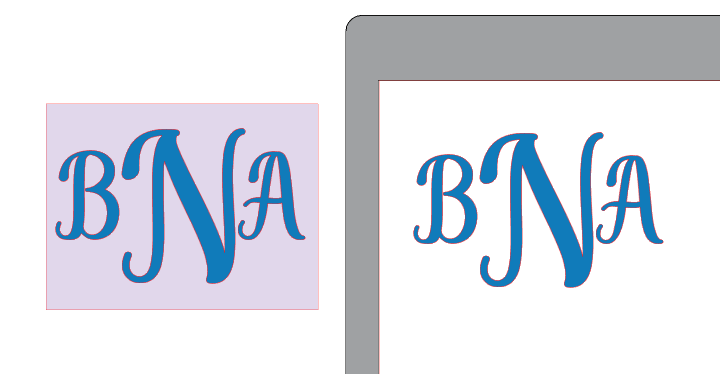
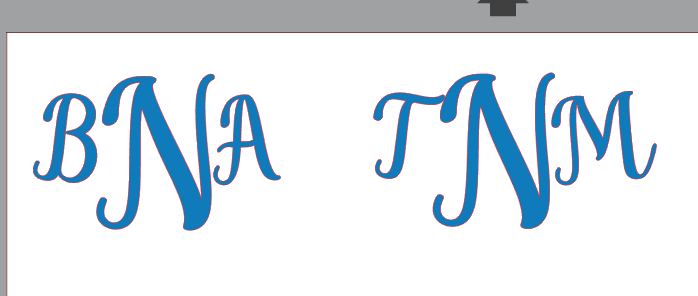
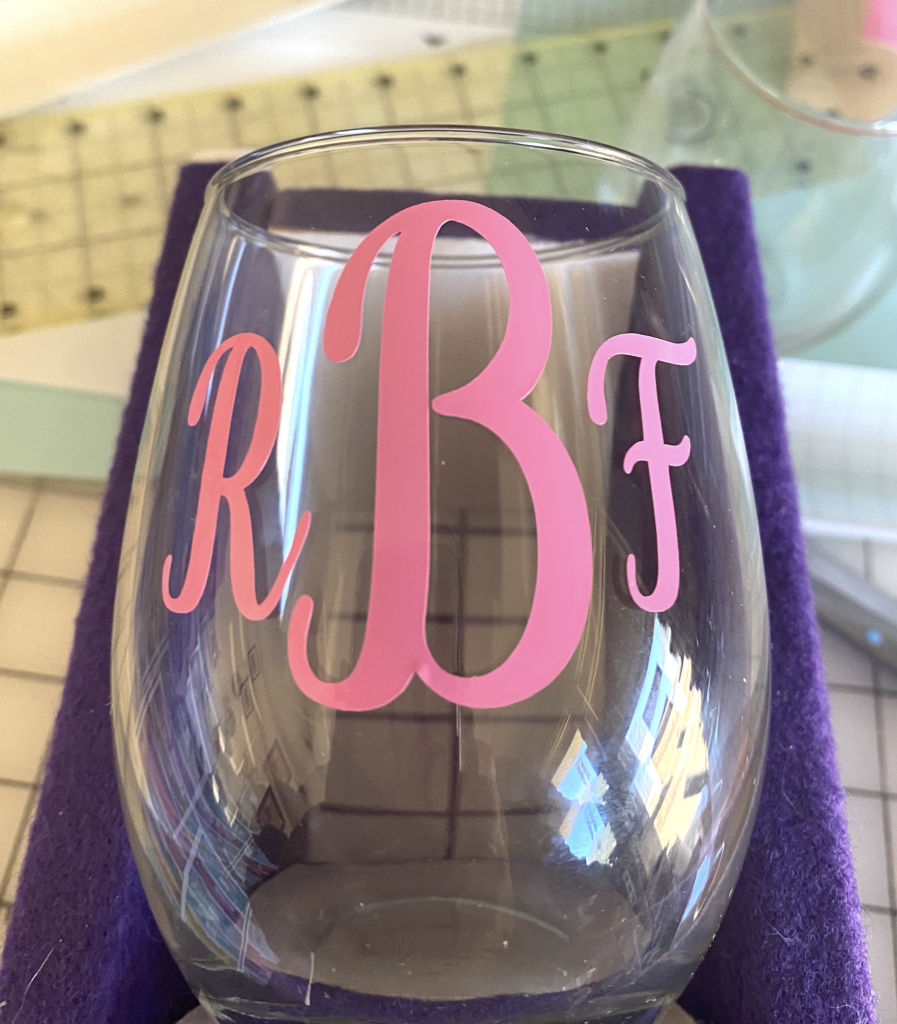
And that’s it! Notice that because I used the conical warp, the letters appeared crooked on before being placed but they are straight on the glass.
I just love the conical warp and hope you will as well. For more tips on using the conical warp tool, check out this post. I hope you will try the conical warp — be sure to post photos of your creations in the Facebook group.
If you enjoyed these tips, please join my Facebook groups … Libby’s Silhouette Group — Tips, Tricks, Tutorials and Projects, Libby’s Craft and Sewing Group and Running With Sisers – Juliet and Romeo. You can also find me on FB at Libby’s Loft.com. Please join and feel free to ask questions and share your creations! I look forward to seeing you there!!
Until Next Time,
Happy Crafting!!
Disclaimer: Posts on this site may contain affiliate links. Clicking on one of these links or making purchases at linked sites does not mean you pay more for your purchases. It means I may receive a small commission on your purchase. This commission helps defray the costs of this site and enables me to continue to provide you with new and exciting content.
Until Next time
Happy Crafting!!
Disclaimer: Posts on this site may contain affiliate links. Clicking on one of these links or making purchases at linked sites does not mean you pay more for your purchases. It means I may receive a small commission on your purchase. This commission helps defray the costs of this site and enables me to continue to provide you with new and exciting content.