Did you know you can use an offset to create dimension and detail in your design? In this shirt, I created an offset and used the shirt as part of the design!

To get started, I purchased design #234151 by Sophie Gallo from the Silhouette Design Store.

In Silhouette Studio, locate the file in your Library and double click on it to place it in the workspace. Now right click on the design and select Ungroup from the menu. This will allow you to change the color of each line of text. In this case, each letter becomes an individual object.
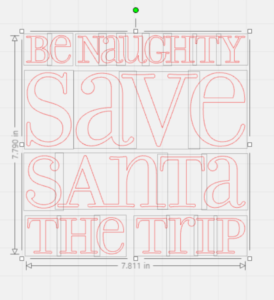
Click outside the design so nothing is selected. Left click and drag a box around the letters in the first line. I have my Preferences set so that objects are selected when the box touches them — that way, I do not have to completely enclose the letters in my selection box. You can check your settings by clicking on the Preferences Panel icon near the bottom of the right toolbar.
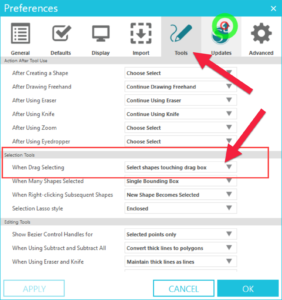
In the Preferences window, click on the Tools tab. In the middle of the page you will find the Selection Tools. The first chose, When Drag Selecting, is the one you want to check. Mine is set to Select Objects Touching Drag Box. The alternative is Select Objects Enclosed by Drag Box. Selecting this one means you have to completely enclose objects in the drag box for them to be selected. If you make a change, click Apply and then click OK.
Back in the workspace, left click and drag a box over the letters in the first line of text. Right click and select Group. Click on the Fill Color icon in the Quick Access Toolbar and select White. Click on the Line color icon in the Quick Access Toolbar and select white.
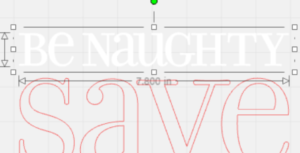
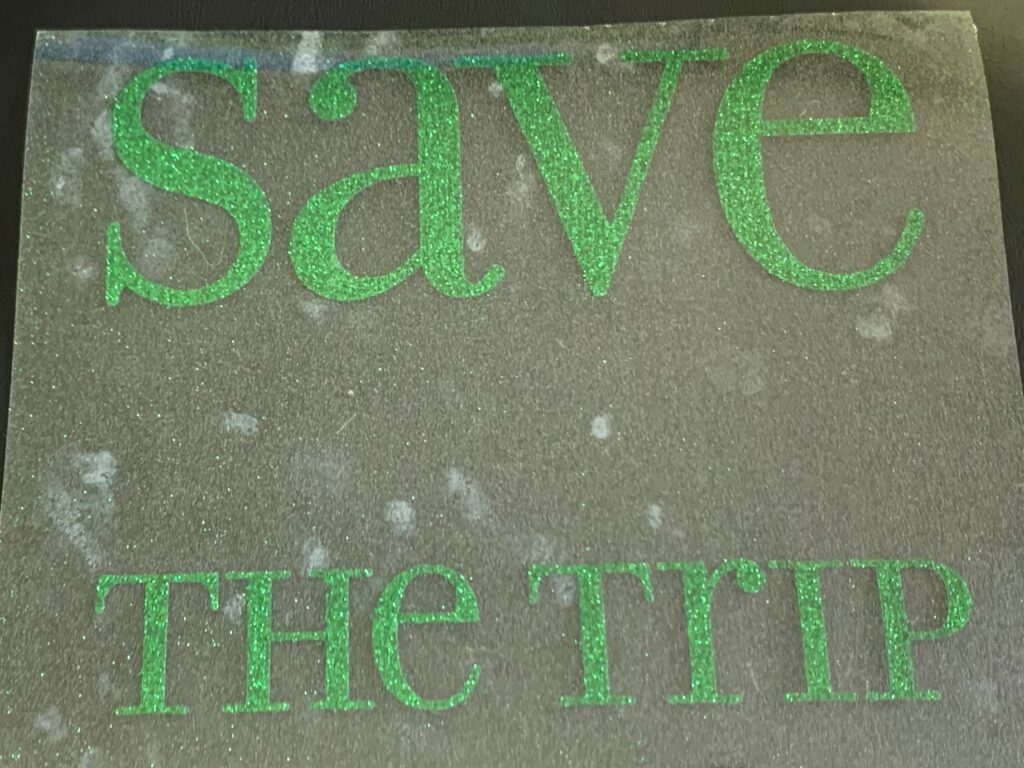
Select the letters in the third line and group them. Change the Fill and Line colors to white. Now select the letters in the second line and group them. Change the fill and line colors to green. Repeat this step for the last line of text.

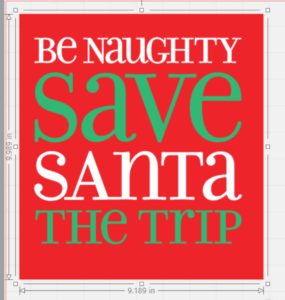
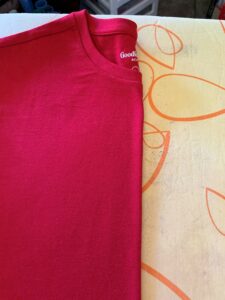
I like to preview my design against the color of my shirt. To do this, click on the Draw Tool in left toolbar and select Rectangle. Bring the cursor into the workspace and left click and drag a box larger than your design. Click on the Fill Color icon in the Quick Access toolbar and change the color of the box to red (the color of your shirt).
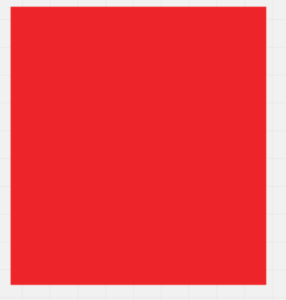
It’s a nice box, but not very helpful. Right click on the rectangle and select Send to Back. So much better!!
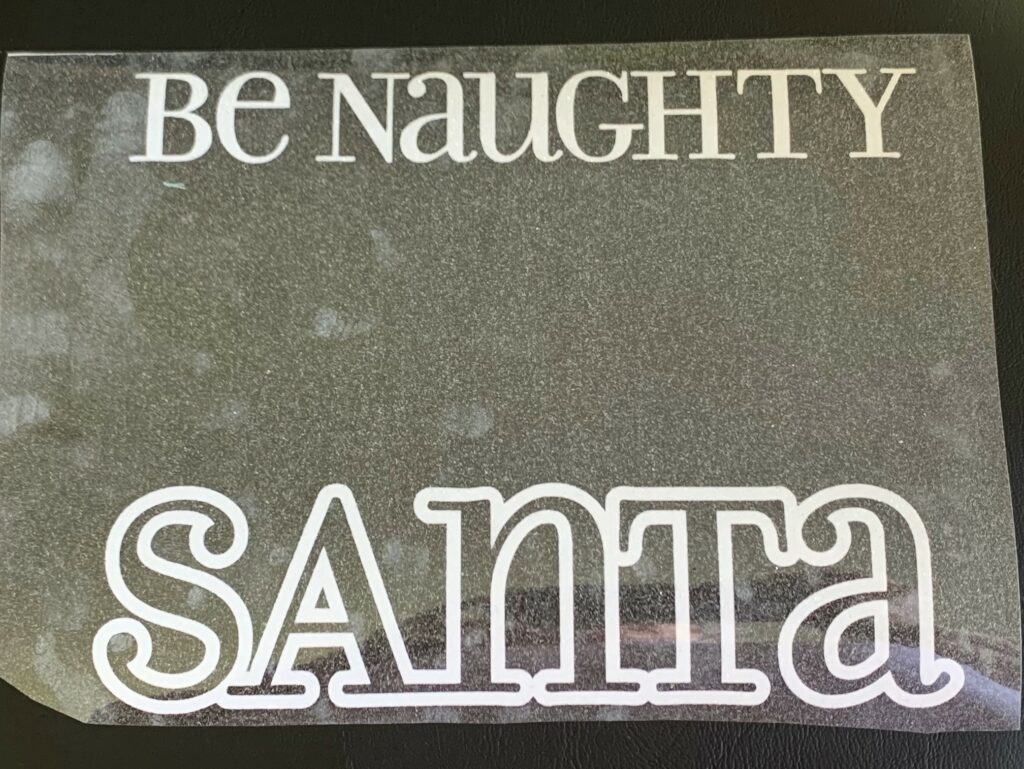
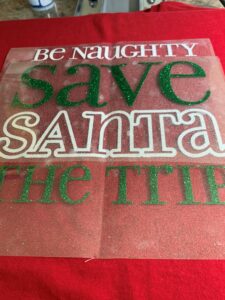
I liked the way this looked, but wanted to give a more dimensional look to the word “Santa” without having to layer vinyl. In your software, select the word Santa. Click on the Offset tool in the right toolbar. In the window that opens, click on Offset. I left the Distance set to the default of 0.125. You can change this distance if you like. Click Apply to change the setting.
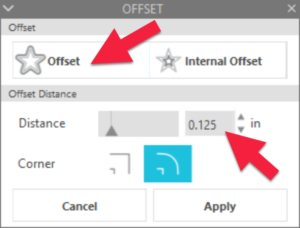
Your word will now have an outline around it and the outline (offset) will be selected. I changed the line color in mine so you can see the offset — you don’t need to change your line color.
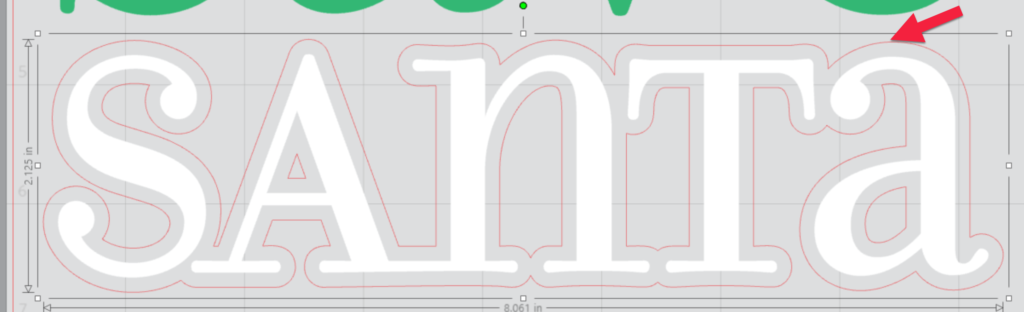
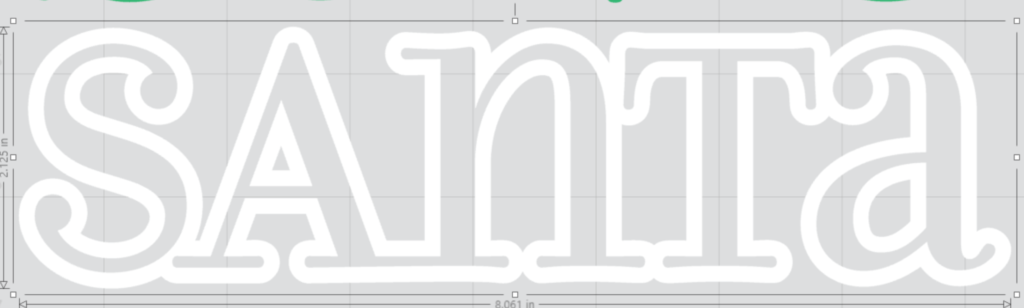
With the offset still selected, hold down the Shift key on the keyboard and click on the word “Santa”. With both items selected, right click and select Make Compound Path. In the Quick Access toolbar, click on Fill Color and change the color to white. Click on the Line color and change that to white as well.
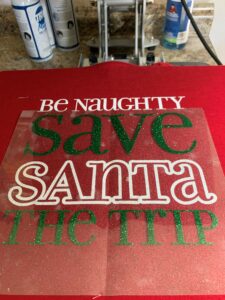
Here’s what it looks like with my red “shirt” behind it! I think this is much more interesting, don’t you!

At this point, I saved the design … just in case! This is going to be cut from HTV so it needs to be mirrored. Select the words and right click. Select Flip Horizontal. I like to do this instead of depending on the software to prompt me to mirror.

Click on the Send tab. Make sure your cut lines are turned on (they will be dark red). Because I want to maintain the spacing between the lines, I am not going to move the words closer together. I like to use Cut by Fill Color.
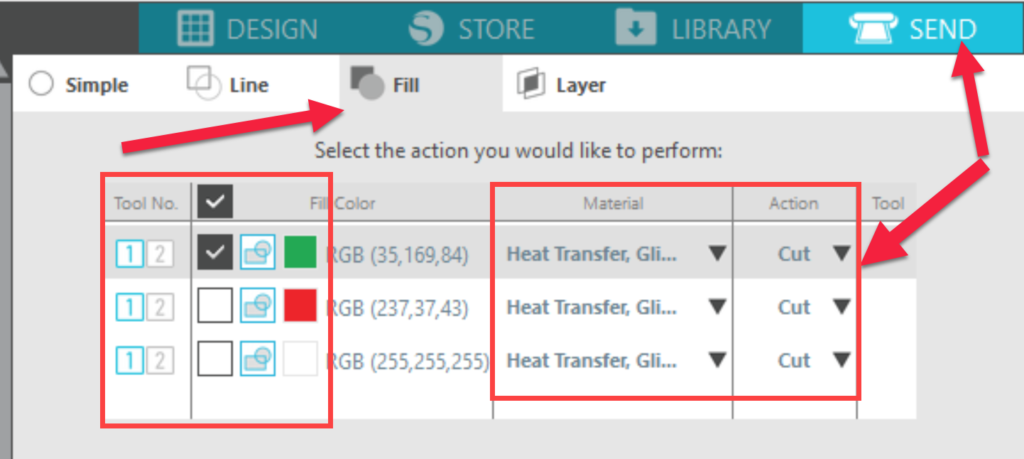
Be sure to check that you are using the correct tool (if using a Cameo 3 or 4). Check your Material to be sure you have the correct material settings (I used glitter HTV). And check that your action is set to cut. Then in the fill color box, check the color you want to cut and make sure the other colors are not checked. Perform your test cut. Make any necessary adjustments and cut your vinyl.
Repeat this process for the second color, making sure to check the correct box in the Fill Color section. Once your vinyl is cut and weeded, you are ready to press your shirt!
I used Siser Glitter HTV so I set my heat press to 320 degrees. Be sure to check with the manufacturer of your vinyl for the correct settings for pressing. Here’s a link to a great resource document with all the settings at the SiserNA website.
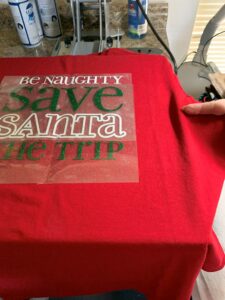
Once the press was ready, I pressed the shirt for about 3 seconds to get out the moisture (and the wrinkles). Next I folded the shirt in half to get a crease for alignment.
I lined the two pieces of HTV on each other and then folded them down center. Don’t worry that this will cause a problem, the crease comes out when you press. I positioned it on the shirt, matching the center fold line and the crease on the vinyl.
To check the placement on my shirt, I line the center of the design up with the armpits on the shirt.
I removed the green vinyl and pressed the white vinyl for about 3 seconds — just long enough to activate the glue. I removed the carrier sheet and placed the green vinyl on the shirt.
I covered the design with a piece of parchment paper and did another quick 3 second press. I removed the carrier sheet from the green vinyl and covered the entire design with parchment paper and pressed again for about 10-12 seconds. (The recommended press time is is 15-20 seconds.) Removing the carrier sheet and covering the design with parchment paper helps prevent “carrier sheet lines” from being pressed into the vinyl. And that’s it!! A fun Christmas shirt!
Hope you enjoyed this tutorial and will try adding that “something extra” to your designs.
If you enjoyed these tips, please join my Facebook groups … Libby’s Silhouette Group — Tips, Tricks, Tutorials and Projects, Libby’s Craft and Sewing Group and Running With Sisers – Juliet and Romeo. You can also find me on FB at Libby’s Loft.com. Please join and feel free to ask questions and share your creations! I look forward to seeing you there!!
Until Next Time,
Happy Crafting!!
Disclaimer: Posts on this site may contain affiliate links. Clicking on one of these links or making purchases at linked sites does not mean you pay more for your purchases. It means I may receive a small commission on your purchase. This commission helps defray the costs of this site and enables me to continue to provide you with new and exciting content.
Until next time,
Happy crafting!!
Disclaimer: Posts on this site may contain affiliate links. Clicking on one of these links or making purchases at linked sites does not mean you pay more for your purchases. It means I may receive a small commission on your purchase. This commission helps defray the costs of this site and enables me to continue to provide you with new and exciting content.