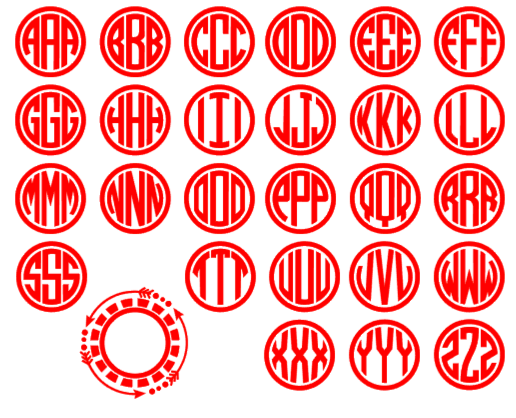
Have you purchased what you thought was a font, only to find out it is really a group of design elements that look like letters … aka, an alphabet set? When you open the file in Silhouette Studio, does it look like this (I added color to mine so you could see it more easily).
When you open the file in Studio, it is usually all grouped together. When you click on it, just one bounding box and set of handles appear. To make the new steps easier, I left click and drag the entire design off the mat to the left.
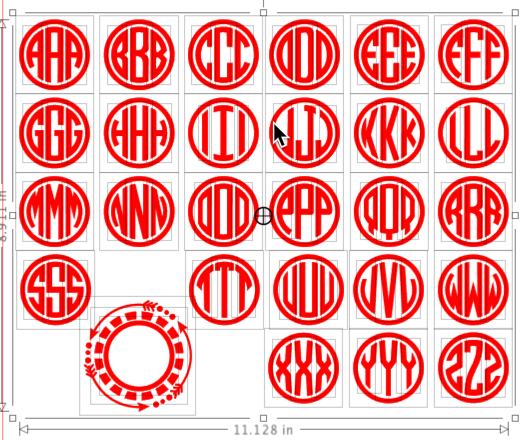
The next thing to do is right click on the design and select Ungroup (or click on the Ungroup icon in the top toolbar). You may have to do this several times, but your goal is to get a file that looks like this. Do you see all the individual bounding boxes around the letters? That’s what you want.
Click on the first letter you need to create your monogram. Left click and drag the letter into the workspace. Repeat this step for the other letters you need. Position them close to where you want them in relation to each other but you don’t have to be exact. We will fix the spacing in a minute.

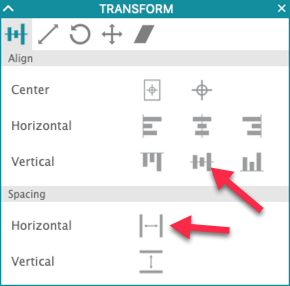
Left click and drag a box around all three letters so they are selected. Click on the Transform Panel in the right toolbar. First select Align Middle in the Vertical group. This will align the letters along their midpoint. Next select Horizontal in the Spacing Area. This will equally distribute the letters horizontally.

With the three letters selected, right click and select Group (or click on the Group icon in the top toolbar). This way, when we add the frame and get ready to center the letters inside the frame, the letters will all act as one item.
The frame in my alphabet set is composed of several elements, so I had to select all those elements and group them before moving the frame into position on the mat.

I also had to use the corner handle and scale to increase the size of the frame a little to fit around the letter group. This was necessary because of the amount of space I left between my letters.
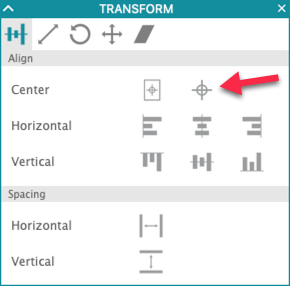
Select the letter group and the frame. In the Transform panel, click on the Center icon in the Center section of the tab. This will center the letter group and the frame. It centers the objects on each other both horizontally and vertically in one click.
Here’s the finished monogram with frame.

There you go! Alphabet sets are easy to use once you understand how they work. Hope this helps!!
REMEMBER: When shopping for fonts, fonts come in TTF (true type font) or OTF (open type font) formats. These have to be downloaded and installed on your computer in order to use them. When designers create alphabet sets, they are usually saved as SVG, PNG, JPG or similar file formats. These are used like the example in this blog.
If you enjoyed these tips, please join my Facebook groups … Libby’s Silhouette Group — Tips, Tricks, Tutorials and Projects, Libby’s Craft and Sewing Group and Running With Sisers – Juliet and Romeo. You can also find me on FB at Libby’s Loft.com. Please join and feel free to ask questions and share your creations! I look forward to seeing you there!!
Until Next Time,
Happy Crafting!!
Disclaimer: Posts on this site may contain affiliate links. Clicking on one of these links or making purchases at linked sites does not mean you pay more for your purchases. It means I may receive a small commission on your purchase. This commission helps defray the costs of this site and enables me to continue to provide you with new and exciting content.
Until next time,
Happy Crafting!!