Have you seen this “bullseye” in the middle of your object when you select an object in Silhouette Studio?
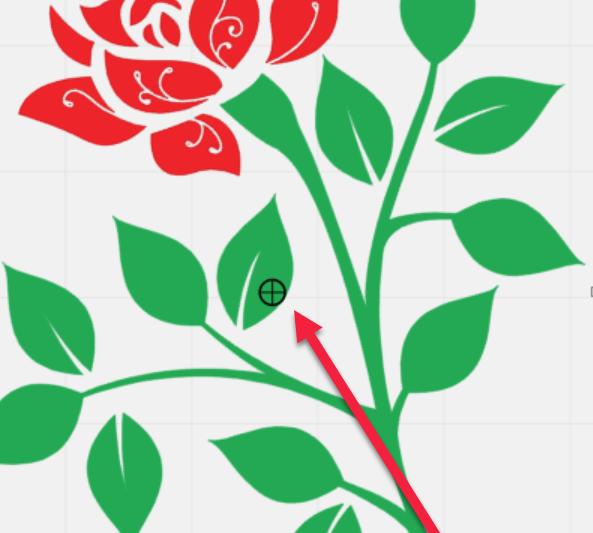
That’s the Center of Rotation. And, truth be told, sometimes it gets in the way … especially if a design is small.
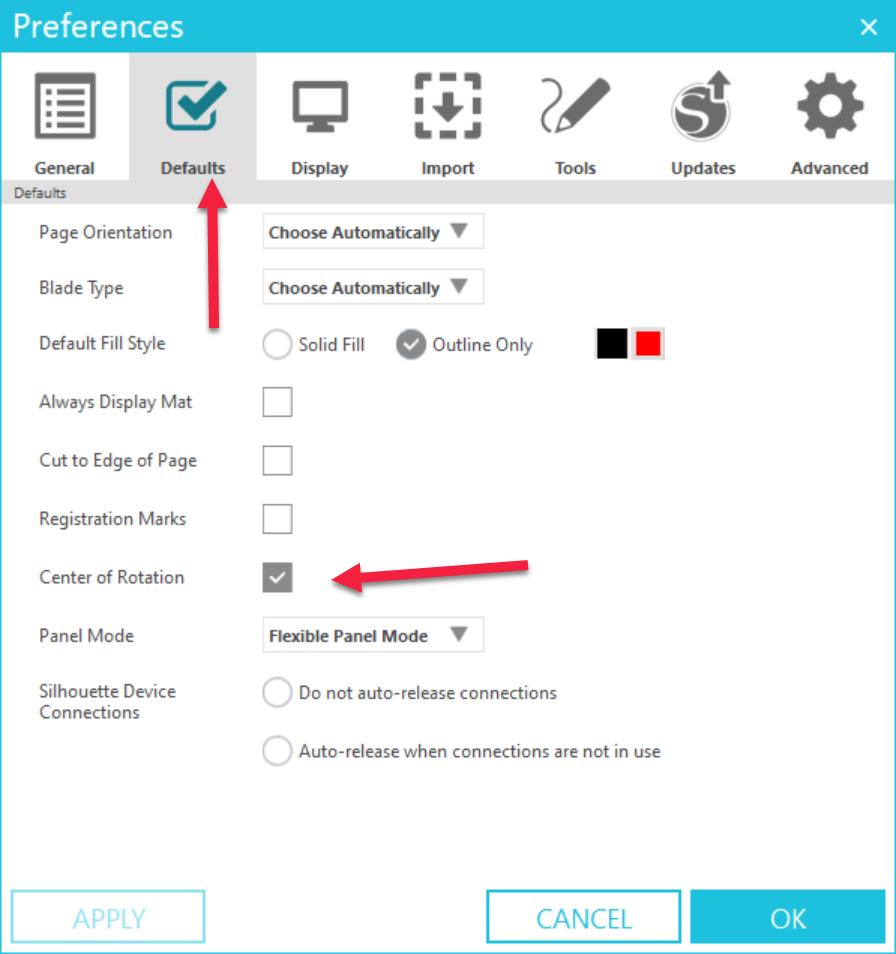
You can toggle the Center of Rotation on and off by pressing the “O” on the keyboard. You can also turn it off or on in your system Preferences. Click on the Preferences icon in the lower right are of the toolbar (it looks like a gear). Click on the Default tab. Place a check (or remove it) in front of Center of Rotation and press Apply. Then press OK to exit Preferences.
So now that you know how to turn the tool on and off, what does it do? Think of the Center of Rotation as a pushpin that has been placed in your design. When you use the free rotate handle, the design rotates around the Center of Rotation.
That’s great, but that’s how free rotation works, whether the Center of Rotation is displayed or not. So, why use it? If you move the Center of Rotation, it moves the pushpin!
Now that you know how it works, let’s put it to use in a practical way. I want to put this shape around a circle, to create a monogram frame. To get started, click on the Drawing tools icon in the left toolbar. Click on the ellipse tool. Bring your cursor into the workspace. Hold down the shift key and left click & drag to create a circle. Release the mouse and then let go of the shift key. Voila! You have a circle!
With the flourish element selected, click on the Replicate icon. Click on the third tab, the Object on Path tab. Click on the Show Grab Handle icon in the Object on Path section of the window.
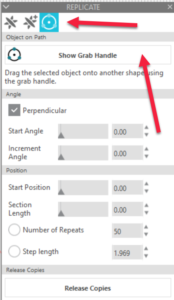
The Grab Handle shows in the center of the design. We’ll left click and drag that handle over onto the circle we created. Once the design “grabs” onto the circle, we can use the Replicate panel to adjust the number of repeats until we have a design we like.
Here’s another practical application showing the adjusted center of rotation.
I hope this explains the Center of Rotation and gives you some ideas for how adjusting the location makes it a great tool! And remember, you can toggle the Center of Rotation on and off by just pressing “O”! (Don’t you love keyboard shortcuts!!)
If you enjoyed these tips, please join my Facebook groups … Libby’s Silhouette Group — Tips, Tricks, Tutorials and Projects, Libby’s Craft and Sewing Group and Running With Sisers – Juliet and Romeo. You can also find me on FB at Libby’s Loft.com. Please join and feel free to ask questions and share your creations! I look forward to seeing you there!!
Until Next Time,
Happy Crafting!!
Disclaimer: Posts on this site may contain affiliate links. Clicking on one of these links or making purchases at linked sites does not mean you pay more for your purchases. It means I may receive a small commission on your purchase. This commission helps defray the costs of this site and enables me to continue to provide you with new and exciting content.
Until next time,
Happy Crafting!!
Disclaimer: Posts on this site may contain affiliate links. Clicking on one of these links or making purchases at linked sites does not mean you pay more for your purchases. It means I may receive a small commission on your purchase. This commission helps defray the costs of this site and enables me to continue to provide you with new and exciting content.
This was really cool how you made the design fir a monogram circle! Thanks and I will be joining your group to learn more!!!