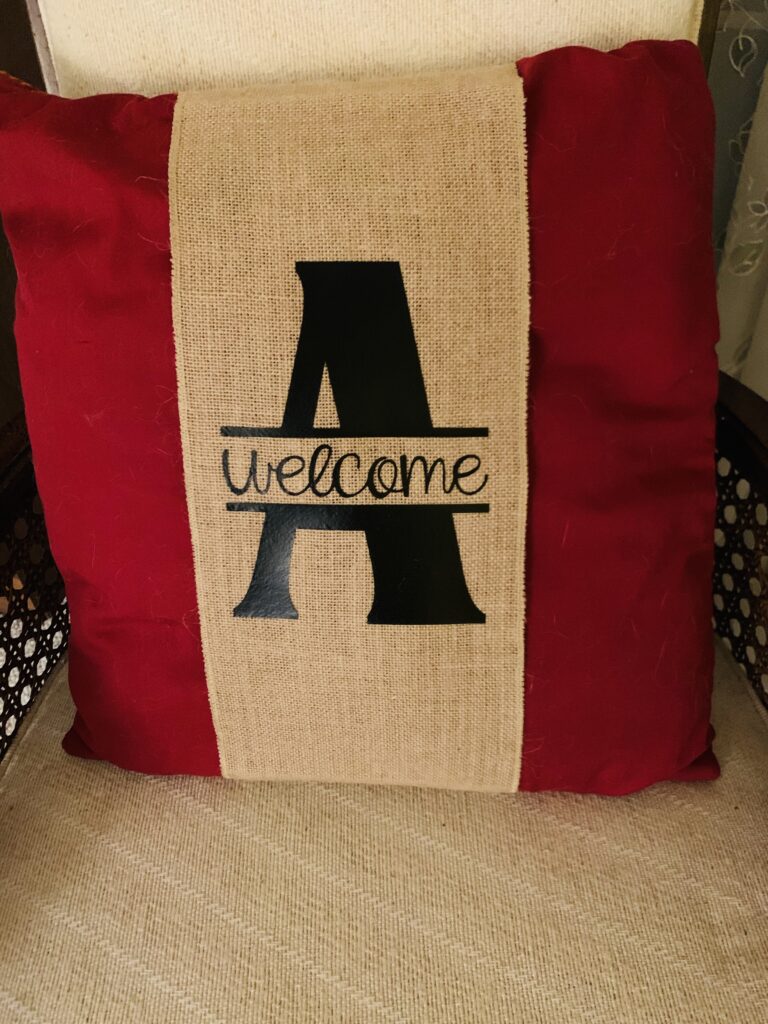
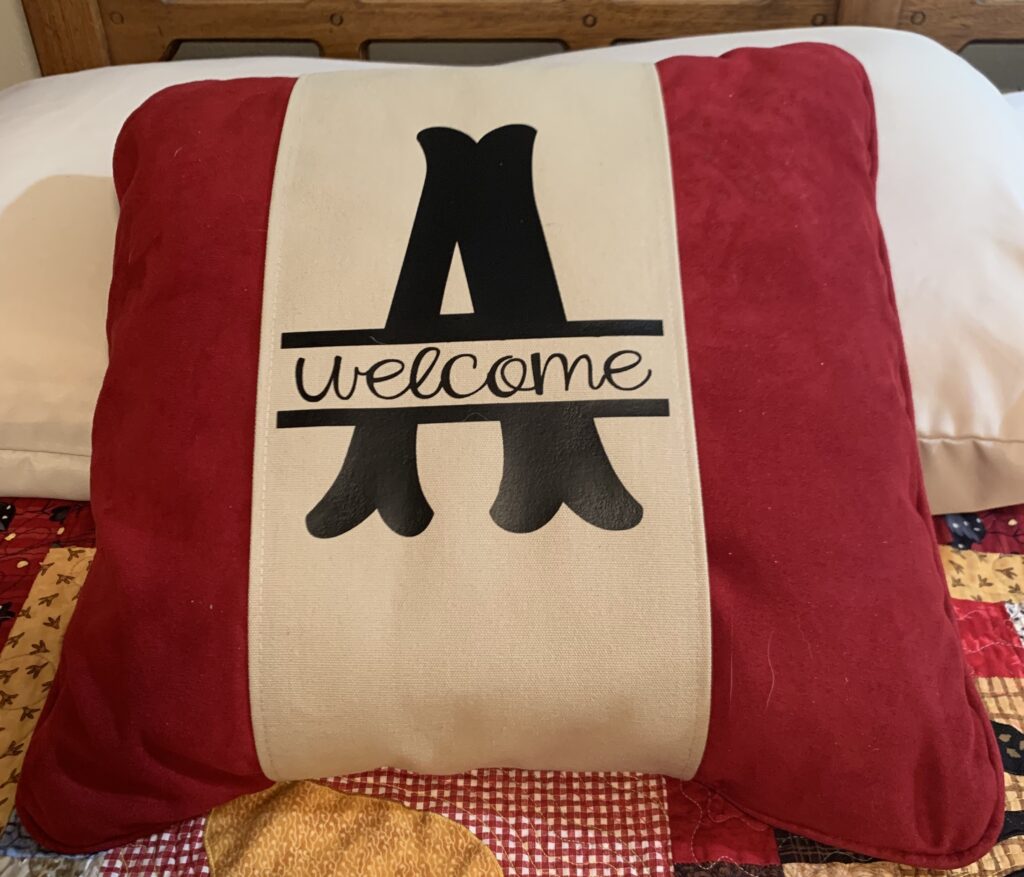
Need a quick gift? Nothing is more special than a personalized gift! This split initial would be great on a pillow wrap, sign, tile, or even a phone!!
Let’s start by creating the split initial. Open your Silhouette Studio software and create a new workspace. Click on the Text tool in the left toolbar. Click in the workspace to get a text placeholder and blinking cursor. Enter the initial you want to use. Click on the Text panel in the right toolbar. Select the font you want to use. I used Lori Whitlock’s Sweetie Pie font.
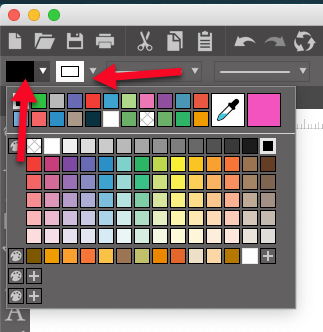
I like to fill my letters with color. Click on the Fill icon in the Quick Access toolbar and select a color. If you like, you can also click on the line color and select the same color.
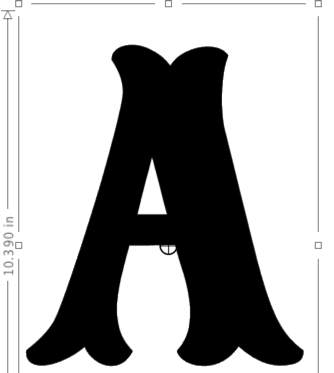
Now, left click on one of the corner handles and drag to increase the size of the letter. I increased the size of my letter so the bounding box was almost as tall as the mat. The size says the letter is 11.334″ tall, but looking at the mat grid in the background, I can see it’s not nearly that tall!
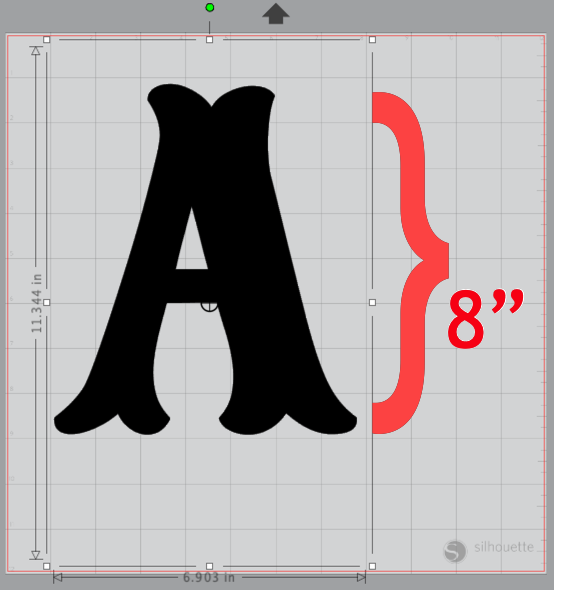
This is because the letter is still text and the software saves space in the text box for ascending and descending parts of letters I might use. Before I make any other changes, I always create a duplicate of my lettering in case I mess up in the design process. I just right click and select Duplicate and move the duplicate copy off the mat. With that done, I right click again and select Convert to Path. My letter is no longer text, it’s just an image that looks like a letter. But now, the size is correct!!
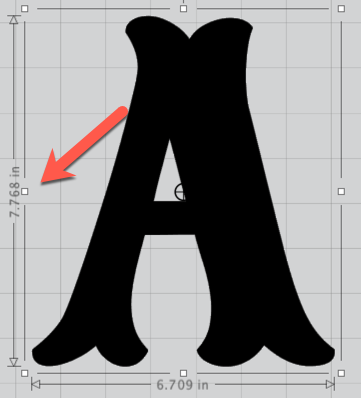
I am planning to put this initial on a pillow band from Craft Chameleon. The pillow band is 7.5″x34″, and I will be putting it around a 15″ pillow, so I need to keep this in mind when sizing my design. Right now, I am only going to adjust the height of the design. (This may change when I get through designing.) To adjust the height, I just dragged the middle handle until the design was about the height I wanted. This skews the design (meaning it will distort the design). Now my initial is taller but not any wider.
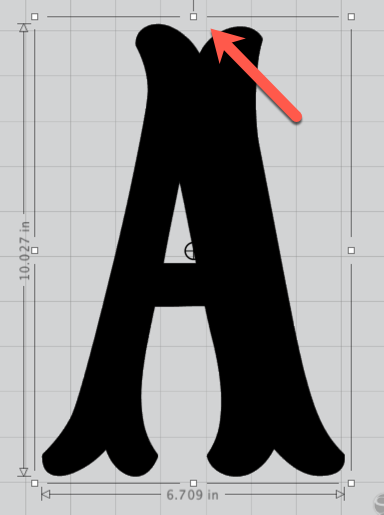
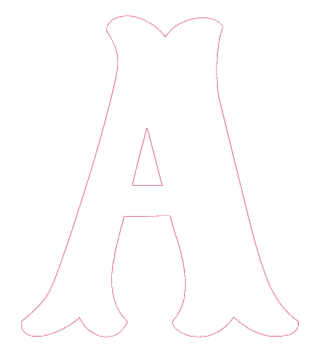
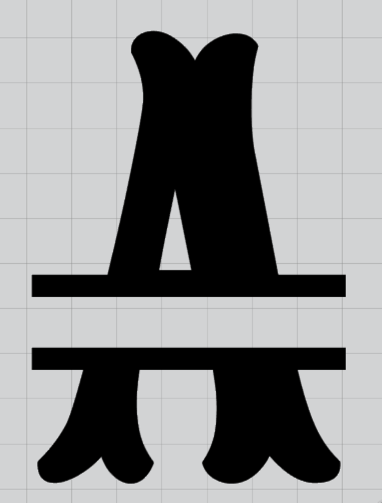
Now we are ready to split the design. To do this, I selected the rectangle tool from the Draw tools in the left toolbar. Left click and drag a rectangle that is wide enough to cover the middle portion of your initial. I made mine about 2″ tall. Left click and drag the rectangle into position over your initial.

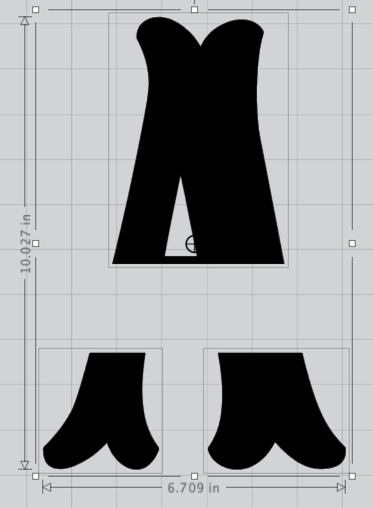
Once you have the two design elements positioned the way you want, select them both. Click on the Modify panel in the right toolbar and select Subtract. Notice that I did not position my rectangle exactly in the middle of the initial. I tried it there and did not like the way it looked, so I moved it down below center. Thank goodness for Undo!!
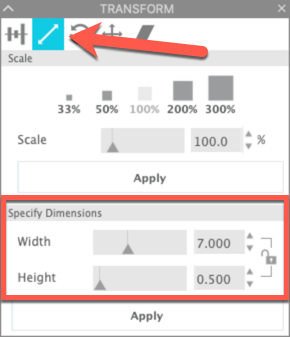
Select all the elements of the initial and right click and Group them together. To create the bars on the initial that will act as a frame for the text that will go in the newly created hole, select the rectangle tool from the Draw tools again. Left click and drag a rectangle. I used the Scale tab in the Transform panel to set the exact size for the rectangle. I set the size of mine to be just a little wider than my initial and 1/2″ tall.
With the newly created rectangle selected, right click and select Duplicate. Move each rectangle into position over the initial, making sure that the objects overlap a little bit. Select both these rectangles. I made mine red so it would be easier to see in the next steps.
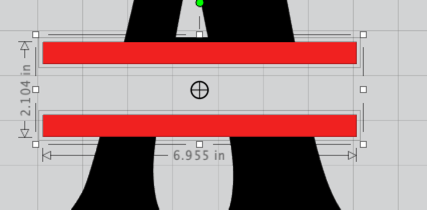
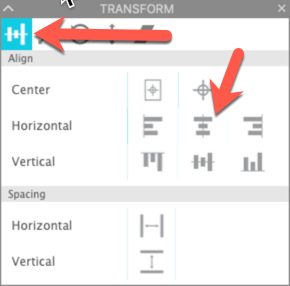
With both rectangles selected, click on the Align tab in the Transform panel. Select Left Justify to make sure the edges of the rectangles line up with each other. Right click and select Group. Select both the initial and the rectangles. In the Transform panel, select Horizontal Center.
With everything still selected, right click and select Weld. Because I changed the color of my rectangles to red earlier, I can see quickly and easily that my Weld command worked because now everything is the same color.
At this point, I would save this design so I could use it over and over. I don’t like to save designs that I create to my Library so I select File Save As–Save to Hard Drive. I then save to my external hard drive.
I wanted to add the word “Welcome” to my design. I selected the font called PN JellyBean from the Silhouette Design store.
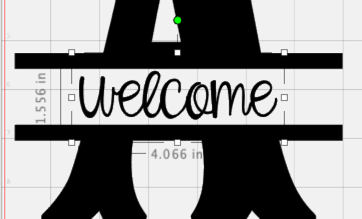
When I brought the word into my design, it was not large enough to fill the space. I used the handles to stretch the word horizontally and vertically. Then I selected the word and the initial and used Align center to make sure they were aligned with each other.
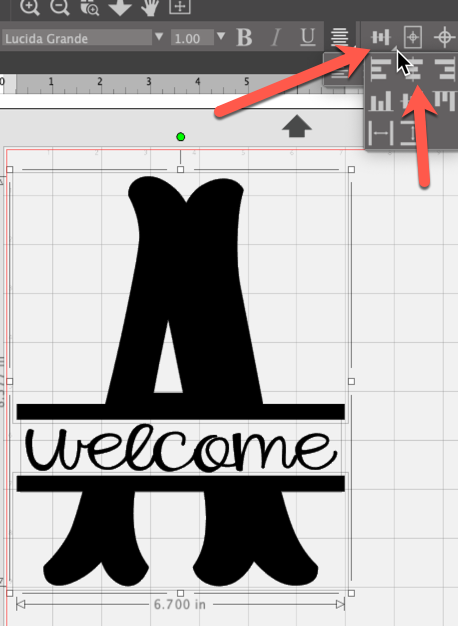
I saved my design again, just in case. Because I am cutting this from HTV, with both design elements selected, I right clicked and selected Flip Horizontal. I like to use this instead of the Mirror option in the send menu. In the Send menu, I selected my material and cut action and clicked on Test Cut. I do a test cut EVERY time!! I was cutting on my Cameo 4 and have found that the presets have been working great for me.
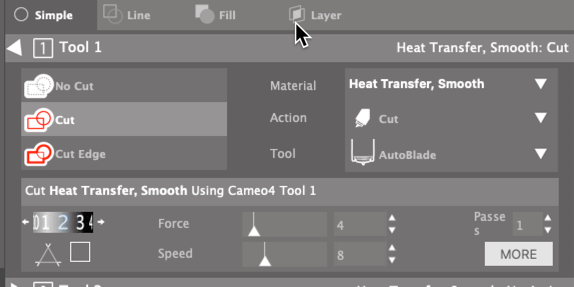
If you do your test cut and the vinyl does not come off the carrier cleanly without cutting the carrier sheet, make one adjustment at a time. I usually increase the force a little and test again. I will make several small adjustments to force before I try increasing the blade depth. Often just a little more force is all it takes.
Once the design was cut and weeded, I applied it to the pillow wrap. I used Siser EasyWeed for I pressed for 15 seconds at 305 degrees.
I hope you will try this fun technique for creating your own split initial! Be sure to post pictures in my FB groups when you create your own split initial projects!
If you enjoyed these tips, please join my Facebook groups … Libby’s Silhouette Group — Tips, Tricks, Tutorials and Projects, Libby’s Craft and Sewing Group and Running With Sisers – Juliet and Romeo. You can also find me on FB at Libby’s Loft.com. Please join and feel free to ask questions and share your creations! I look forward to seeing you there!!
Until Next Time,
Happy Crafting!!
Disclaimer: Posts on this site may contain affiliate links. Clicking on one of these links or making purchases at linked sites does not mean you pay more for your purchases. It means I may receive a small commission on your purchase. This commission helps defray the costs of this site and enables me to continue to provide you with new and exciting content.
Until Next time,
Happy Crafting!!
Disclaimer: Posts on this site may contain affiliate links. Clicking on one of these links or making purchases at linked sites does not mean you pay more for your purchases. It means I may receive a small commission on your purchase. This commission helps defray the costs of this site and enables me to continue to provide you with new and exciting content.