
Working with purchased embroidery fonts (those not included in your embroidery software) is not always easy. Each letter is an individual design and has to be opened or merged separately.
Embrilliance Essentials software makes working with purchased embroidery fonts much easier … if the digitizer provides the BX format. BX files are installed and then the font is usable in your Essentials software as a “typing” font, just like fonts that came with your software! Select the font and type. It’s that easy!
Many embroidery fonts are in a compressed (ZIP) file when you download them. On a Mac, you can double click on the zipped file and the items will be extracted. On a PC, depending on your Windows version, you can double click on the ZIP file to extract it, or right click on the file and select Extract. My Windows 10 has WINZIP as a selection when I right click.
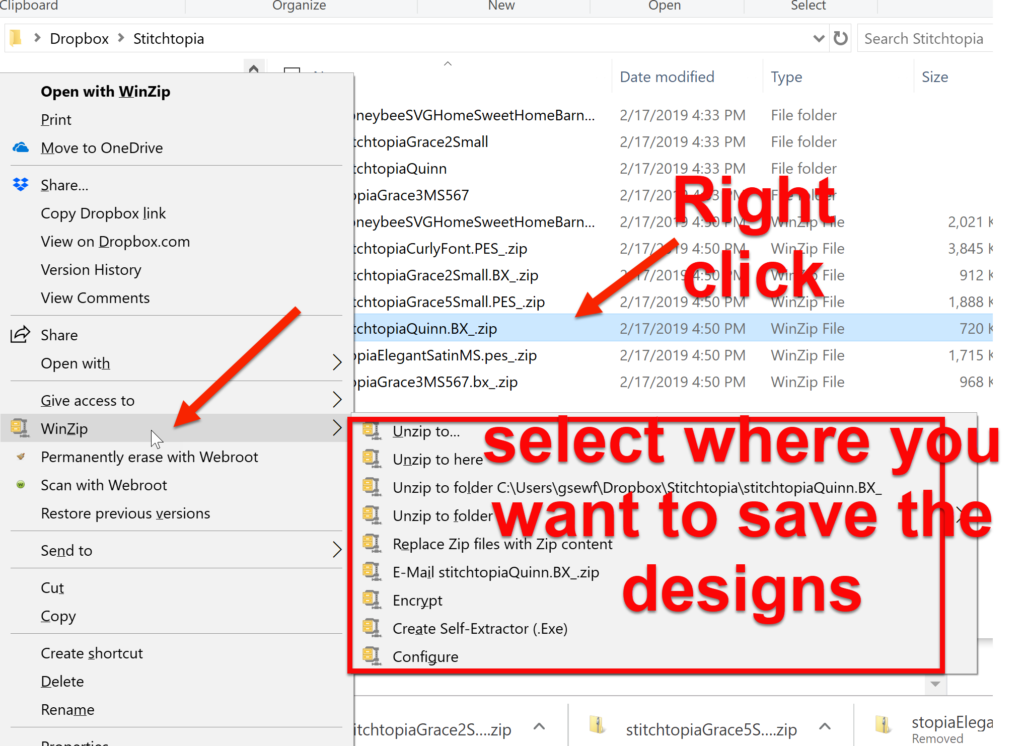
Whichever way you unzip the file, be sure to make a note of where you save the files! Here’s my unzipped font folder. My font came with several sizes, so there are several files to install.
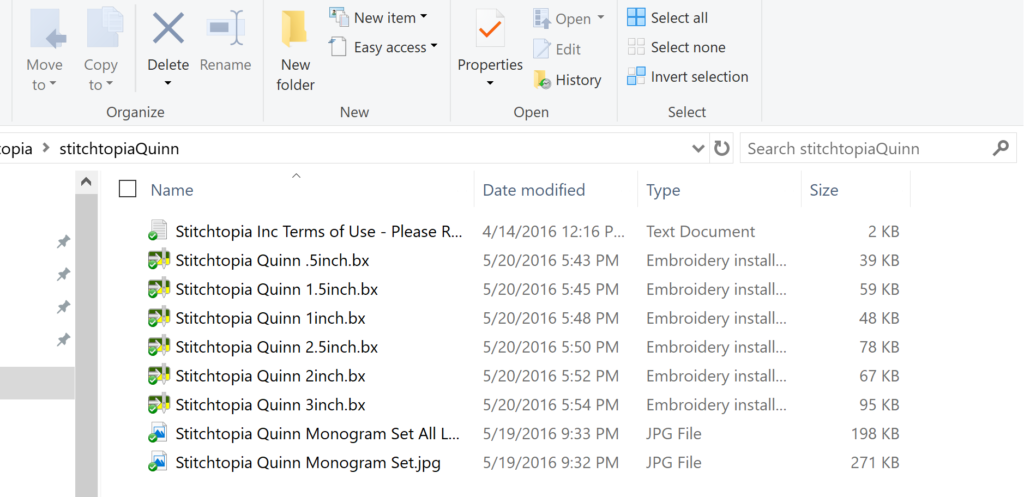
To install each font individually, double click on the font with the BX extension. The icon looks like this:

Once the font is installed, your Embrilliance software will display a dialog box letting you know the font has been installed. Click OK to close this dialog box.
But wait, you can install multiple fonts at the same time!! To do this, left click on the first font to be installed. Shift left click on the last font in the list. All the fonts in between these two fonts will also be selected.
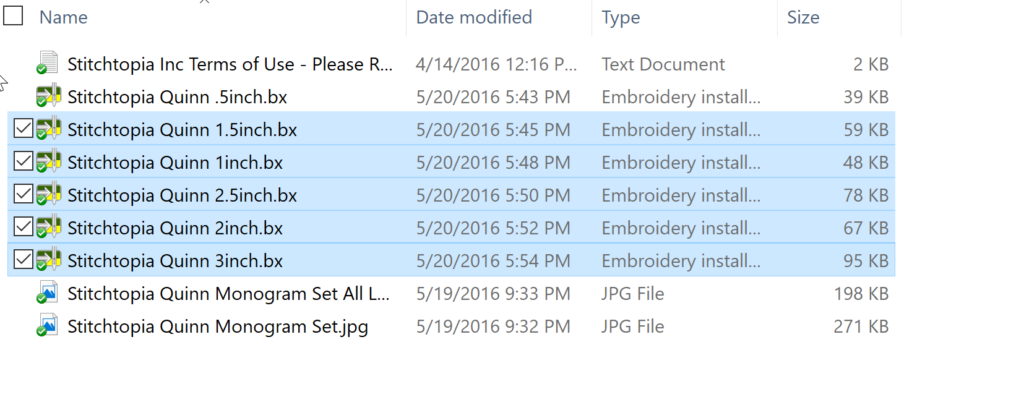
With your Embrilliance Essentials software open, position the window containing your so you can see the selected fonts. Left click and drag the selected fonts over into the Embrilliance window. The fonts will be installed and you will see a dialog box saying each font has been installed. Click OK to close each dialog box. You are now ready to use your new fonts!!
Click on the Create Letters icon. The “ABC” text placeholder is placed in the workspace.

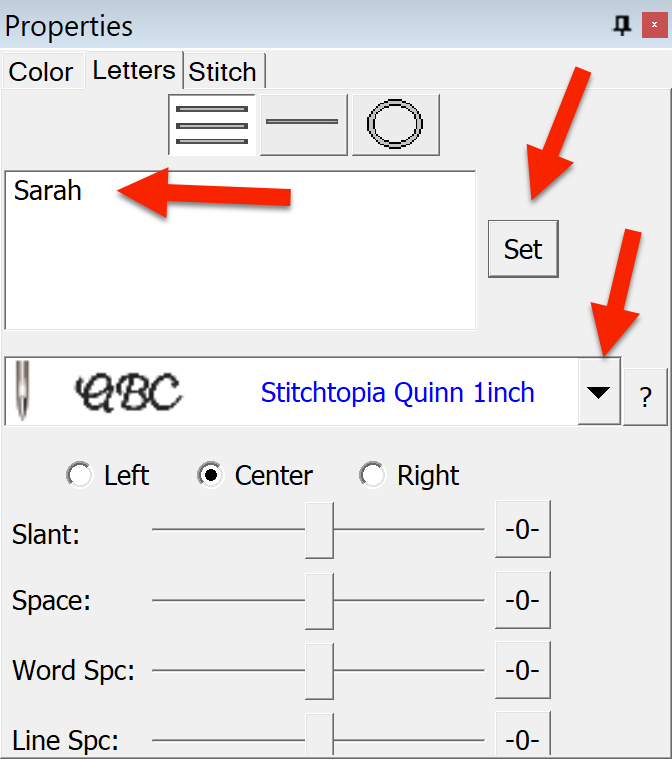
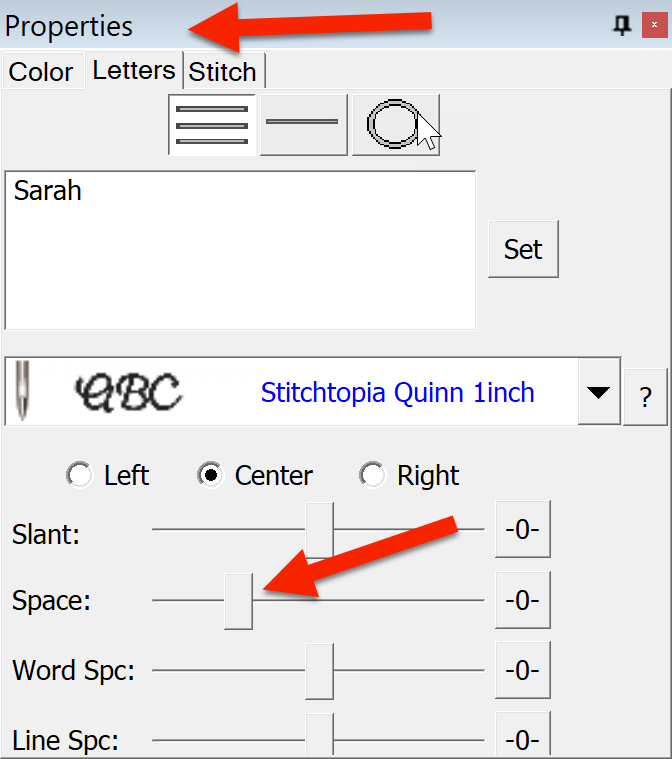
With the text placeholder selected, click in the Text box in the Properties window. Enter the word you wish to embroider. Click on the dropdown arrow next to the fonts and select the font you want to use. Click Set.
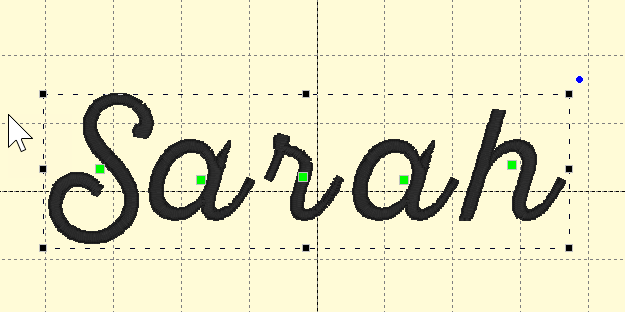
The new word is placed in the workspace. Take a look at the word. Some script fonts will need to have the letter spacing adjusted. Here, the letters are too far apart.
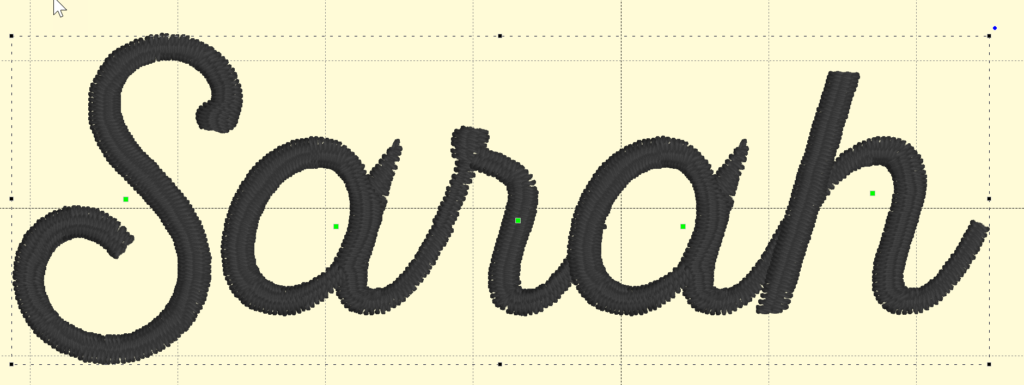
With the word selected, click on the slider for Spacing in the Properties window and move it to the left to decrease the spacing between the letters.
And that’s how easy it is to use BX fonts in Embrilliance! Have a great time with your new fonts and remember to post pictures of your projects in my FB group, Libby’s Craft and Sewing Group.
Until next time,
Happy Crafting!!