Have you played with Window Cling? It is so much fun … and so easy to use!
For this project, I used Silhouette Brand Window Cling. They have two types, white and clear. I used both so you can see the differences.
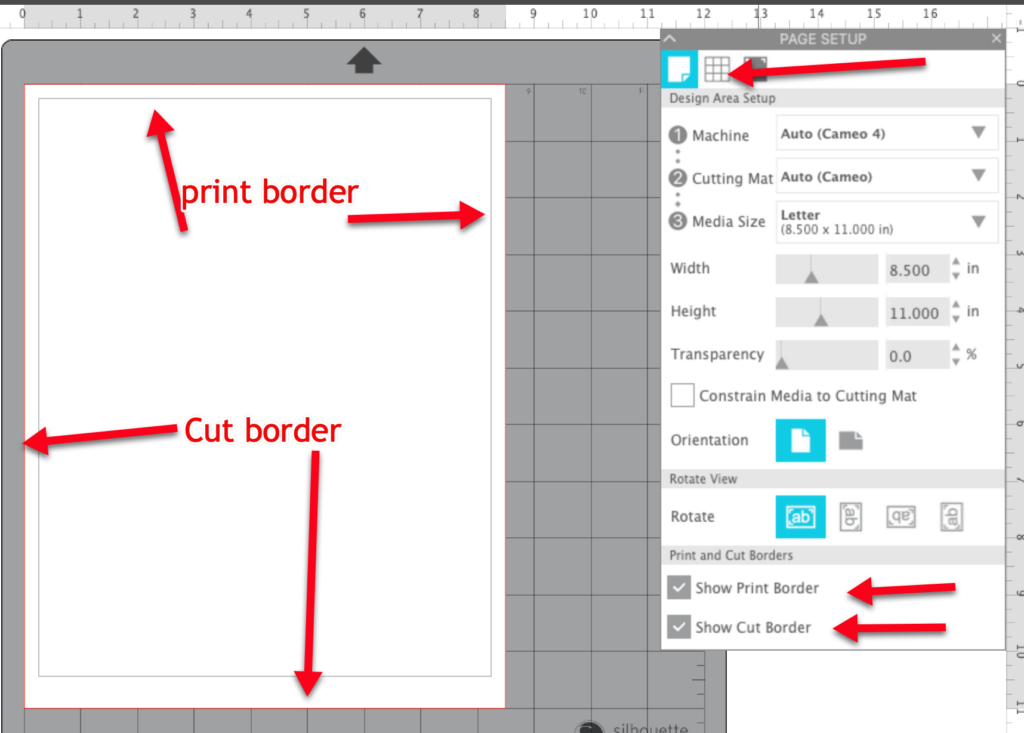
Let’s get started! Open your Silhouette Studio software and create a new workspace. Before adding a design, click on the Page Setup panel and check Show Print Border and Show Cut Border. These will be helpful as you continue working with your design. The grey line is the print border and it is determined by your printer. The red line is the cut border and it is determined by the media size you have selected. (This will change in a minute.)
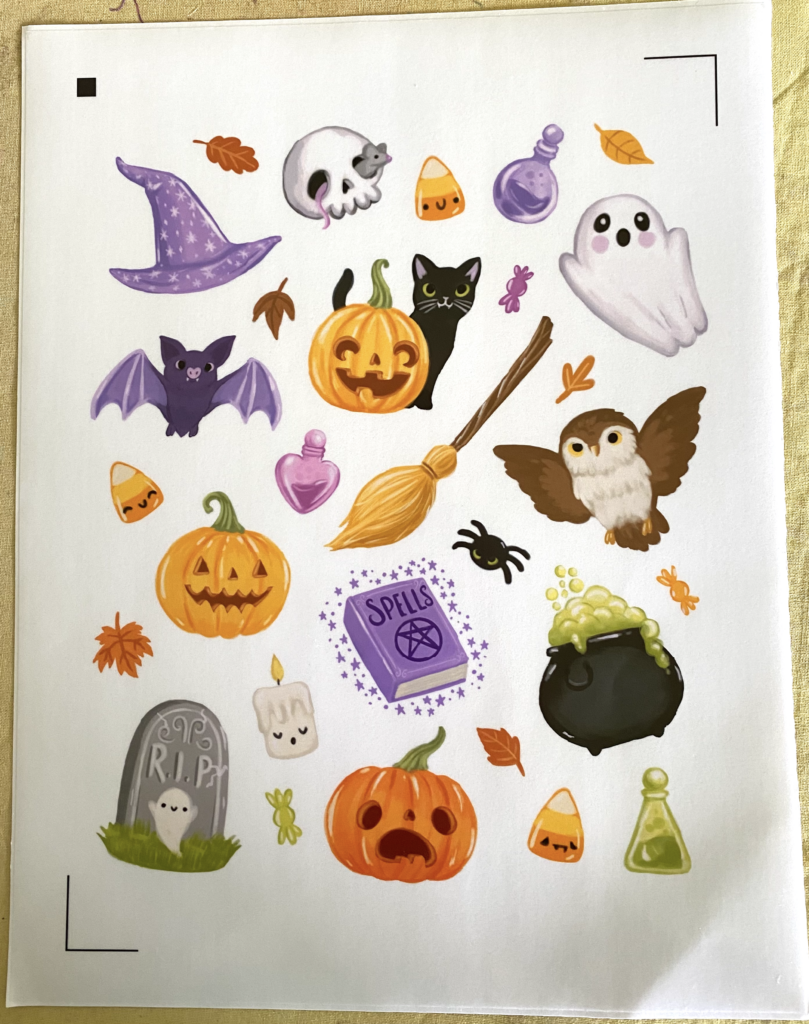
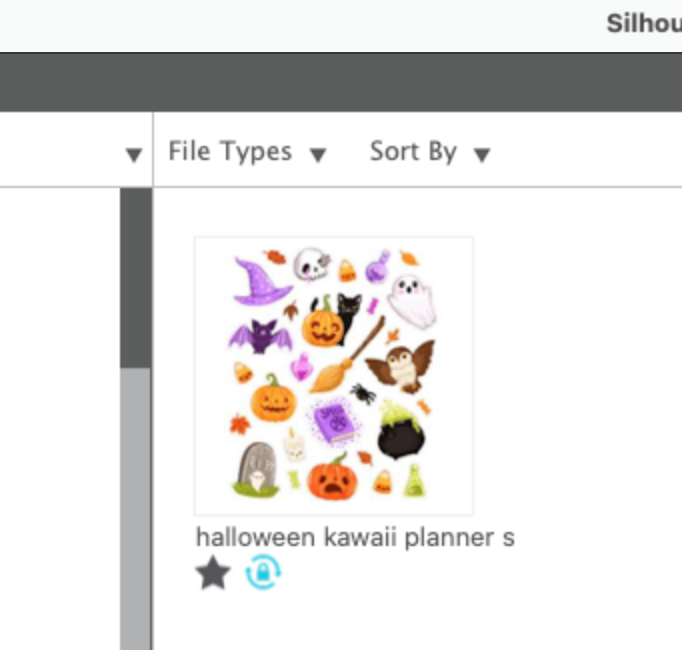
Load the design you want to use for your window clings. If they are from the Silhouette Design Store, you can just double click on the images in the Library. If they are from a 3rd party source, use either File>Open to open the design in a new workspace or File>Merge to open the design in the current workspace. I am using Design #332742 (Halloween Kawaii Planner Stickers) from the Silhouette Design Store.
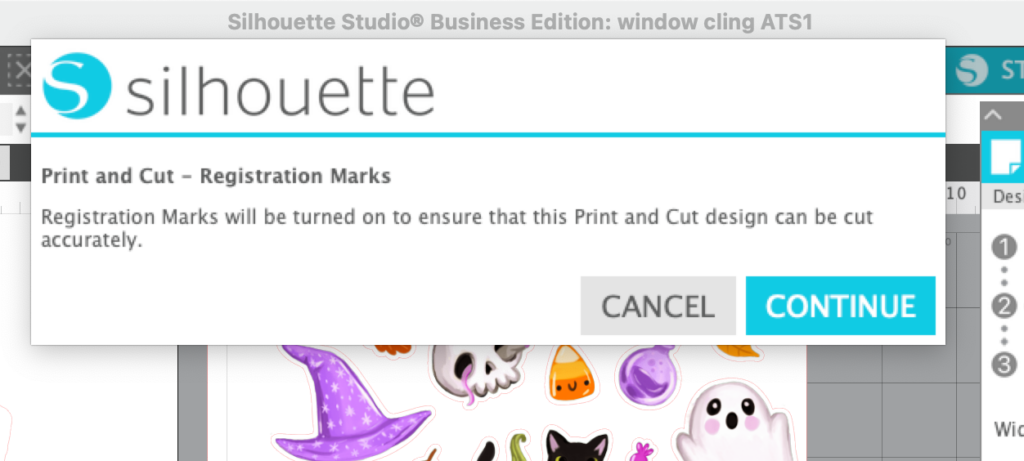
When I double click on the design in the Library, I get a message that this is a Print and Cut project. I have the option to turn on the Registration Marks for this design. Since I am planning to use it as a print and cut, I click Continue.
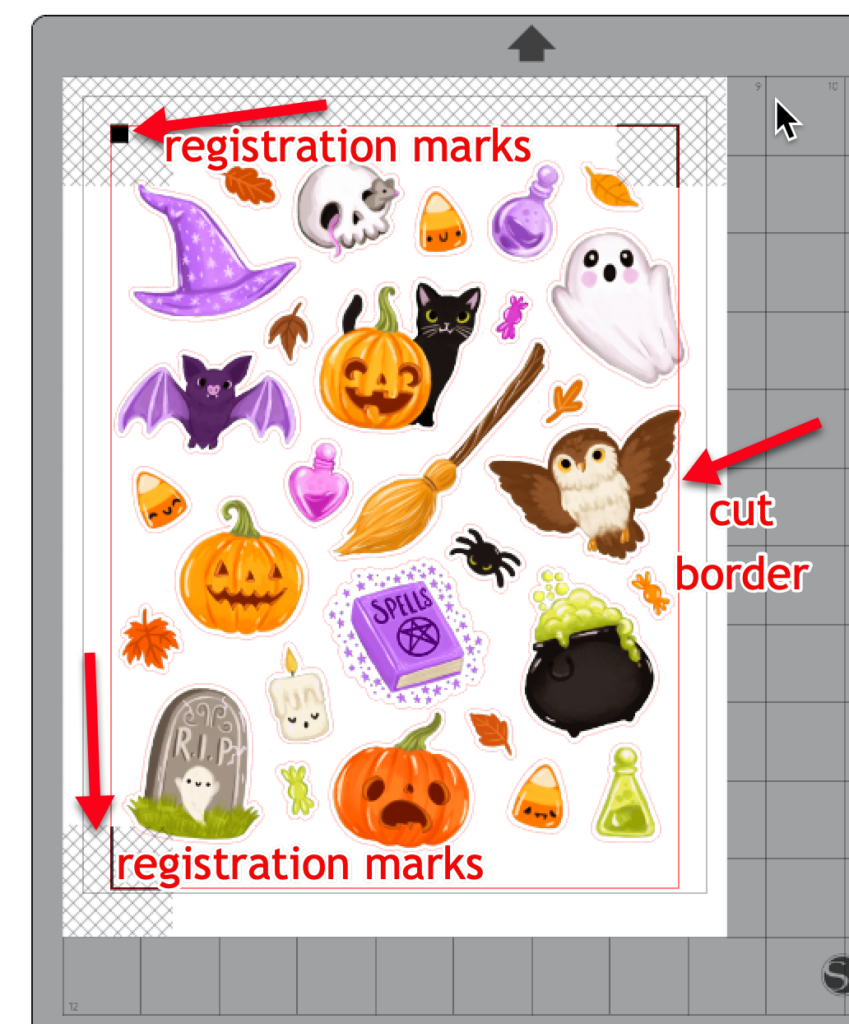
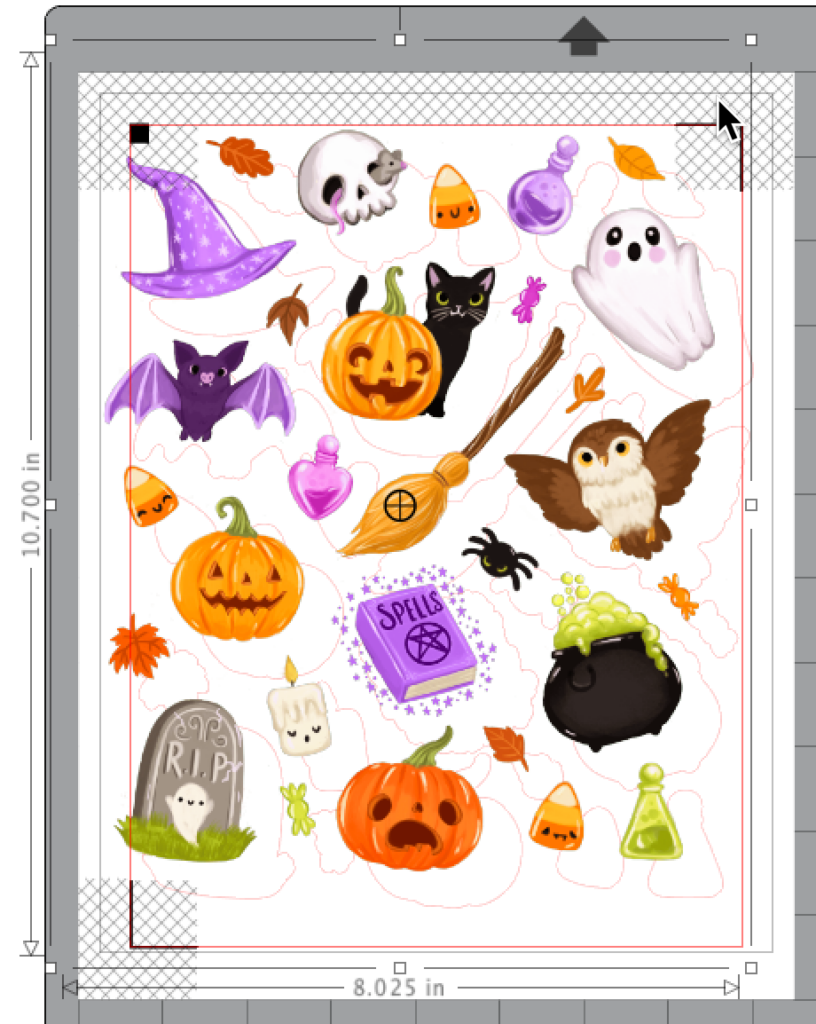
The design is placed in my workspace. Notice that there are now registration marks on the page and my cut border has decreased in size. The registration marks will be read by the Cameo when you are ready to cut. The hashmark area is important because none of your design should be in this area.
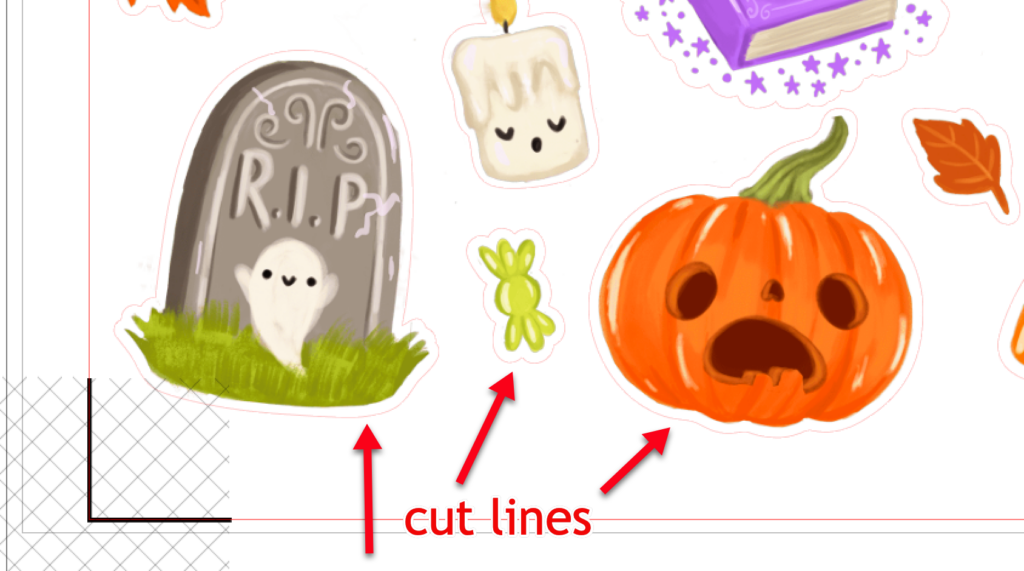
This design was designed as a Print and Cut. The cut stickers all have red cut lines around them. These lines do not have any line width so they will not print but they are what your Cameo will use to cut around the images.
When you look at this design in the workspace, you will see that parts of the design are inside the hash marks. This can cause problems so I need to make the design smaller or move the individual design elements so they is outside the hashmarks and inside the cut border.
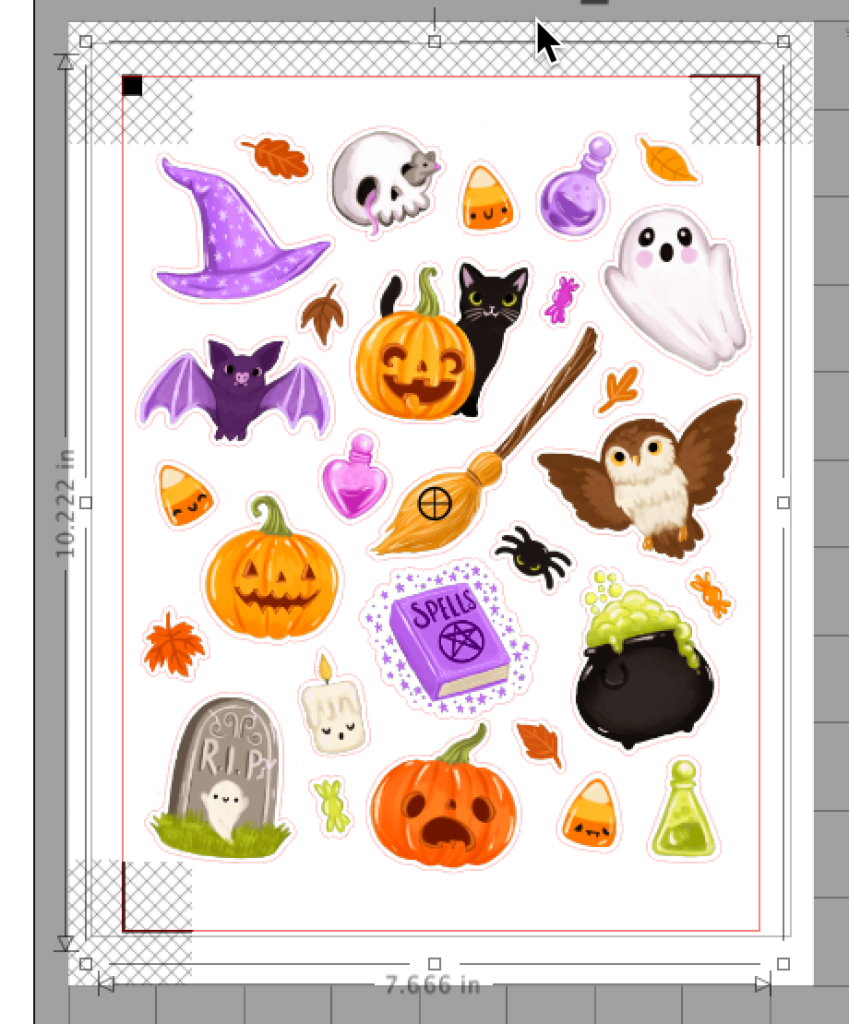
In this case, I selected the design and ungrouped it. When I tried to select an individual part of the design and it’s cut line, I found that the cut lines are all individual elements and can be ungrouped but the pretty colored part of the design is all one element and cannot be ungrouped. Therefore, instead of being able to move or resize individual elements in this design, I will have to resize the entire group.
To make sure the outlines are exactly spaced around the pictures, I used Undo until the two parts of the design were realigned. To make sure I did not accidentally move something after printing, I selected both parts of the design and used CTRL/CMD+G to group them. I then resized and moved the design until it was inside the cut lines and nothing was touching the hashmarks.
Now I am ready to send the job to the printer. Before I do, I take a quick look at the design in the Send panel to be sure that all the cut lines are turned on and will be cut. I also check to be sure that nothing inside the colored part of the design is set to cut. Only the cut lines around the outside of each sticker should be dark red.

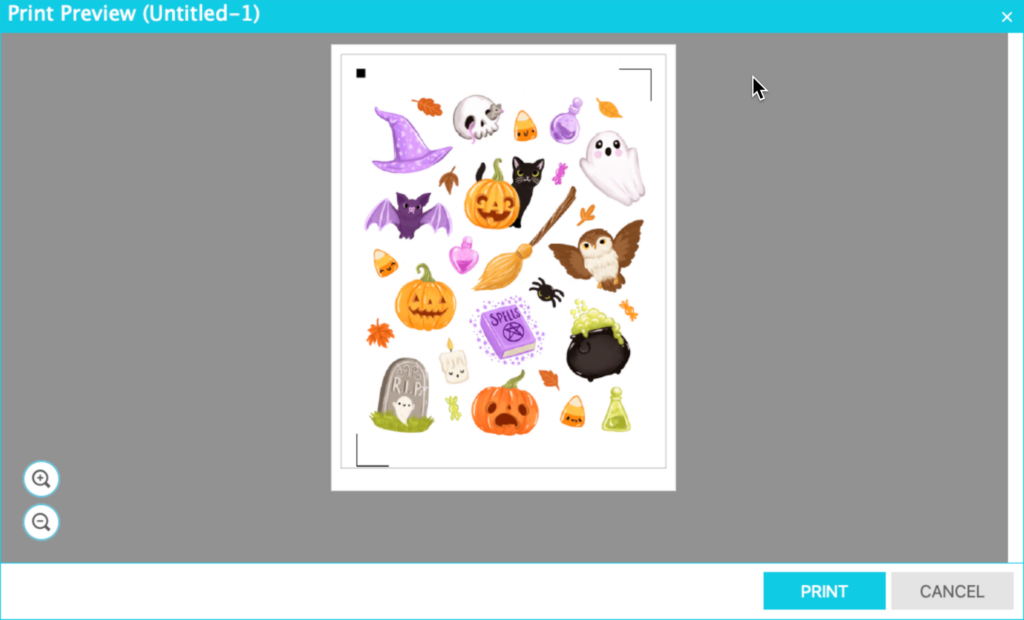
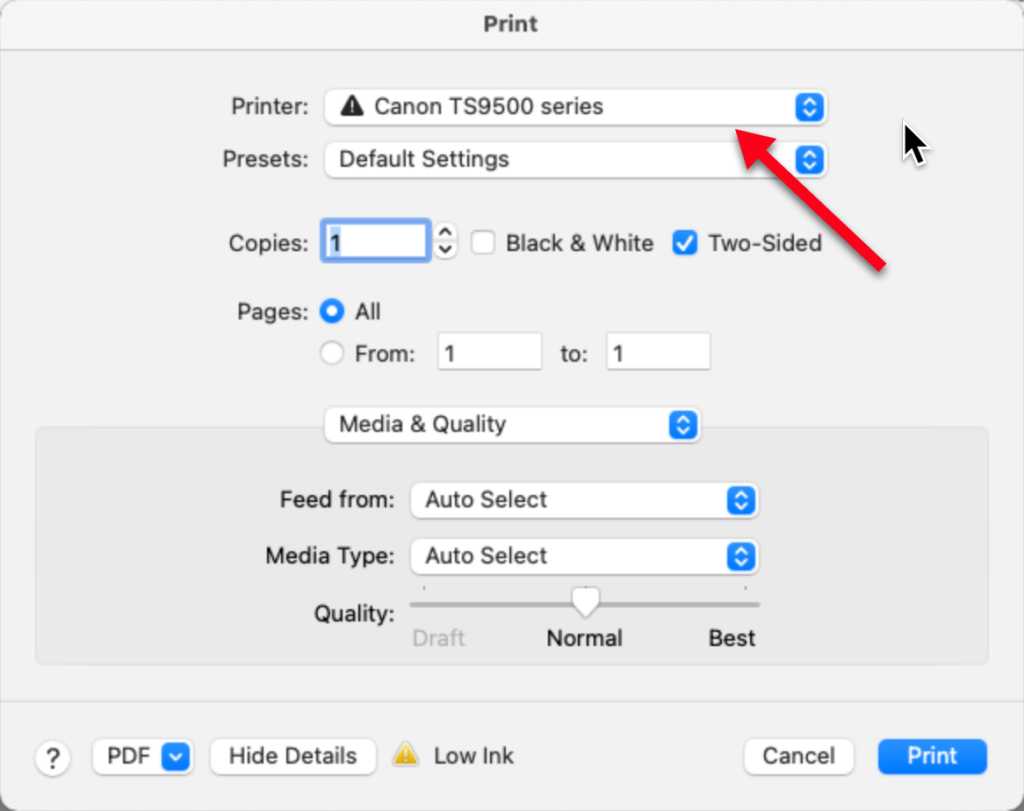
It’s time to print. Load the Window Cling into your printer — you want to load it so the printing will be on the shiny side of the window cling, not the paper backing. In the design tab, check the line width and make sure it is set to 0.0 so it does not print. selected Print from the File Menu. The print preview box is displayed. In this box, you can zoom in to check details or zoom out to check the entire page. Once you are satisfied, you will press Print.
In the Print window, I selected my printer and checked my print settings. Be sure to check the Feed From setting, if needed. If you have loaded your Window Cling in a rear tray, you do not want the printer to pull from the default cassette tray. Once you are satisfied with the settings, press Print.
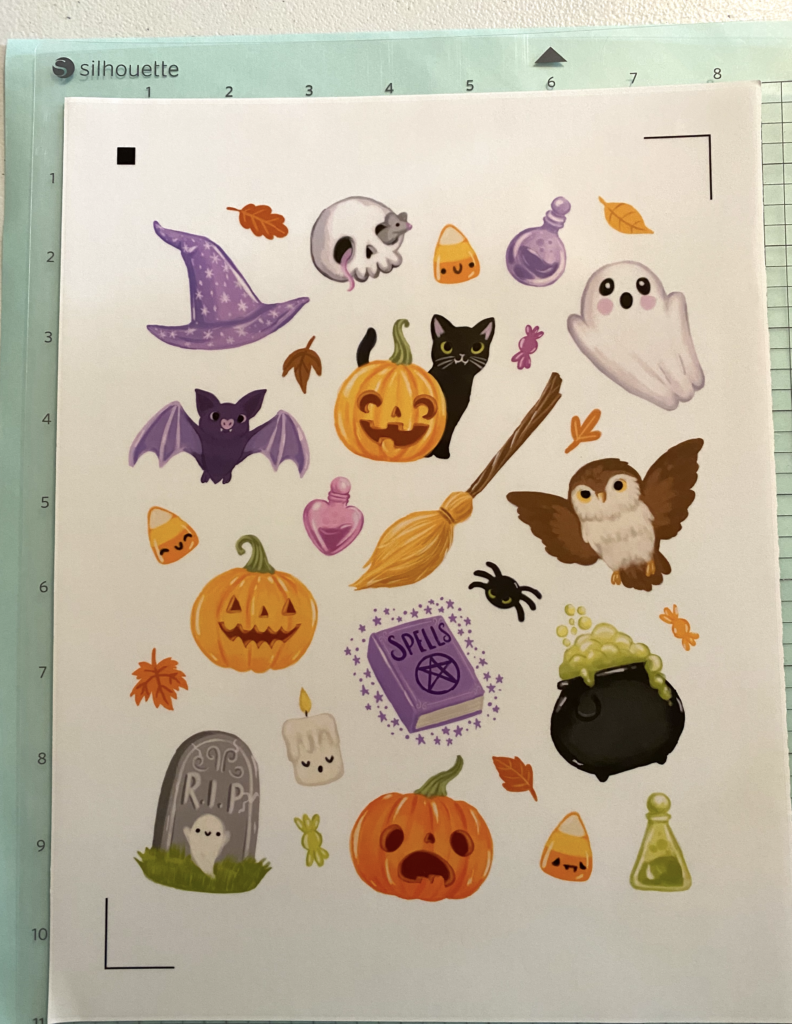
Here’s my printed design page. Notice that the red cut lines did not print. Neither did the hashmarks. But the three registration marks are printed.
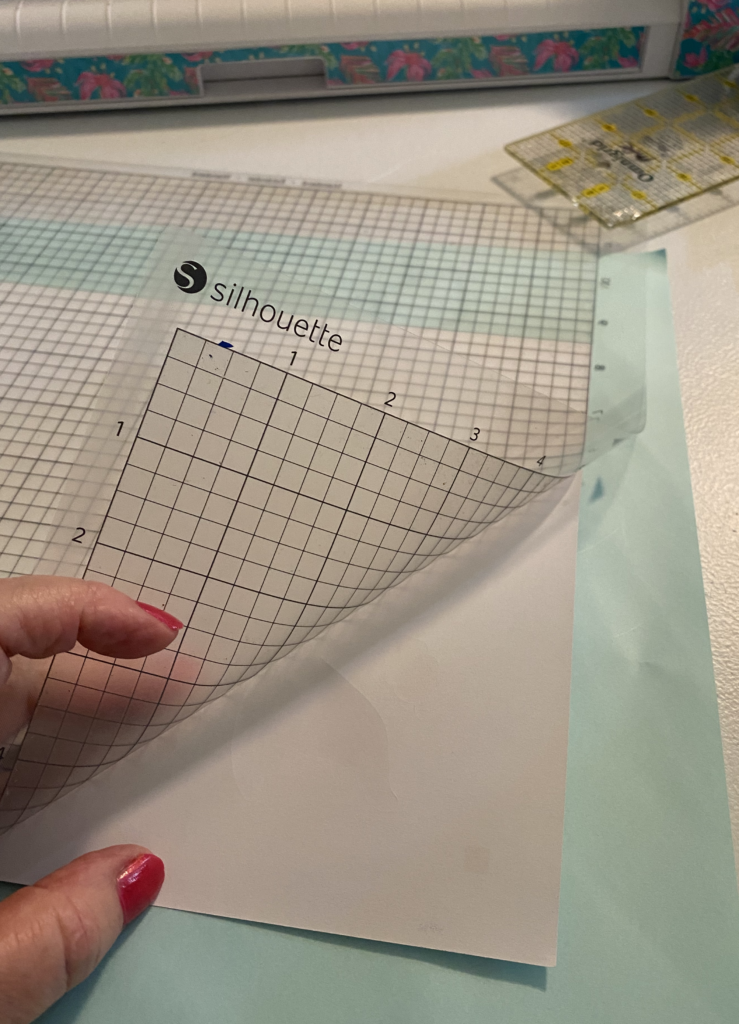
Now it’s time to cut! Place your printed page on the mat. When you put it on the mat, overlap the left edge of the page with the grid lines on the mat just the tiniest bit — this will keep the optical eye from reading that line instead of the registration marks.
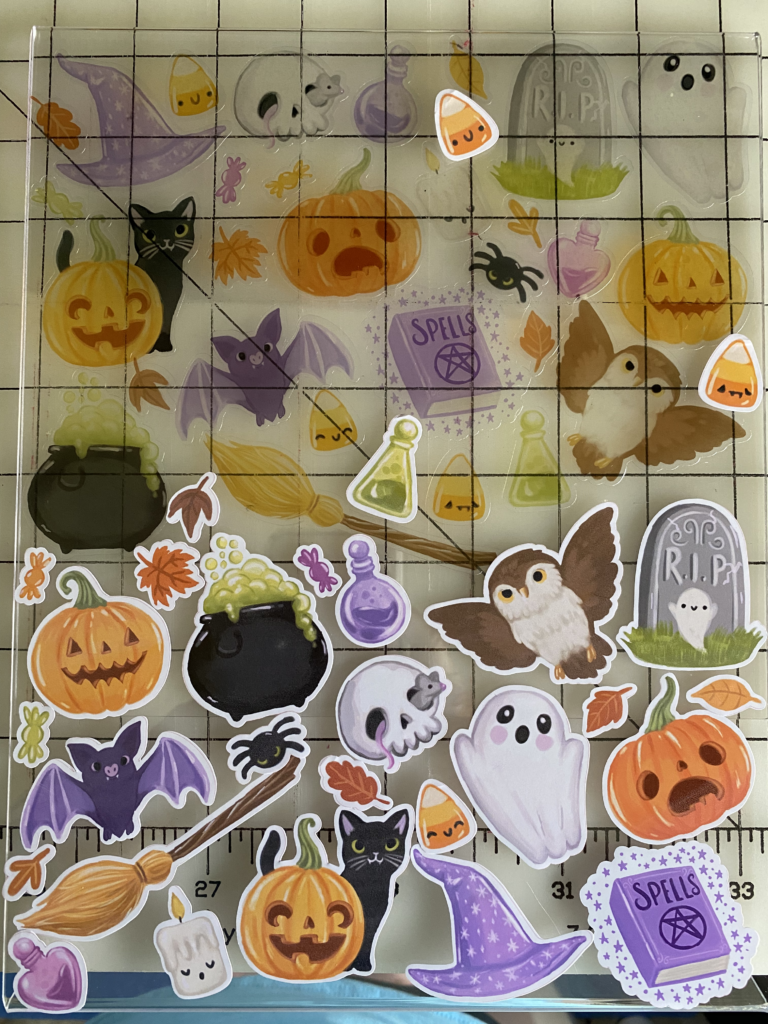
If you are going to do a test cut, be sure to move it down into the design area so that it is not in the same area as the registration marks. After the design is cut, I weed all the excess off the page and then turn the mat over and roll the mat away from the window cling instead of trying to remove the window cling from the mat — it keeps the paper from curling.
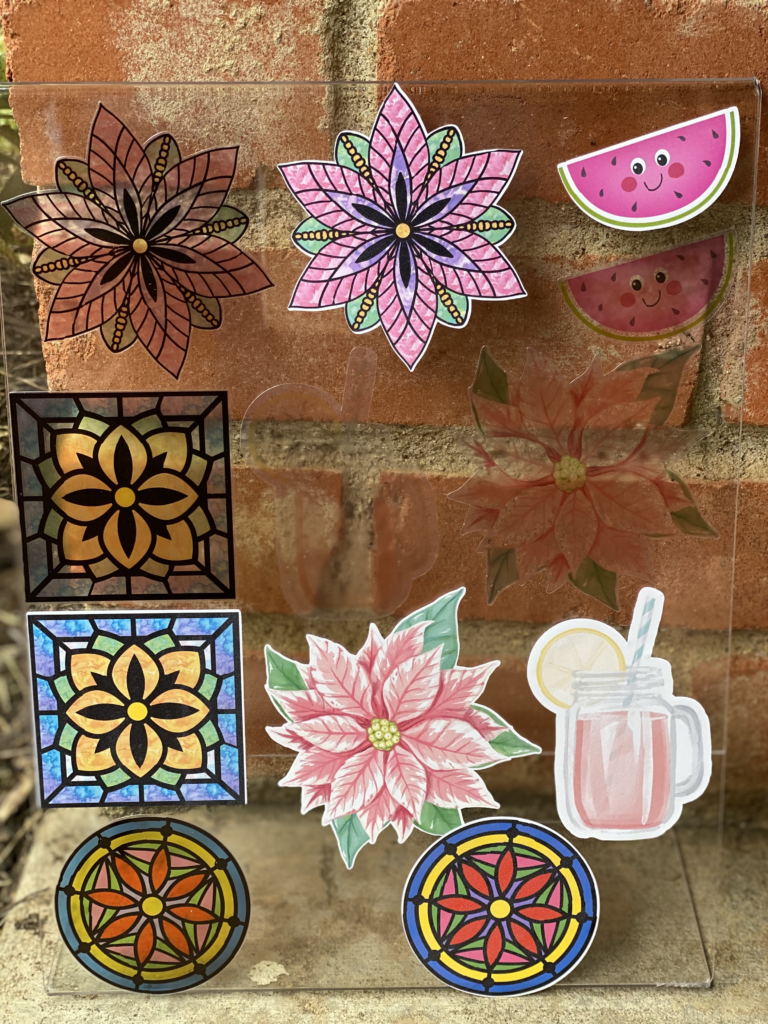
I printed these designs twice, using both the clear window cling and white window cling products so you could see the difference. Unless you have a printer that prints white (not every printer does), you need to consider whether there is any white in your design — it will be clear on the clear window cling. The white background of the white window cling will fill in those spots.
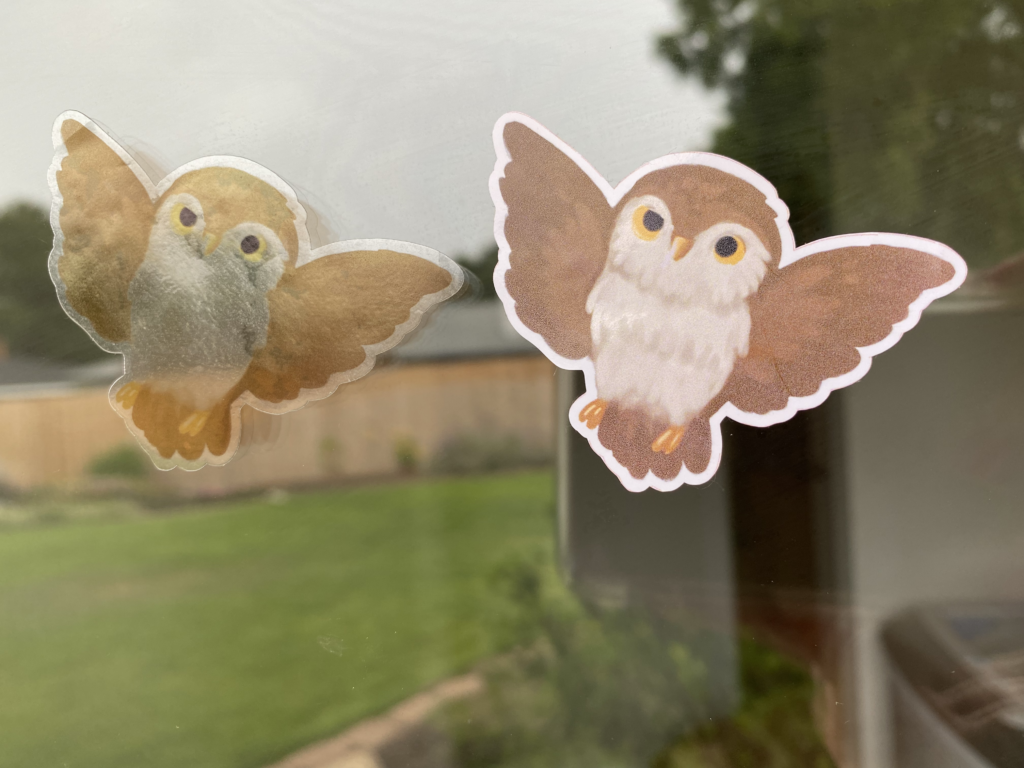
Here’s a little better example. There’s a little bit of a reflection of the clear owl because it is on the window but I wanted you to see them side by side.
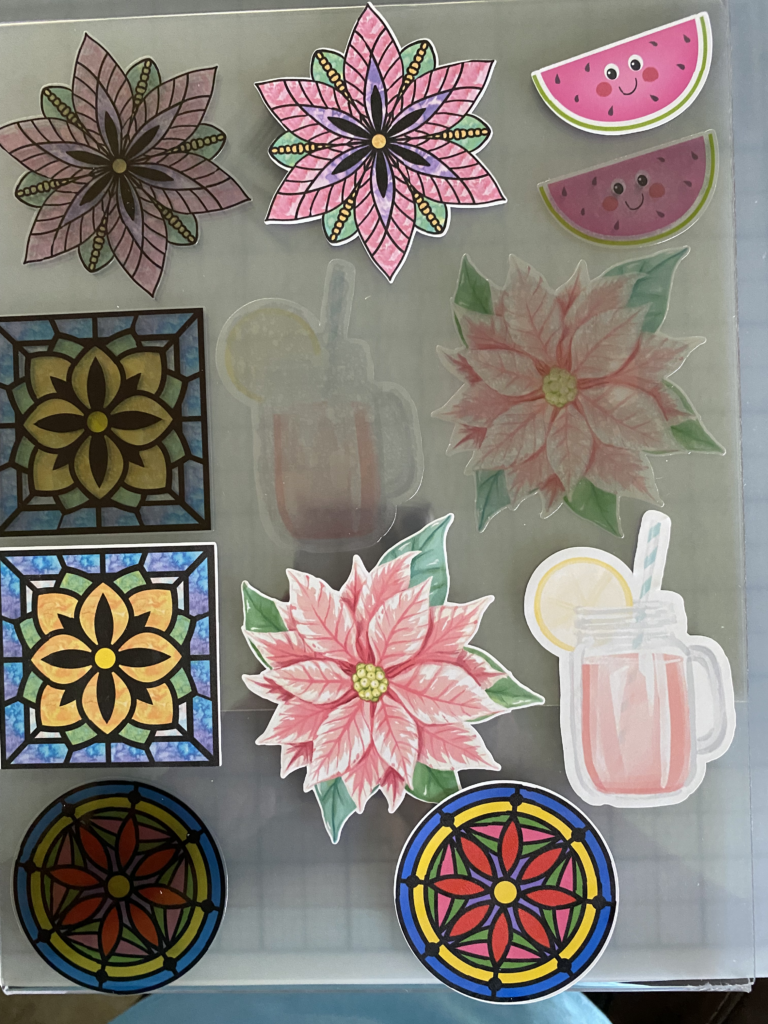
Here’s another group of designs I printed. You can see that some of the clear ones are very hard to see on clear backgrounds like this picture frame or a window.

But the clear ones look really good if there is a background with a little color instead of being clear like the window. Here’s the clear lemonade from above on a kitchen tile. I like the muted look it has. Of course, you would have made it the right size to fit the tile (I did not think of that when I started this post!)

Here’s both sets of designs I printed for this post …. you can really see the difference in the clear and white backgrounded window cling! I am really thinking the clear ones would be a great way to add holiday cheer to your kitchen backsplash or to let the grandchildren decorate the bathtub!

If you enjoyed these tips, please join my Facebook groups … Libby’s Silhouette Group — Tips, Tricks, Tutorials and Projects, Libby’s Craft and Sewing Group and Running With Sisers – Juliet and Romeo. You can also find me on FB at Libby’s Loft.com. Please join and feel free to ask questions and share your creations! I look forward to seeing you there!!
Until Next Time,
Happy Crafting!!
Disclaimer: Posts on this site may contain affiliate links. Clicking on one of these links or making purchases at linked sites does not mean you pay more for your purchases. It means I may receive a small commission on your purchase. This commission helps defray the costs of this site and enables me to continue to provide you with new and exciting content.