One of the most common questions users of all levels ask is “what are the settings for”. And unfortunately, there is not one answer that works for every person! Things that can impact your cut settings include whether or not you are using a mat, the age (and dullness) of your blade, and the brand of material you are using. Just because materials are the same type, they are not all manufactured the same and therefore, require different cut settings.
Silhouette Studio has more than 80 preset cut settings built-in. These settings are a starting place for your settings.
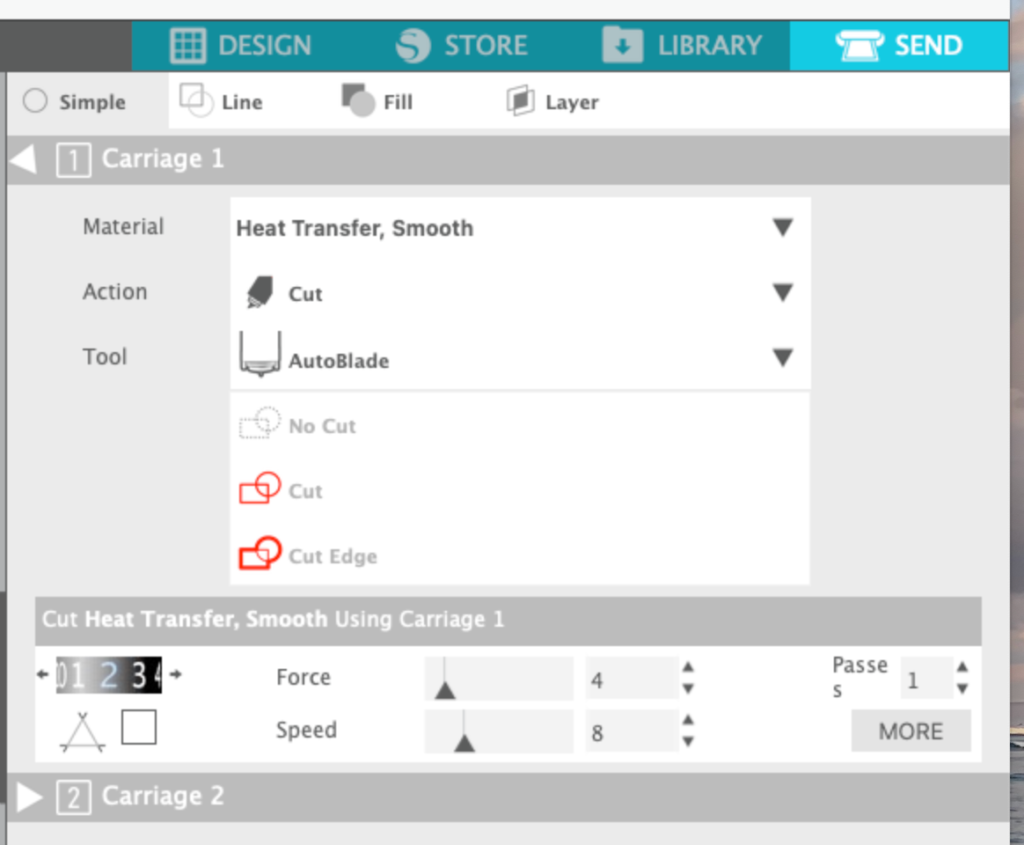
When you select a material type, the software will present you with the recommended settings for that material. It will display the recommended starting point for your blade depth, the force (downward force applied to the blade), the speed and the number of passes needed to cut that material.
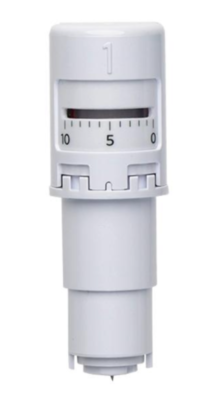
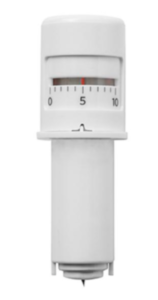
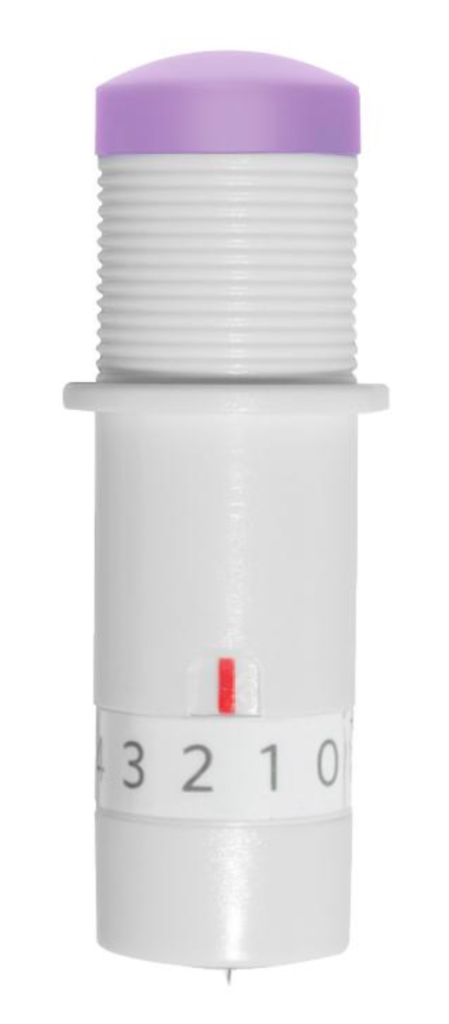
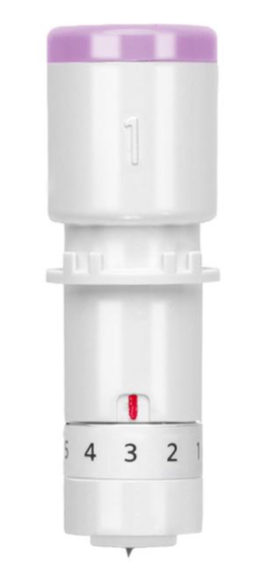
If you are using an auto blade, the Silhouette will automatically adjust the blade depth when you send the cut job. These are the two types of auto blades. The one on the left is for the Cameo 3 and the Portrait 2. The one on the right is for the Cameo 4 and the Portrait 3. Notice that it has a “1” on it to remind you it belongs in Carriage 1.
If you are using a ratchet-style blade (not an auto blade), you will have to manually adjust the blade depth to the correct depth before cutting. These are examples of ratchet style blades.
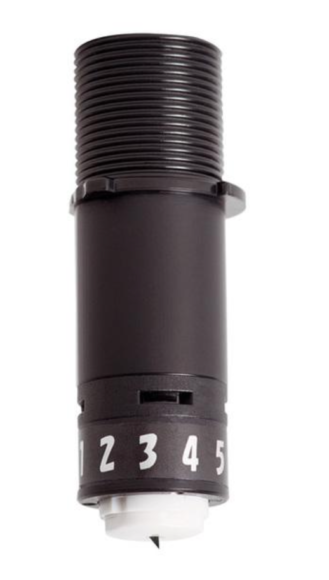
When using a manual blade, you will want to change the tool option in your Send panel. Select the correct tool from the dropdown menu. You will notice that the blade setting is shown — that is the recommended starting point for you to set the blade.
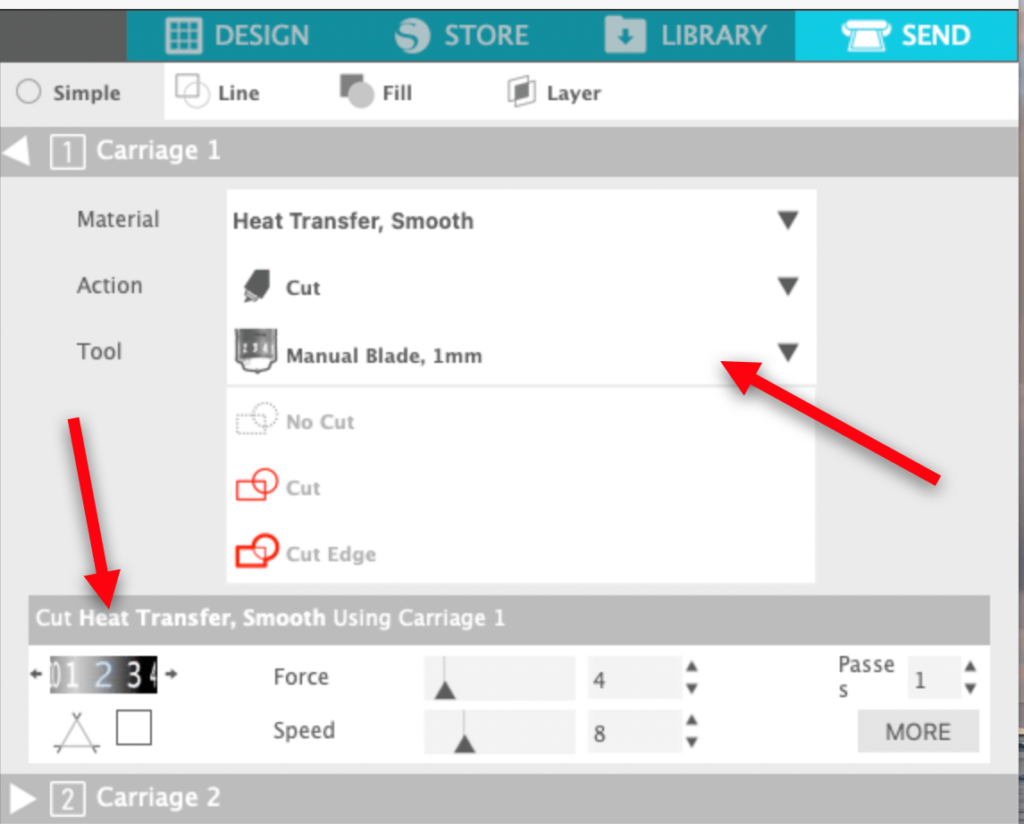
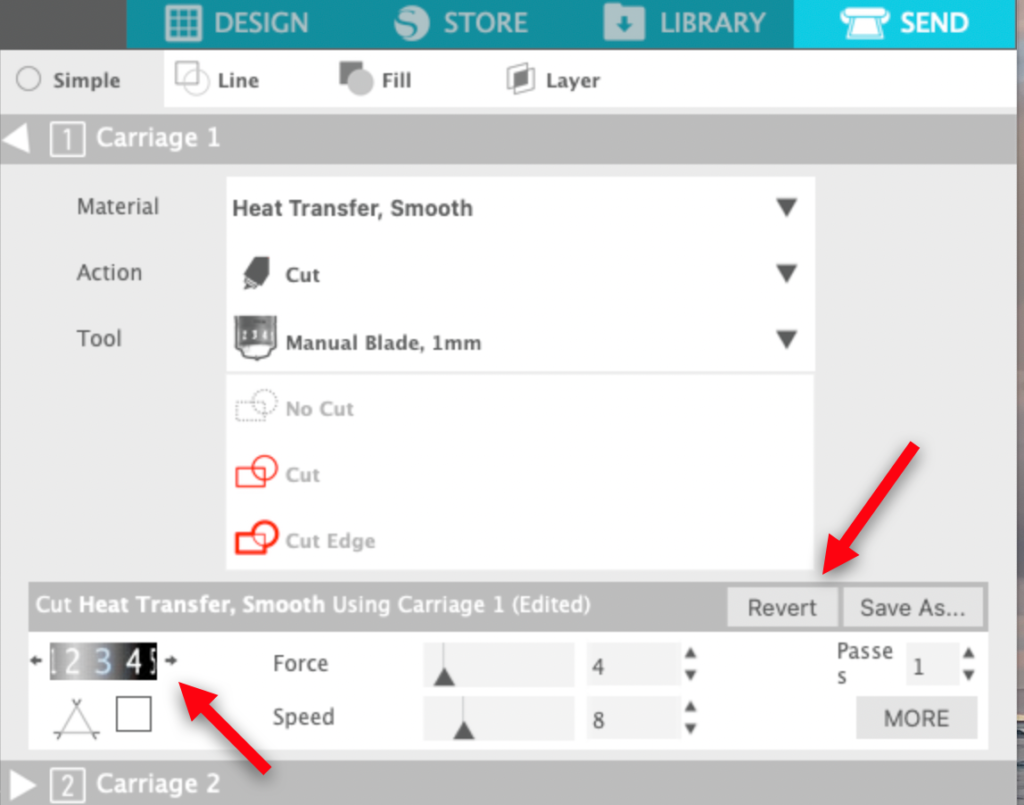
With the correct material and tool selected, it is time to look at the settings Silhouette gives you. The first is the recommended blade setting. If you are setting it yourself, use this as a starting point. For the Cameo 4, I have found that I need to increase my blade depth by 1 for most materials, so I just automatically adjust that setting. The software lets me know I have made a change to the recommended settings and offers me the change to Revert to the default or save the changes.
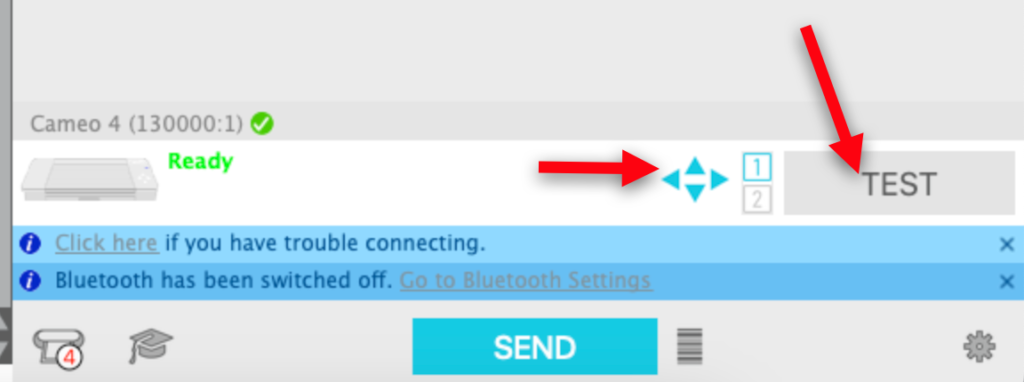
The Force setting controls how much downward force is used when the blade is cutting. Sometimes when the difference between two blade settings is too much, adjusting the force can be just enough to help you get a clean cut. Adjusting the speed can also help you get a better cut – often using a slower speed gives better results. I don’t adjust these until I have done my test cuts. The test cut button located in the lower right corner of the screen.
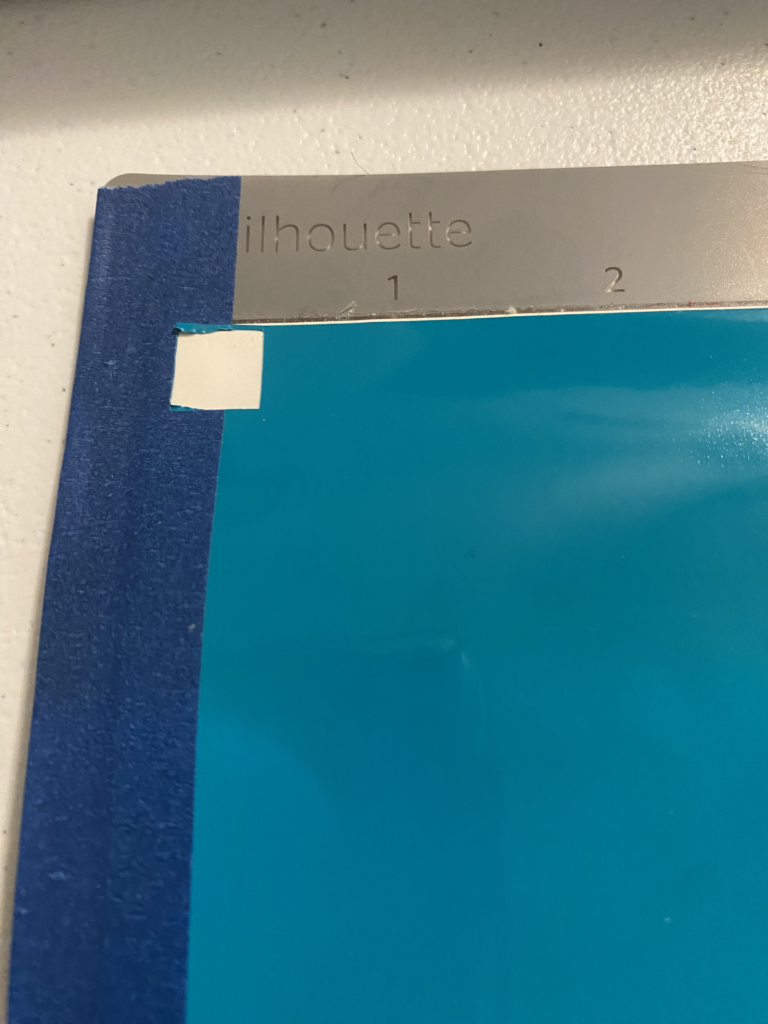
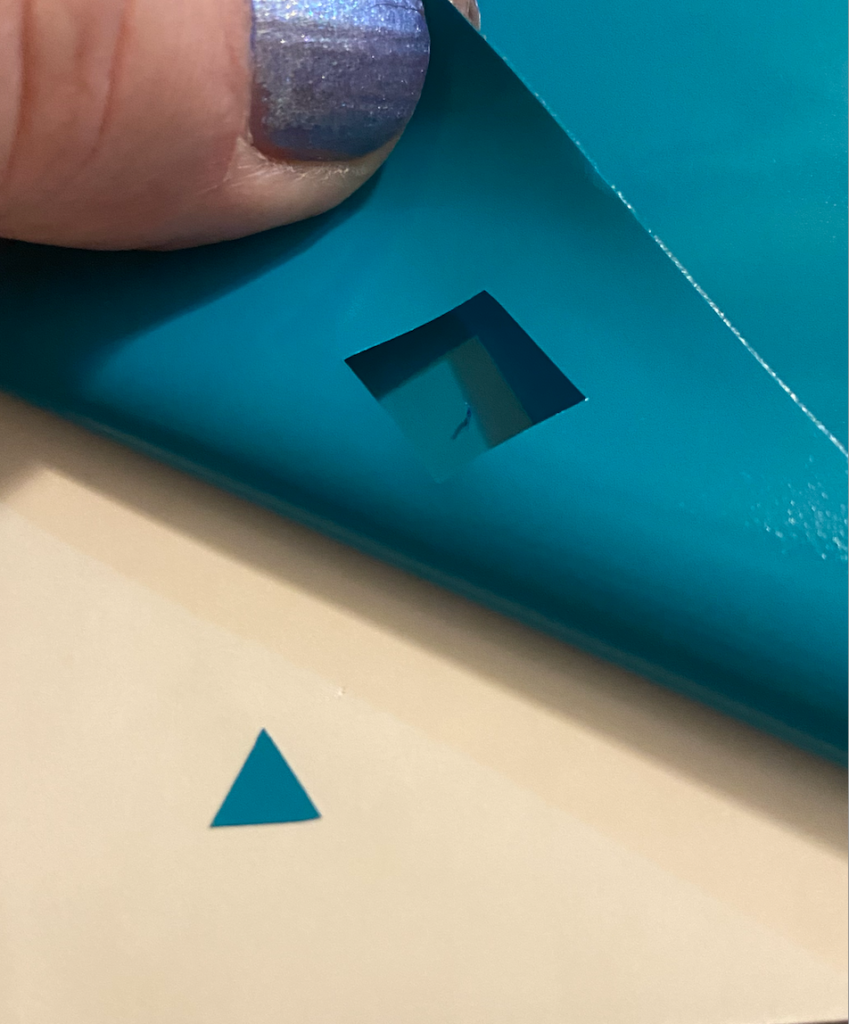
Because the mat I was using is pretty old and is not very sticky, I used some painters tape to hold the vinyl in place. This caused a problem for me with my test cut when left in the default position. The test cut was in the tape and so I did not get a good reading but you can see the placement of the default test cut.
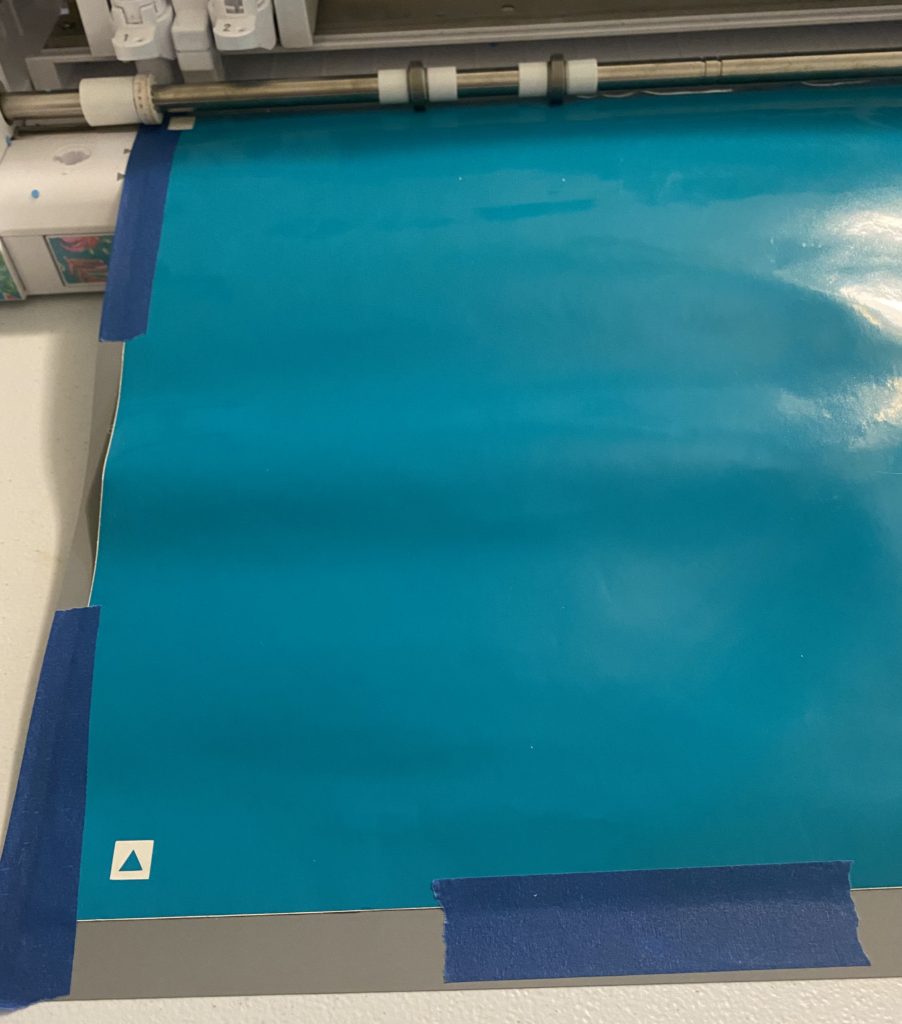
Using the default test cut requires me to remove the mat from the Cameo to check the cut so often I use the scoocher buttons next to the test cut button to move the test cut down to the bottom of the mat so I don’t have to remove it from the machine to check the cut.

I moved the test cut down to the bottom and could easily check the settings of my cut.
A good cut is one where the vinyl is easily removed from the carrier sheet without cutting through the carrier sheet.
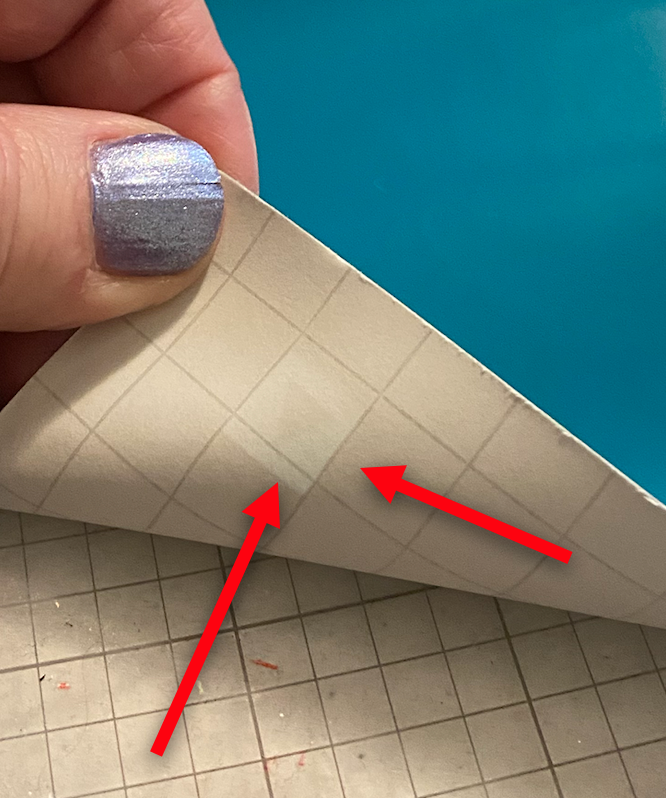
You also don’t want to be cutting so deeply that the blade is scoring the carrier sheet. This can cause the edges of your vinyl to be pushed down into the carrier sheet and, even though it seems to weed well, it can cause your vinyl to be hard to remove from the carrier sheet with transfer tape.
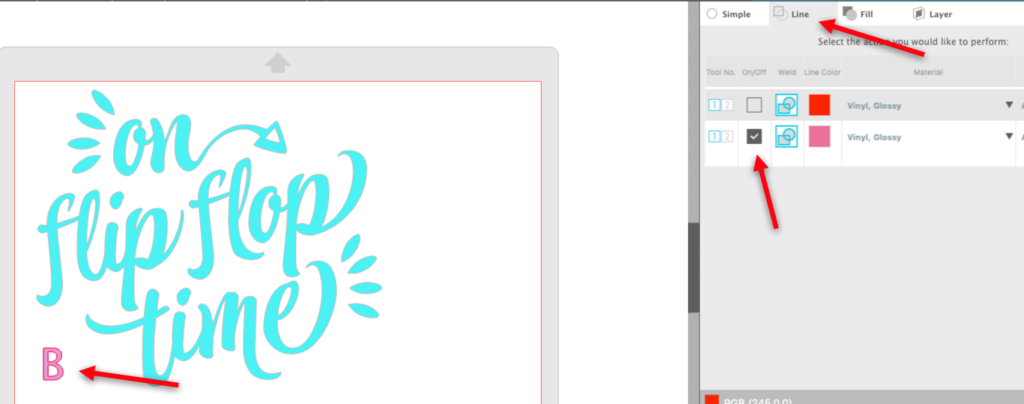
You can use the default test cut or you can do what my friend EllyMae Habets recommends and use a capital letter “B”. It is great because it will test the curves as well as the straight cuts. You can move this to a vacant spot in your design area and use it to check your cut. When I use it, I use a different line color or fill color and then cut by either line or fill color so it is the first thing that cuts. For more information on cutting by line, click here. Either way, remember to test cut!!
I recommend that you test cut every time you are ready to cut, even if you have used the material many times. If your test cut is not satisfactory, change just one variable at a time. I usually increase the blade depth by 1 and try the cut again. After adjusting the blade a time or two, I try adjusting the force. You never want the blade to be extended too far — that can cause drag and ruin your material.
Add a New Material
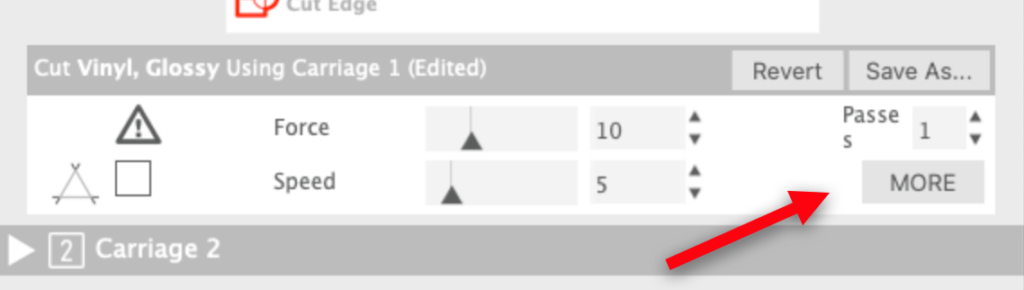
I don’t recommend that you make changes to the default values for materials already in Silhouette Studio. But if you have a material that you cut frequently and have made changes to the default settings, you can save those settings in your software. Click on the More button in the cut settings box.
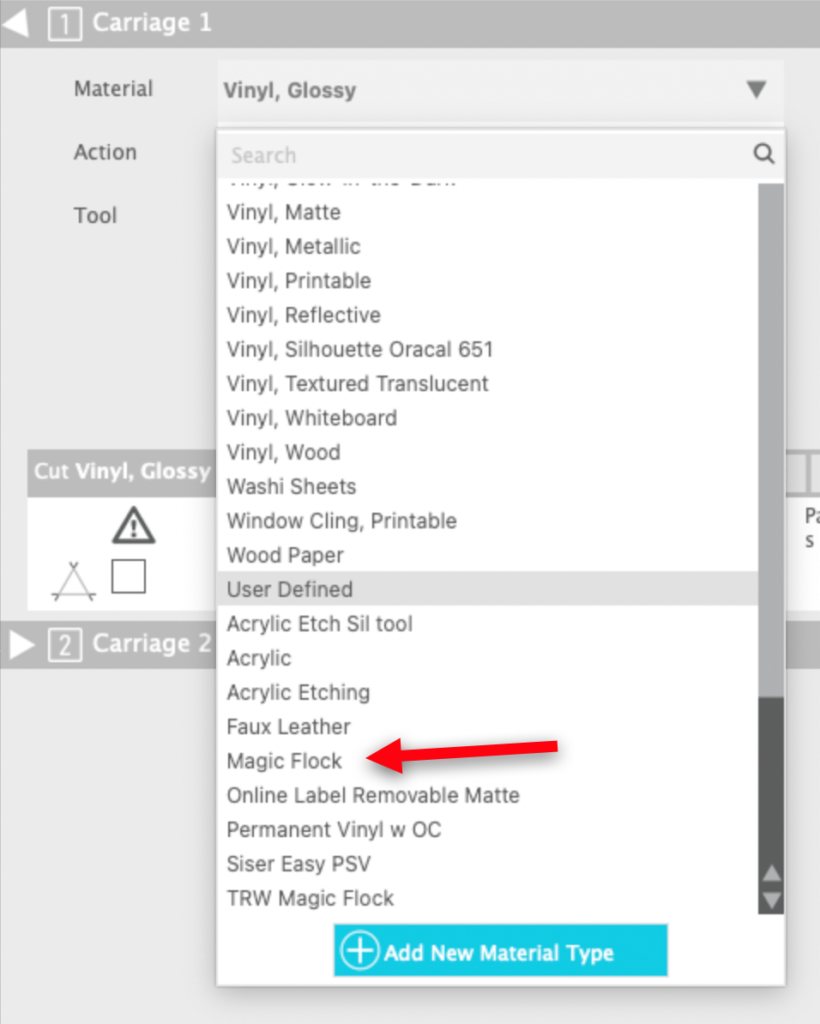
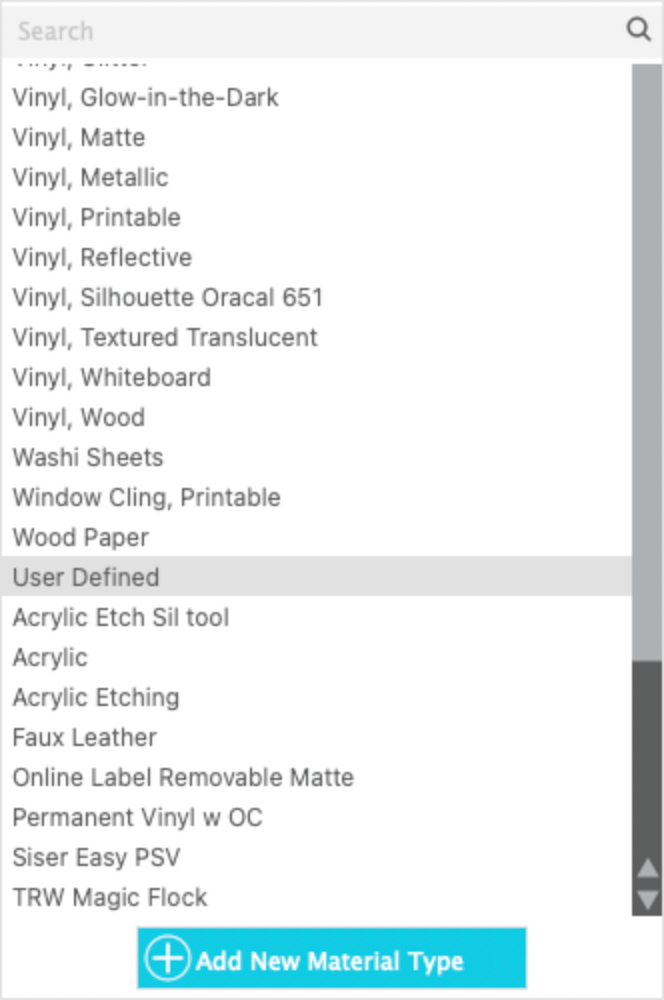
You will be brought to the User Defined area of the material settings. Click on New Material. Click on it again and you can name the material something you will remember. I created one for the flock I use for rhinestones because it requires different settings than the Silhouette brand. Make sure the correct carriage is set and that your action is set to cut. Adjust the force, speed, number of passes and blade setting and then click Save.
Once you click save, the new material will be listed in the material settings under User Defined. It will be at the bottom of the list. If you want it to be in the list alphabetically, you can click on More again and then left click and drag the setting up so it is listed alphabetically in the User Defined settings.
If you ever decide you no longer need the user defined setting, you can always press the More button and select the material you don’t want. Then click the “-” next to the name and it will be deleted.
Final Words
The most important thing you can do when working with your cutter is to do a test cut. I cannot repeat that enough … test cut, test cut, test cut!! As you can see, the perfect cut is often a matter of changing settings and then testing, changing settings and testing again. Don’t forget to move your test cut each time to get a true reading of the impact of your changes.
If you enjoyed these tips, please join my Facebook groups … Libby’s Silhouette Group — Tips, Tricks, Tutorials and Projects, Libby’s Craft and Sewing Group and Running With Sisers – Juliet and Romeo. You can also find me on FB at Libby’s Loft.com. Please join and feel free to ask questions and share your creations! I look forward to seeing you there!!
Until Next Time,
Happy Crafting!!
Disclaimer: Posts on this site may contain affiliate links. Clicking on one of these links or making purchases at linked sites does not mean you pay more for your purchases. It means I may receive a small commission on your purchase. This commission helps defray the costs of this site and enables me to continue to provide you with new and exciting content.