It’s been a while since we talked about the updates to Silhouette Studio. There have been some exciting things happening in versions 4.3 and 4.4! Let’s take a look!
Studio 4.3 Updates
Select Machine — this update allows you to select your machine in the Page Setup Panel. Once your machine is selected, only options for mats and media that are compatible with the selected machine will be displayed. So, if you select a Curio, only Curio mats and media will be available.
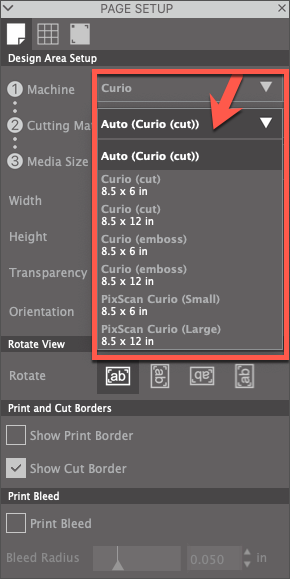
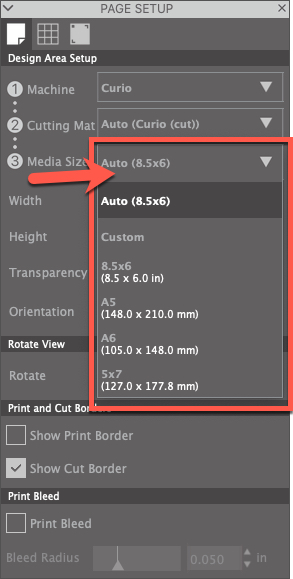
The size of the mat selected will further constrain the media choices. Selecting No Machine will offer no constraints and allow you to create a design whatever size you want, even if it cannot be cut on any Silhouette cutter.
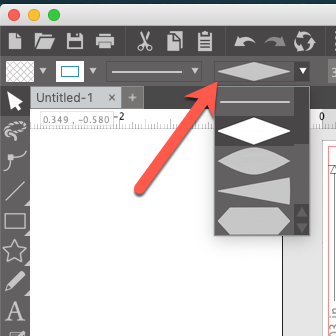
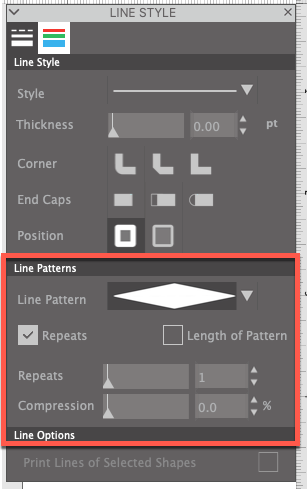
Line Style Patterns — these are available in Designer Edition + and Business Edition. There are 10 line patterns and they can be accessed in the Line Style Panel or in the Quick Access Toolbar.
Here are examples of all 10 of the patterns.
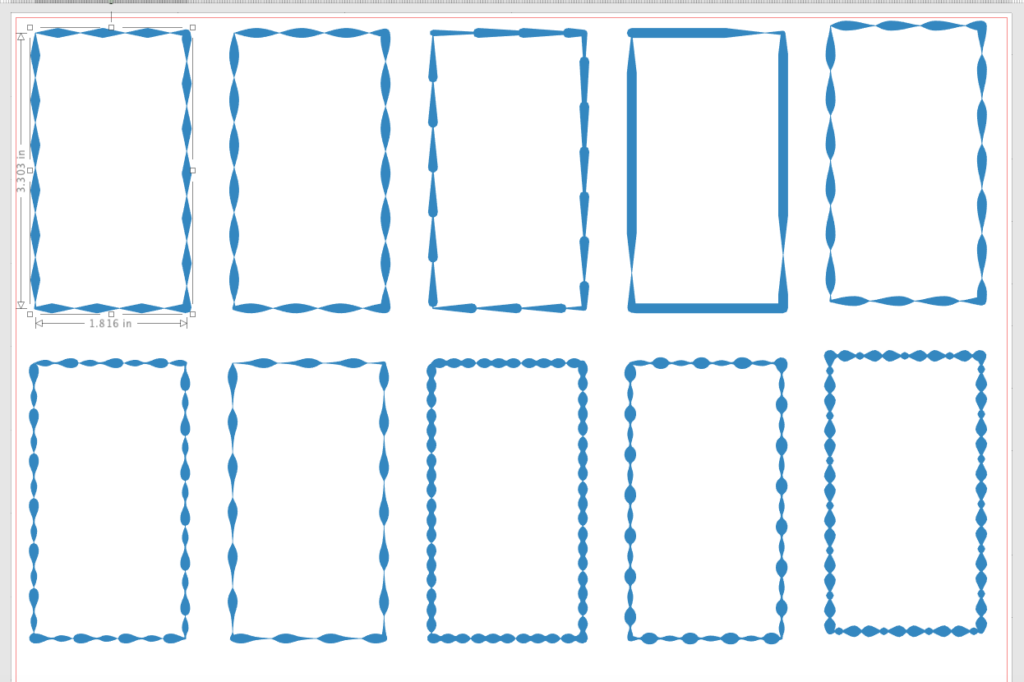
The fun thing about these patterns is you can totally customize the look of the lines in the Line Style Pattern. You can control the number of the pattern by selecting the number of repeats or the length of the pattern. You can also control the compression of the repeats.
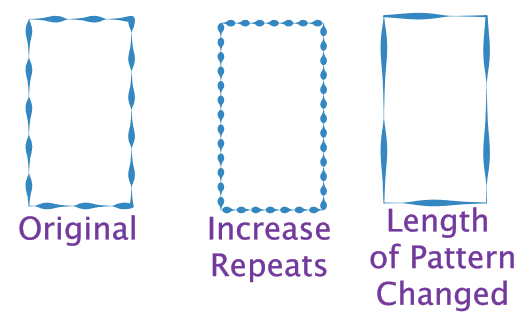
Here are examples of increased number of repeats and a change in the length of pattern. The choices are limited only by your imagination!!
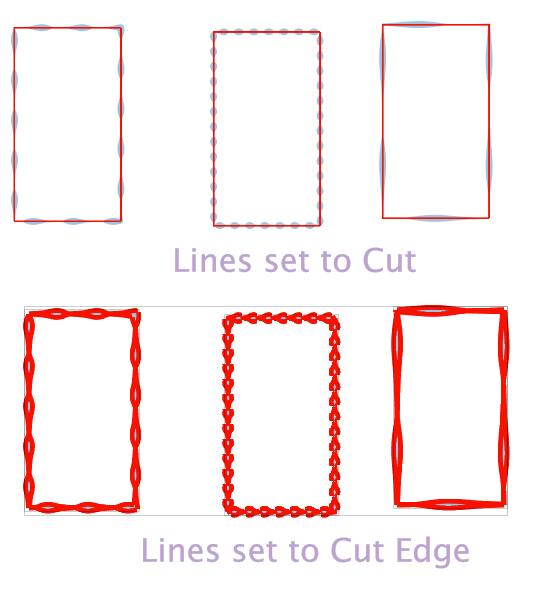
One important thing to remember when using the new Line Style Patterns: The default thickness is 2.0 but the default cut setting is still a line. If you have your image set to Cut in the Send window, you will still get a single cut line, not the new line. To cut the new line shape, you need to use Cut Edge.
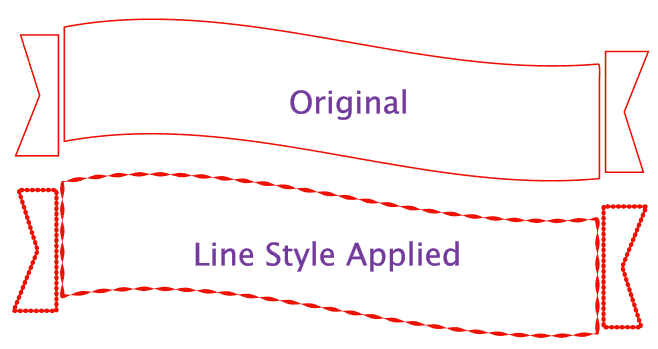
One more great thing about these line styles … you can add them to almost any design … like this banner purchased from the Design Store!
Fill Panel and Line Style Panel Enhancements — When you look in the Fill Panel or Line Style Panel you may notice some changes. There is now a Recently Used palette, showing the colors you have used most recently … and best of all, this panel is the same in the Fill and Line panels, so it makes matching your fill and line colors sooo easy!!

You can also create your own custom color palettes now! This means you can create a palette to use for a project and save the palette to use over and over! In the Fill Color (or Line Style Panel), click on the New Palette Name box and enter the name of the new palette. Then select a color in the design or image you want to include in your palette. Click on the “+”. Continue this way until you have all the colors in your palette. No matter which panel you create in, the new palette will appear in the other one!
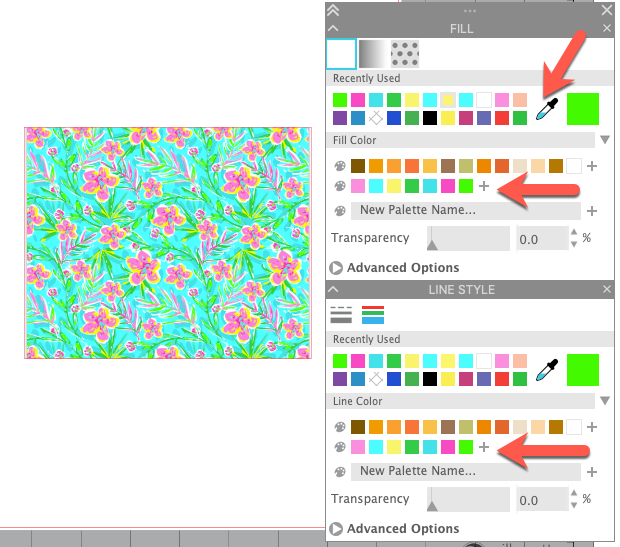
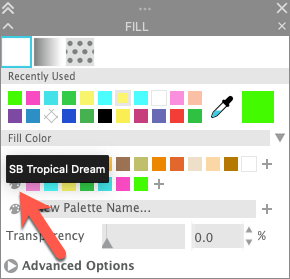
If you hover over the palette icon, you can check the name of the palette.
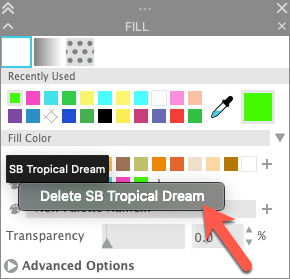
You can delete colors from the palette or delete the palette altogether when you are finished using it. Right click on a color in the palette and select Delete Custom Color. Right click on the palette icon and select Delete (name of palette).
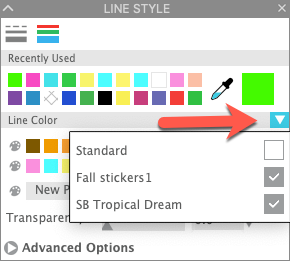
You can also hide a palette from view by clicking on the down arrow next to Fill (or Line) Color and unchecking the palette you want to hide.
Studio 4.4 Updates
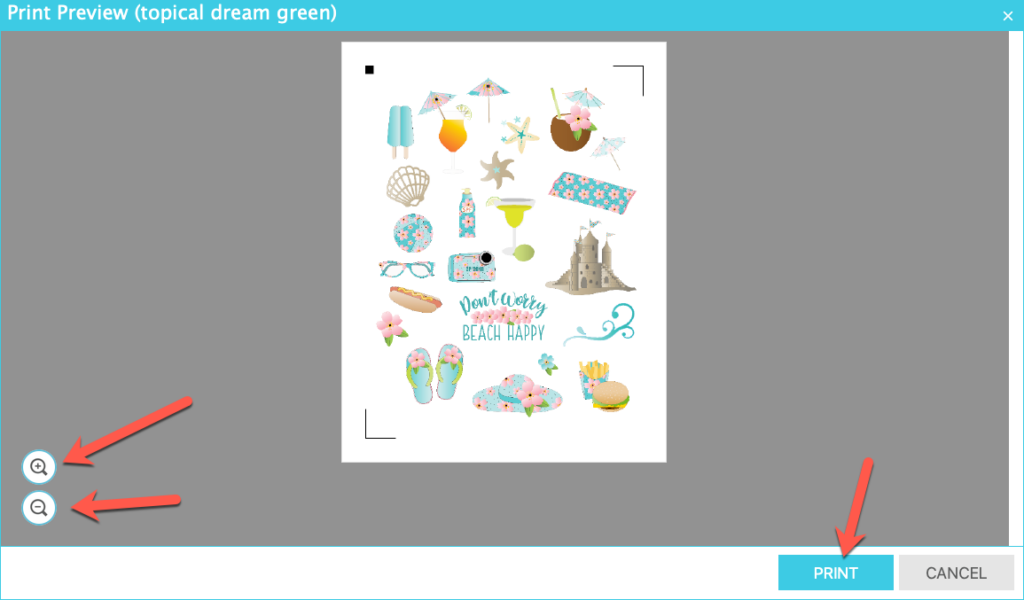
Print Preview — When you select Print from the File menu, a print preview screen now automatically opens! You can zoom in and out in this preview window to check details or see the entire page!
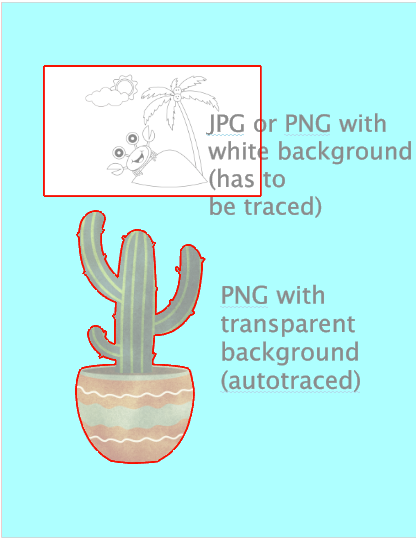
AutoTrace PNG with Transparent Background — in previous versions, PNG files with white or transparent backgrounds had to be traced when brought into Silhouette Studio. You can see here in the Send preview, the JPG or PNG with a white background would have to be traced. The PNG with the transparent background is ready to use!
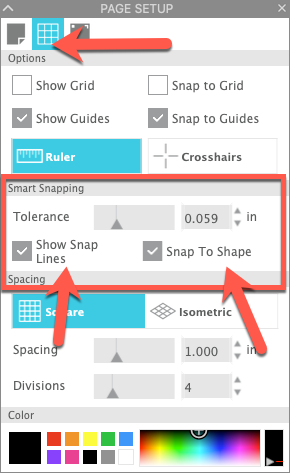
Smart Snapping — have you struggled to get things lined up when you are designing? Smart snapping is here to help! As you drag one design element toward another element, a temporary guide will appear and your design will snap to it! When you are moving objects, you will see a blue line as they align with each other both horizontally and/or vertically. If you release your mouse and stop dragging when you see the line, the objects will remain aligned!
You can turn Smart Snapping on and off in the Grid Settings tab of the Page Setup Panel. You can also adjust the tolerance or how close objects have to be in order to “snap” to each other. Our them on when you want to use them and turn them off when you do not want to use them.
So, what do you think? I really like the custom color palettes and the auto tracing of PNG files … Which is your favorite update? How will you use them to make your designing quicker and easier??
You can update your software by downloading the new version directly from the Silhouette America website. Remember, it is not recommended that you do an update through the software!
If you enjoyed these tips, please join my Facebook groups … Libby’s Silhouette Group — Tips, Tricks, Tutorials and Projects, Libby’s Craft and Sewing Group and Running With Sisers – Juliet and Romeo. You can also find me on FB at Libby’s Loft.com. Please join and feel free to ask questions and share your creations! I look forward to seeing you there!!
Until Next Time,
Happy Crafting!!
Disclaimer: Posts on this site may contain affiliate links. Clicking on one of these links or making purchases at linked sites does not mean you pay more for your purchases. It means I may receive a small commission on your purchase. This commission helps defray the costs of this site and enables me to continue to provide you with new and exciting content.