
I love the look of a mandala inside another shape, don’t you! They look so difficult but are really so easy to create! Let’s get started.
Open your Silhouette software. If you have Designer Edition Plus, you can use a FlexiShape heart for the first part of this exercise. If you do not have DE+, you can use the heart provided in the download files. Select Merge from the File menu and bring the heart into the workspace.
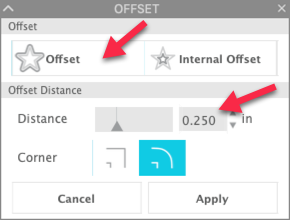
Click on the heart, if necessary, to select it. Click on the Offset icon in the right toolbar. Click Offset to create an external offset around the shape. Set the distance to 0.25 and click Apply.
With the offset still selected, click on the Fill icon in the top toolbar and select another color. I chose purple.

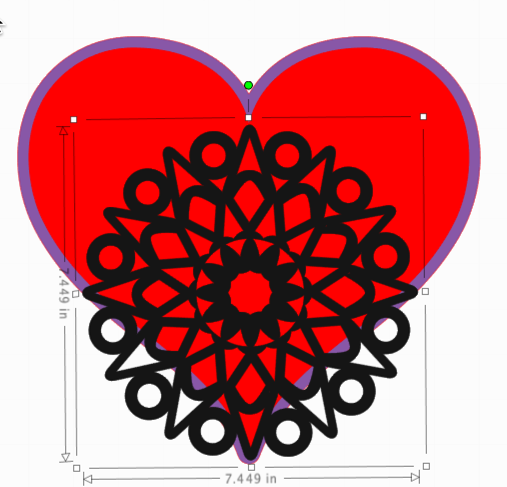
Click Merge from the file menu and locate the mandala file. Select it and it will be placed in the workspace. Using Merge opens the new design into the exiting workspace instead of opening a new workspace. Left click and drag the mandala into place over the heart. Drag one of the corner handles to make the mandala larger so it fits in the heart. Using the corner handles will maintain the aspect ratio for the design so it does not look skewed.
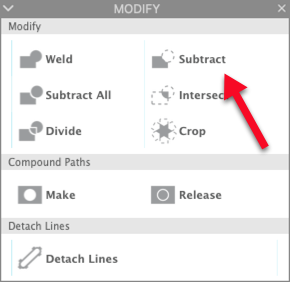
With the mandala still selected, hold down the shift key and click on the red heart. Click on the Modify Panel icon in the right toolbar. Select Subtract.
The mandala will be subtracted from the heart. You will see bounding boxes around all the parts that are created when we subtracted.
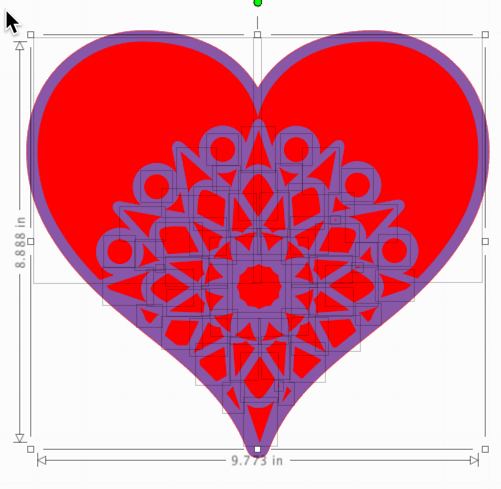
With these parts still selected, hold down the Shift key and click on the purple heart. With all the parts selected, right click and select Make Compound Path.
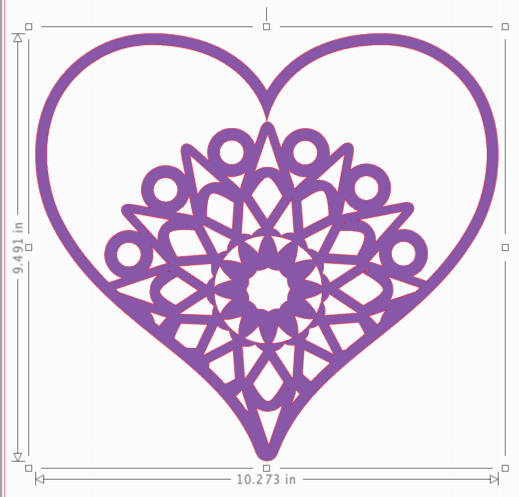
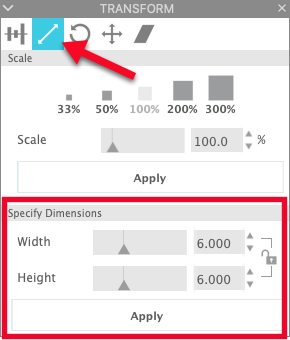
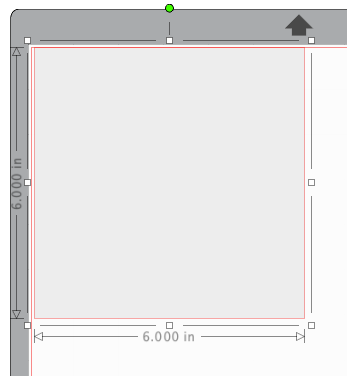
All the parts have been welded into one design. There is now only one bounding box around the design. I am going to put this on a ceramic tile. To simulate the tile, click on the Draw tools and select the rectangle tool. Bring the cursor into the workspace. Left click and drag to create a shape. Click on the Transform tab and select the Scale tab. Change both sides of the shape to match the size of your tile. My tile is 6″x6″. Press Apply.
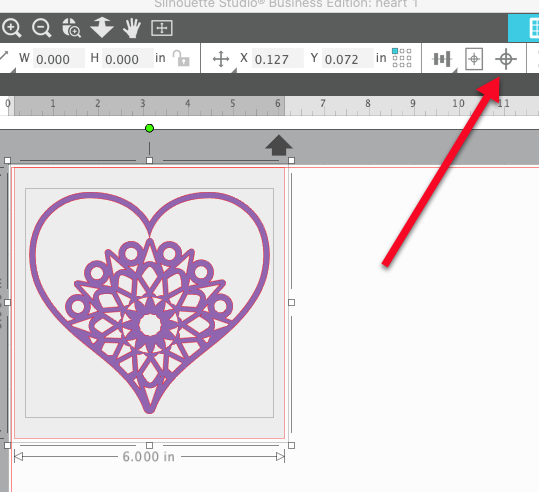
I also added some color to my shape. Click on the Fill icon in the Quick Access toolbar and apply a color. I used a light grey.
This square is on top of the heart. To move it to the back so you can see both elements, right click on the square and select Send to Back. Left click and drag a box around both elements. Click on Center in the Quick Access toolbar to center the heart exactly on the square.
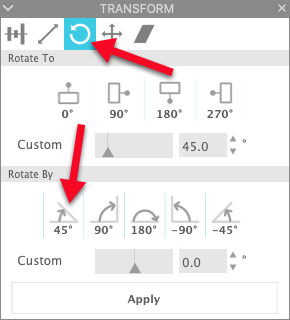
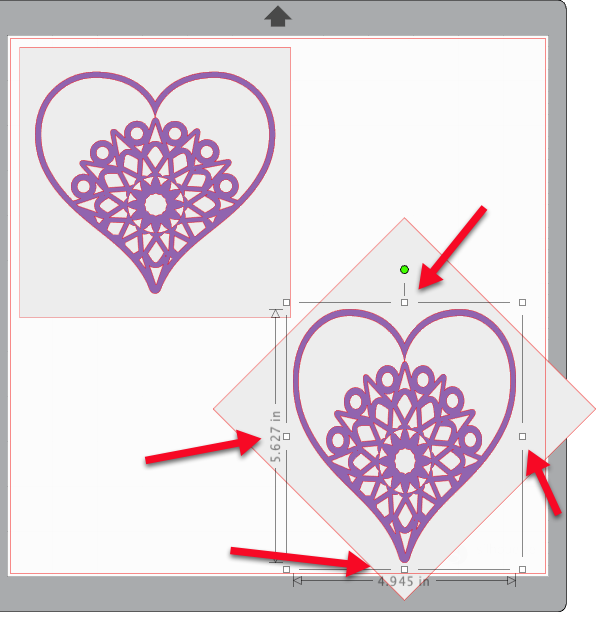
With both shapes selected, right click and select Copy. Paste the copy away from the first two objects. At this point, you can use a corner handle on the bounding box on the first heart to adjust the size if you want to make it larger or smaller. Now left click and drag a box around the second square. Click on the Rotate tab in the Transform panel. Rotate this element 45 degrees and click Apply.
.
You can now use the rotation handle on the heart to adjust the heart on the square. You can also use the center handles of the bounding box to scale the design, making it taller or wider as you wish.
Once you decide which way you want the heart to be placed on the tile and have adjusted the size, you can delete the other heart and square …. or move it off the mat to use another time. At this point, I would save the design.
Now you are ready to cut. I cut my vinyl down to 6″x6″ to make weeding easier. Because of this, I moved the square off to the side of the mat, in case I needed it again. But you can just delete it if you prefer. You could also use it as a weeding box if you are going to cut a lot of hearts at one time. Position your vinyl on your mat and click on the Send tab. I selected the Vinyl, Glossy setting and did a test cut. I used a printed vinyl from Sparkleberry, Inc. and needed to adjust my settings. I increased the blade setting by one click and performed another test cut. I wound up making one more adjustment to my settings to get that perfect cut.
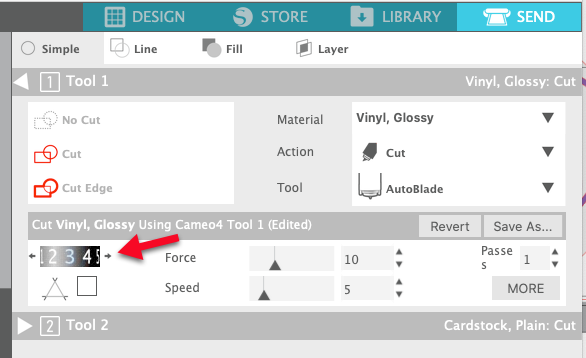
Notice that you can see that you have edited the settings and there is a Revert button you can press to go back to the pre-set when you are finished with this cut job. If you wanted to save it as a custom setting, you could press Save As and add a custom setting. Once the design is cut, gently weed away the excess and apply your transfer tape. I turned my design over and removed the backing from the design instead of trying to remove the design from the backing.

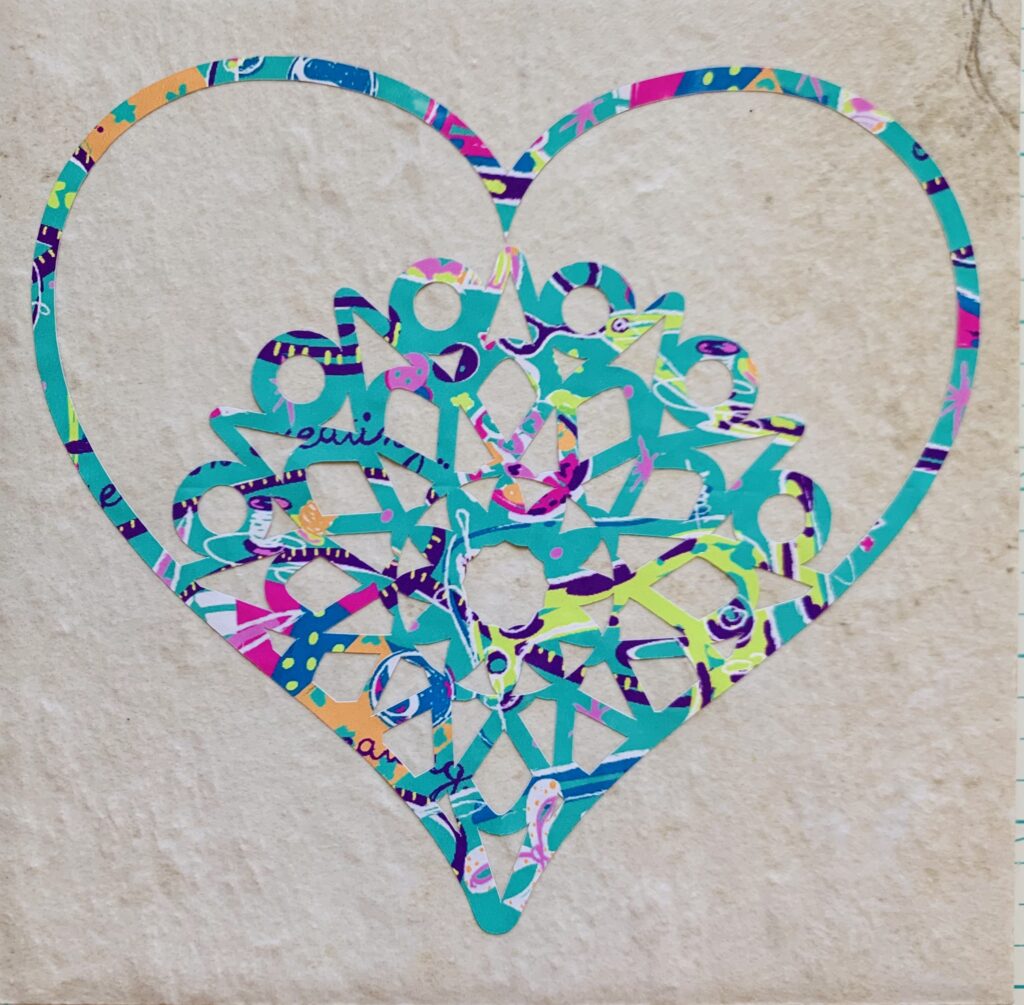
I positioned my tile on my cutting mat so I could take advantage of the grid when lining my heart up on the tile. This tile has a lot of texture, so I positioned my heart and then used a squeegee to help it adhere.
Once I had the heart on the tile and removed the transfer tape, I gently but firmly rubbed my fingers over the vinyl to help it adhere. There are lots of small lines and shapes in this design and I found that helped it adhere better due to the texture of the tile.
To give the tile a more finished look (and protect my table), I placed a piece of peel and stick cork that I purchased at Lowe’s on the back of the tile.
So, what do you think? I created the mandala we used in this exercise. Don’t forget to download the heart and mandala here. Stay tuned … in a future post I will show you some techniques for creating your own mandalas.
If you enjoyed these tips, please join my Facebook groups … Libby’s Silhouette Group — Tips, Tricks, Tutorials and Projects, Libby’s Craft and Sewing Group and Running With Sisers – Juliet and Romeo. You can also find me on FB at Libby’s Loft.com. Please join and feel free to ask questions and share your creations! I look forward to seeing you there!!
Until Next Time,
Happy Crafting!!
Disclaimer: Posts on this site may contain affiliate links. Clicking on one of these links or making purchases at linked sites does not mean you pay more for your purchases. It means I may receive a small commission on your purchase. This commission helps defray the costs of this site and enables me to continue to provide you with new and exciting content.
Until next time,
Happy Crafting!!
Disclaimer: Posts on this site may contain affiliate links. Clicking on one of these links or making purchases at linked sites does not mean you pay more for your purchases. It means I may receive a small commission on your purchase. This commission helps defray the costs of this site and enables me to continue to provide you with new and exciting content.
Libby, thank you SO much for this lesson. I have been trying to figure this out without using the knife or a pattern to fill an object. This was SOOOO helpful!