Someone asked a question in a FB group today that got me thinking …. she wanted to add a grunge effect to some text. I have used grunge effects before but had to purchase them.

After searching a few places to find some grunge effects to share in answer to the original FB question, I looked out the window and found several possible grunge opportunities right in my back yard. So out I went with my iPhone and snapped a few pictures.
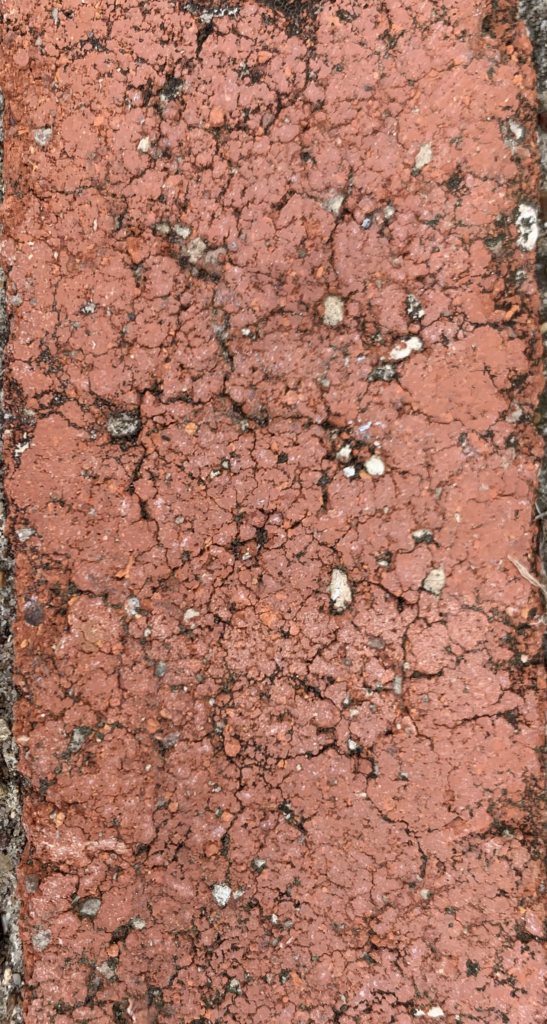
First I opened the brick image in my Silhouette Studio software and opened the Trace panel. I decided that tracing the entire image would result in a very large overlay, so I opted to select just a part of the image.
I was concerned that this would result in LOTS of weeding of very small pieces. So I increased the Scale of the trace so that it would not be as detailed. The Scale slider is interactive, so as I adjusted the slider, I could immediately see what my result would be.
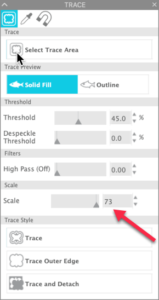
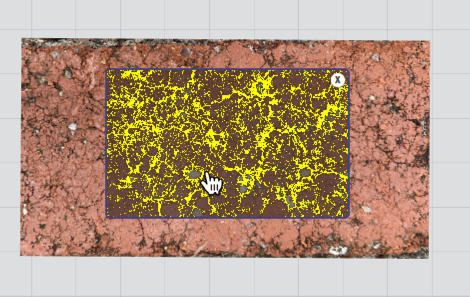
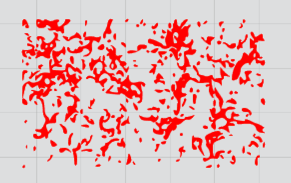
Here’s what the trace will look like with the scale set to 73.

You can see that this resulted in bigger chunks and a lot less detail. For weeding purposes, I thought this would be better, so I clicked Trace.
This is what the compound path that was created by the trace looks like. I did add a fill color to mine so it would be easier for you to see.
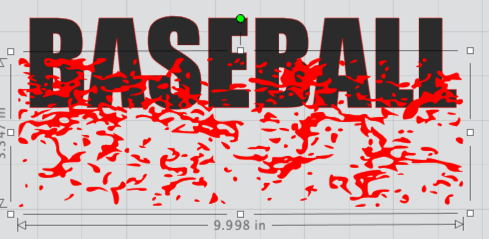
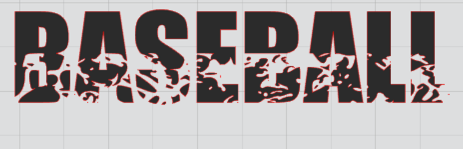
Now for the fun! I added some text to my workspace. I chose a bolder font because I thought the effect would be more dramatic than on a skinny font. Again, I added a fill color so it would be easier to see. I adjusted the size of the grunge overlay by using the handles. This also stretched the design a bit and made the grunge spots a little larger (again, thinking about weeding).
I made sure the grunge was on top of the lettering and selected the words and the grunge. I opened the Modify Panel and selected Subtract. Here’s what happened.
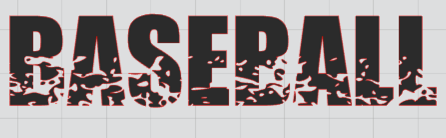
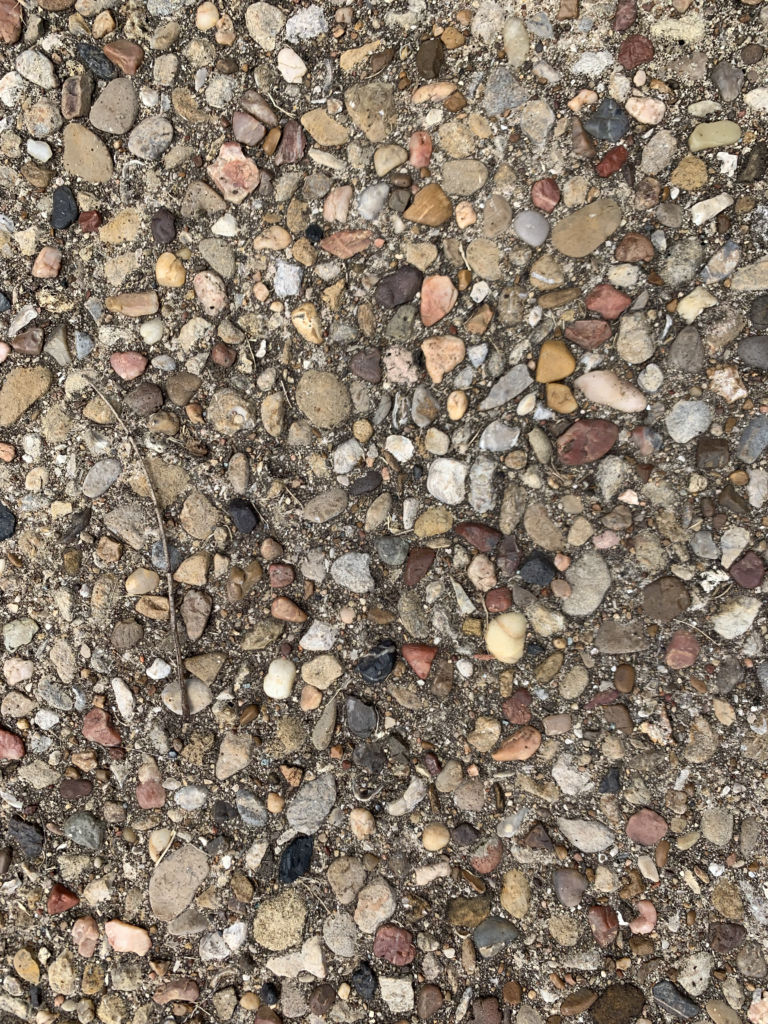
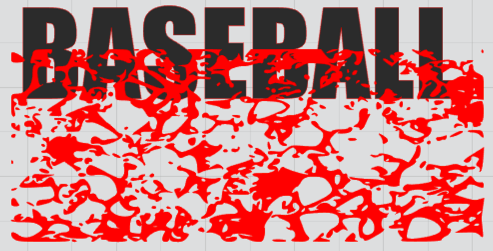
Exactly the look I was hoping to get!! So now I decided to see how my other images would work for this technique. Here’s the pebbles from my patio before ….
And after the subtract ….
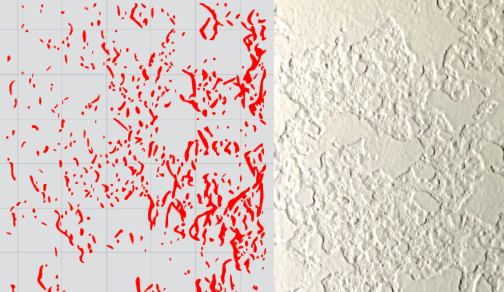
And here’s the trace result from a picture of my textured wall. I did have to increase the Threshold settings to get this to trace well because there is not a lot of contrast in the image.
So there you have it!! Create your own grunge effects quickly and easily!! One reminder, when you apply the grunge effect to the text, be sure to create a compound path immediately after applying the effect or you will wind up with a lot of little pieces that will move independently of each other (ask me how I know!!).
I cannot wait to see what you create using grunge effects you create!!
If you enjoyed these tips, please join my Facebook groups … Libby’s Silhouette Group — Tips, Tricks, Tutorials and Projects, Libby’s Craft and Sewing Group and Running With Sisers – Juliet and Romeo. You can also find me on FB at Libby’s Loft.com. Please join and feel free to ask questions and share your creations! I look forward to seeing you there!!
Until Next Time,
Happy Crafting!!
Disclaimer: Posts on this site may contain affiliate links. Clicking on one of these links or making purchases at linked sites does not mean you pay more for your purchases. It means I may receive a small commission on your purchase. This commission helps defray the costs of this site and enables me to continue to provide you with new and exciting content.
Until next time,
Happy Crafting!!