Hey, all my Scan ‘n Cut users! Did you know that Brother’s CanvasWorkspace now has a Fill Page feature? It was added in the latest update to the software (v2.6, released in August 2021). This new tool will be a real timesaver if you want to cut multiples of the same design element.
Open your Canvas Workspace. If you have not already updated to the newest release, you will be notified that there is an update and you will be given the option to update your software. You will need to do this to take advantage of the newest features. Once the software is updated, you can open your software. You will see the Canvas Project/Pattern Collection window.
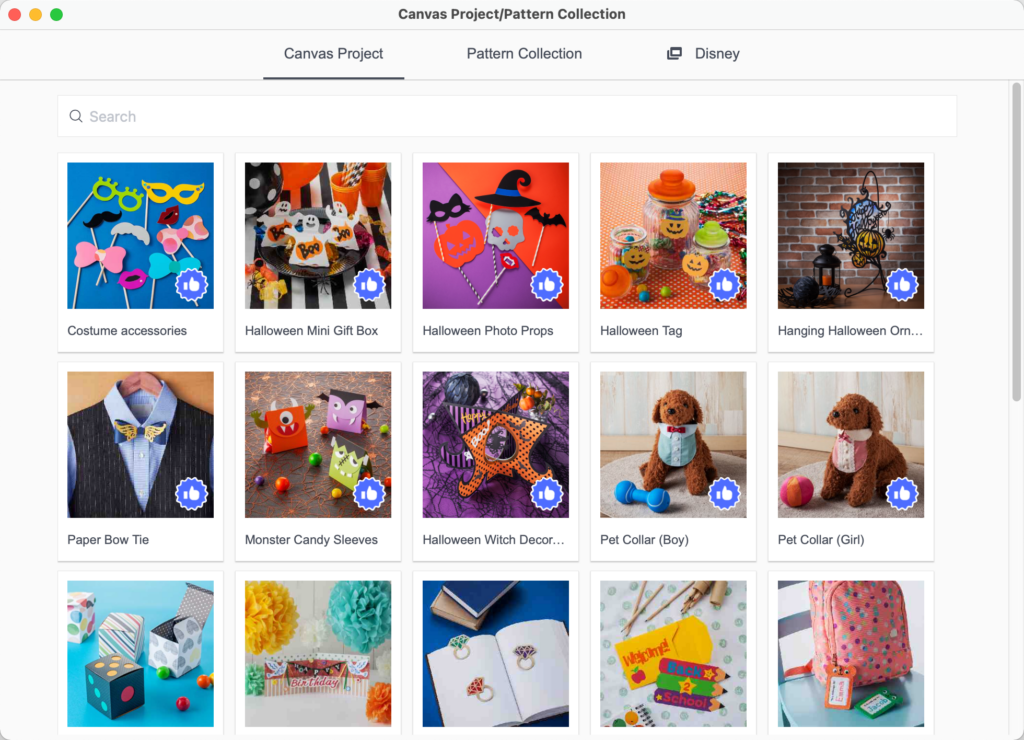
You can scroll through this window to see projects that are available for you to use — they include designs and directions for completing the project. If you have purchased Pattern collections or Disney collections, you can also access those from this window. I scrolled down and located this cute Botanical MultiLayer Frame. Here’s what you will see when you click on it to open it.
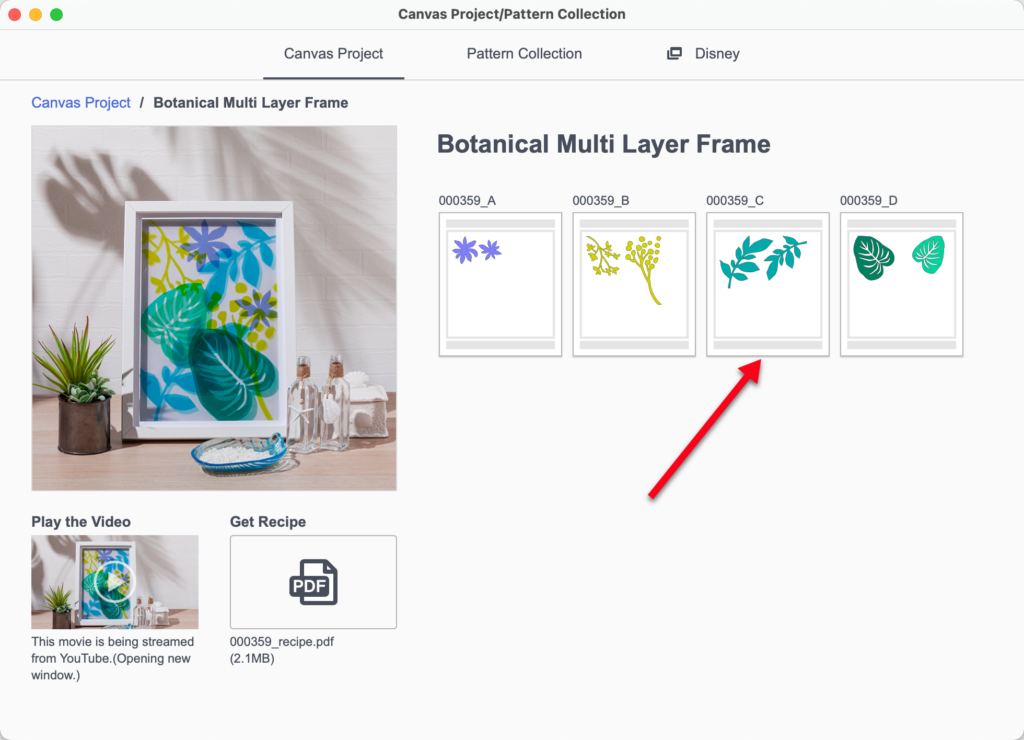
This project contains 4 cut files (labeled A-D), a video and the PDF with instructions for completing the project I only want to use the leaves that are in part C. When I click on it, that design element will be placed in my workspace. If I was going to use all the elements, I could click on each one and it would be added to the workspace.
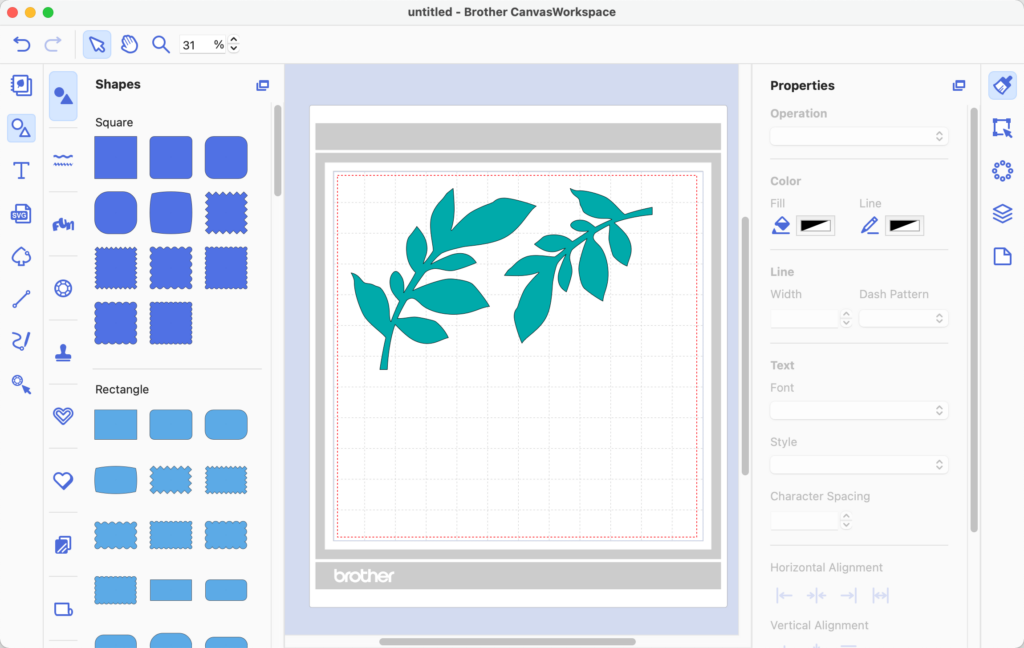
I only want to cut one of the leaves so i clicked on one of the leaf elements to select it and then pressed the Delete key on the keyboard. I then selected the remaining leaf and adjusted the size using the corner handle to maintain the proportion between the height and width.
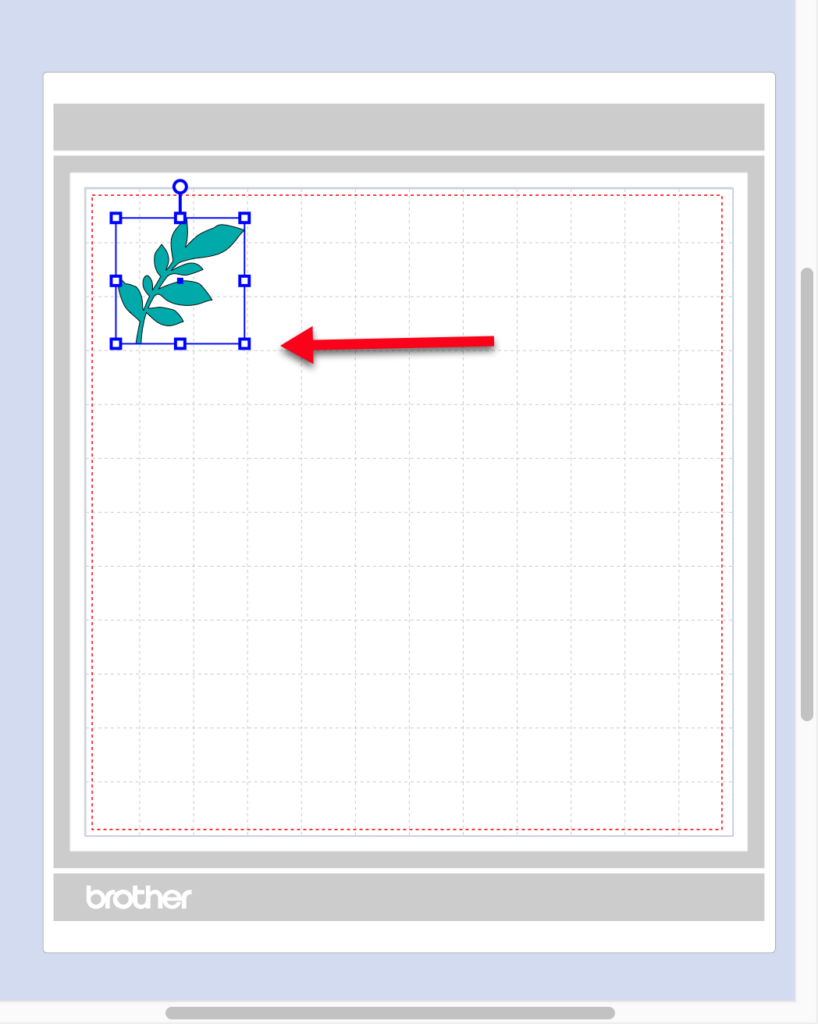
Now for the fun part. I want to fill the page with leaves so I can cut as many as possible on a 12″x12″ piece of vinyl. With the newly sized design selected, I clicked on the Edit tab in the right toolbar. Then I located the Duplicate icon and clicked on it. Voila! The entire page is filled with leaves!!
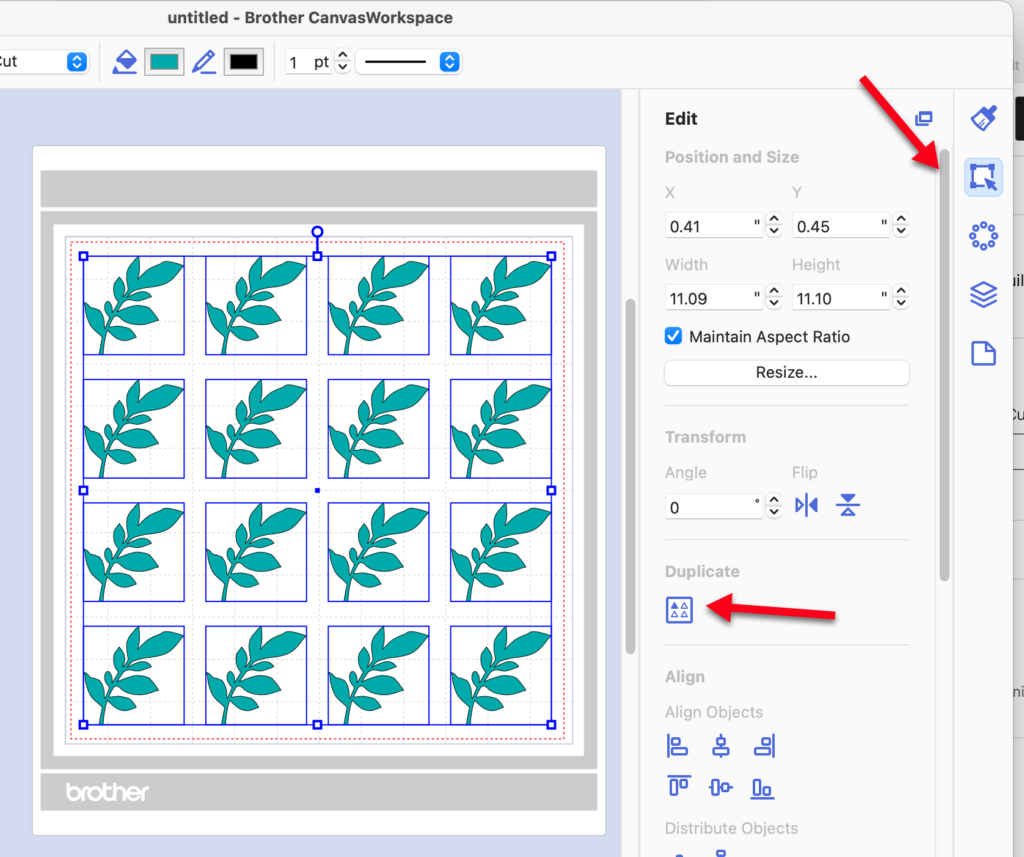
There are currently no controls to adjust the distance between the dupiicated objects. The software also does not rotate the images to maximize your materials. I decided to see if making some adjustments and putting two leaves closer together would let me get more leaves on the page. So I used CTRL/CMD+Z to undo the Fill Page. I then selected the leave. I right clicked and selected Duplicate. Then I flipped the new leave horizontally and vertically using the icons on the Edit panel.

I selected both the leaves and clicked on the Duplicate icon in the Edit Panel. Here’s the result.
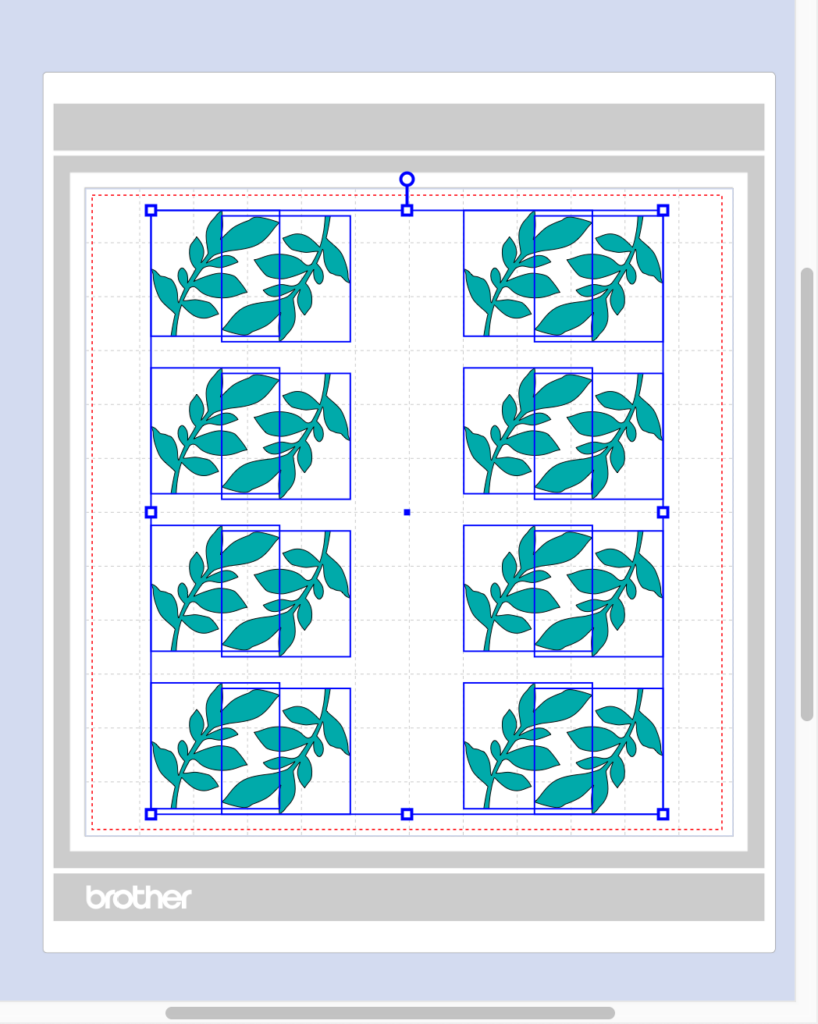
I still did not get more leaves on the page. So I moved leaves around on the top row and added leaves to fill the space. Then I deleted all the rest of the leaves. I selected the entire group of 6 i had lined up in the first row and clicked on Duplicate. This time, I got more leaves on the page.
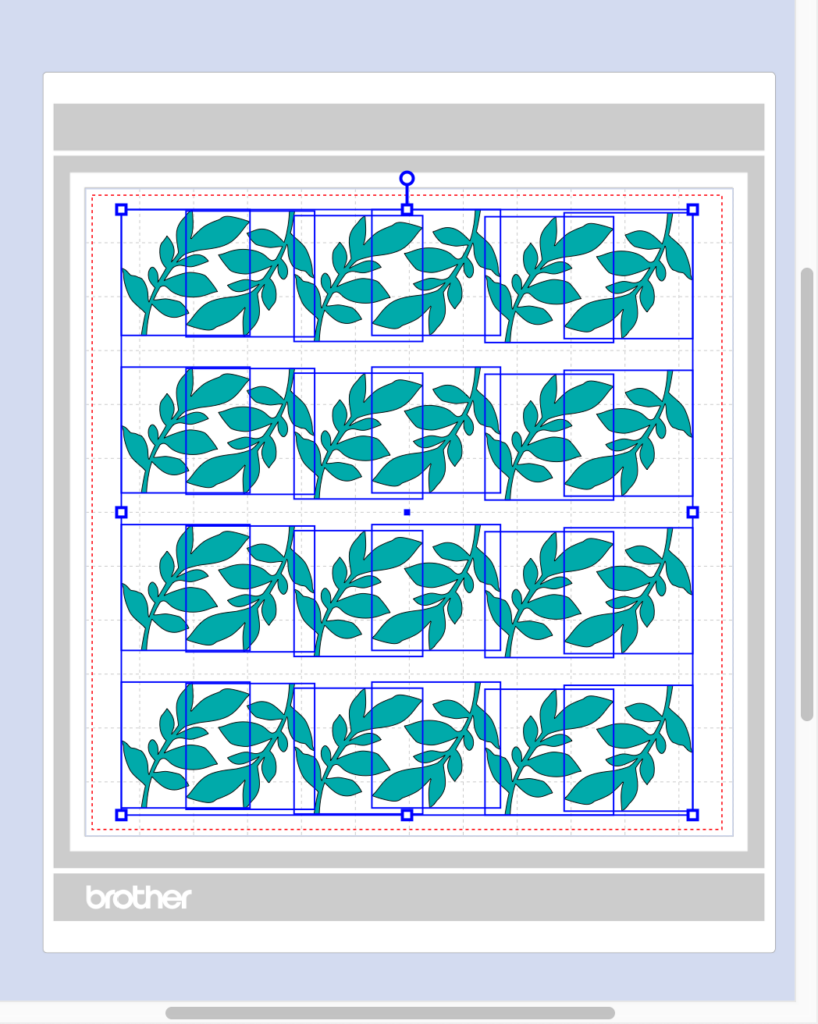
So while still not perfect, the new Duplicate/Fill Page tools is certainly a time saver over copying and pasting multiple rows of designs into the workspace. Hopefully this tool will continue to be improved as time goes on!
If you enjoyed these tips, please join my Facebook groups … Libby’s Silhouette Group — Tips, Tricks, Tutorials and Projects, Libby’s Craft and Sewing Group and Running With Sisers – Juliet and Romeo. You can also find me on FB at Libby’s Loft.com. Please join and feel free to ask questions and share your creations! I look forward to seeing you there!!
Until Next Time,
Happy Crafting!!
Disclaimer: Posts on this site may contain affiliate links. Clicking on one of these links or making purchases at linked sites does not mean you pay more for your purchases. It means I may receive a small commission on your purchase. This commission helps defray the costs of this site and enables me to continue to provide you with new and exciting content.
Until Next Time,
Happy Crafting!
Disclaimer: Posts on this site may contain affiliate links. Clicking on one of these links or making purchases at linked sites does not mean you pay more for your purchases. It means I may receive a small commission on your purchase. This commission helps defray the costs of this site and enables me to continue to provide you with new and exciting content.