I love using the Replicate Panel in Silhouette Studio when I need to place multiples of a design into the workspace. Not only does it allow me to place multiple designs quickly, it also will align them as close together as possible to help maximize your material use. You can find the Replicate panel icon in the right toolbar, right under the Transform panel icon.
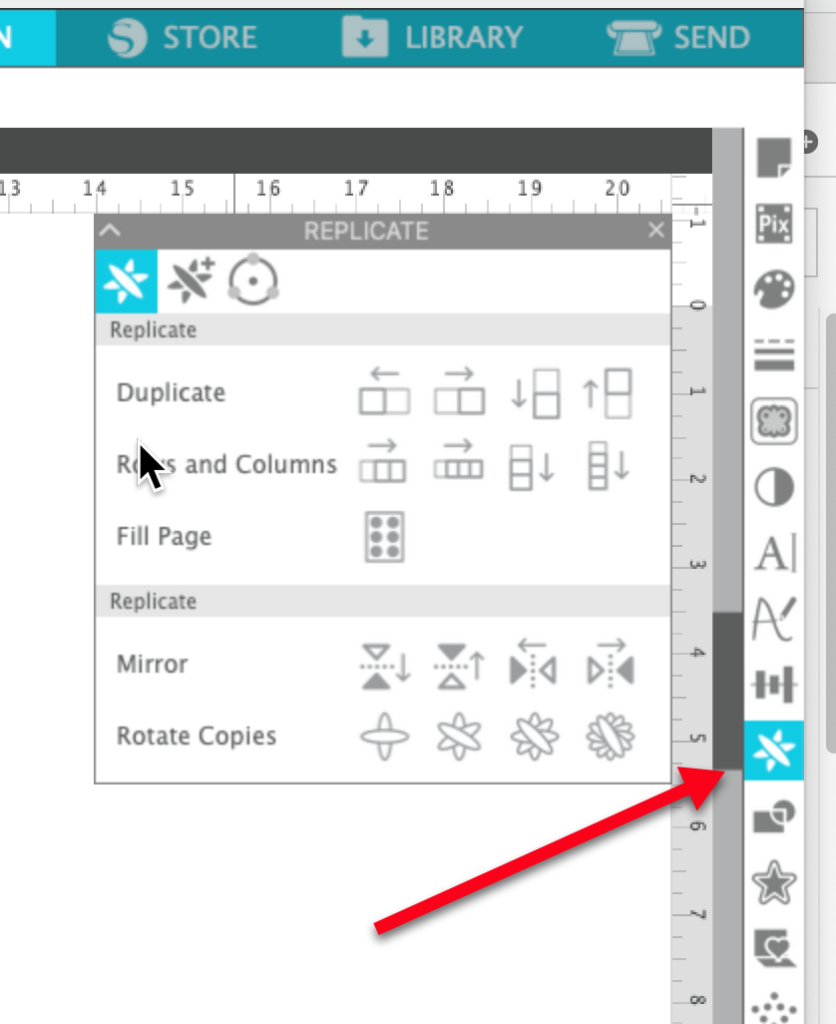
There are 3 tabs in the Replicate panel in all levels of Silhouette Studio. We’ll take a look at each tab individually, starting with the Replicate tab that opens when you open the panel. The first area contains the basic replicate tools. With an object selected in the workspace, you can add a duplicate either to the left, the right, below or above the selected object. Here I added an oval to the right and then one below the new oval.
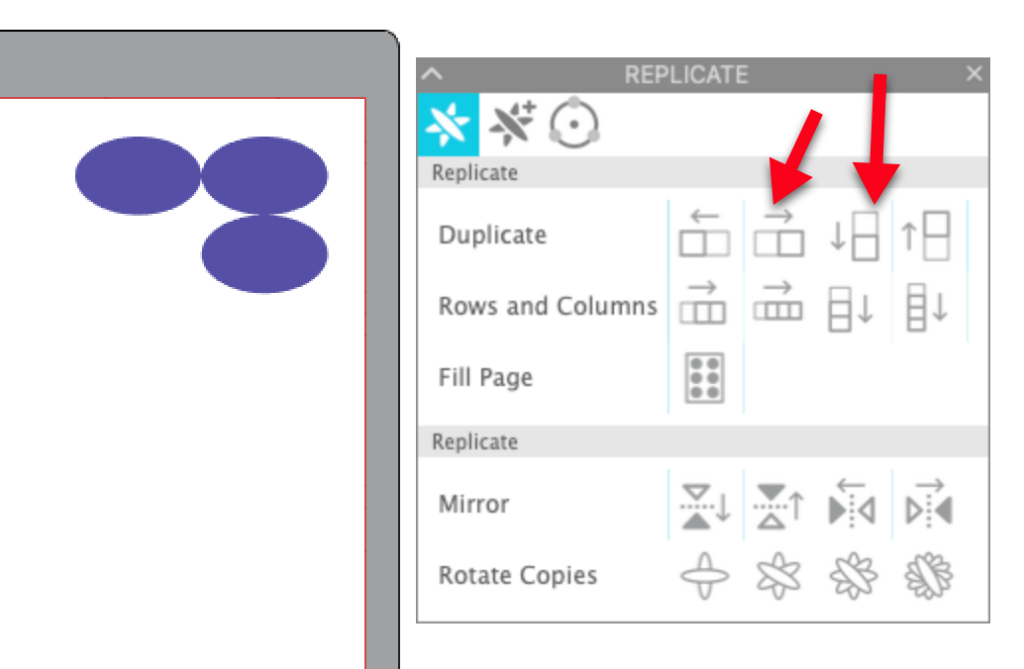
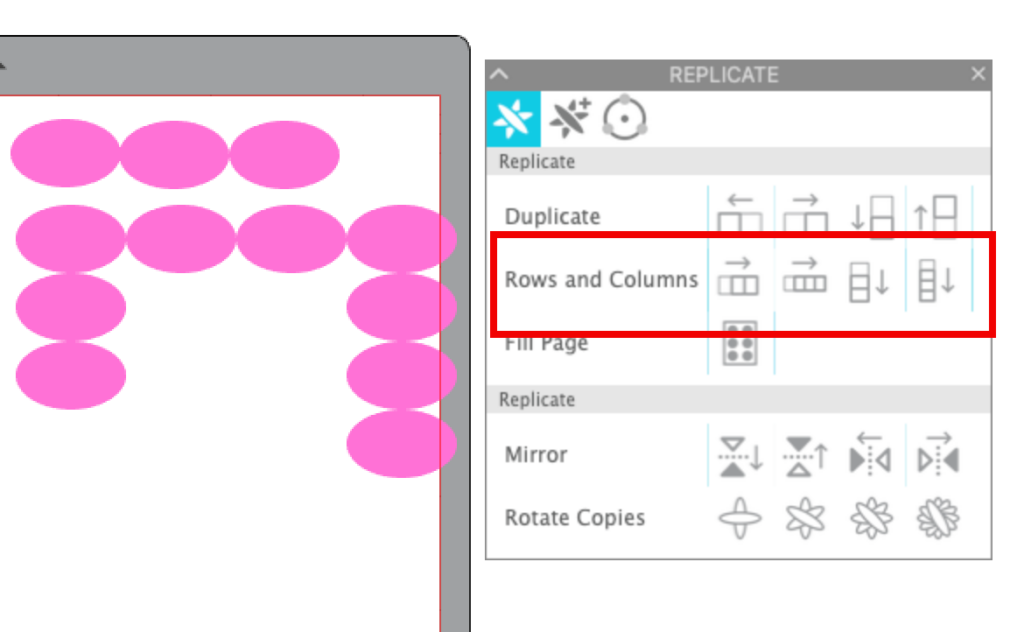
The Rows and Columns tools will allow you to create either two additional or three additional object to the right or down. In the first row, I added two additional ovals to the right. In the second row, I added three ovals to the right. I then added two additional ovals down in one column and three additional ovals down in the other column.
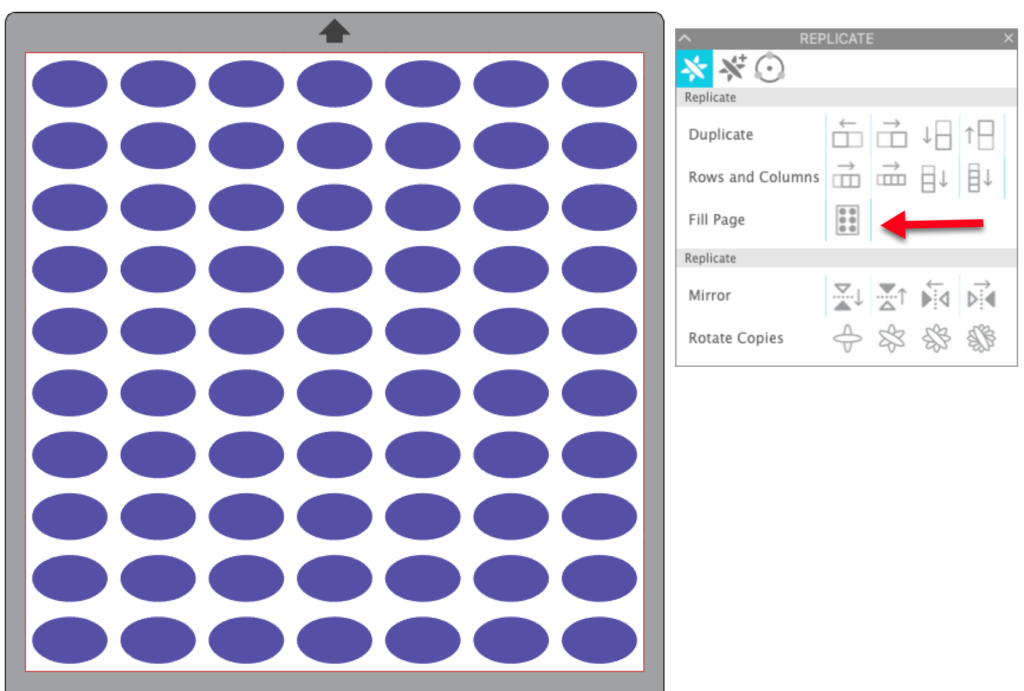
And best of all, there is the Fill page command. Just select the object(s) you want to duplicate and click on Fill Page! The page is filled with the selected shape.
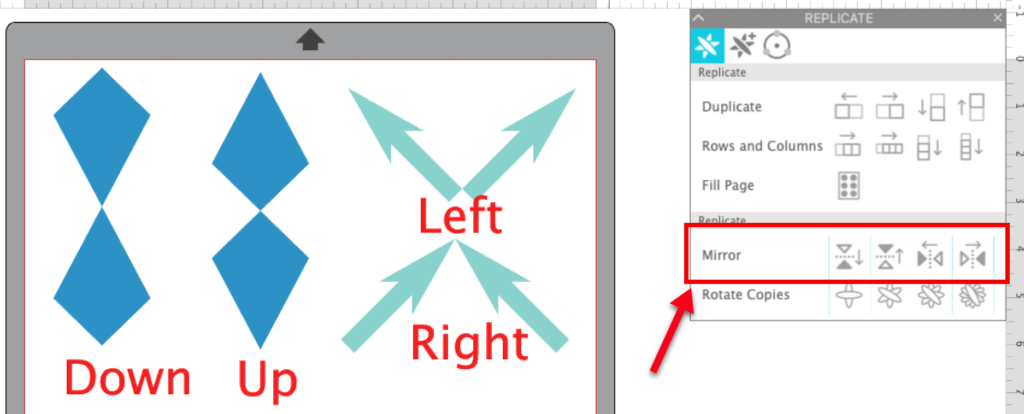
The Mirror command can create fun and interesting looks. Select the object you want to mirror — you can mirror down, up, left or right.
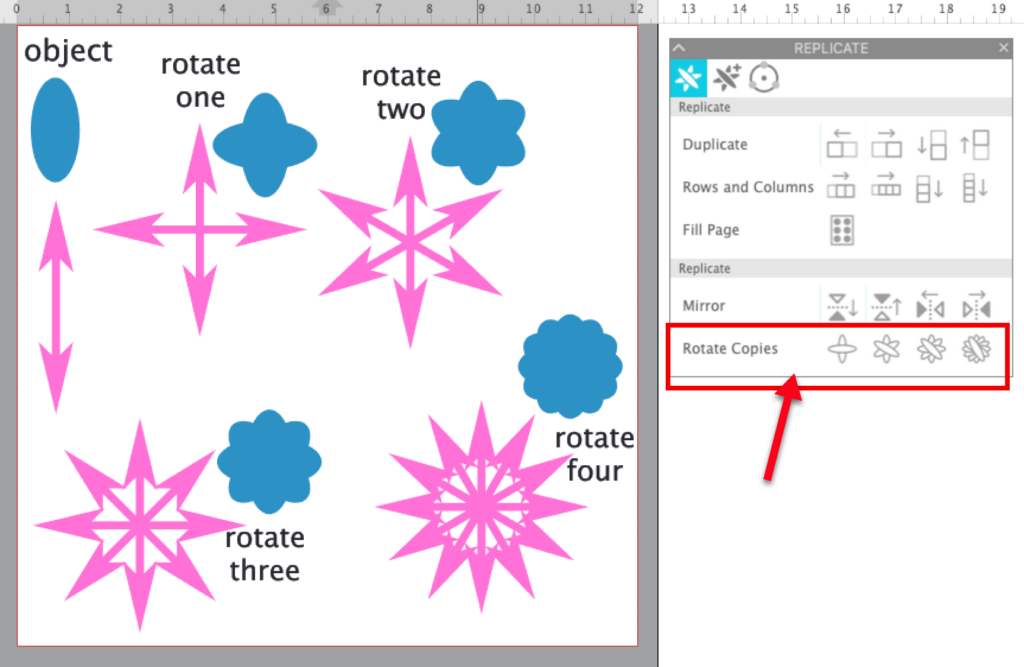
The Rotate Copies command can also be used to create fun and exciting designs! You can add one copy and rotate it, add two copies and rotate them, add three copies and rotate them or add four copies and rotate them.
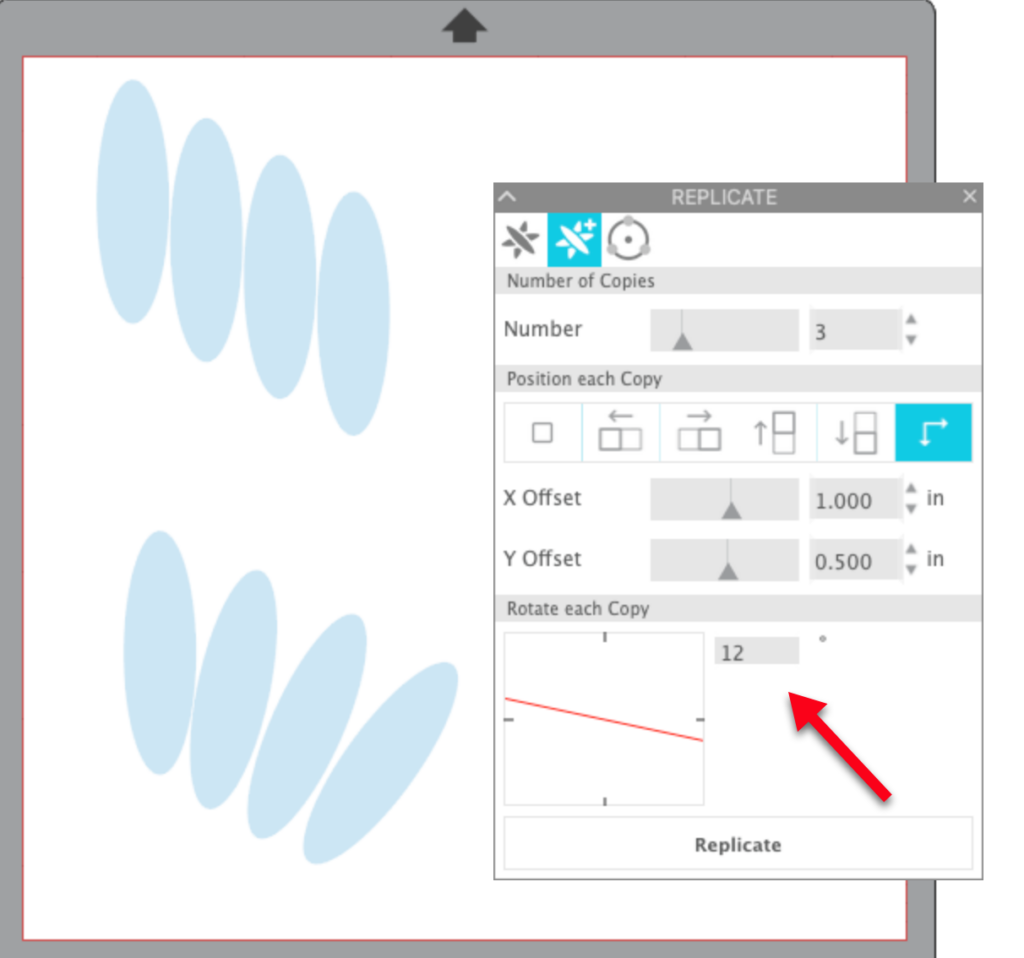
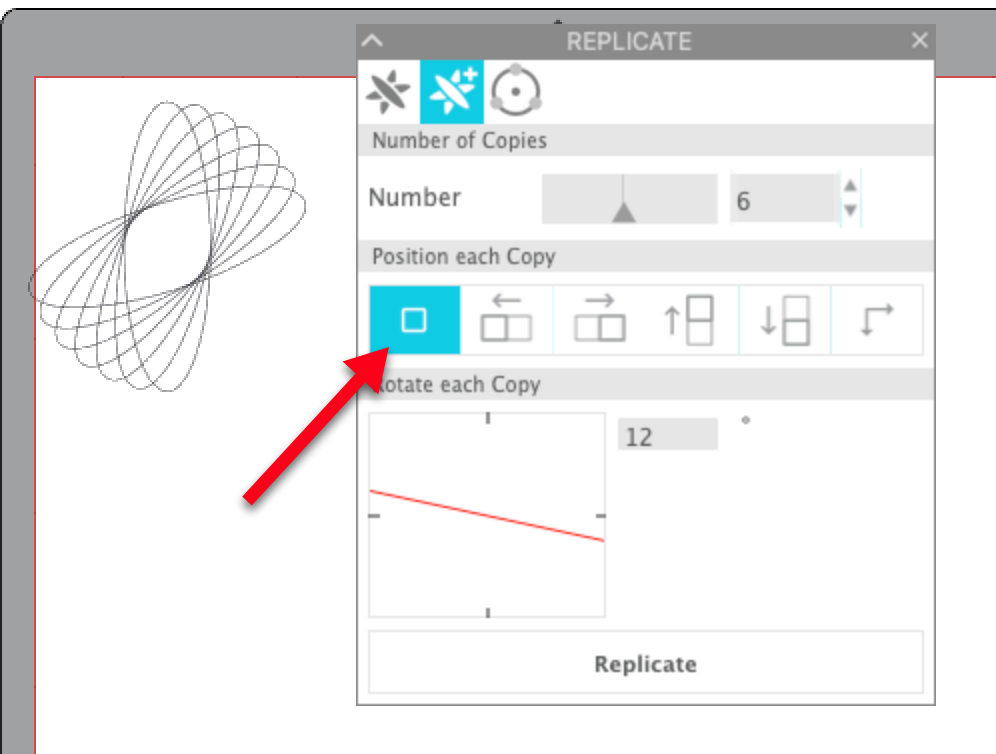
The next tab is the Advanced Replicate tab. Here you can set the number of items you will be creating, determine how they will be replicated in relation to each other and also the angle of each replicated object.
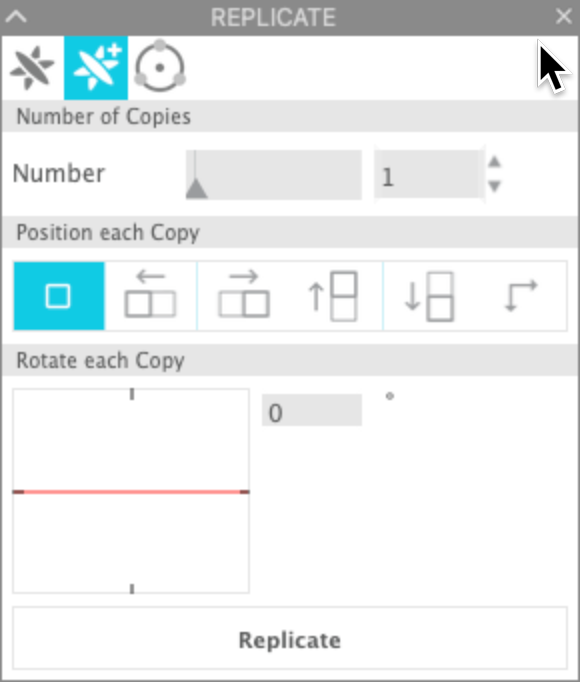
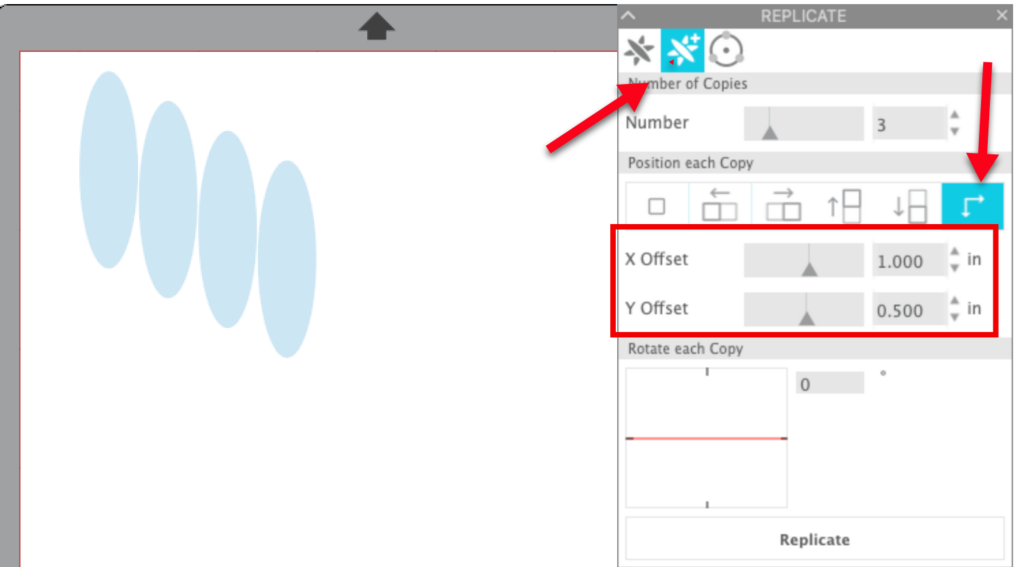
Use either the up/down arrows, the number slider or highlight and enter the number of replications to create. Then select the position. The default is for the replications to be placed on top of each other. You can also select to replicate to the left, right, up or down. But the most fun can happen when you use the custom position. When you click on the Custom Position icon, you can set the horizontal and vertical distance for each object.
You can also set the amount of rotation for each of the replicated objects. Here you can see the replicated shapes with the rotation set to -0- in the top example and with the rotation set to 12 in the second example.
There’s one last tab in the Replicate panel — the Object on Path tab. This tab allows you to place objects along a path (object). Create the object you want to replicate. Create the path (shape) you want to use. With the first object selected, click on the Show Grab Handle button.

Then left click and drag the Grab Handle onto the shape you are using to create your new shape (in this case the oval). You can adjust the number of repeats and other settings until you achieve the desired shape. Here I used 11 hearts around the oval.
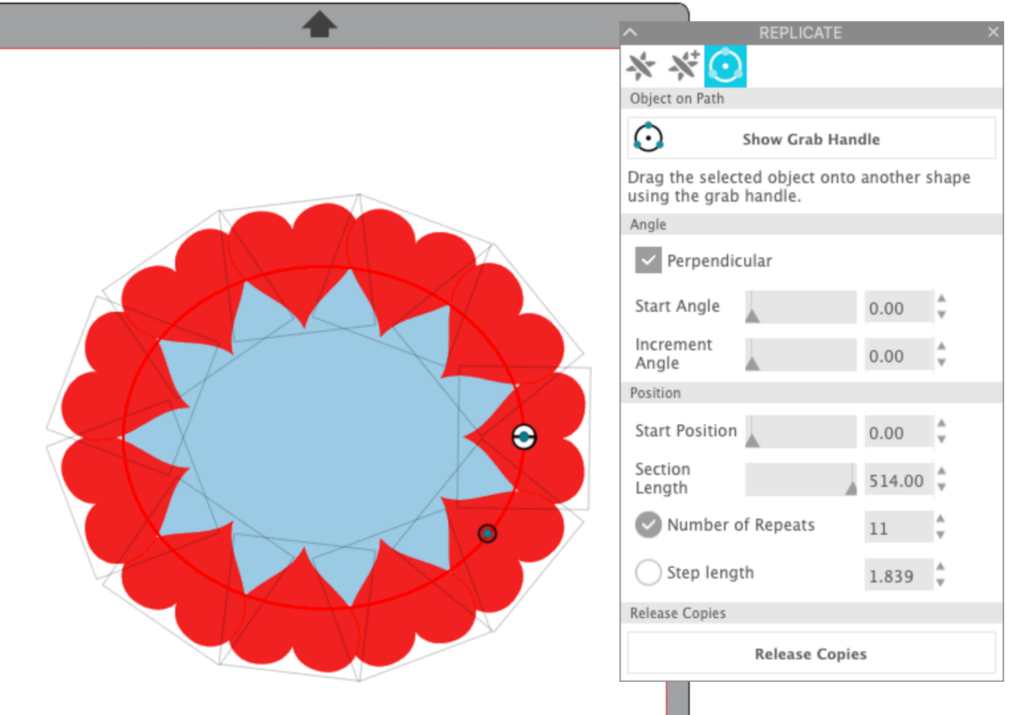
Once you have the exact size you want, select Release Copies and the hearts will be separated from the oval. Be sure to group all the hearts and then you can move and delete the oval. I just moved it to the side so you could see the parts.
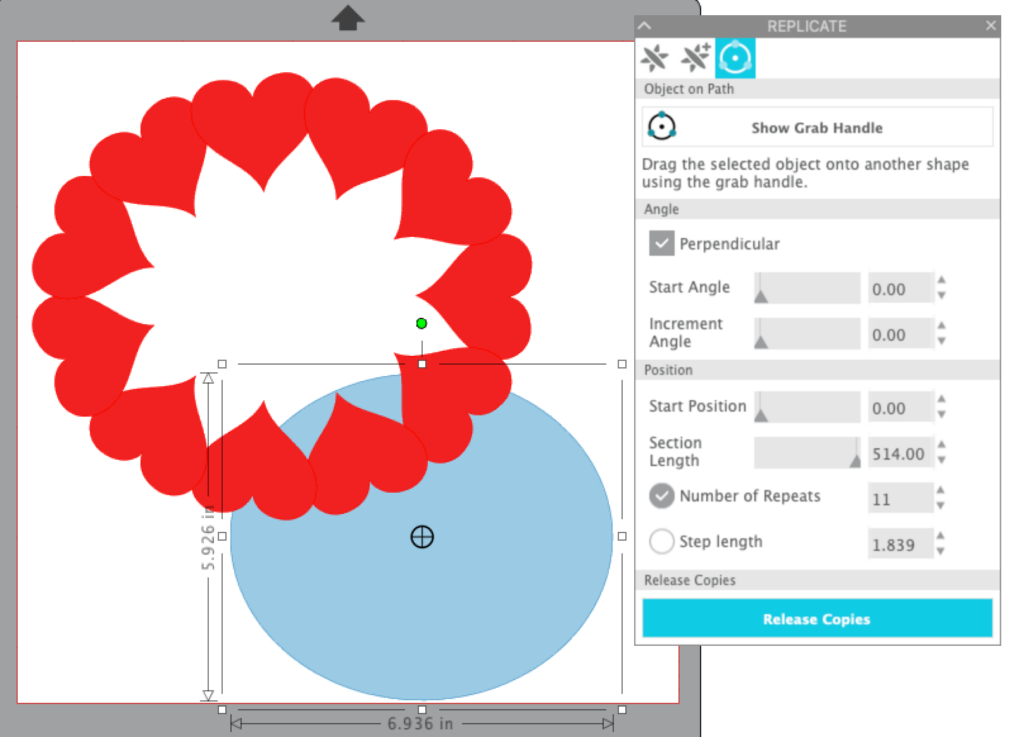
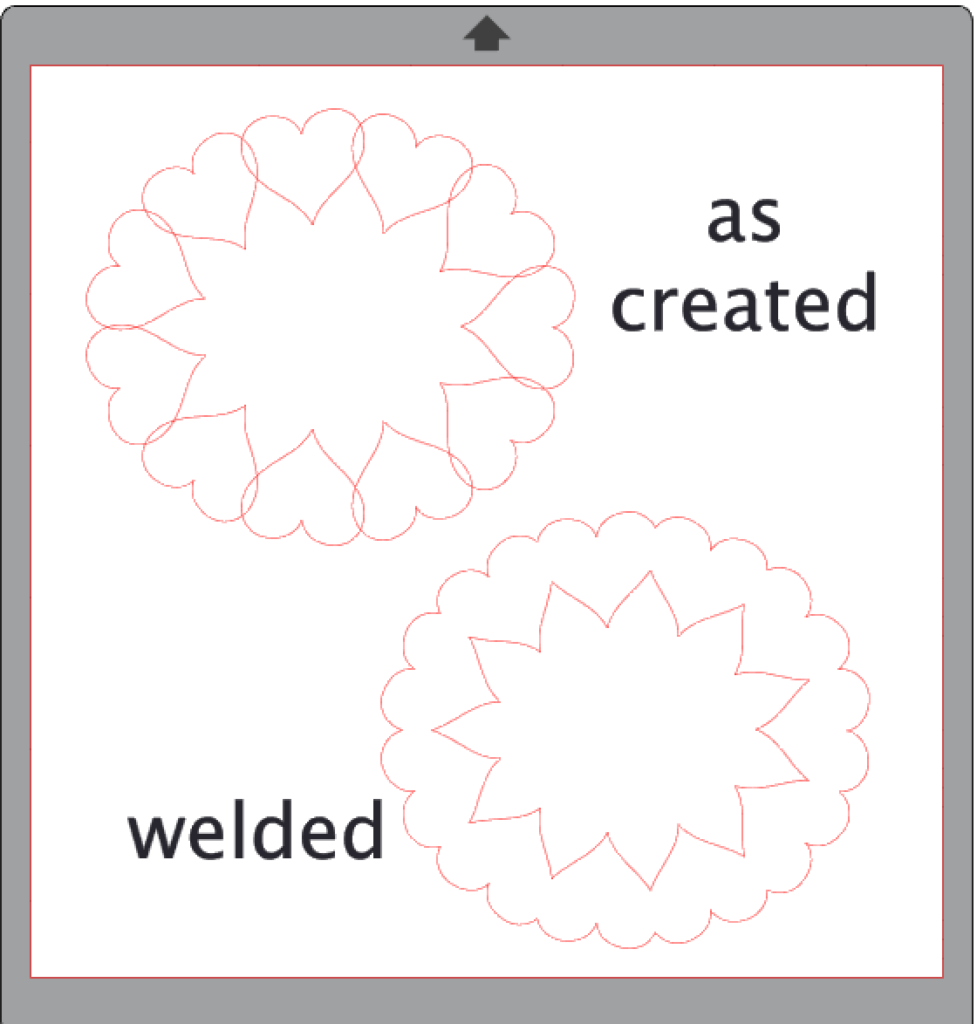
You have one last step — be sure to weld the shapes so you can eliminate extra cuts due to the overlapping shapes. I removed the color from the shape here so you could see the overlap and the result after welding.
If you want to learn more about using the Object on Path tool, check out this post for more detailed examples.
And there you have it … the ins and outs of the Replicate Panel in Silhouette Studio. I hope you will take time to play with the tools using different shape … symmetrical shapes produce different results than asymmetrical shapes. Be sure to post photos of the cool shapes you create on the FB page!! I can’t wait to see what you create!!
If you enjoyed these tips, please join my Facebook groups … Libby’s Silhouette Group — Tips, Tricks, Tutorials and Projects, Libby’s Craft and Sewing Group and Running With Sisers – Juliet and Romeo. You can also find me on FB at Libby’s Loft.com. Please join and feel free to ask questions and share your creations! I look forward to seeing you there!!
Until Next Time,
Happy Crafting!!
Disclaimer: Posts on this site may contain affiliate links. Clicking on one of these links or making purchases at linked sites does not mean you pay more for your purchases. It means I may receive a small commission on your purchase. This commission helps defray the costs of this site and enables me to continue to provide you with new and exciting content.
Until Next Time,
Happy Crafting!
Disclaimer: Posts on this site may contain affiliate links. Clicking on one of these links or making purchases at linked sites does not mean you pay more for your purchases. It means I may receive a small commission on your purchase. This commission helps defray the costs of this site and enables me to continue to provide you with new and exciting content.