A sweet young lady was struggling with layering her HTV and wanted to layer glitter HTV on top of glitter HTV. I explained that this is not recommended and told her about using an offset to help make placement easy and allow her to use two colors of glitter HTV. I thought I’d share the steps here for you as well.
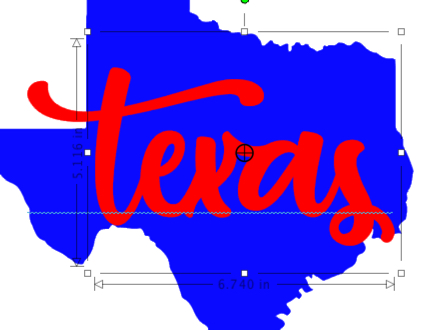
Open your Silhouette Studio software. Add your shape to the workspace. In this case, I am using the state of Texas.
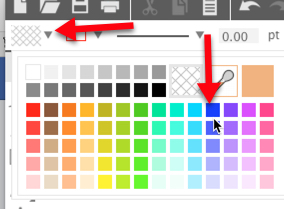
To make things easier, add a fill color to the design. This will help you as you complete the next steps. I selected blue for my fill color. With your shape selected, click on the Fill Color quick tool and select the color you wish to use.

Add the word you wish to use. Click on the Text tool and left click in the workspace. Enter your text.
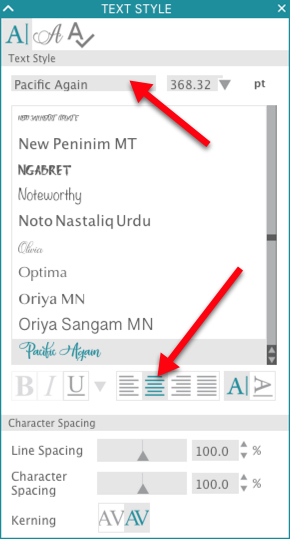
With your word selected, click on the Text Style panel and select a font. I used Pacific Again, a font available in the Silhouette Design Store.
Add color to your word, using the Fill Color dropdown just as you did to add color to your shape
Use the handles on the bounding box to size the word. Left click and drag the word to position it over the shape. Right click and select Copy. Right click and select Paste.
Left click and drag the copy off the mat in the workspace. We made this copy in case we need to edit the word or know what font we used.
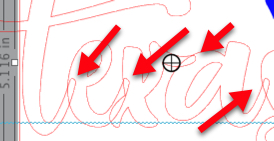
With the original word selected, right click and select Weld. This will remove the individual overlap areas where the letters join. This will turn the word into a “path” and it will no longer be text.
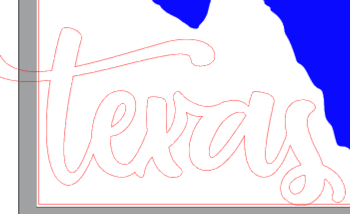
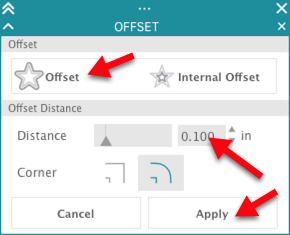
With the word still selected, click on the Offset Panel icon. Click on Offset. Adjust the Distance to 0.05 inches. Click Apply.
The offset is selected in the workspace. Click on the Fill Dropdown and change the color to green.

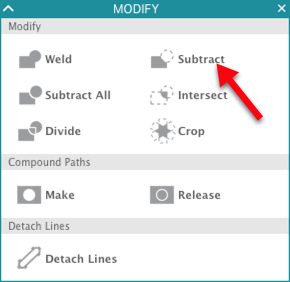
Select the green offset. Hold the shift key down and select the shape. Do not select the original word. Click on the Modify Panel icon. Click on Subtract. The offset (which is on top) is subtracted from the shape (which is on the bottom).

Final Tips:
Now you can cut the two colors of glitter HTV and layer them easily. The offset gives you a “fudge factor” so it is easier to fit the word inside the shape.
Remember when you apply the first layer (I would press the shape first), only press for 3-5 seconds – just enough to activate the glue and easily remove the carrier sheet.
Position your word over the shape and cover with a Teflon sheet. Press for the full time recommended for your brand of glitter HTV.
If you enjoyed these tips, please join my Facebook groups … Libby’s Silhouette Group — Tips, Tricks, Tutorials and Projects, Libby’s Craft and Sewing Group and Running With Sisers – Juliet and Romeo. You can also find me on FB at Libby’s Loft.com. Please join and feel free to ask questions and share your creations! I look forward to seeing you there!!
Until Next Time,
Happy Crafting!!
Disclaimer: Posts on this site may contain affiliate links. Clicking on one of these links or making purchases at linked sites does not mean you pay more for your purchases. It means I may receive a small commission on your purchase. This commission helps defray the costs of this site and enables me to continue to provide you with new and exciting content.
Until next time, happy crafting!!
Libby
Disclaimer: Posts on this site may contain affiliate links. Clicking on one of these links or making purchases at linked sites does not mean you pay more for your purchases. It means I may receive a small commission on your purchase. This commission helps defray the costs of this site and enables me to continue to provide you with new and exciting content.