I love giving personalized cups and mugs as gifts, don’t you! But sometimes getting words and designs to look right on a curved surface can be a challenge. That’s where Silhouette Studio’s Conical Warp tool comes in handy! Let me show you what I mean.
A conical shape is one where the top and bottom are not the same size … so a tumbler that has a wider mouth and a smaller bottom is an example of a tumbler. The tumbler below is an all-over pattern that I warped using the conical warp.

Not all designs can be placed on conical shapes without having them warp or wrinkle unless you warp them a little. You could try adjusting the design yourself but it will be a lot of trial and error. That’s where the Conical Warp feature is a huge time-saver! The Conical Warp tab is in the Warp panel and is a feature available in Designer Edition Plus and Business Edition.
With your design selected, click on the Warp Panel icon near the bottom of the right toolbar. Click on the 3rd tab in this panel to open the Conical Warp tool.
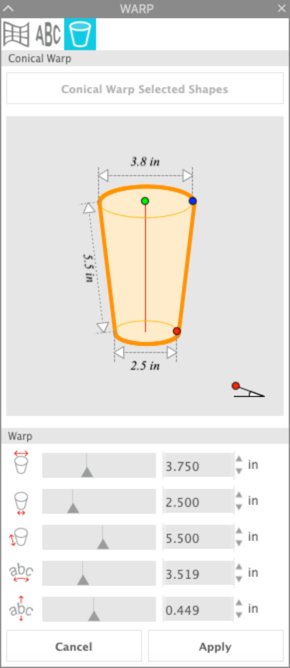
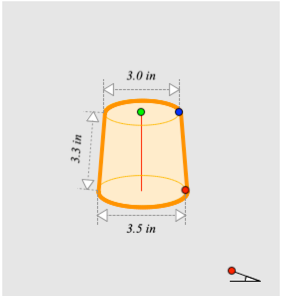
Click on the Conical Warp Selected Shapes button near the top of the screen. You will see a conical shape on the mat around your design.
Measure across the top and bottom of your cup. Measure the height of the cup in the area you plan to place your design. Enter these values in the Conical Warp panel.
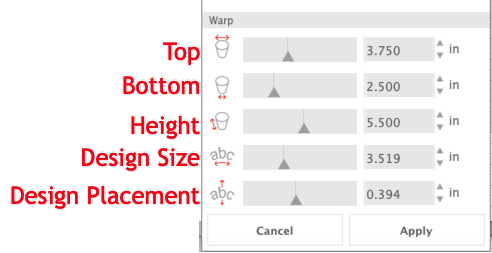
As you enter the measurements, the size of the cup in the preview window and also the cup in the workspace will change. My cup is 3.75″ wide at the top, 2.5″ wide at the bottom and has a height of 5.5″ for the design.
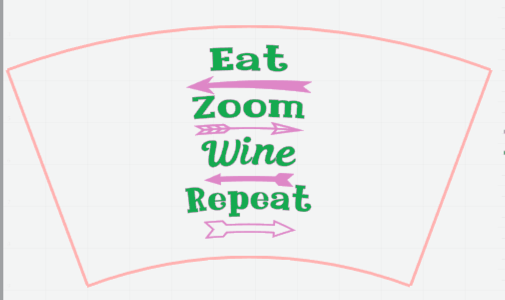
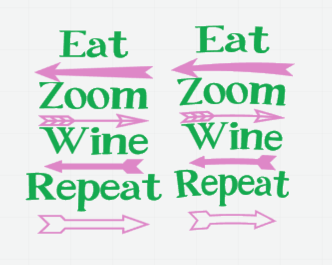
You may or may not see a lot of curvature of your design as you enter these values. Do not worry — the correct amount of curvature is being added to your design. Below you can see the original design on the left and the new curved design on the right.
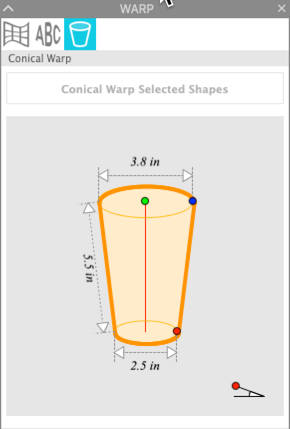
Using the default placement of the design on the cup, my design is too close to the bottom.

I clicked on the slider bar for the Design Placement and moved the design up so it is more centered.
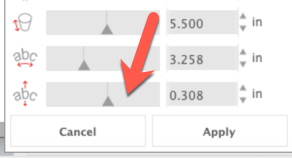
As I moved the design up on the cup, the amount of curvature increased slightly.
When your preview looks the way you want, click Apply. The design will be set and the outline of the cup will be gone. With all the elements of your design selected, right click and select Group. Your design is now ready to cut.
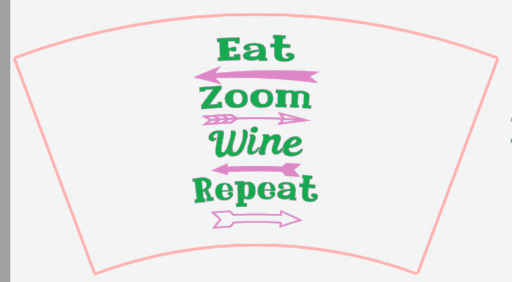
When I got to this point in the design, I decided I wanted something a little different. I edited the design and the style of cup. This new design will go on a cup that is wider at the bottom than the top.
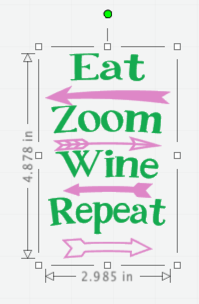
Here’s the new design in Silhouette Studio.

I used permanent adhesive vinyl on my cups and cut using my Cameo 4 with the autoblade. I used the pre-set for Vinyl, glossy in Silhouette Studio.. Even though I was pretty confident this is the correct setting, I did a test cut, just to be sure. I always do a test cut. It saves so much time and vinyl to adjust the settings now, if needed.
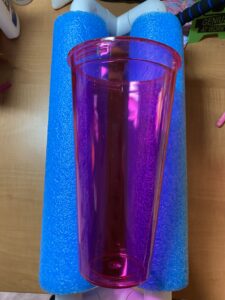
I wiped my cup with alcohol to remove any oils or debris from the cup before applying the vinyl. I placed the cup in a cup holder that my husband made for me using PVC pipe and pool noodles and applied the vinyl. The idea for this cup holder came from Matt at The Rhinestone World. He has a great video showing how to make your own cup holder.

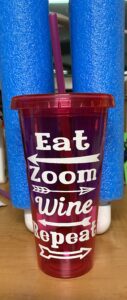
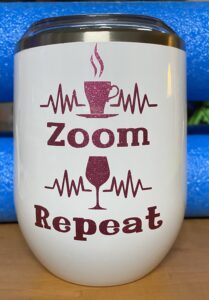
Here are my two new cups …. I think they look great! What do you think? Notice how nice and straight the arrows and heartbeats look … that’s conical warp at its best!
I can’t wait to see what you create using conical warp! Stay tuned for projects using the other warp tools … I’ll come back and link them in this post once they are created so you can try all the warp tools.
If you enjoyed these tips, please join my Facebook groups … Libby’s Silhouette Group — Tips, Tricks, Tutorials and Projects, Libby’s Craft and Sewing Group and Running With Sisers – Juliet and Romeo. You can also find me on FB at Libby’s Loft.com. Please join and feel free to ask questions and share your creations! I look forward to seeing you there!!
Until Next Time,
Happy Crafting!!
Disclaimer: Posts on this site may contain affiliate links. Clicking on one of these links or making purchases at linked sites does not mean you pay more for your purchases. It means I may receive a small commission on your purchase. This commission helps defray the costs of this site and enables me to continue to provide you with new and exciting content.