Do you have boxes of photos and not enough time to create scrapbook pages to showcase them? I love working with paper and creating beautiful pages, but there are not enough hours in the day to get them all done … so I have begun to create digital scrapbook pages.
As I write this, backgrounds are on sale in the Silhouette Design store …. so it’s a great time to stock up! I am working with a 12×12 Scrapbook design page from the Silhouette Design store … it’s number 48258 by Sarah Hurley.
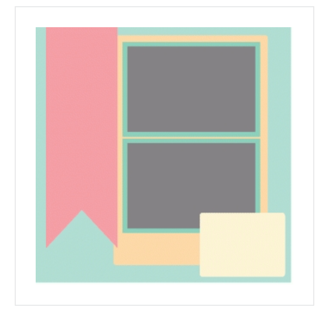
When you open this design in your workspace, there are no colors and it is not assembled. (I added color to the shapes in my workspace so you can see them more easily.)
All the shapes are grouped, so the first think you should do is ungroup them — click on the design to select it, right click and select Ungroup. You can then begin to add colors to the shapes so it is easier to work with them. The colors do not matter right now … it’s just so it is easier to get things lined up. Click on each shape and add a color using the Fill icon in the Quick Access toolbar.
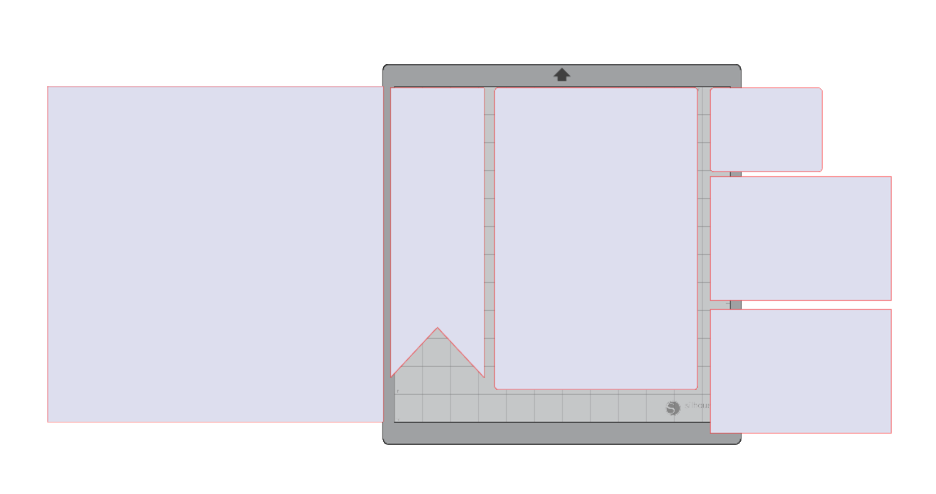
Now you can begin to assemble your page. To easily see how the pieces go together, click on your Library icon and locate the scrapbook page. Right click on the design and select Show Properties.

You can grab a copy of the image from this page. If you have a PC, use the Snipping tool in Windows and get your image. You can then paste that image into your workspace. On a Mac, press Shift/CMD 4. Your cursor will become a crosshair and you can left click and drag over the image of the page. You can then paste that image into your workspace. I had to increase the size of my image so it was large enough to see.
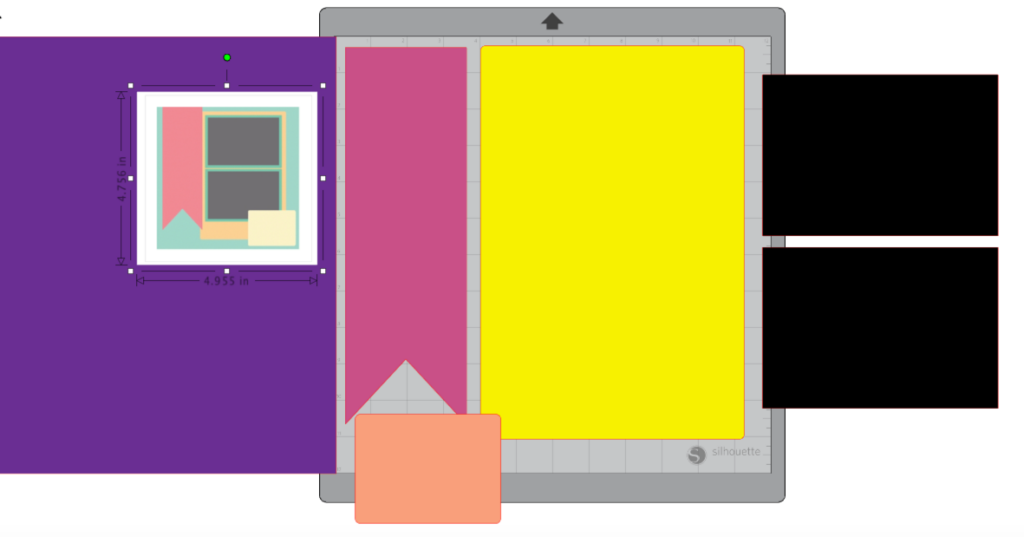
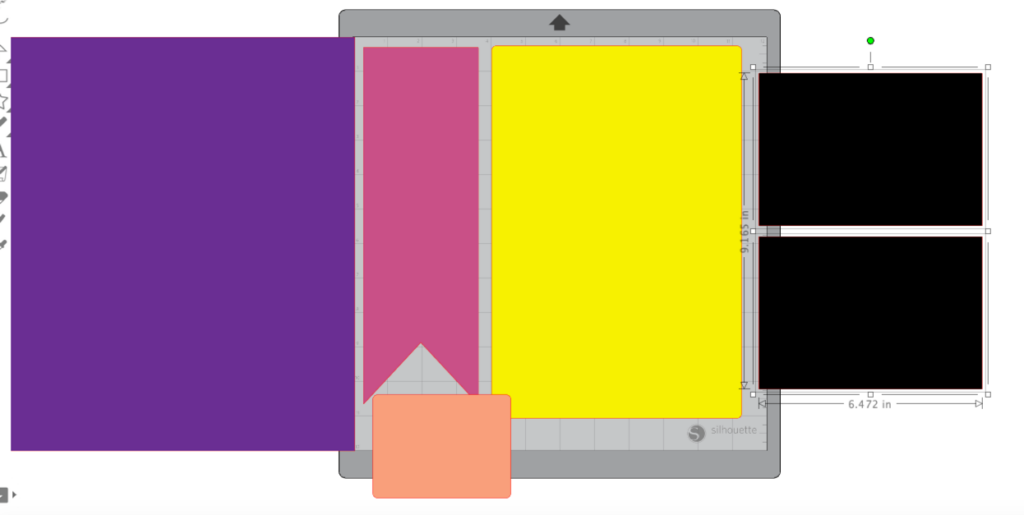
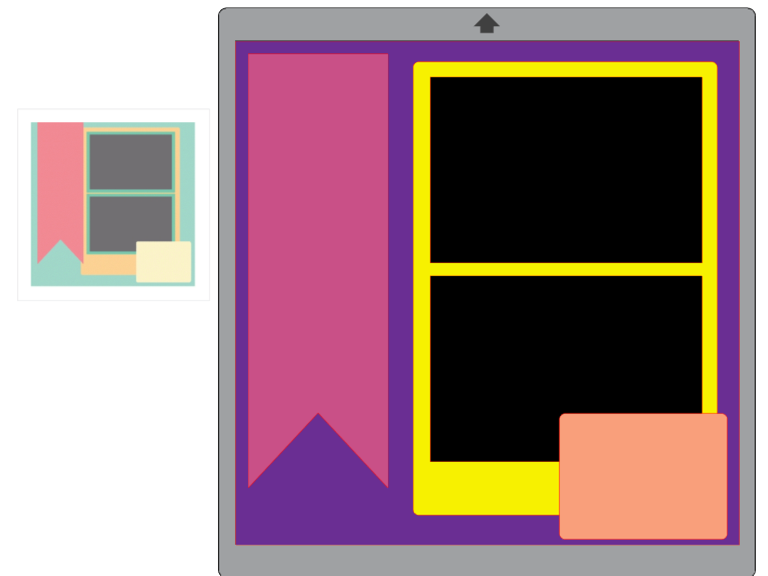
With that image as a guide, you can now move the shapes into position in the workspace. Left click and drag your shapes into position. I selected both the black shapes as grouped them together (right click and select Group) to make them easier to position on the page.
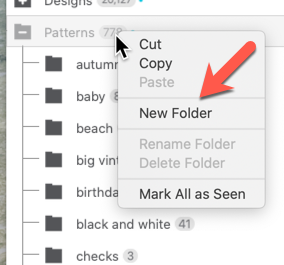
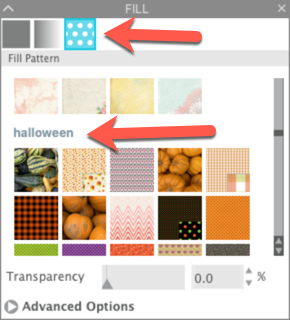
Now the fun begins! Let’s get ready to add some patterns to the different shapes in the layout. I have added folders to my Patterns folder in my Library to help organize my patterns. To add a folder to your Pattern folder, right click on your Pattern folder and select New folder. You can then name the folder.
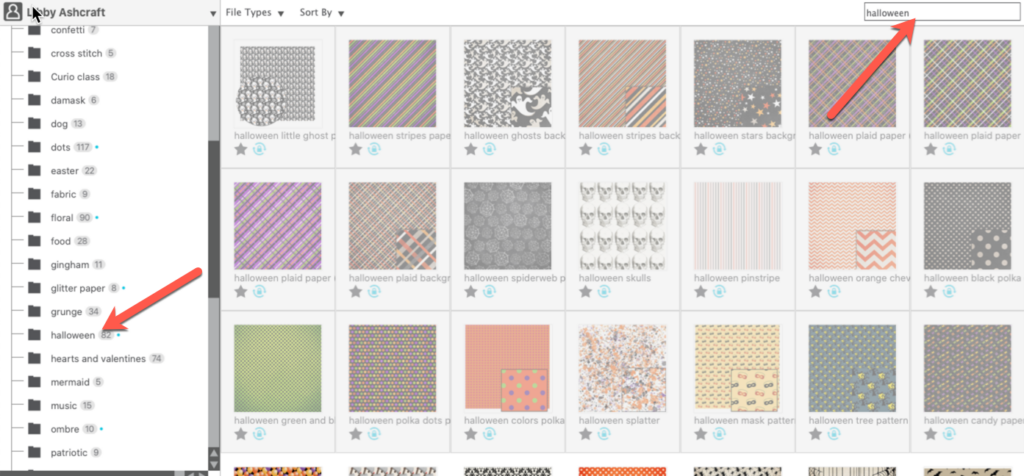
Now you can search in your Patterns folder and locate the patterns that belong in that folder. My new folder is Halloween, so I entered that in the search bar. I then selected the Halloween patterns and dragged them into the new Halloween folder.
Back on the Design tab, I am ready to add patterns to my shapes. Select the background shape. Click on the Fill panel in the right toolbar. Select the Pattern tab. You can now scroll down and locate the Halloween folder to see all the Halloween patterns.
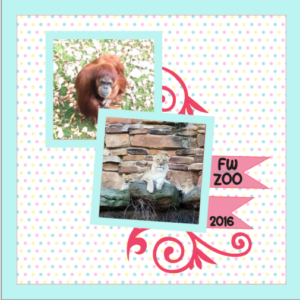
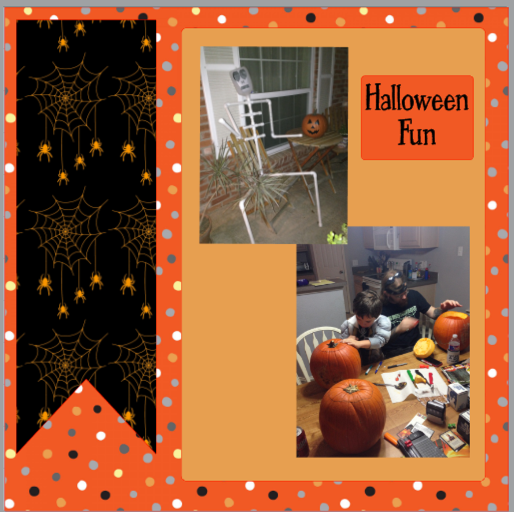
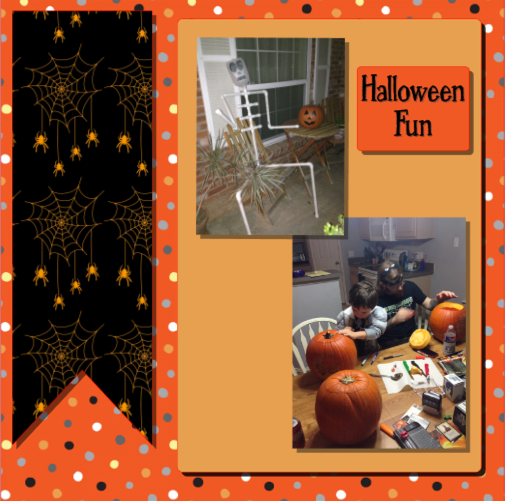
After I added all the colors to my shapes, it was time to add my photos. I found some fun Halloween photos but mine needed to be vertical instead of horizontal. I deleted the horizontal photo placeholders and arranged my photos. Finally I added some text and centered it on the small rectangle.
To me, this page looks flat. If I had created this using individual paper shapes and printed photos, there would be some depth to the page. To do this, I used the Drop Shadow tool in the Image Effects Panel.
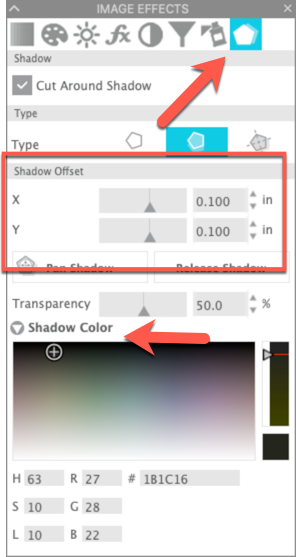
With your image selected, you can adjust the distance the shadow falls away from the image using the Shadow Offset values. Click on the Shadow Color triangle and change the color of the shadow if you wish.
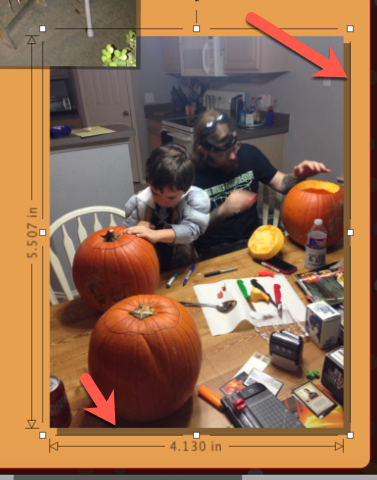
Once I decided on values for my drop shadow, I applied it to the other elements in the design. Now the elements have depth and the page is much more pleasing to the eye.
Now I am ready to print this page or save it to a digital scrapbook page to have a book printed. Hope you have as much fun as I did adding custom backgrounds and photos and creating fun scrapbook pages!
If you enjoyed these tips, please join my Facebook groups … Libby’s Silhouette Group — Tips, Tricks, Tutorials and Projects, Libby’s Craft and Sewing Group and Running With Sisers – Juliet and Romeo. You can also find me on FB at Libby’s Loft.com. Please join and feel free to ask questions and share your creations! I look forward to seeing you there!!
Until Next Time,
Happy Crafting!!
Disclaimer: Posts on this site may contain affiliate links. Clicking on one of these links or making purchases at linked sites does not mean you pay more for your purchases. It means I may receive a small commission on your purchase. This commission helps defray the costs of this site and enables me to continue to provide you with new and exciting content.
Until Next time,
Happy Crafting!!
Disclaimer: Posts on this site may contain affiliate links. Clicking on one of these links or making purchases at linked sites does not mean you pay more for your purchases. It means I may receive a small commission on your purchase. This commission helps defray the costs of this site and enables me to continue to provide you with new and exciting content.