It’s no secret that I love patterned adhesive vinyl!! It’s so colorful and fun! But in areas where the vinyl will be touched, it’s important to add a laminate to protect the ink from the oils in your skin. Ask me how I know!
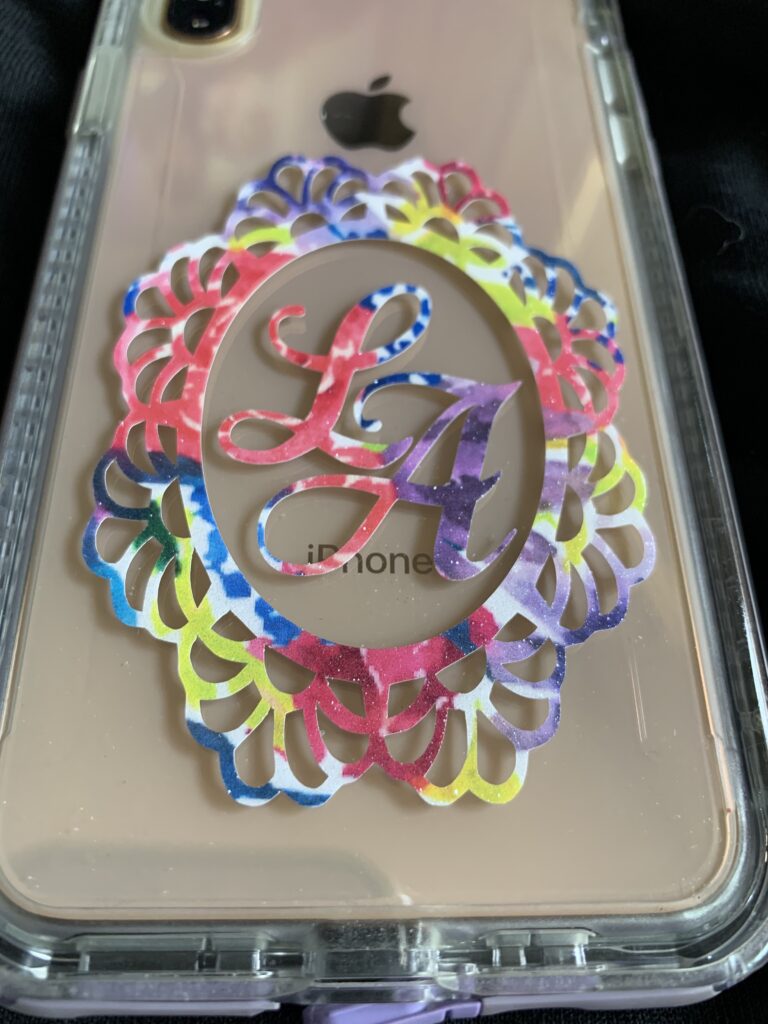
I put this design on my phone approximately 4 months ago. Both the frame and the initials are the exact same printed vinyl — I just forgot the laminate on the initials! What a difference!!
So, how do you apply glitter laminate (or plain laminate) to your vinyl, you ask? It’s really easy … and it adds a touch of bling!!
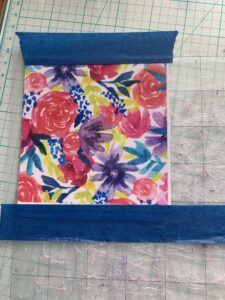
I cut a piece of printed vinyl a little larger than my final design. I also cut a piece of glitter laminate the same size. I then taped my printed vinyl to my We R Memory Keepers Precision Glass Cutting Mat. (Don’t look at my dirty cutting mat in this photo … I have been cutting fabric for class kits.)
I used the “hinge method” to apply my glitter laminate to my vinyl. I positioned the laminate over the printed vinyl and placed a small piece of tape on the side of the laminate near the middle. Next, I separated the laminate from the carrier at the top edge of the laminate and pulled the laminate back toward the middle. Using my squeegee, I smoothed the laminate into place working from the middle to the top. Then I repeated these steps for the other end of the laminate. Here’s a quick video showing you how I did it.
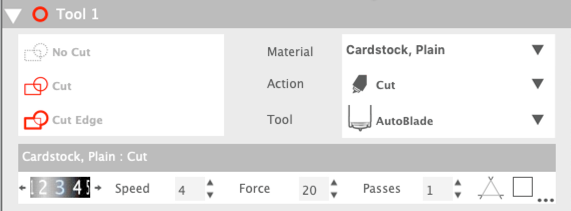
It’s that easy!! When I cut this design, I used the Cardstock as my Material Type in my Silhouette Studio software.
Here’s my new phone design on the transfer tape ready to apply to the phone.
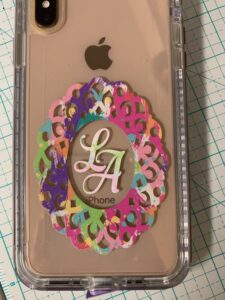
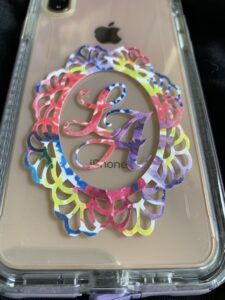
I cleaned the phone well using alcohol wipes to make sure any glue residue and oils were removed. Then I placed the new frame on my phone. This looks much better, don’t you think!
The patterned vinyl I used is called Nonie’s Bouquet and it’s from Sparkleberry Ink. It comes in permanent adhesive, HTV and glitter HTV … watch for a project using the glitter HTV soon! The glitter laminate is also from Sparkleberry Ink.
You can use glitter laminate on any permanent adhesive vinyl to give it that little touch of bling!
If you enjoyed these tips, please join my Facebook groups … Libby’s Silhouette Group — Tips, Tricks, Tutorials and Projects, Libby’s Craft and Sewing Group and Running With Sisers – Juliet and Romeo. You can also find me on FB at Libby’s Loft.com. Please join and feel free to ask questions and share your creations! I look forward to seeing you there!!
Until Next Time,
Happy Crafting!!
Disclaimer: Posts on this site may contain affiliate links. Clicking on one of these links or making purchases at linked sites does not mean you pay more for your purchases. It means I may receive a small commission on your purchase. This commission helps defray the costs of this site and enables me to continue to provide you with new and exciting content.
Until next time
Happy Crafting!!
Disclaimer: Posts on this site may contain affiliate links. Clicking on one of these links or making purchases at linked sites does not mean you pay more for your purchases. It means I may receive a small commission on your purchase. This commission helps defray the costs of this site and enables me to continue to provide you with new and exciting content.