I love mug rugs, don’t you! They are cute, quick and easy to make and are great gifts! I took a break from writing lessons to stitch some of fun mug rugs and wanted to share a few tips for mug rug success with you.
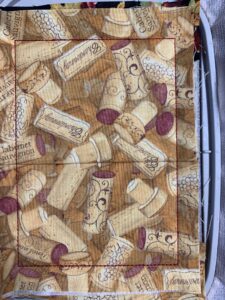
When I first started stitching mug rugs several years ago, my sweet friend Jane Miller, gave me a great tip about the backing fabric. At the time, most mug rug designs used a single piece of fabric for the backing. The machine included stitching that went almost all the way around the mug rug attaching the backing and leaving a small hole for you to turn the mug rug rightside out and then close the hole by hand. You can see the opening in the photo below before it is turned right side out.
Jane’s idea was to use two pieces of fabric and create an envelope style backing. To stitch the backing down all the way around the mug rug, Jane just skipped the last color and stitched the first color again since it stitched the outline of the entire mug rug. Because I am a software girl, I took the design into my embroidery software and extended the line in the last color so it went around the entire mug rug.
Stitch the entire design and turn the mug rug rightside out. I used my Precision Point Turner from Floriani to perfect the corners.

Once it is completely turned, press the mug rug well. Then close the envelope back with a small piece of Steam a Seam.

Some designers, including Kimberbell Designs, have started using Jane’s two-piece back method.
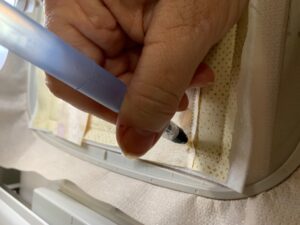
When creating mug rugs with more than one piece of fabric on the front, there are seams connecting the two fabrics. Sometimes it’s hard to get a good finger press when you turn the seam and your iron may not fit easily into your hoop to press the seam into place. To get around this, I used my Fabric Folding Pen to help turn that seam.


Simply run a bead of liquid along the seam and then turn the seam. It’s like magic! It turns easily stays in place! Be sure to read the instructions when you get the pen … you only need a few drops of the liquid that comes in the package … the rest of the liquid is water!
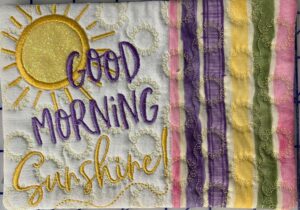
In this Kimberbell Designs mug rug, I used glitter HTV instead of fabric for the sun.

Many designers include the SVG file for applique pieces when you purchase their designs. If they don’t you can use Silhouette Studio Designer Editon Plus or Embrilliance to easily isolate the placement lines and cut the applique pieces with your Silhouette or Scan ‘n Cut.
Cut your applique shape from the HTV. Then remove the shiny carrier sheet from the vinyl. Place it over the stitched placement line in your design and stitch the tackdown stitches.
Once the vinyl has been tacked in place using the tackdown stitch, take a moment to press it into place. Press for 3-5 seconds to hold the vinyl in place. If you do not take this step, the vinyl has a tendency to pucker and not look as nice as you might want. I use the carier sheet to cover the vinyl when I press it into place so I don’t melt it with my iron! Once it’s pressed, you can continue stitching.
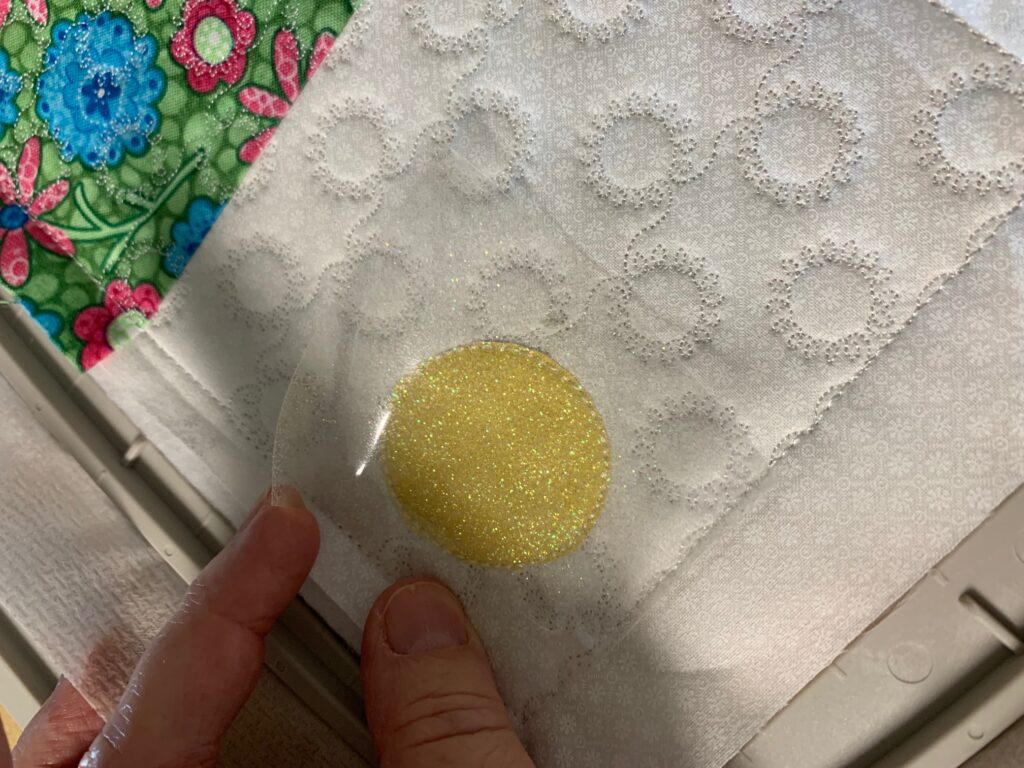
I love the texture and bling that using HTV adds to my stitching.
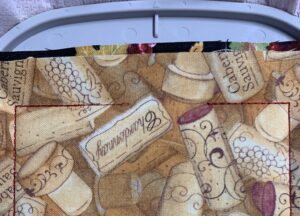
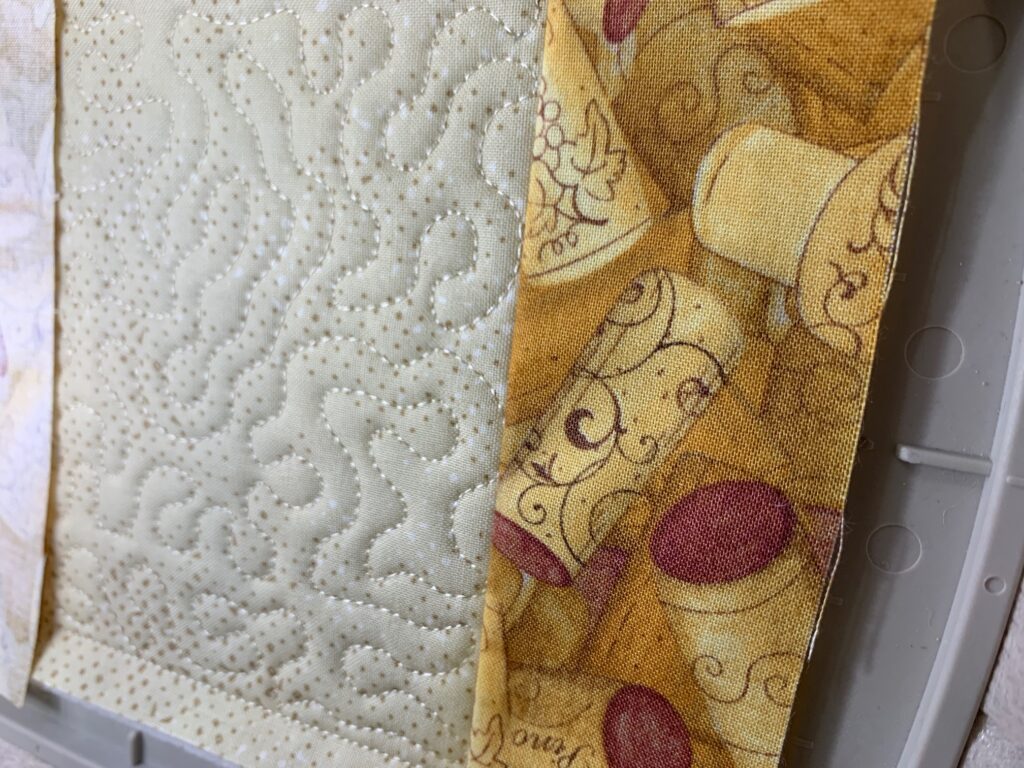
One final tip. I was creating multiple mug rugs using a limited amount of fabric. I needed one more wine mug rug but did not have enough of either focus fabric. I decided to use some of each of my focus fabrics and love the look! So get out those scraps and create a truly unique look!

Well, that’s it for now! I hope you have fun creating your mug rugs.
Be sure to join my FB group, Libby’s Craft and Sewing Group, and post pictures of your creations!
Until next time,
Happy Crafting!
Disclaimer: Posts on this site may contain affiliate links. Clicking on one of these links or making purchases at linked sites does not mean you pay more for your purchases. It means I may receive a small commission on your purchase. This commission helps defray the costs of this site and enables me to continue to provide you with new and exciting content.
I love my mug rug!! It is such a bright spot whenever I sit down to my computer!