My friend Chanti asked how to create a knockout design … so Chanti, this one’s for you!!

Begin by opening your Silhouette Studio software. Click on the Text tool and click in the workspace to get a blinking cursor. Enter the word(s) you want to use in your design. For this technique, use all capital letters. Click off the words when you finish typing. With the words selected, click on the Font Dropdown in the QAT (Quick Access Toolbar). Scroll down and locate the font called Impact.
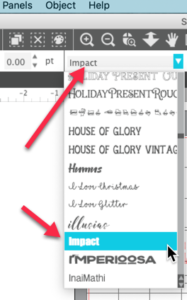
Change the size of the word using the scaling handles. I changed my word to 9.5″ and the height to 5.0″. In the Text Panel, adjust the Character Spacing so the letters are very close together but not touching.
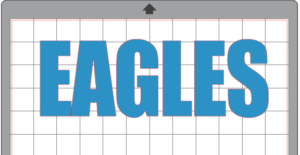
Add a second word by right clicking on the first one and selecting Duplicate. Double click on the word and change the text. Use the scaling handles to adjust the second word so it is the same width and height as the original word. Select both words and click on the Align icon. Select Align Center. Click on the Group icon or right click and select Group.

Select Merge from the File menu and locate the image you want to use in your design. The less detail, the better for this technique. Silhouettes work great! Left click and drag the shape into position over your words. Try to get as much of the shape onto your letters as possible. If necessary, adjust the size and rotation of the design so it looks great on your letters.
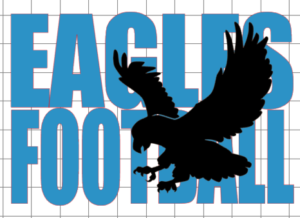
It is very important that you do not adjust the placement of the design on the words from this point forward. Left click and drag a box around the words and the design. Right click and duplicate. Left click and drag the duplicates off the mat.

Working now with the design “on the mat”, click on the eagle. Click on the Offset icon. Select Create Offset and set the offset amount to 0.08″. Click Apply. With the offset still selected, click on the Fill Color icon in the QAT and change the color of the offset from transparent to red. Click on the eagle and press the delete key.
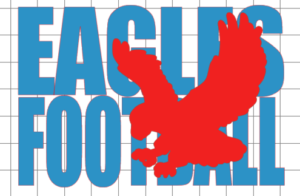
We created the offset to add a little “fudge factor” to make it easier to line your colors up when pressing the design. Select the words and the offset and click on the Modify Panel. Select Subtract. Left click and drag a box around all the pieces and select Group.
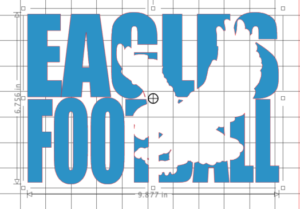
Left click and drag this part of the design off the mat to the right. Left click and drag a box around the duplicate design elements that we moved to the left of the mat. Move them into the mat area. With these elements selected, click on the Modify panel icon. Select Crop. With the cropped parts selected, right click and select Group.

Left click and drag the words back in to the mat area. If necessary, zoom in so you can see better. Align the words around the eagle parts.

And that’s it! You are ready to cut your two colors of vinyl. This technique is frequently used on shirts, pillows or other soft goods, but could also be used to create window decals or other for sublimation projects.
If you enjoyed these tips, please join my Facebook groups … Libby’s Silhouette Group — Tips, Tricks, Tutorials and Projects, Libby’s Craft and Sewing Group and Running With Sisers – Juliet and Romeo. You can also find me on FB at Libby’s Loft.com. Please join and feel free to ask questions and share your creations! I look forward to seeing you there!!
Until Next Time,
Happy Crafting!!
Disclaimer: Posts on this site may contain affiliate links. Clicking on one of these links or making purchases at linked sites does not mean you pay more for your purchases. It means I may receive a small commission on your purchase. This commission helps defray the costs of this site and enables me to continue to provide you with new and exciting content.
Until next time,
Happy Crafting!!
Love knockouts, they look awesome!
Thanks!! They are so much fun!