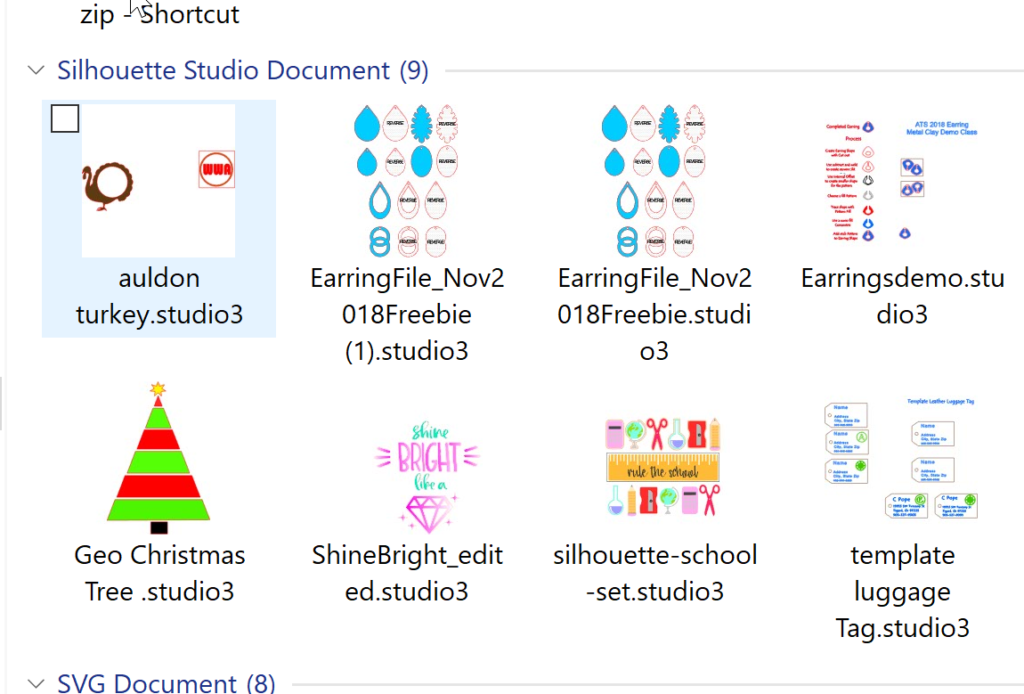
Ever wish you could view Studio3 files as images instead of as a generic logo? The new Thumbnail Preview feature makes this possible!
The Thumbnail Preview is installed automatically when you install your new v4.2 update. Once installed, you can view your Studio3 files as images anywhere you can view lists of files, such as Windows File Explorer or Apple’s Finder.

Notice in the example shown above that only the Studio3 files are shown as images. This applies to Studio3 files that you create and save as well as those you purchase from the Silhouette Design Store and download to your hard drive. Older studio files, Mint files and S3D files are not viewable as images at this time.
On your Mac:
In order to view your files as images, you need to change your view options on the window you are viewing. To do this, right click in the window. From the menu, select View. On your Mac, select As Icons from the flyout menu.

Now type CMD+J to open the View Options Window. Place a check in the Always Open in Icon View and Browse in Icon View boxes. Make any other adjustments you want to make to your View options, such as icon size and grid spacing. Many of these changes will happen as you adjust the settings so you can preview your choices and make additional adjustments. Once you have finished customizing your settings, click Use As Defaults. Now all your windows will open in Icon View.

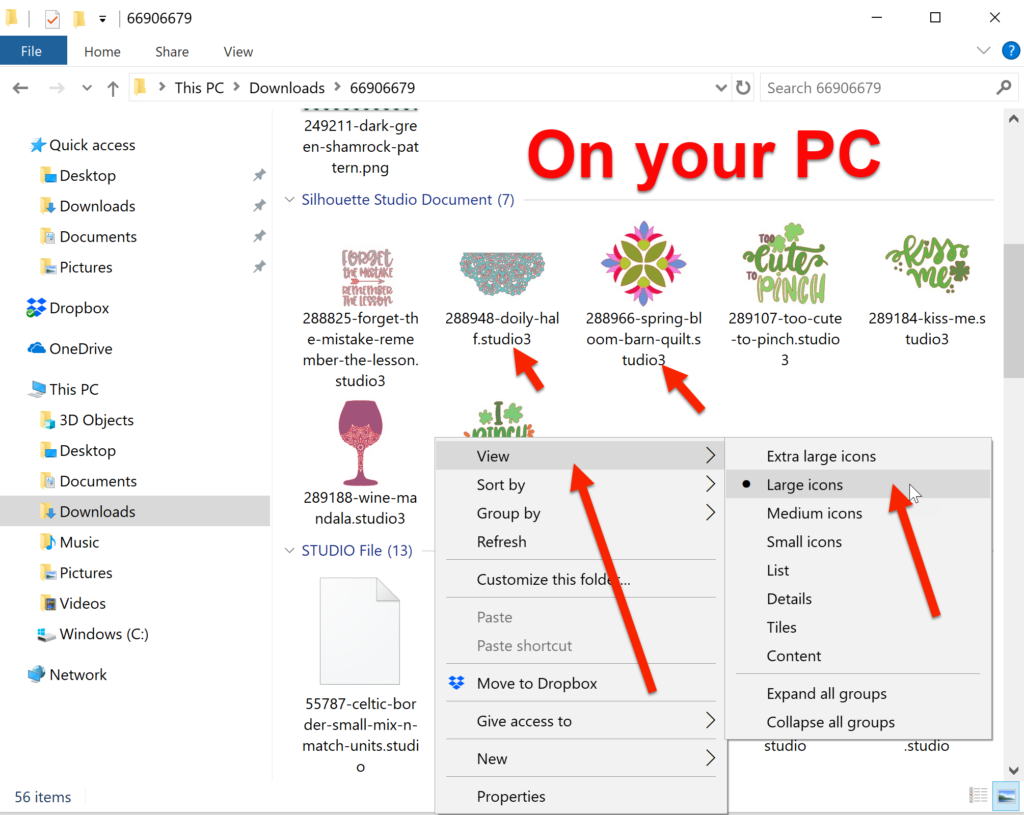
On your PC, right click and select Large icons from the View flyoout. You just select at least Medium icons for the Thumbnail Preview program to work.
On your PC:

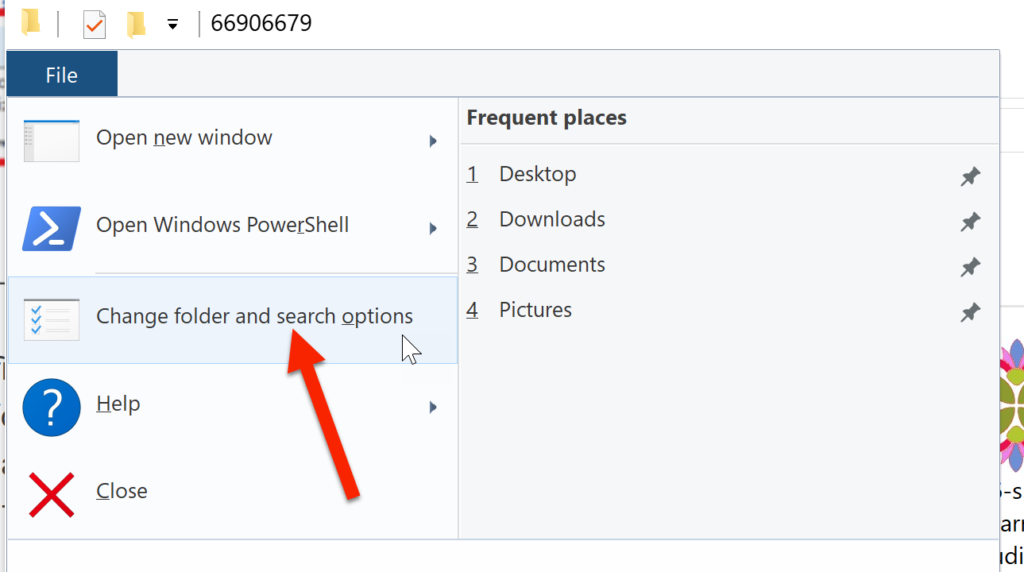
To set this view as the default view for all your windows on your PC, make sure you have a File Explorer window open. In Windows 10, select Change Folder and search Options from the File menu.

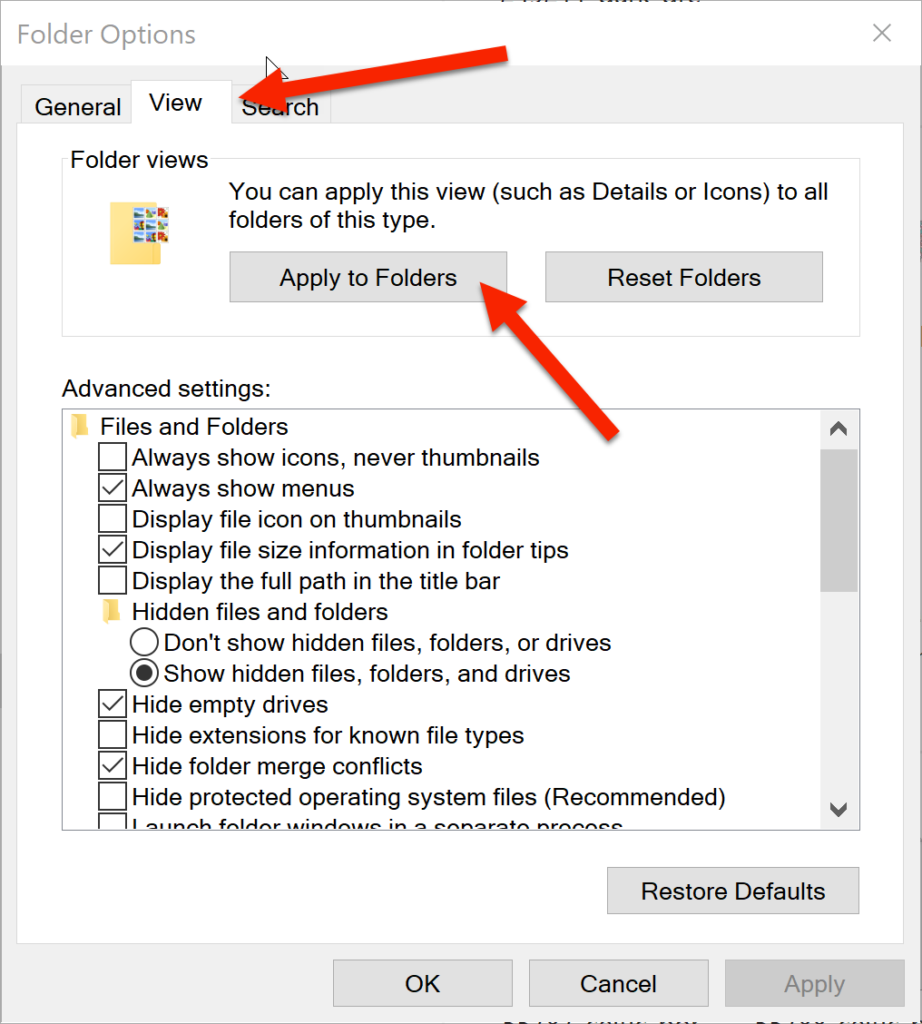
In the Folder Options window, click on the View tab. Click on Apply to Folders.

Once you click on the Apply to Folders button, you will see a confirmation window asking you if you want to apply these settings to all your other folders. Click Yes.

If necessary, click Apply. Click OK to close this window.
And that’s it! You can now see your Studio3 designs as images instead of a generic logo.

Hope you enjoy this fun feature of v4.2. For more helpful hints and information about your Silhouette software, please join my Facebook Groups, Libby’s Silhouette Group and Libby’s Craft and Sewing Group.
Until next time,
Happy Crafting!!
Mine does not show a thump nail what am I doing wrong.
Did you remember to change your View to Medium, Large or Extra Large icons?
Yes. When I save to the folder and click open that file shows correctly. But others just have the S icon. As soon as I leave that folder and come.back.they all.have the s icon.
Mine just change from S-icon to black, what to do?
Are you on a Mac or a PC? What version of the software are you using? All the numbers … 4.x.xxx