In a recent blog, I promised we would start to explore the new features of v4.2, so let’s go! Today we’ll take a look at two features available for all levels of Silhouette Studio: Thumbnail Preview and Print Bleed. Let’s start with Thumbnail Preview.
Thumbnail Preview
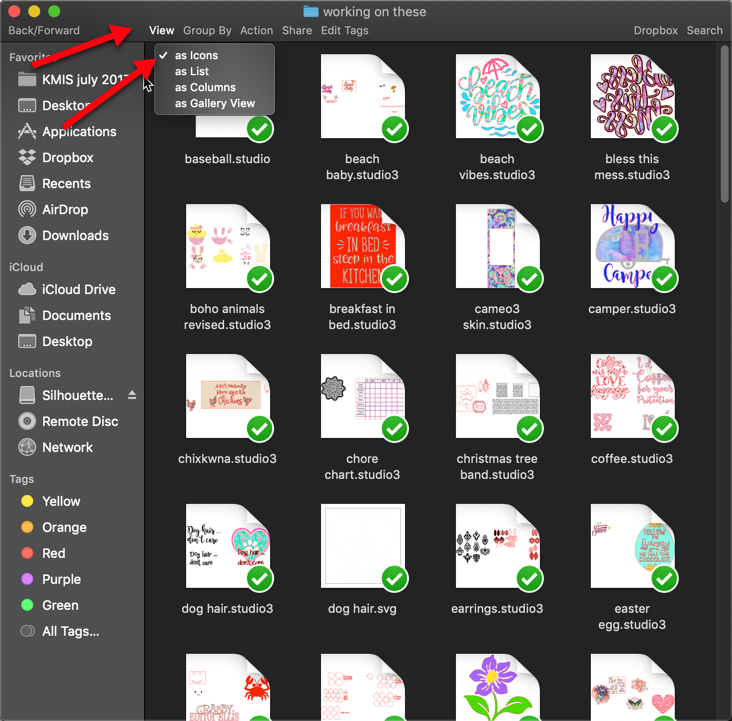
Thumbnail Preview allows you to see your designs as images instead of as a generic application thumbnail. Thumbnail Preview will only work with designs saved as .studio3 files. It will not work with older .studio files, Mint files or S3D files.
On your Mac, open a folder (window). Select View from the menu. Select As Icons from the menu. You can also right click in the window and select View–As icons from the menu.
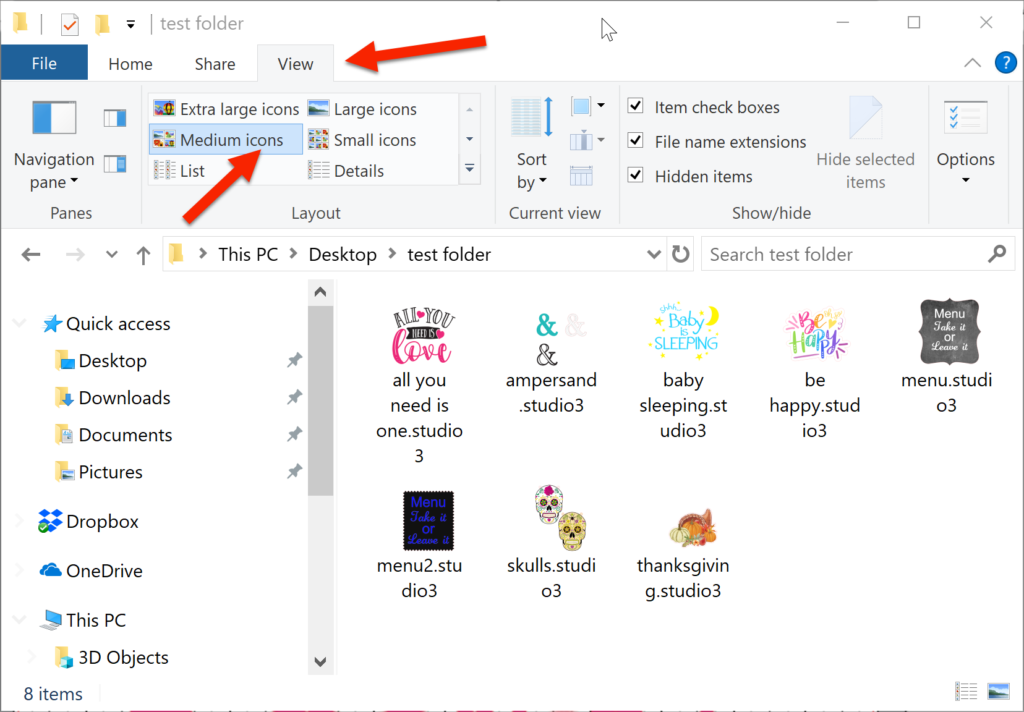
On your PC, open the window (folder) you wish to view. You can right click and select View–Medium (Large or Extra Large) icons to see the files. You can also click on the View menu in the window and select Medium, Large or Extra Large icons. So awesome and so easy!!
Now let’s talk about Print Bleed.
Print Bleed is designed to help get rid of that pesky white outline around your print and cut designs! Basically, what’s happening is that Studio is coloring “outside the lines” to help make sure you have color all the way to the edge of your design.

In the Page Setup Panel, scroll down and select Print Bleed. Then you can use the slider to set the amount of color bleed that will be applied. You will not see anything happen on the screen as there is no preview for print bleed.
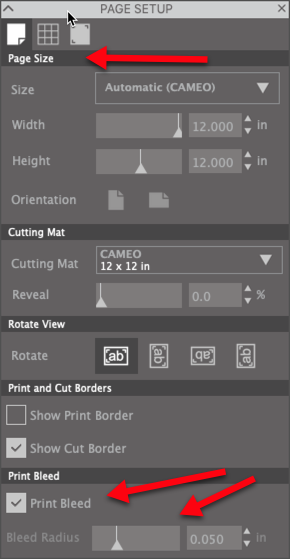
One thing you want to keep in mind when setting the bleed radius is that making it too large can cause it to bleed over into adjacent objects. I have found the default value of 0.05 to be adequate. Here’s what it looked when printed. You cannot see where the original shape ends and the bleed begins.

Here’s what it looked like after I cut it.
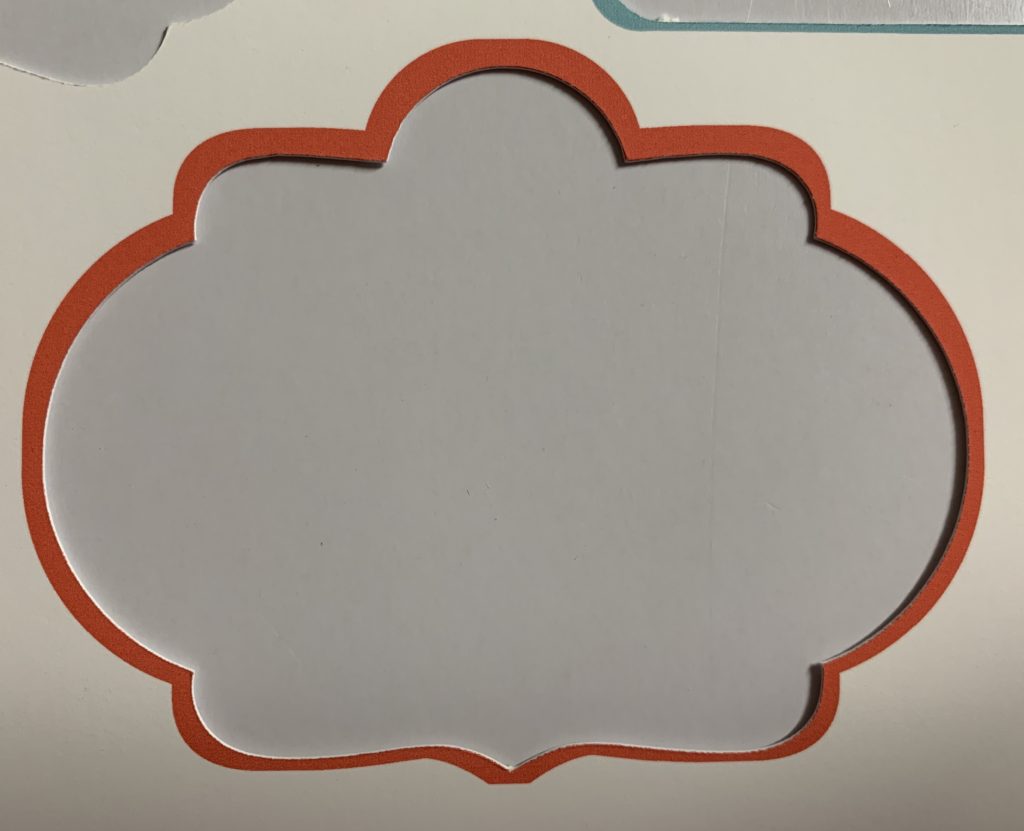

Here’s a cut I did without using print bleed. Notice that there is a small amount of white around the edges of the designs. Applying print bleed would have fixed this.
A couple final notes — print bleed will not work if the design has a white background. The white background keeps the print bleed from working. Additionally, print bleed does not work if there is a white space between the colored edge of the design and the cut line.
That’s it for this time. Next time we’ll talk about more of the fun new features of v4.2. Don’t forget to join my Facebook Groups for fun tips, tricks and inspiration: Libby’s Silhouette Group, and Libby’s Craft and Sewing Group.
Until next time,
Happy Crafting!!
My first thought as a designer is WOW. Then I tried this. This is my opinion and it works great on clip art.
My print and cut drawings are based on Photoshop or Procreate drawings using paintbrushes. These are almost impossible to get a clear nonwhite edge when traced. What I think is happening with the new Studio bleed is the color on the edge is the bleed color. Where the edge is white it bleeds white. The Photo edge is then a ragged color edge. If my drawings were created with vector software then there is a better control over the edge since it would be solid. I share this distinction because there are a lot of hobby crafters that trace images and would be disappointed that it did not solve the white edge problems. The key is there needs to be a solid edge to have this work properly.
As a designer I do the following: I create my cutting lines in Adobe Illustrator from the tracing function there and then offset the path at .01 inch and .02 inch. The first is my cutting line. The second is my fill object with no line for printing a bleed edge. The bleed edge then is a solid color all the way around. Granted, this doesn’t always look the best if you don’t want an outline.
Hope this explains any misconceptions on why some tracing work and others won’t.
Thanks so much for sharing this info!!